Work with Visual capture
This feature is available only on Reach RS4 Pro.
This guide shows how to measure a point using Visual capture on your Reach RS4 Pro rover.
Overview
With Visual capture, you can measure points in hard-to-reach or unsafe areas without entering them. Using the receiver’s front camera, Emlid Flow records a short video from multiple viewpoints and then processes it for position calculation.
Before capturing the point, you need to establish a fixed solution and enable tilt compensation on your Reach RS4 Pro. Learn more in the guides:
To ensure a successful capture, follow the recommendations below:
- Use textured, well-lit targets. Choose areas with visible features such as joints, edges, tape targets, markings, bolts, or other high-contrast details. Low-texture or uniform surfaces (for example, freshly poured concrete or glossy finishes) can reduce accuracy.
- Maintain a 2–10 m distance from the target.
- Move slowly along an arc while recording to capture the target from multiple viewpoints.
- Review the detected point in the captured images. In most cases, confirming it in a few frames is sufficient, and the app will indicate when you have enough coverage.
Workflow
To measure a point using the Visual capture feature, do as follows:
If you receive corrections via NTRIP over BLE, make sure your mobile device has an active internet connection via mobile data or Wi-Fi. When using mobile data, check your mobile device settings to confirm that Emlid Flow is allowed to access it.
-
Open Emlid Flow and connect to your Reach RS4 Pro.
tipMake sure the receiver has a FIX solution over NTRIP or LoRa and tilt compensation is on.
-
Go to the Survey tab and open or create a project.
tipTo learn how to import or create a project, check the Create or import project guide.
-
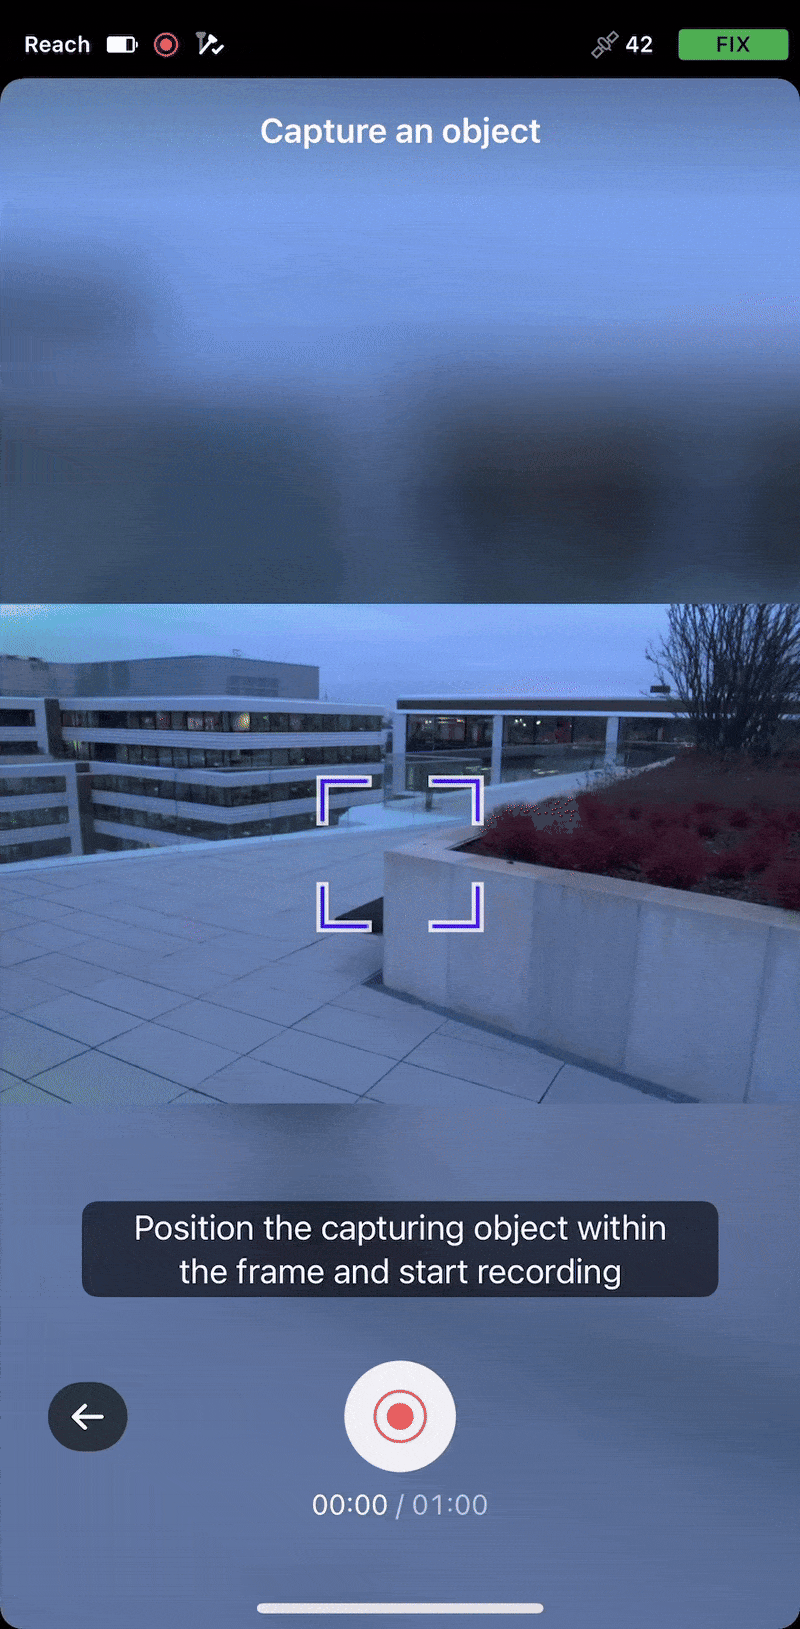
Tap the Plus button, then the Camera icon.

-
Center the object in the blue square and start recording. Make sure to keep the distance between 2-10 meters from the object.
-
Walk around the target object slowly along the arc, keeping the object within the blue square. Continue moving along the arc until you’ve captured the object from different angles. Capturing the front and at least one side ensures optimal results.
noteThe Recording stops automatically after one minute.
-
After completing the capture, tap Stop to start processing the scene.

-
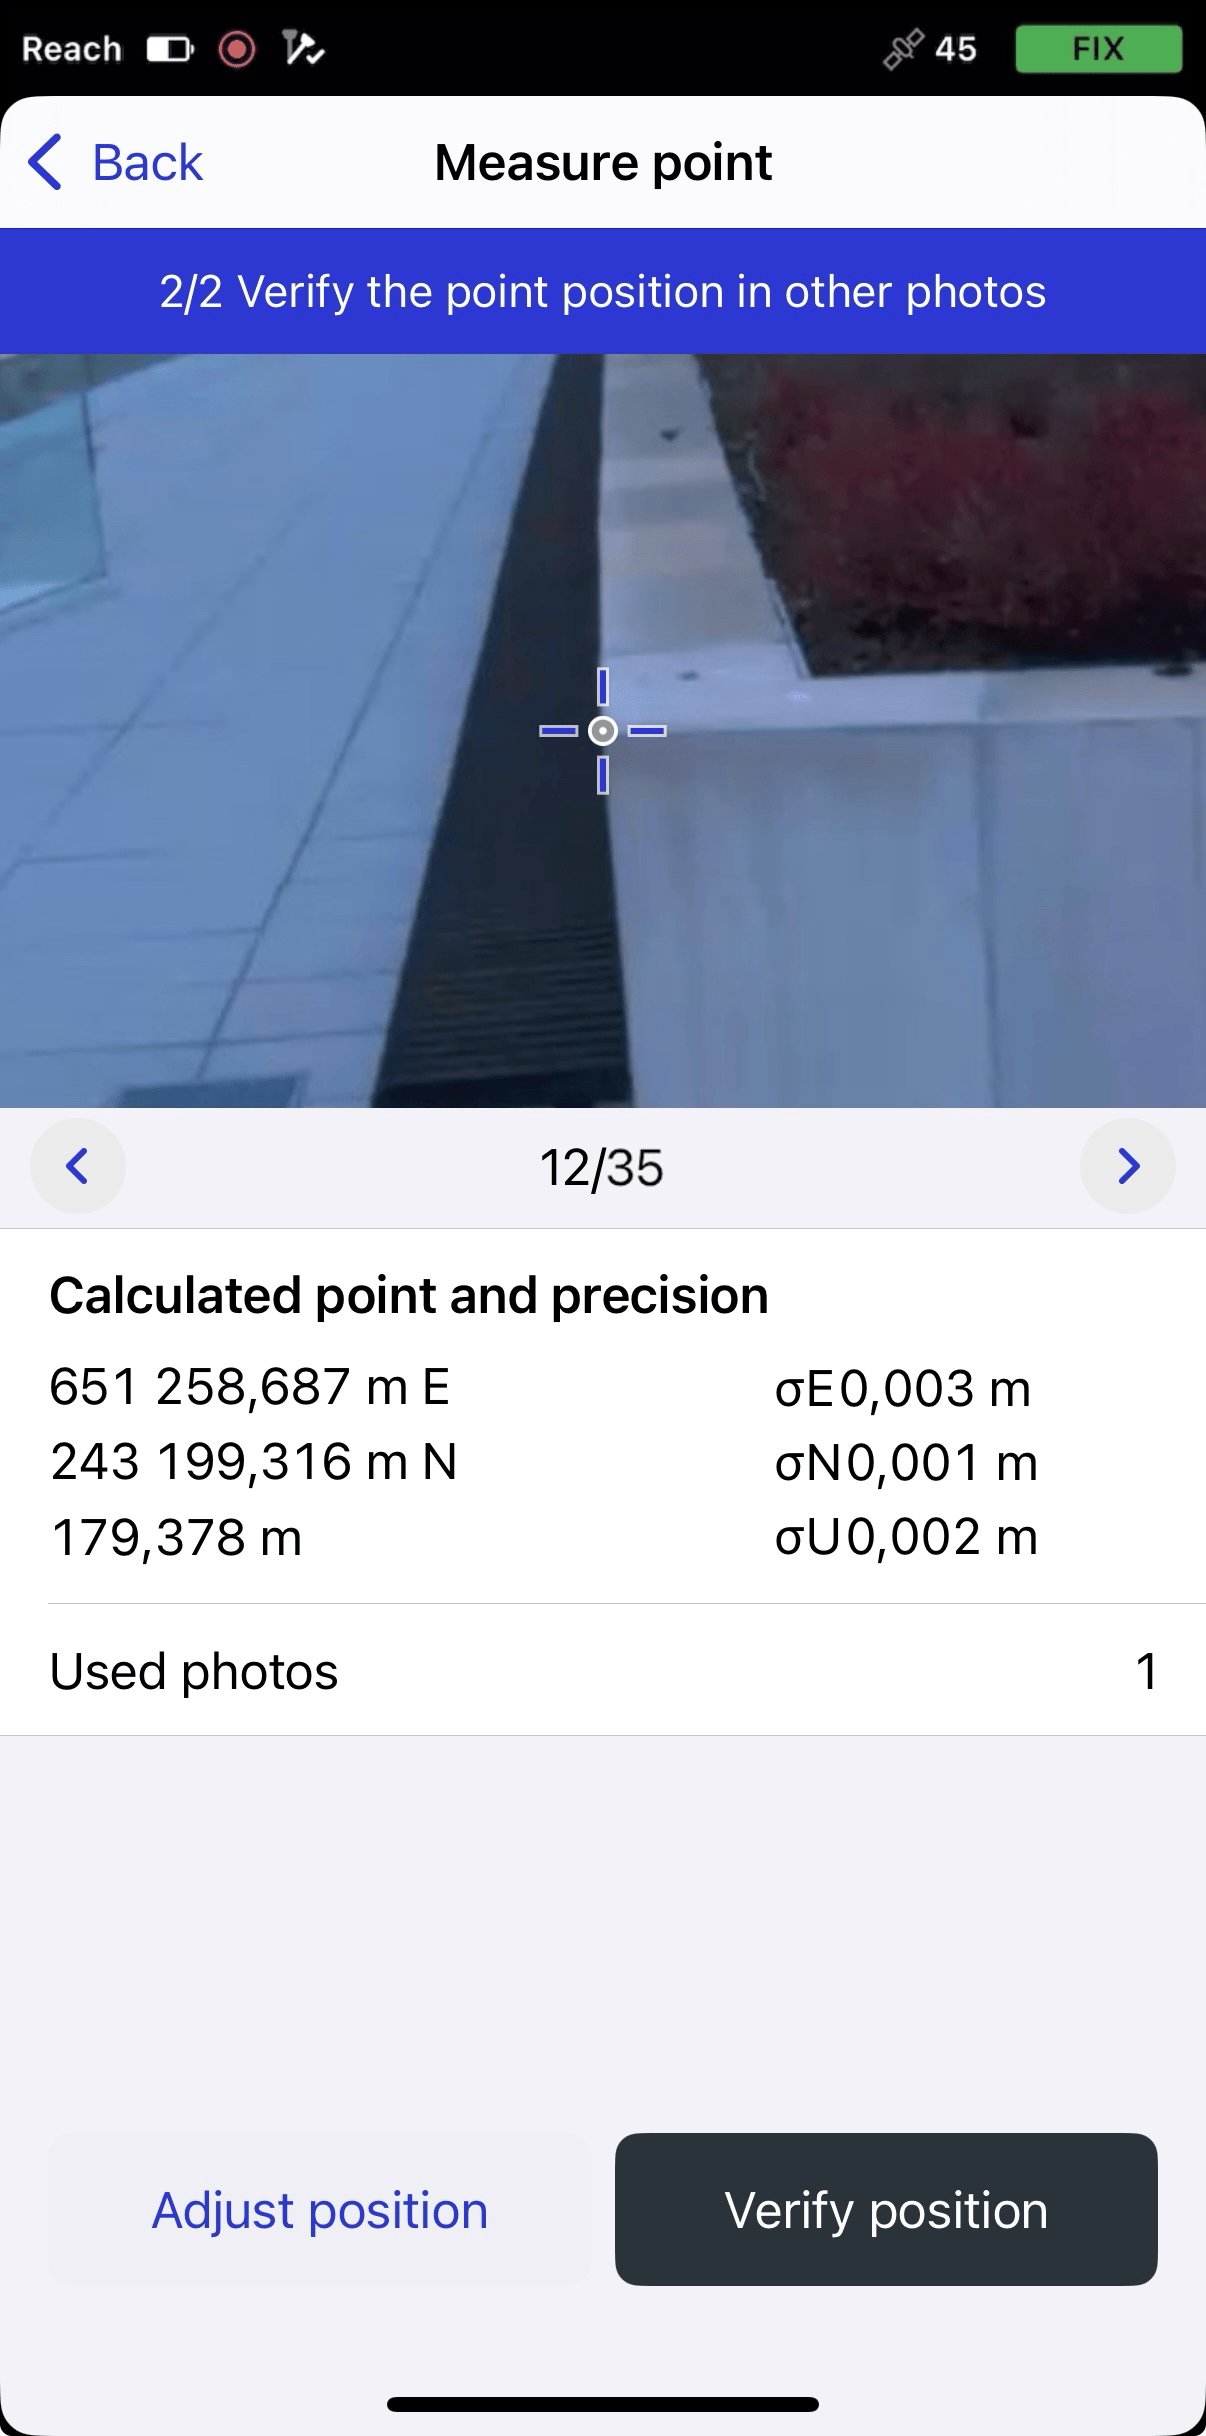
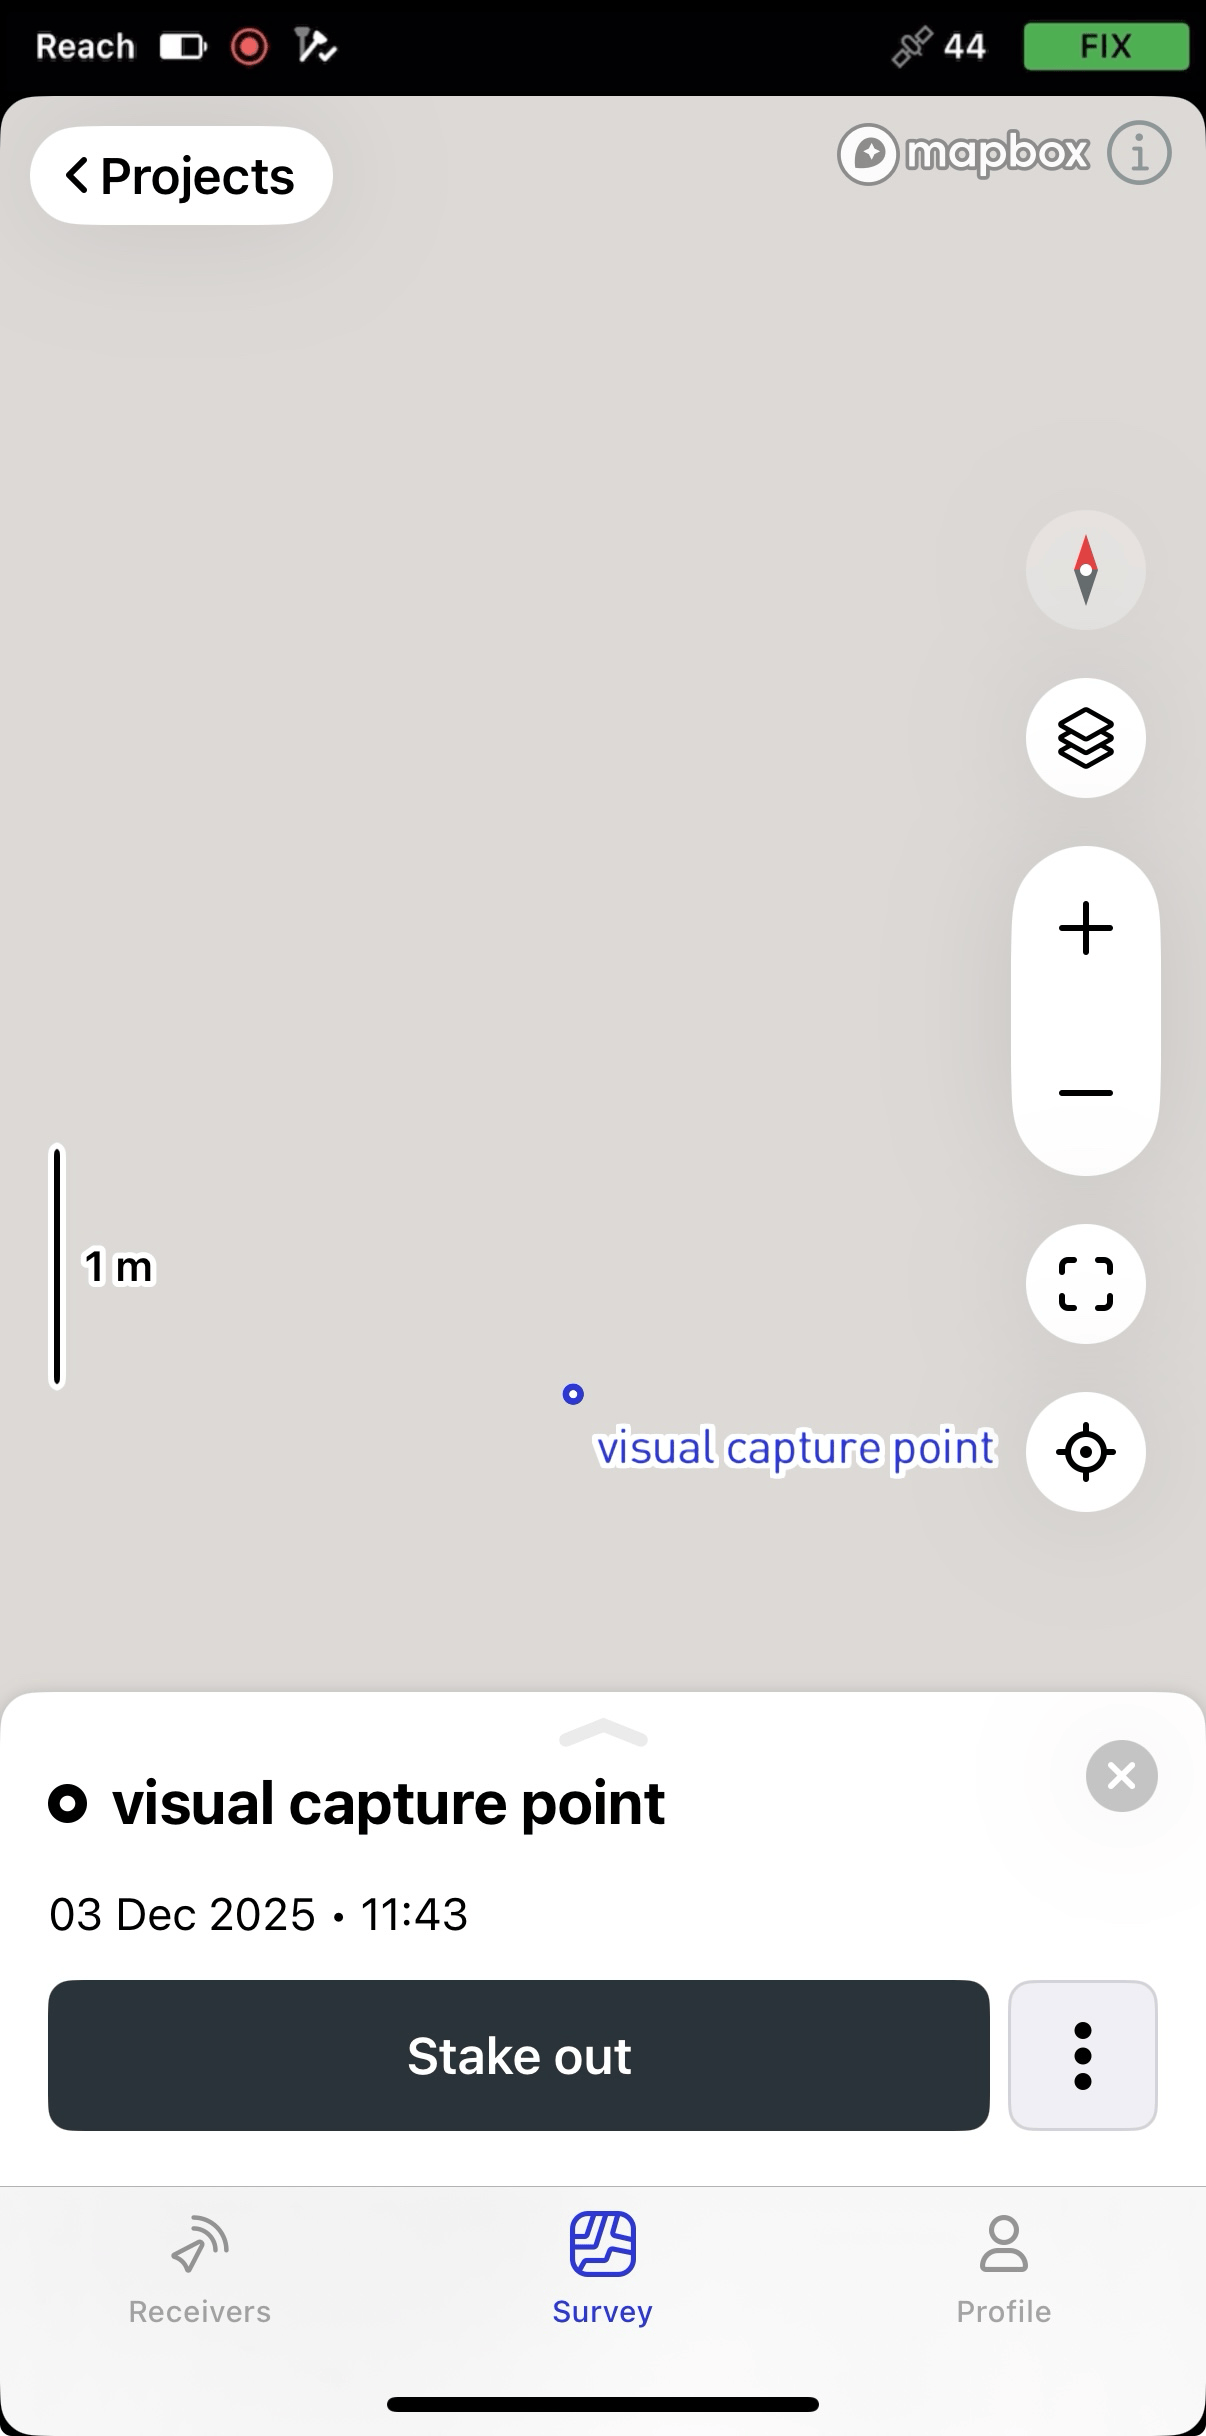
Once the scene is ready, tap Measure point to refine the point’s position. The app will show captured scene images for review.

-
On the screen that opens, select an image from the middle of the set using the arrows. Then, using the crosshair, select the point in the image and tap Measure point to accept it.

-
After that, go through the other images using the arrows to check if the crosshair stays in the right position. If you notice any misalignment in other images, adjust the point position by moving the crosshair and tapping Adjust position. Once you are satisfied with the result, tap Verify position to review all images on one screen and confirm the point.
If you are not satisfied with your adjustment result, or you verified the image by mistake, you can readjust the position. Tap Remove photo and reposition the crosshair.
cautionTo complete the verification process and get the position of the point, you need to tap Verify position. The Back button will terminate the process and get you back to the objects’ list without saving the scene.

-
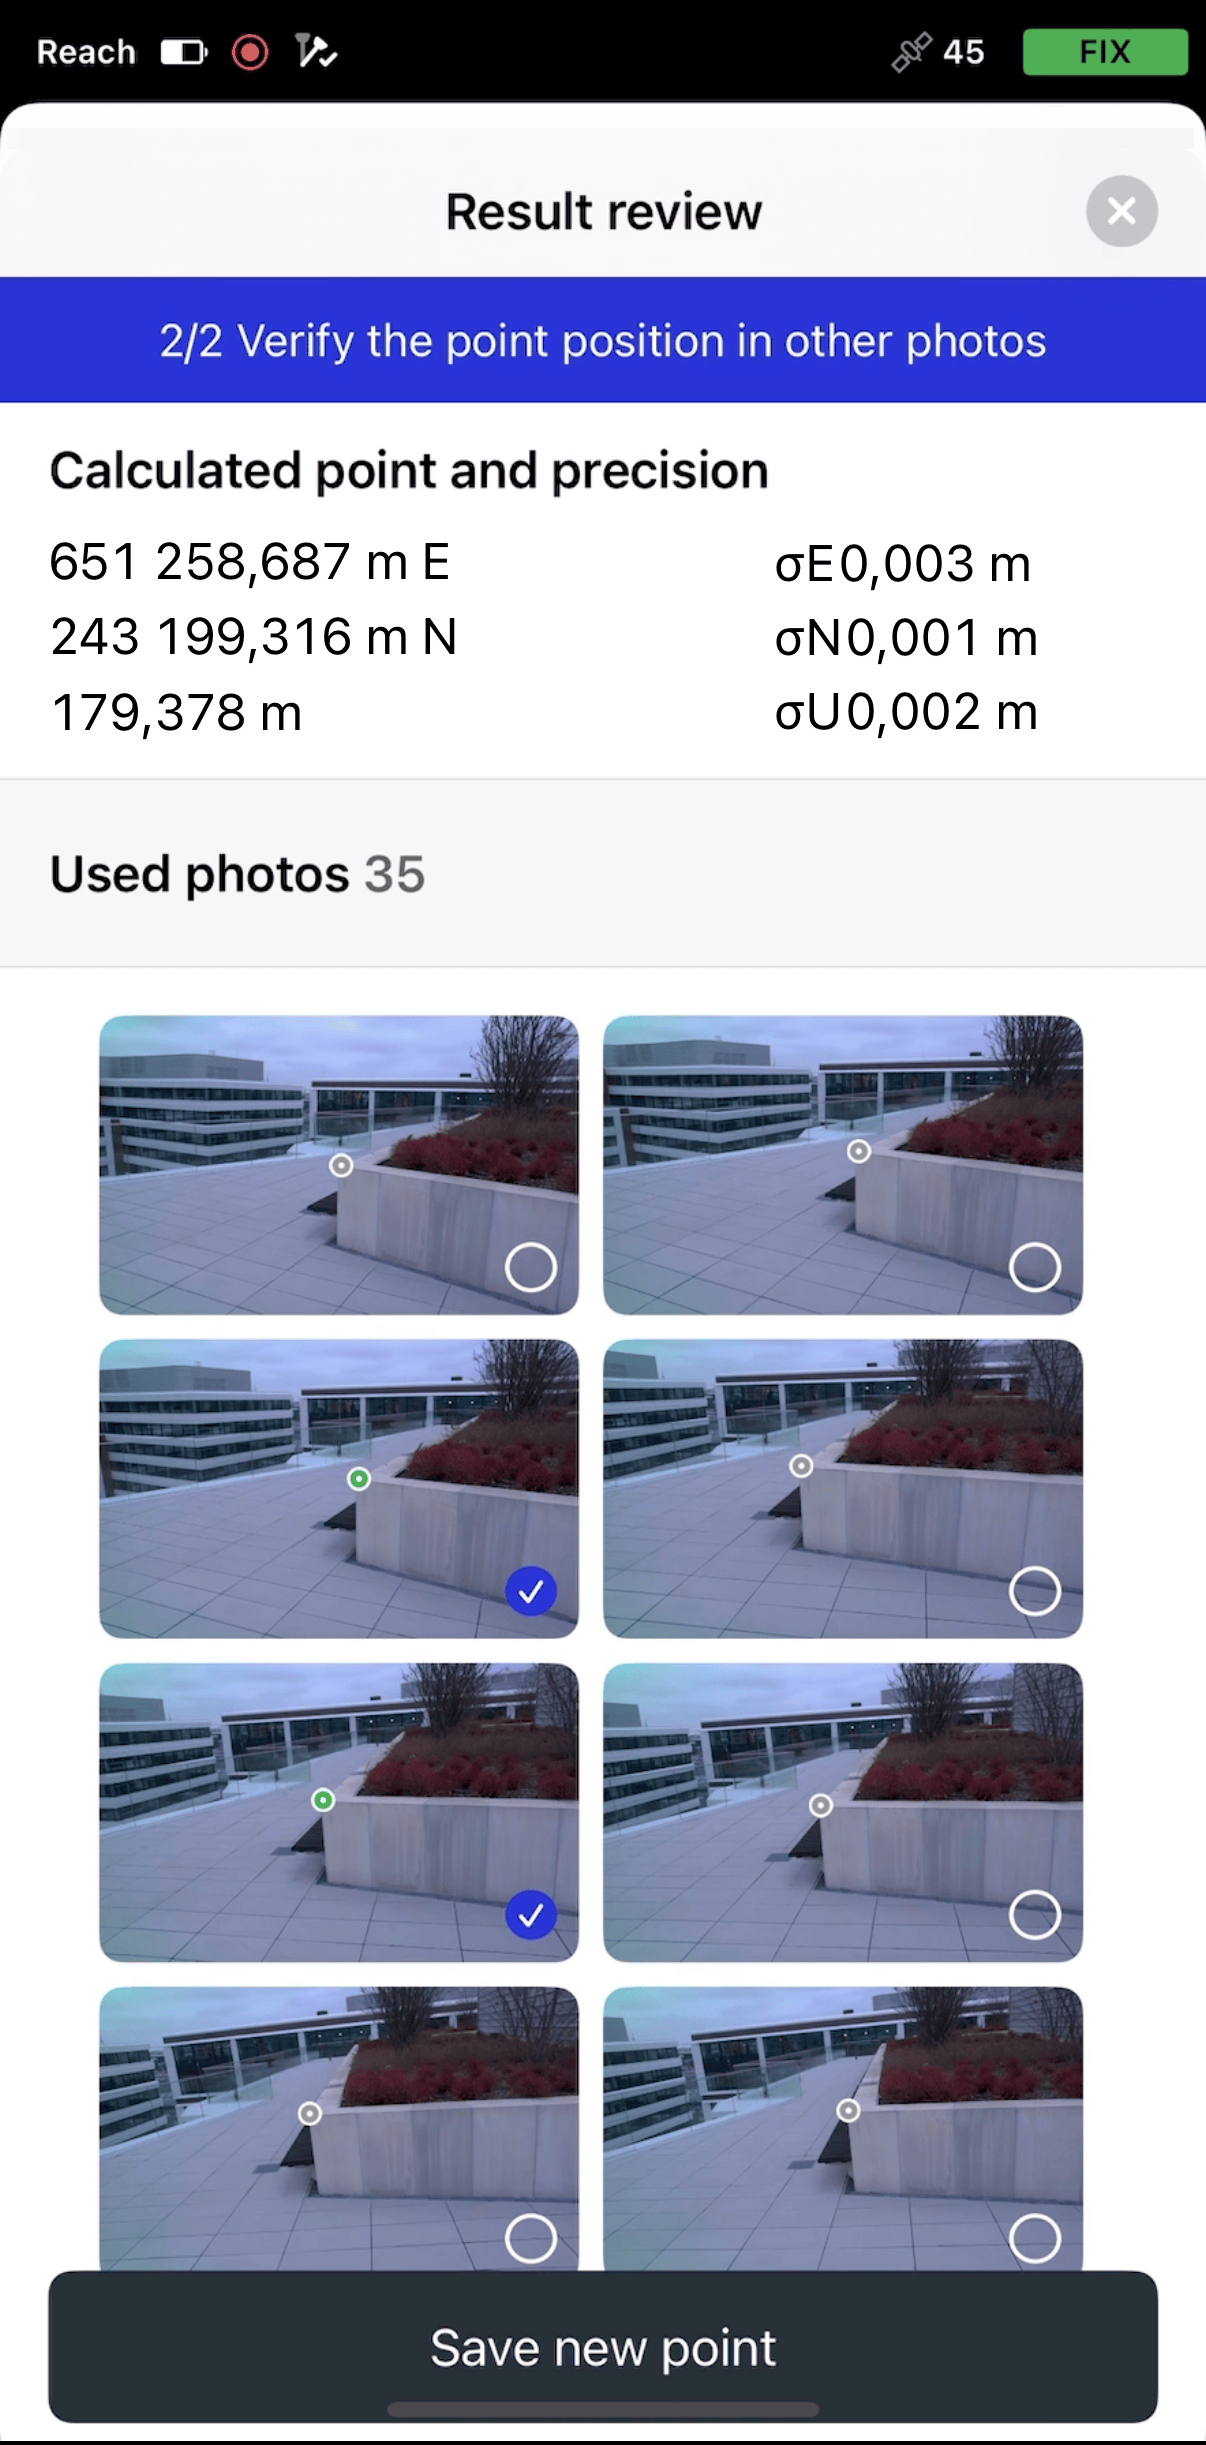
After you tap Verify position, the Result review tab will open. The image where you measured the point, and all the adjusted images, will be indicated by a blue checkmark in the corner and used for the calculation. If needed, you can revisit the images again and adjust them.
-
After you review the result, tap Save new point.
-
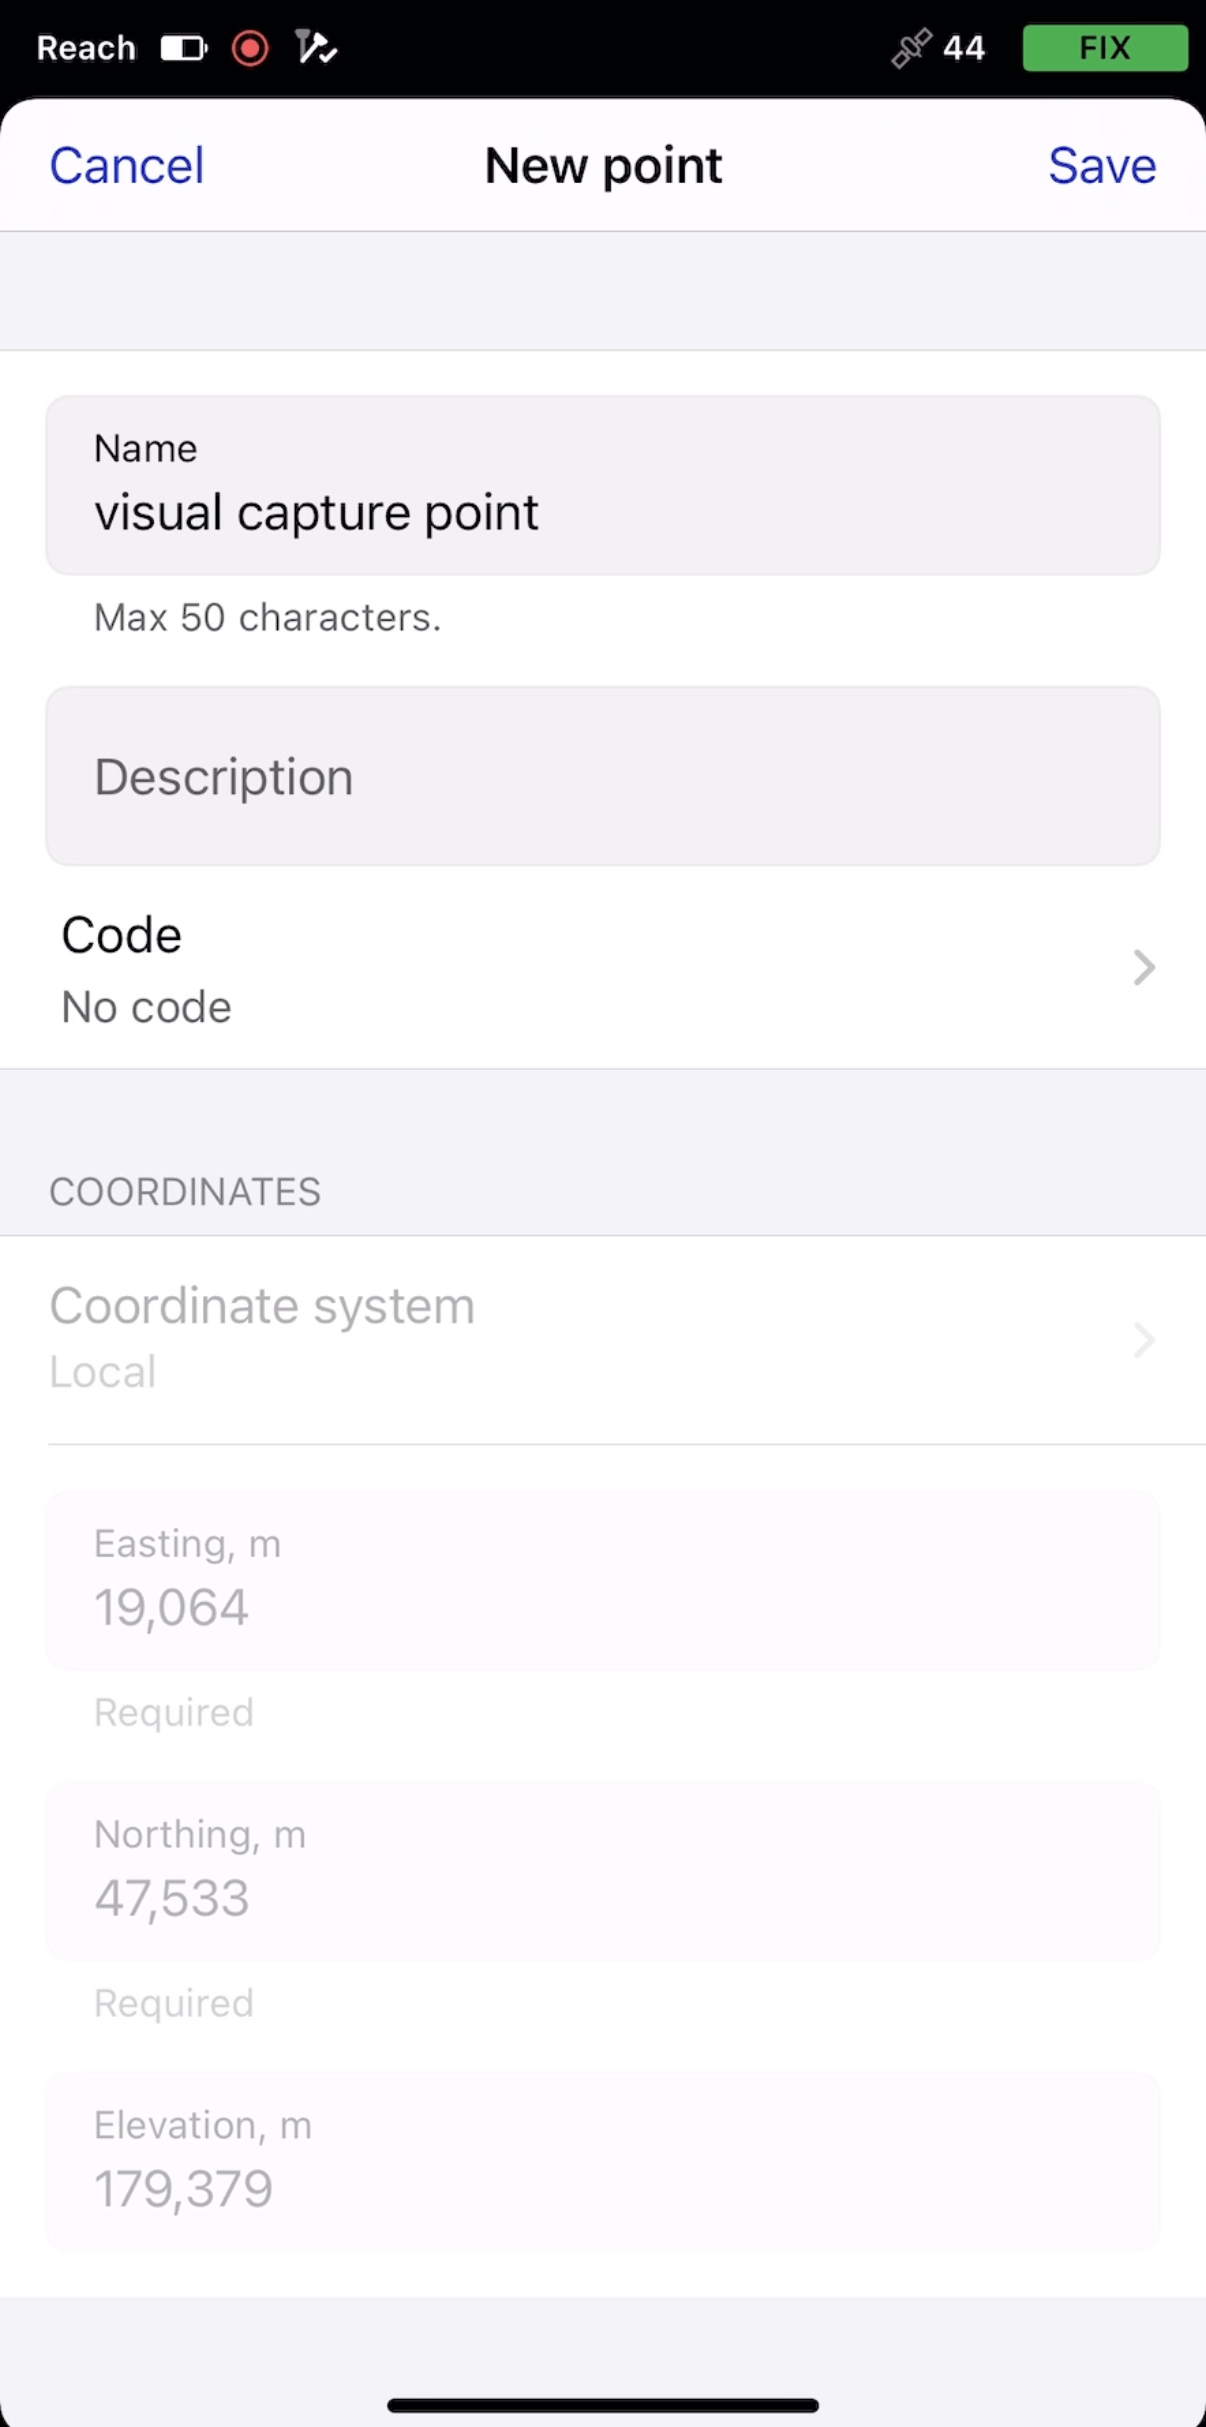
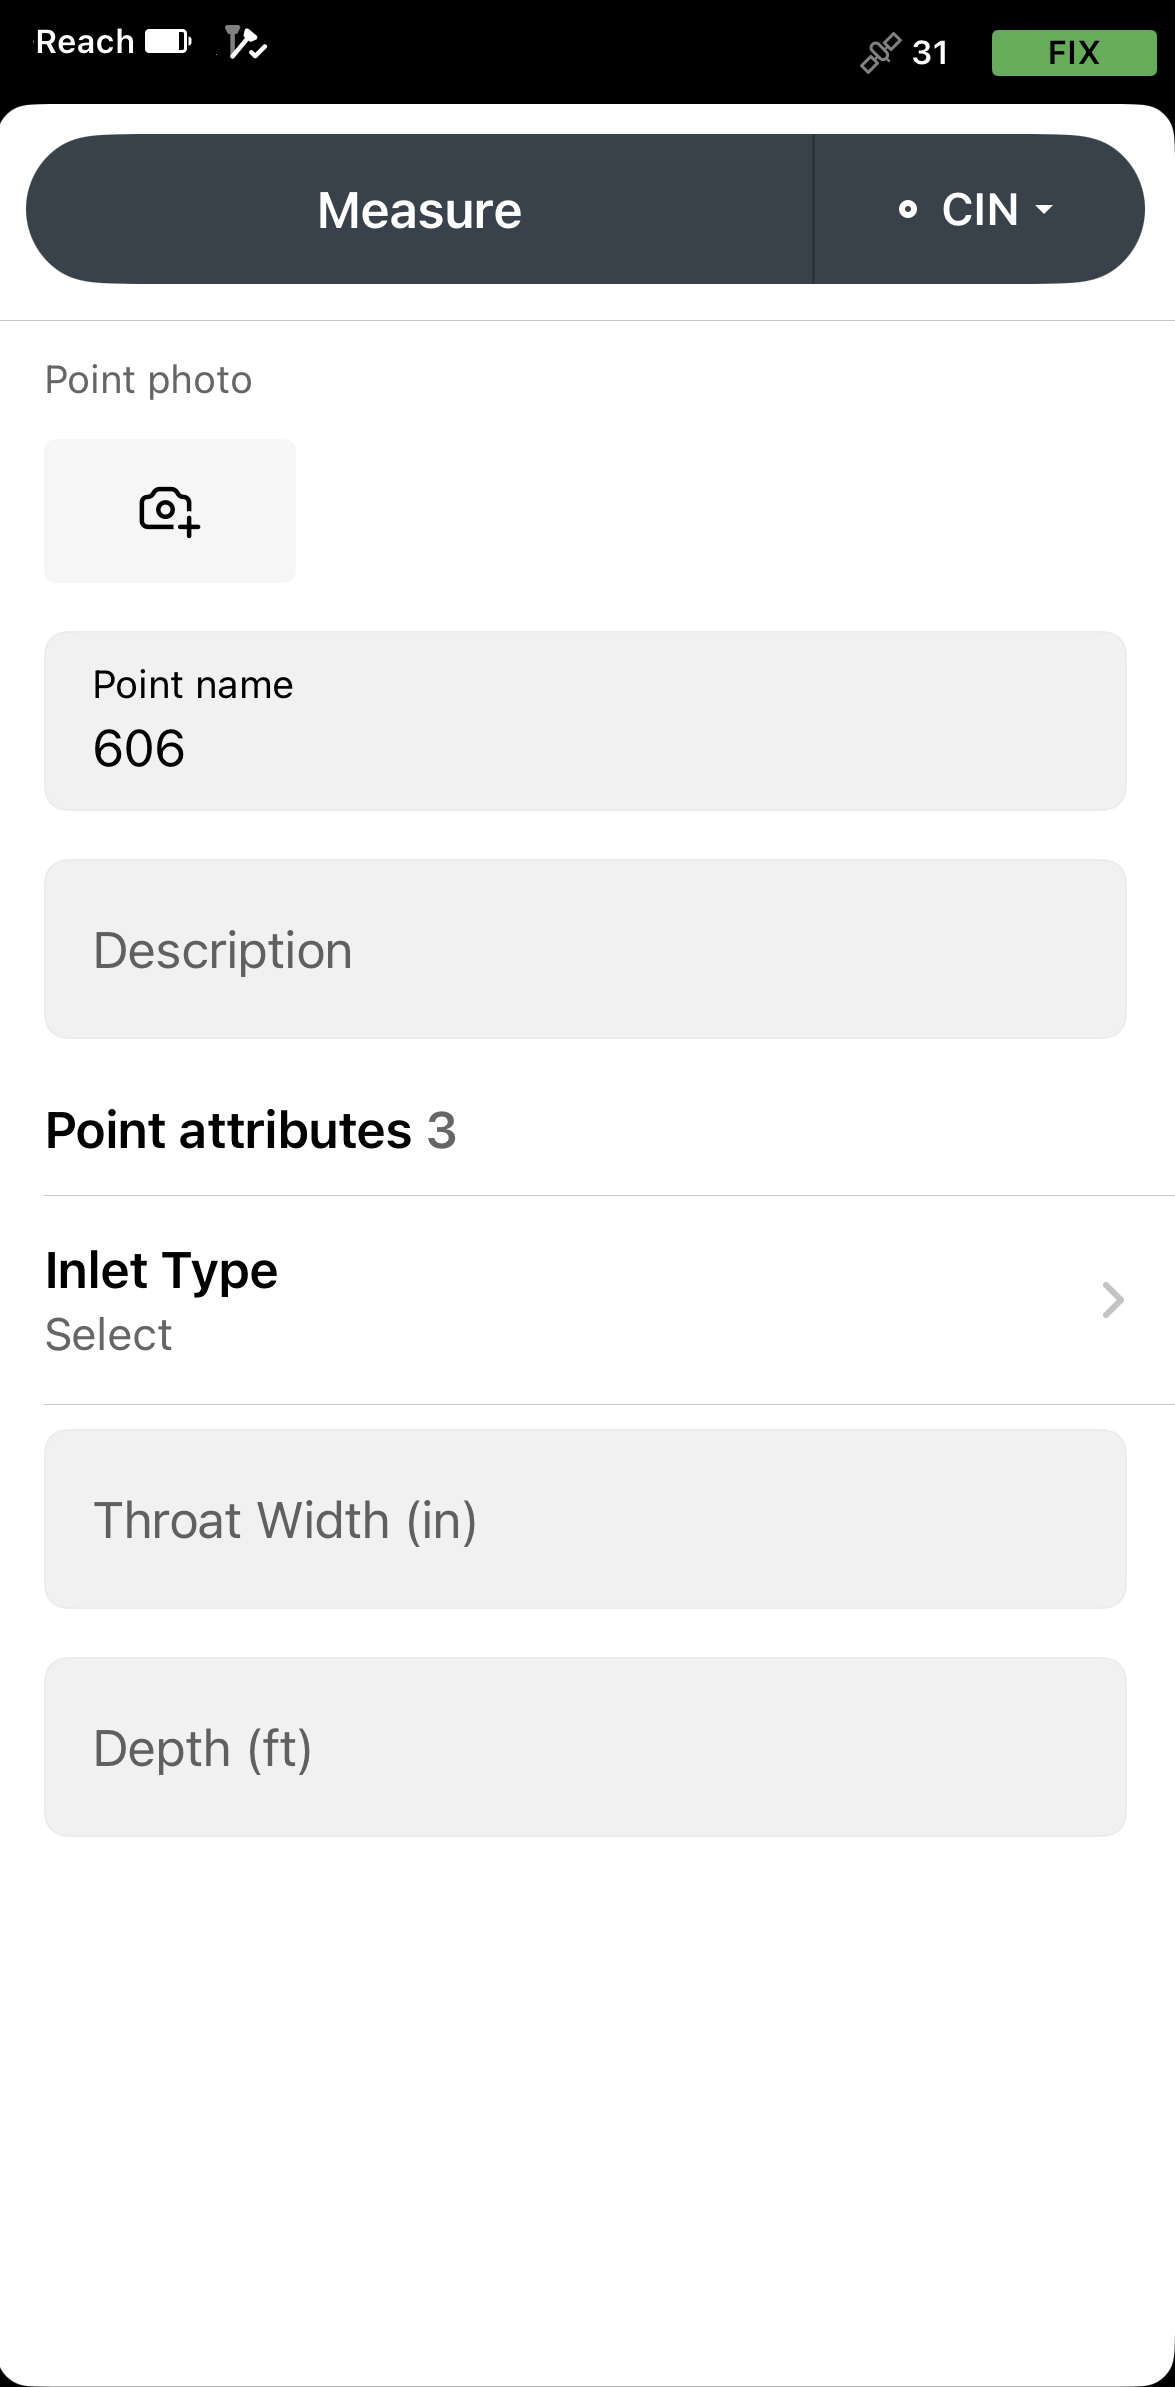
Enter the point’s name and description.
tipIf you don’t assign a name to a point, the app will automatically name it with the next incremental number.
-
With the Pro plan, you can add a survey code with description, an already configured color, and attributes by tapping the Code selector button. Choose a code from the library and enter the associated attributes, if required.
-
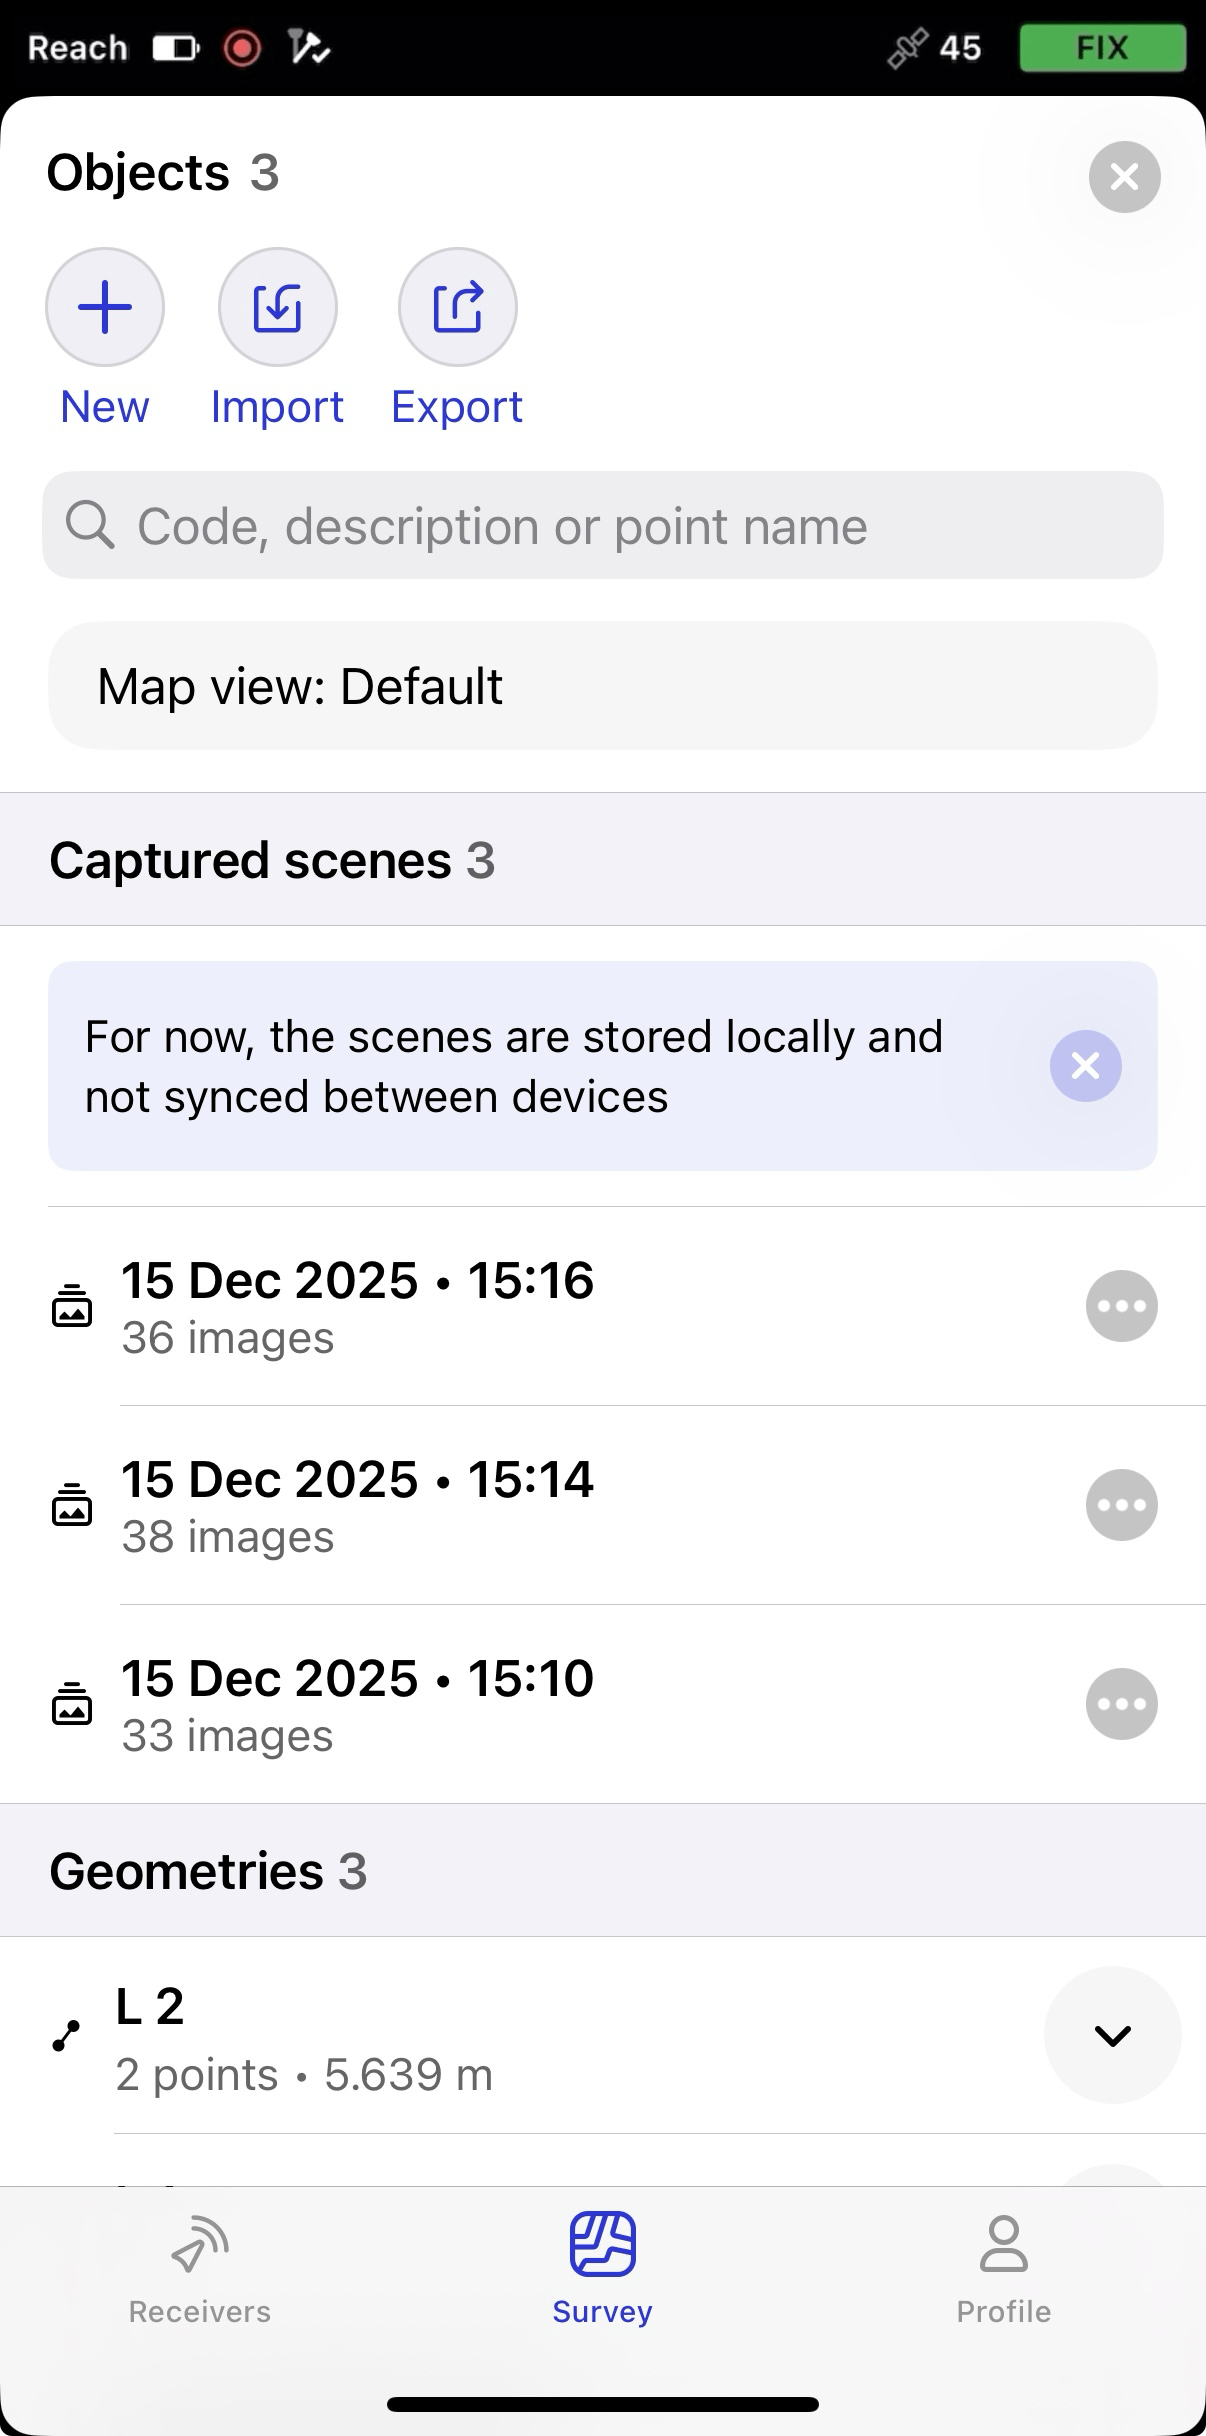
Tap Save. The measured point will appear on the map, and the scene for this point will be saved in the objects list. You can reopen the scene later to add more points if needed.
You can now continue capturing other points or switch to other surveying tools.