How to set up cameras
AR Stakeout and Visual capture are supported only on the Reach RS4 Pro with a dual-camera system.
This guide explains how to prepare for AR stakeout and visual capture using the dual-camera system on Reach RS4 Pro and the Emlid Flow app to visually locate and capture objects in the field.
Overview
Reach RS4 Pro combines RTK GNSS, IMU tilt compensation, and dual Full-HD cameras to help you:
- Stake out points, lines, and polygons in augmented reality (AR), guided by on-screen directions. The tool is useful when surveying in cluttered or low-visibility areas where other types of guidance are hard to follow.
- Capture points visually from photos when physical access is limited or unsafe.
Preparation
To perform AR stakeout and visual capture, you need to ensure the following:
-
The receiver has a FIX status.
tipEstablish RTK connection using one of the following methods:
-
Tilt compensation is enabled.
tipTo set up tilt compensation, follow the steps from the How to enable tilt compensation guide.
-
The receiver’s cameras are clean and unobstructed. Use the cleaning wipe from the package to clean the cameras.
AR Stakeout
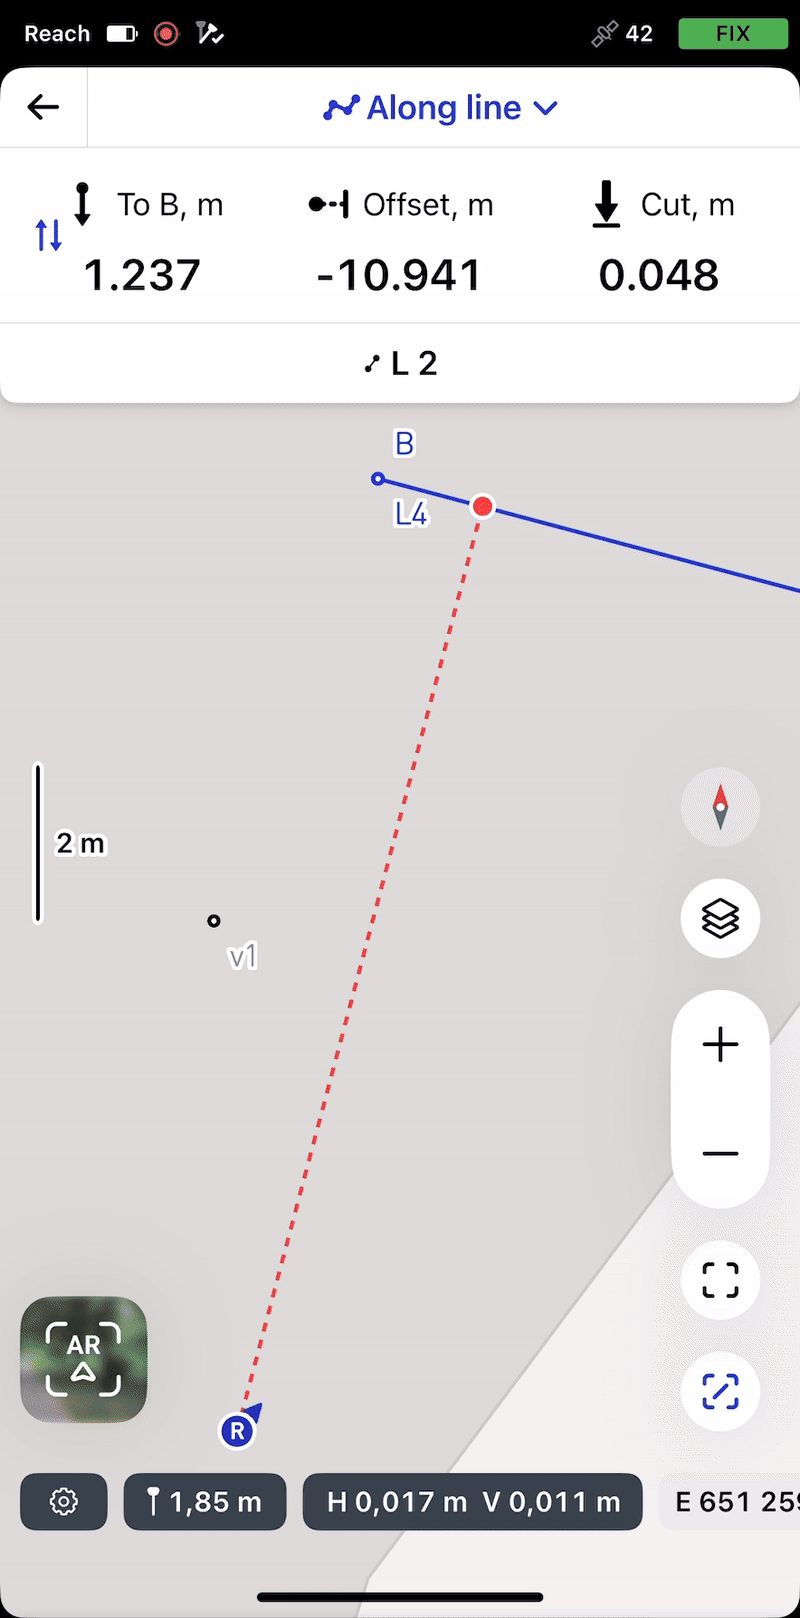
Available for Reach RS4 Pro in Emlid Flow, the AR Stakeout tool overlays the target point or line on the live camera view and provides real-time distance, direction, and approach cues. As you close in, the interface snaps to a bottom-camera-powered bull's-eye, centering the target for precise placement. The live Cut & Fill indicator simultaneously displays elevation differences, allowing you to confirm specifications before marking.
Staking out points
Select a point from the list of objects or on the map and start navigating to it following the on-screen instructions:
To learn how to use the AR Stakeout tool for points, check out the Stake out guide:
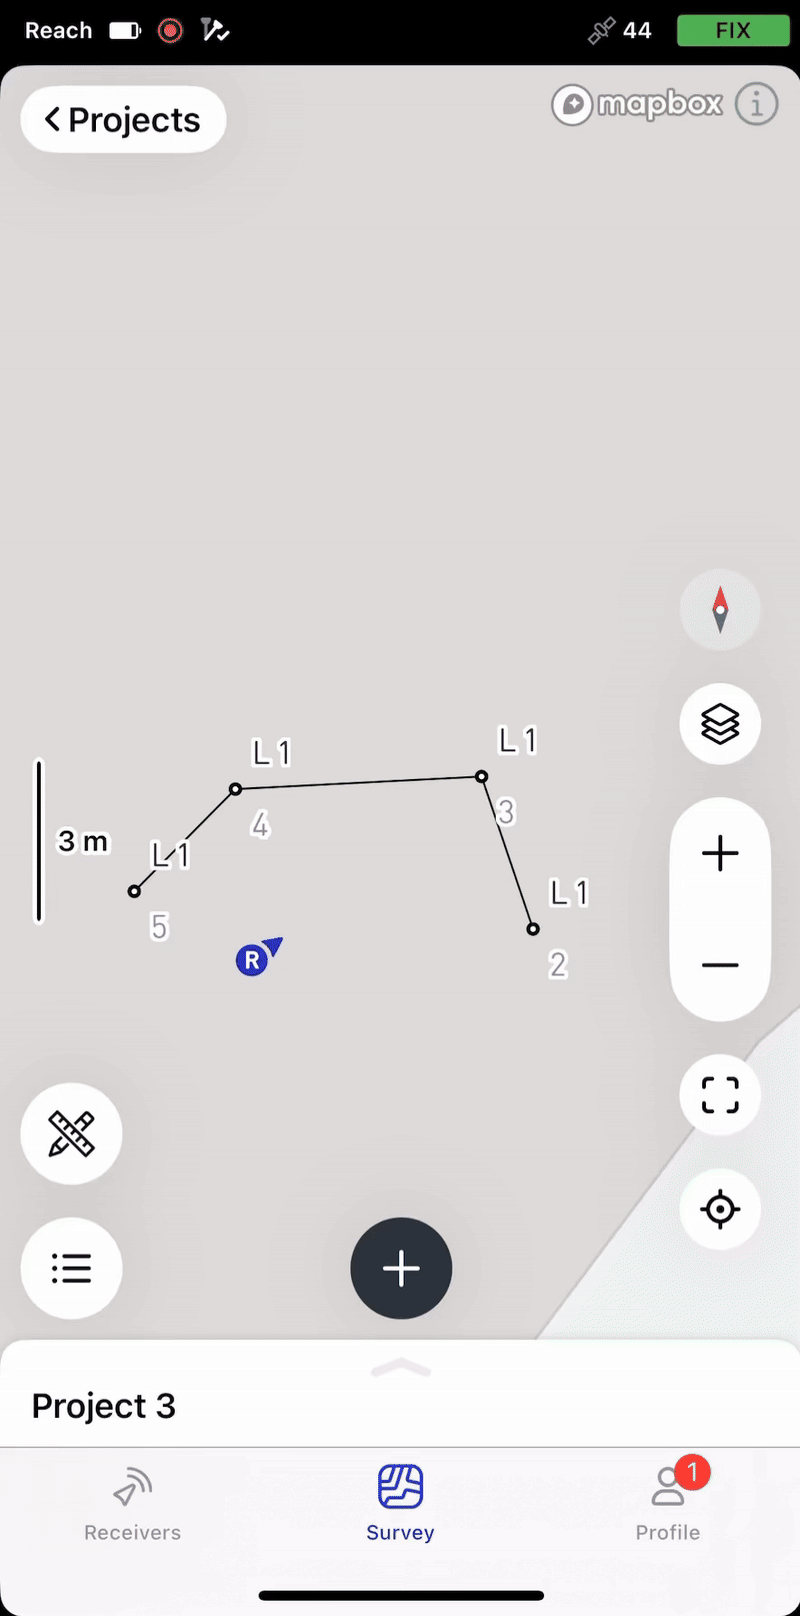
Staking out lines
Select a line or a polygon from the list of objects or on the map and start navigating to it following the on-screen instructions:
To learn how to use the AR Stakeout tool for lines, check out the Stake out lines guide.
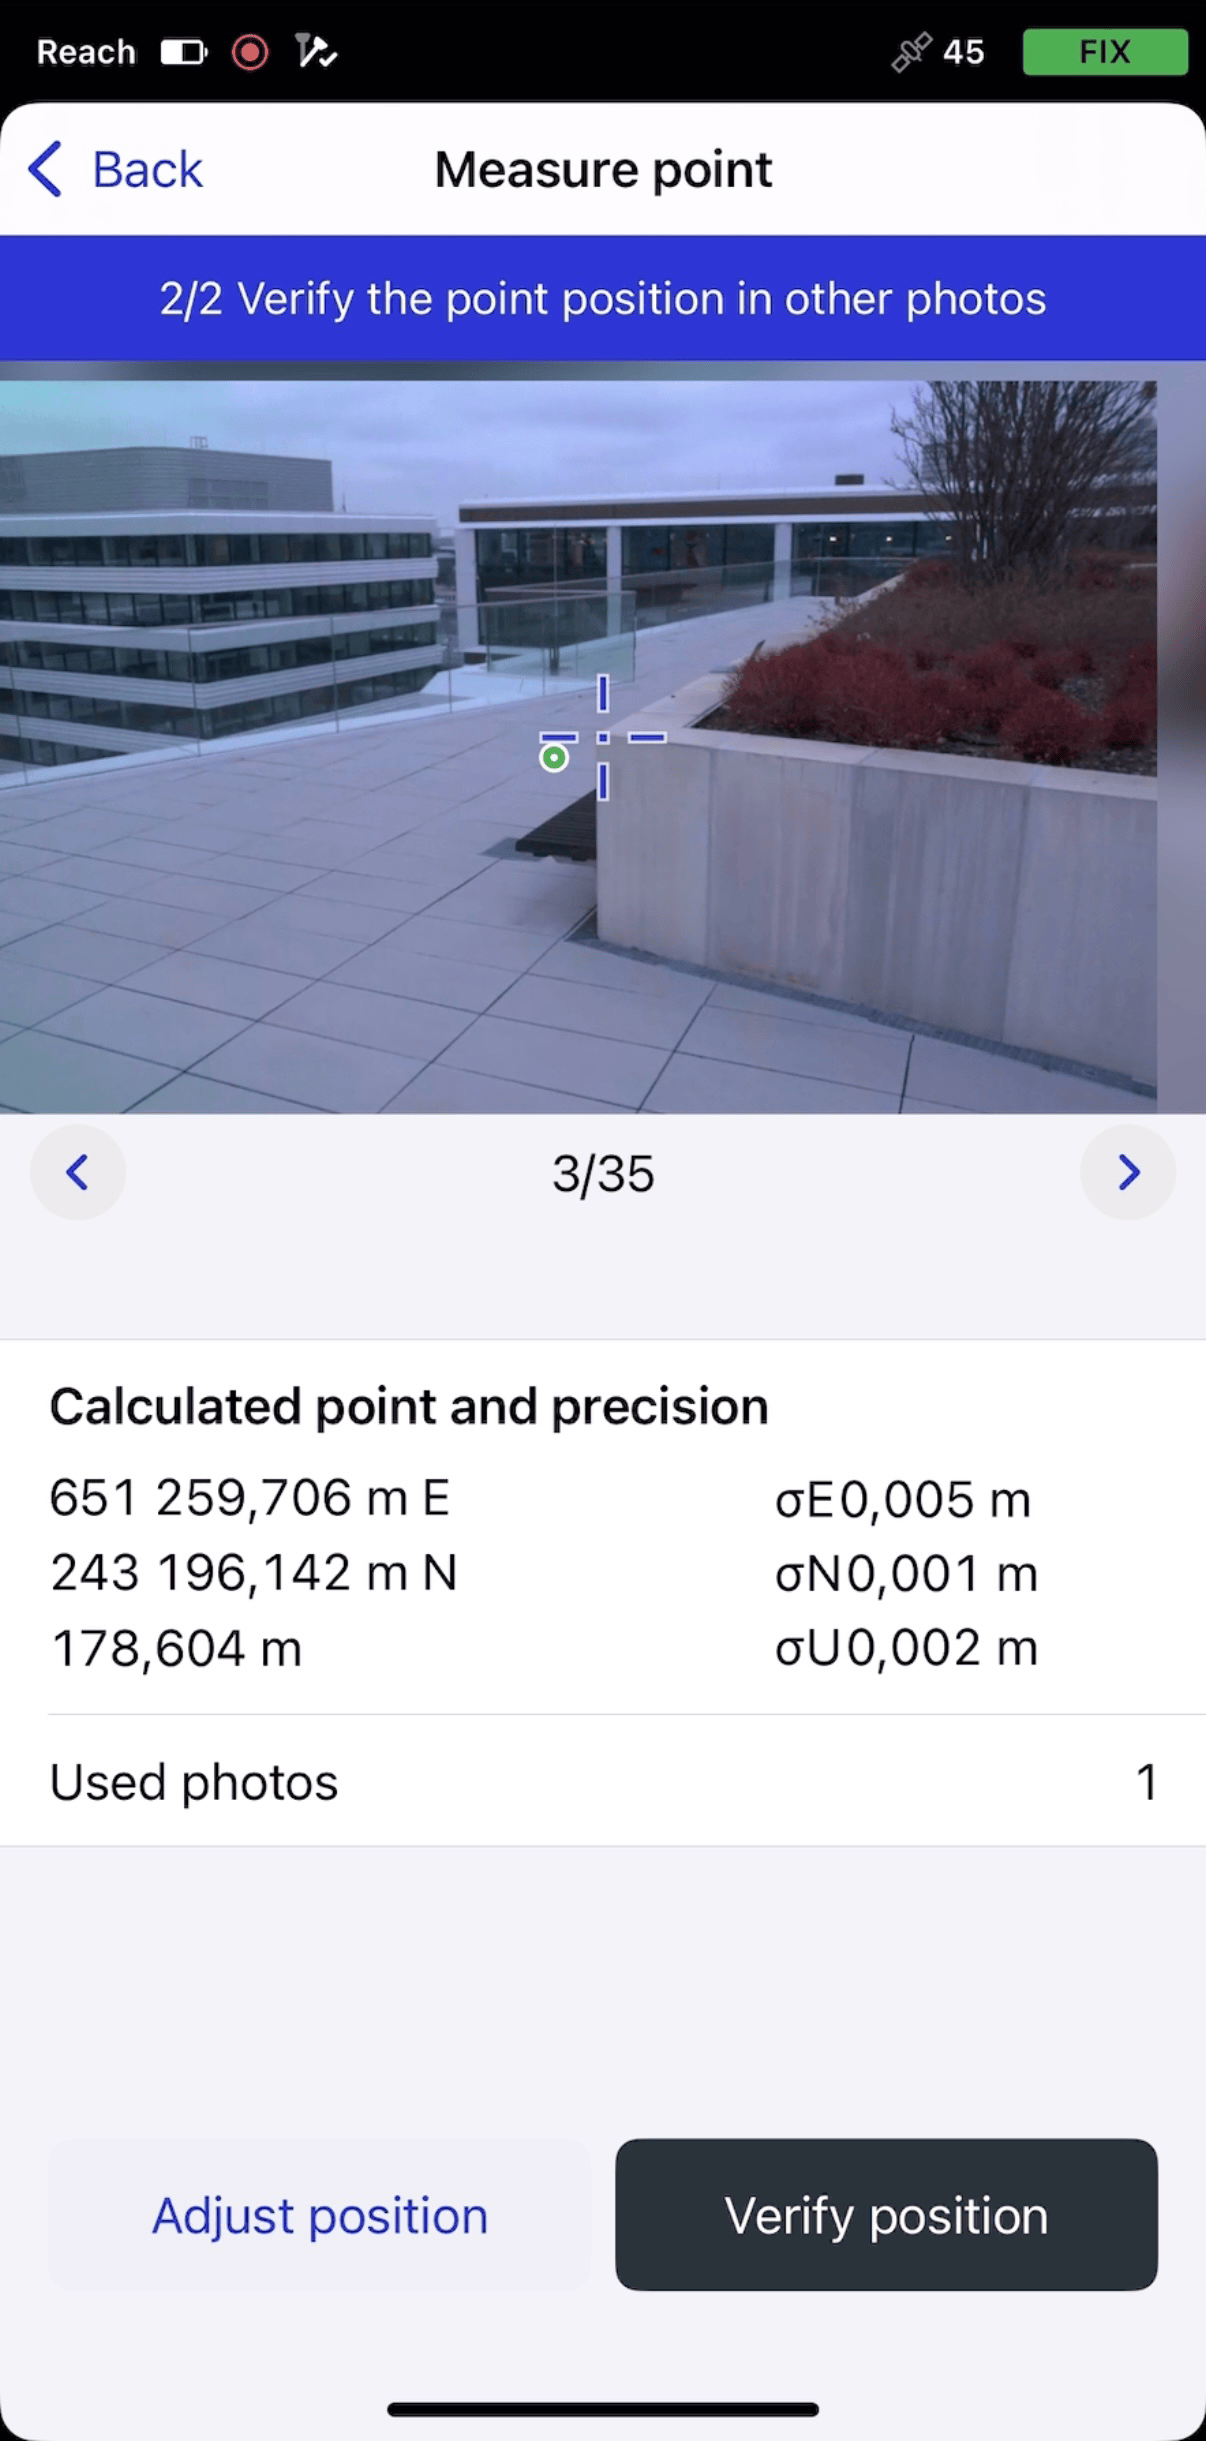
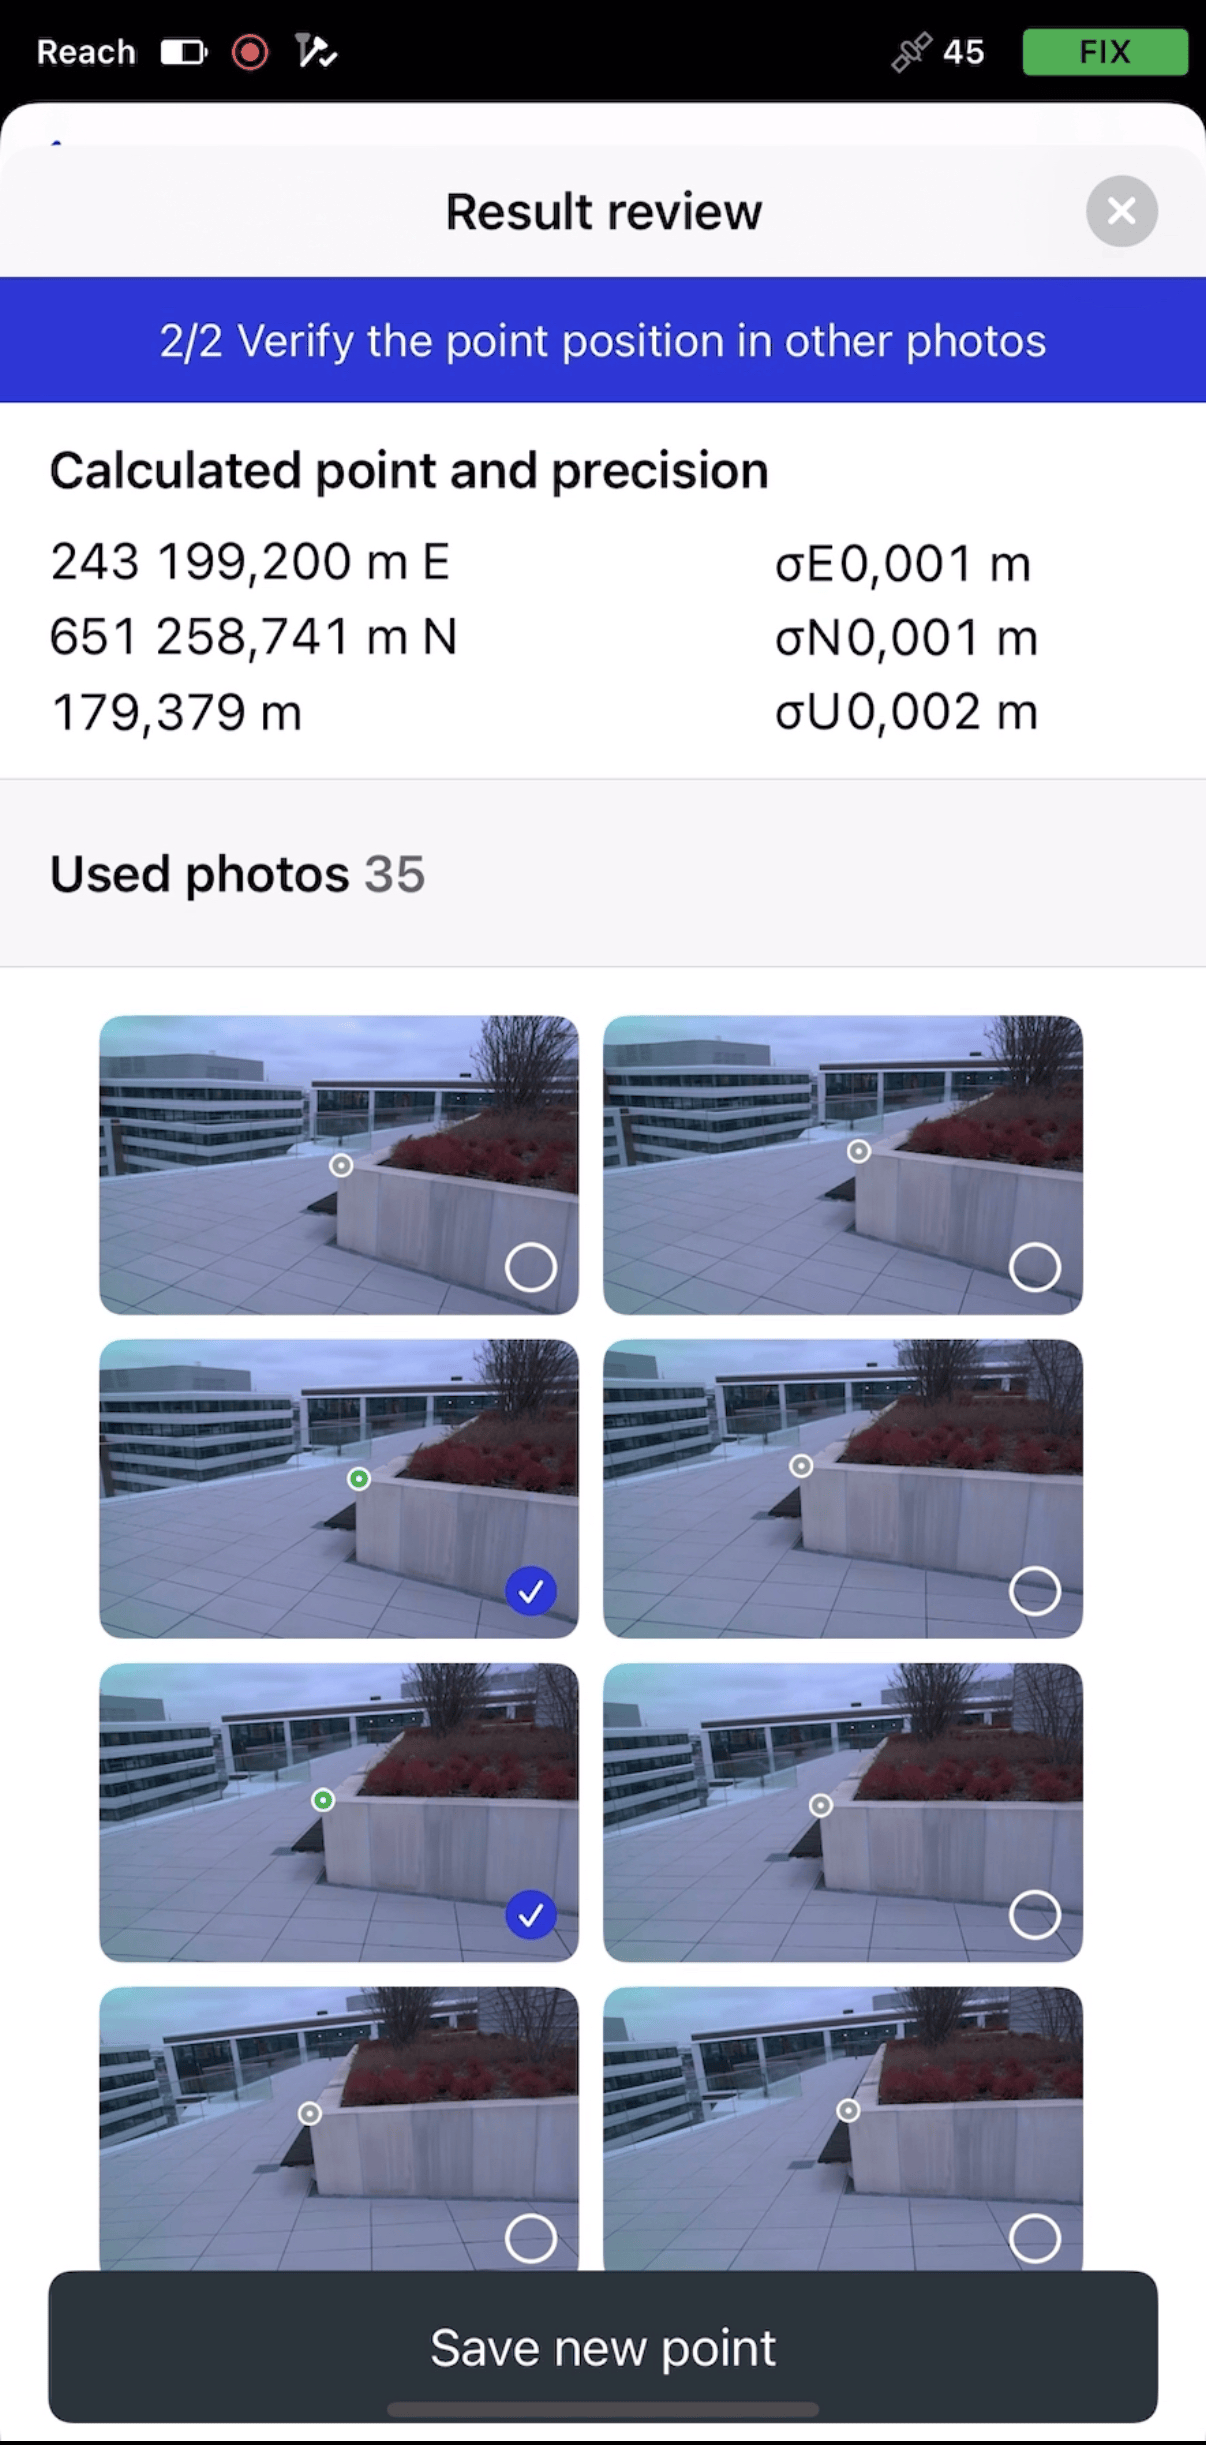
Visual capture
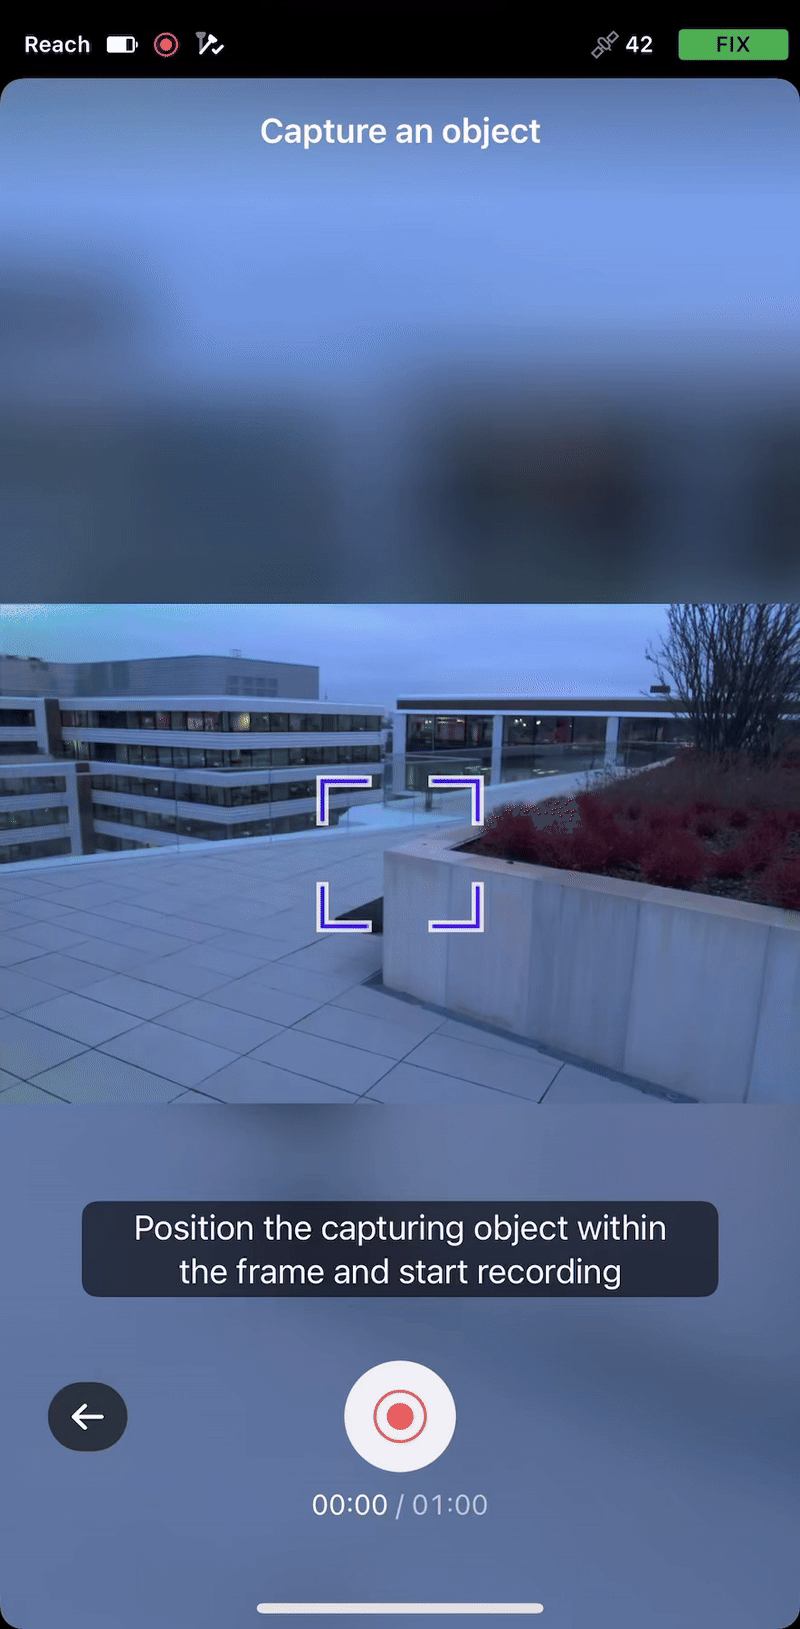
With the Visual capture feature available for Reach RS4 Pro, you can measure points in hard-to-reach or unsafe areas without entering them. Using the receiver’s front camera, Emlid Flow records a short video from multiple viewpoints and then processes it for position calculation:
To ensure a successful capture, follow the recommendations below:
- Use textured, well-lit targets. Choose areas with visible features such as joints, edges, tape targets, markings, bolts, or other high-contrast details. Low-texture or uniform surfaces (for example, freshly poured concrete or glossy finishes) can reduce accuracy.
- Maintain a 2–10 m distance from the target.
- Move slowly along an arc while recording the video to capture the target from multiple viewpoints.
To obtain the coordinates of a point using the Visual capture feature, record a video of the target, measure the point in the image, verify its position in the other frames, and then save it:
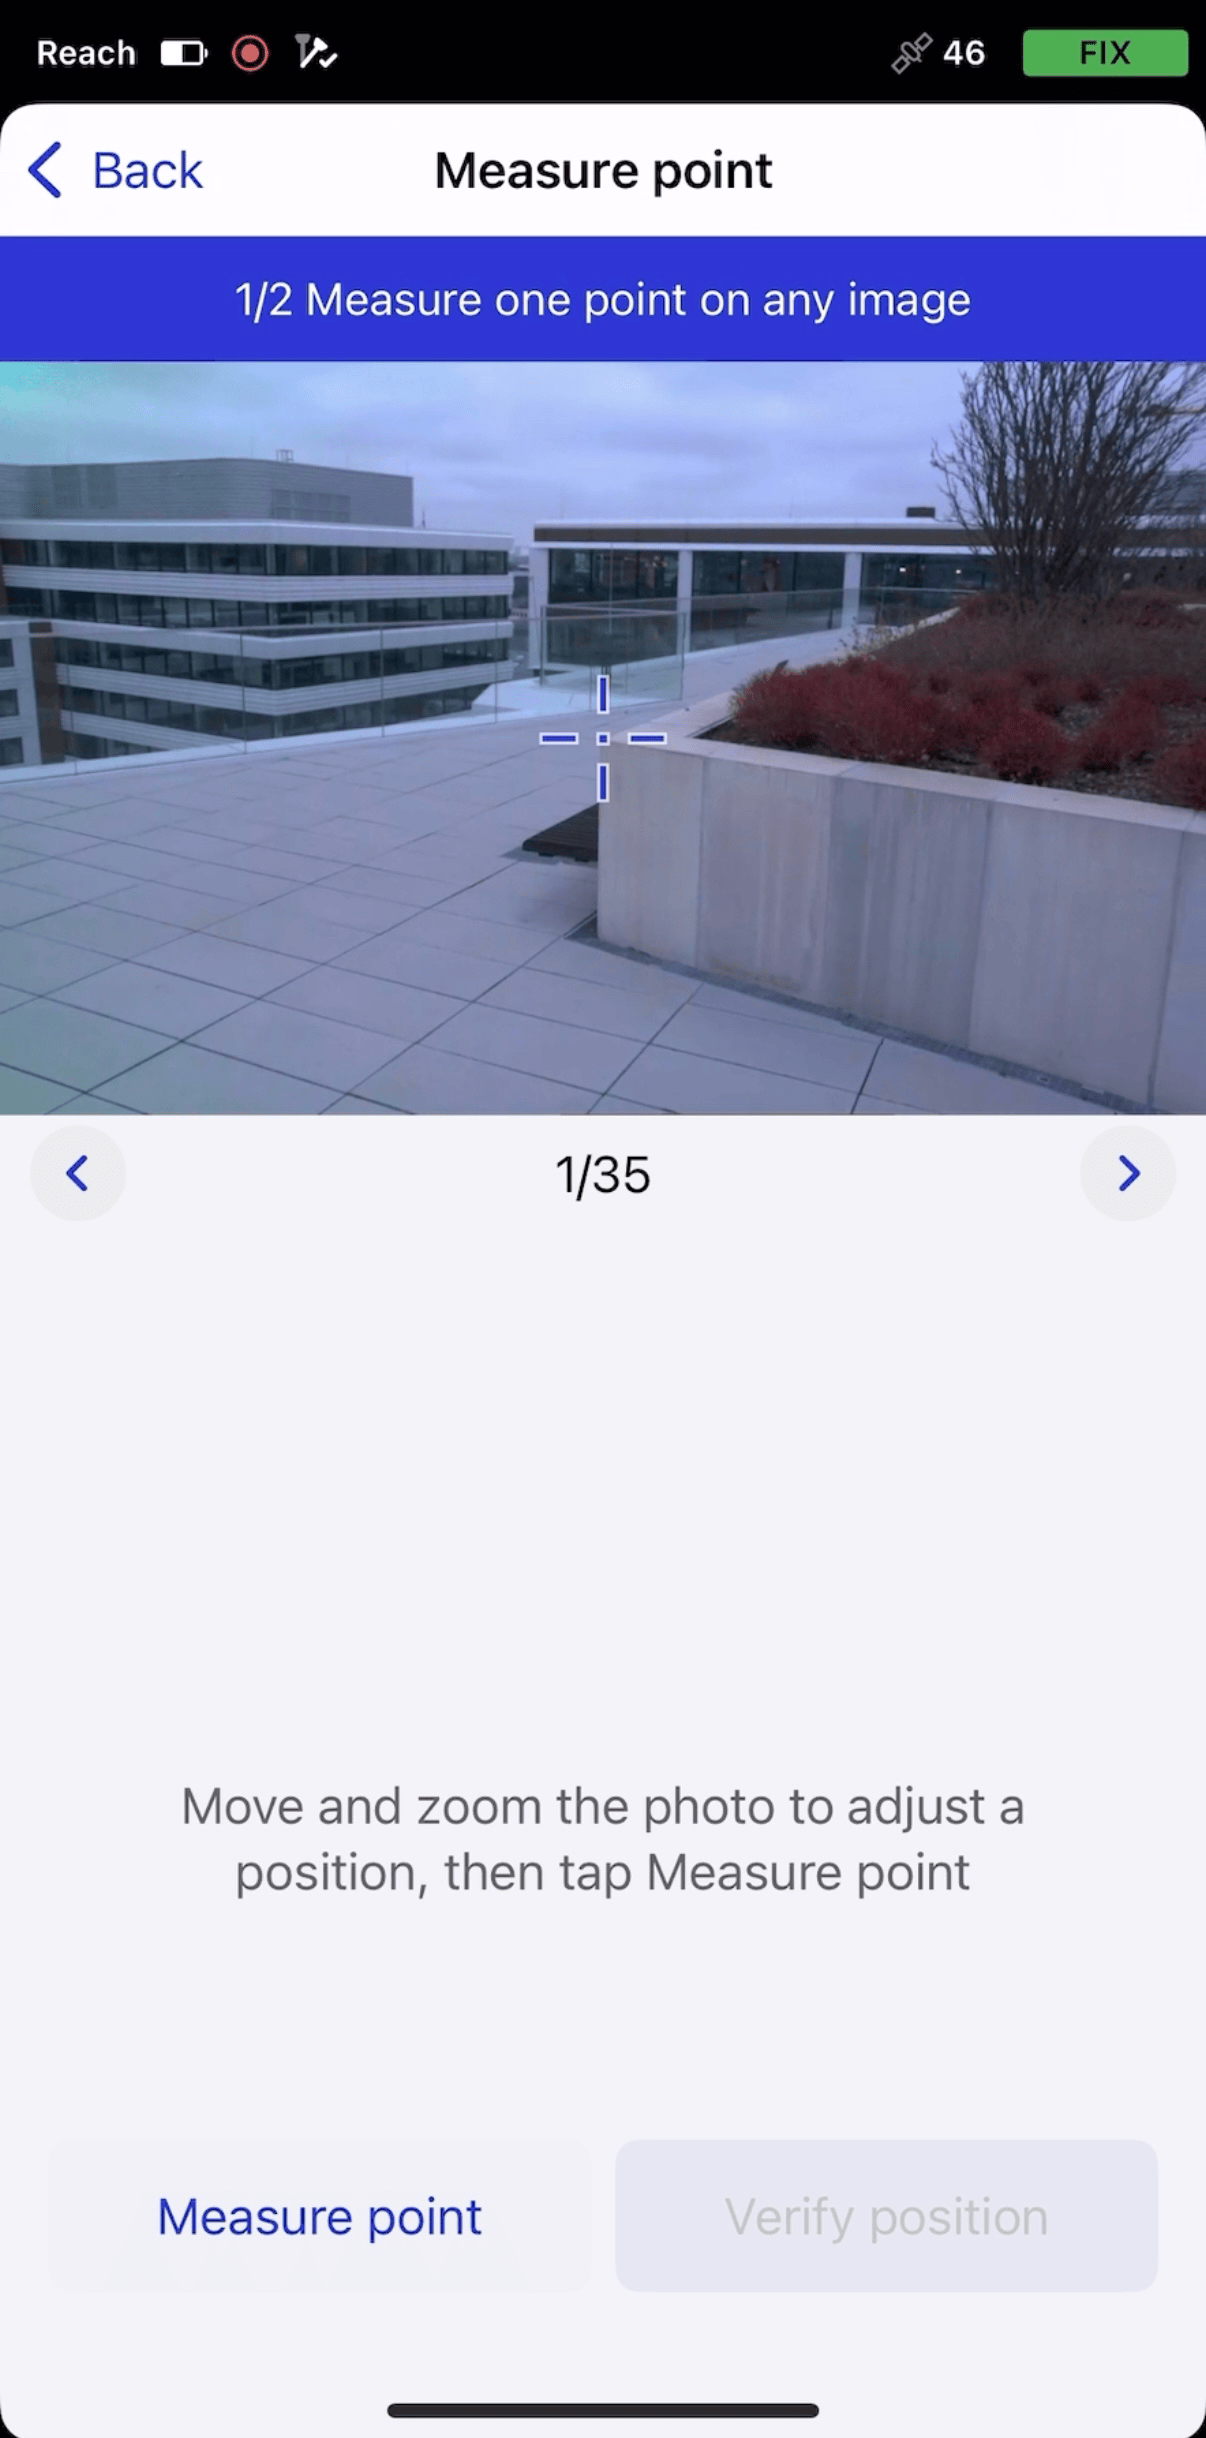
Learn how to use the tool in the step-by-step guide on working with Visual capture.