Create and edit lines
Unlock the full set of features for topo, set-out, and as-built surveys
This guide explains how to create a line from existing points and edit them in your project in the Emlid Flow 360 app.
Overview
Emlid Flow 360 allows you to create lines from existing points. With this feature, you can create and stake out linear objects like fences, roads, and buildings with as many points as you need for further use in GIS or CAD software.
In Emlid Flow 360, you can see the 3D length of your line.
Creating lines
To create a new line from existing points, follow the steps below:
-
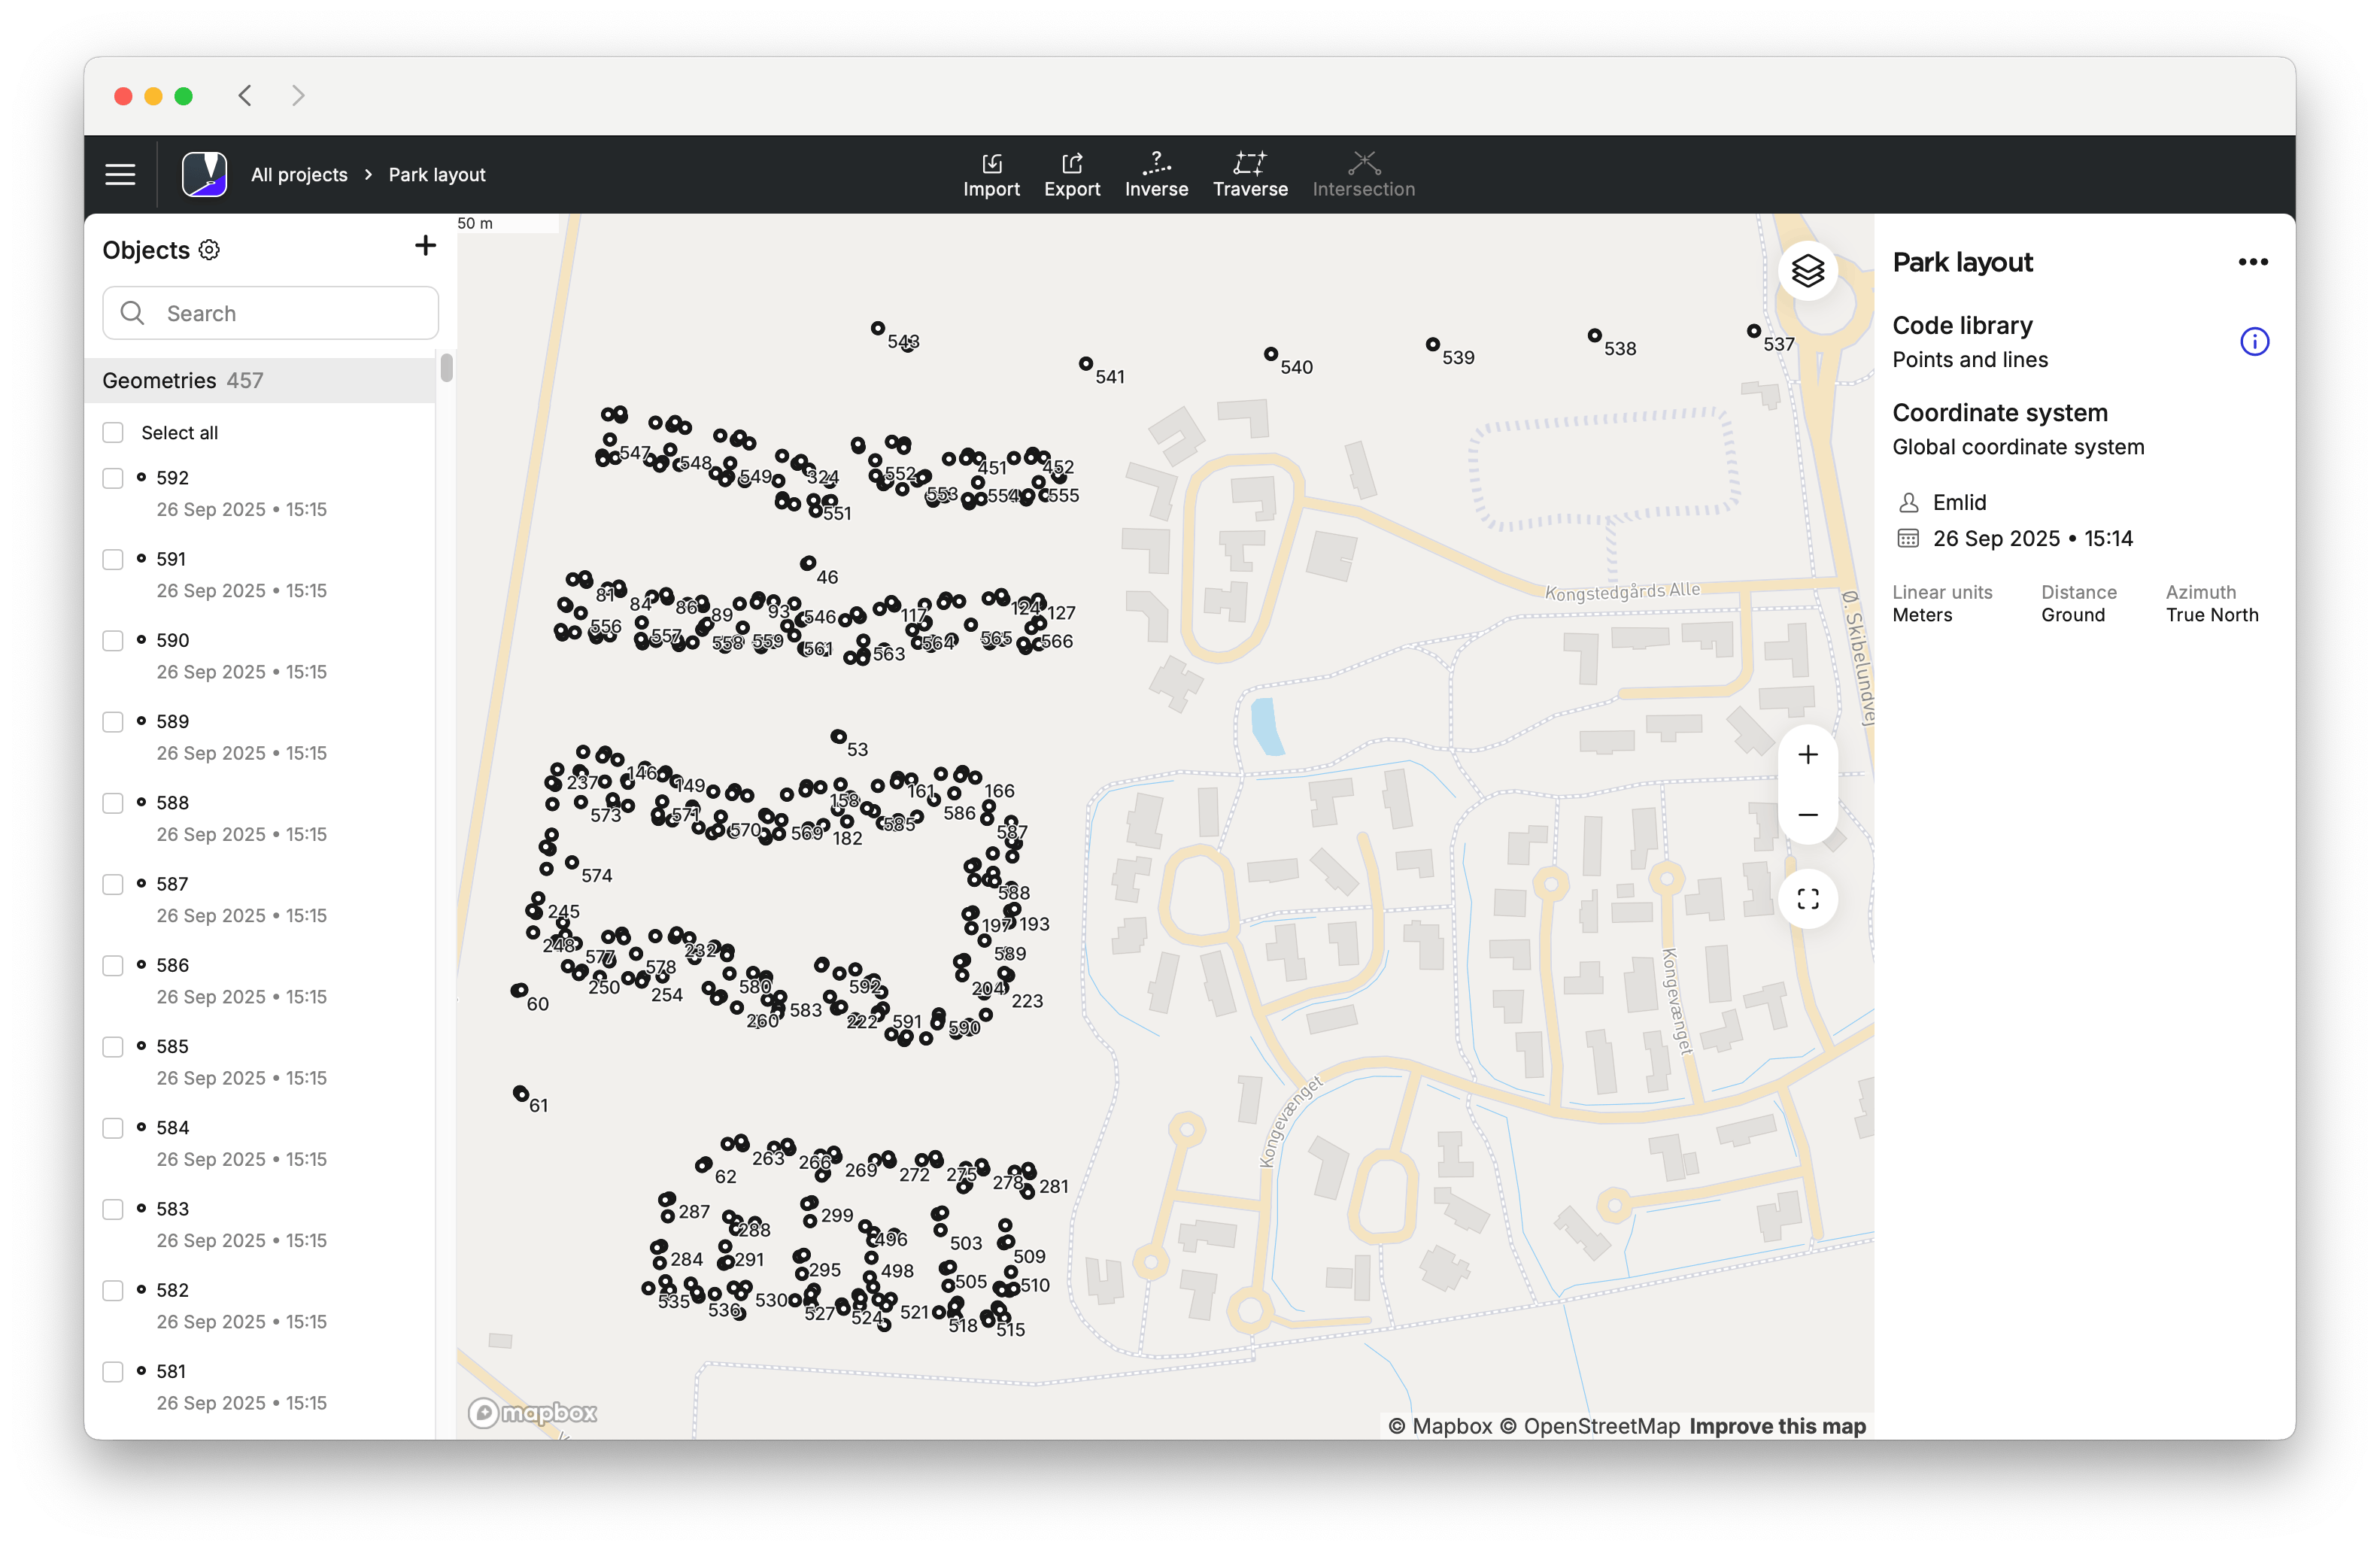
Open the project you want to work with.
-
Go to the list of Objects, tap the + button at the top, and select “Add line” from the drop-down menu.
 tip
tipIn Emlid Flow 360, you can turn point labels on and off on the map. To do this, follow these steps:
- Open your project in Emlid Flow 360.
- Click the Layers button.
- Click Labels on the map, turn on or turn off the following:
- Point name
- Code
tipTap the parameters icon next to Objects to customize the information you want to display for each object. You can customize the display of the following data:
- Point Name
- Code
- Date and Time
- Solution
-
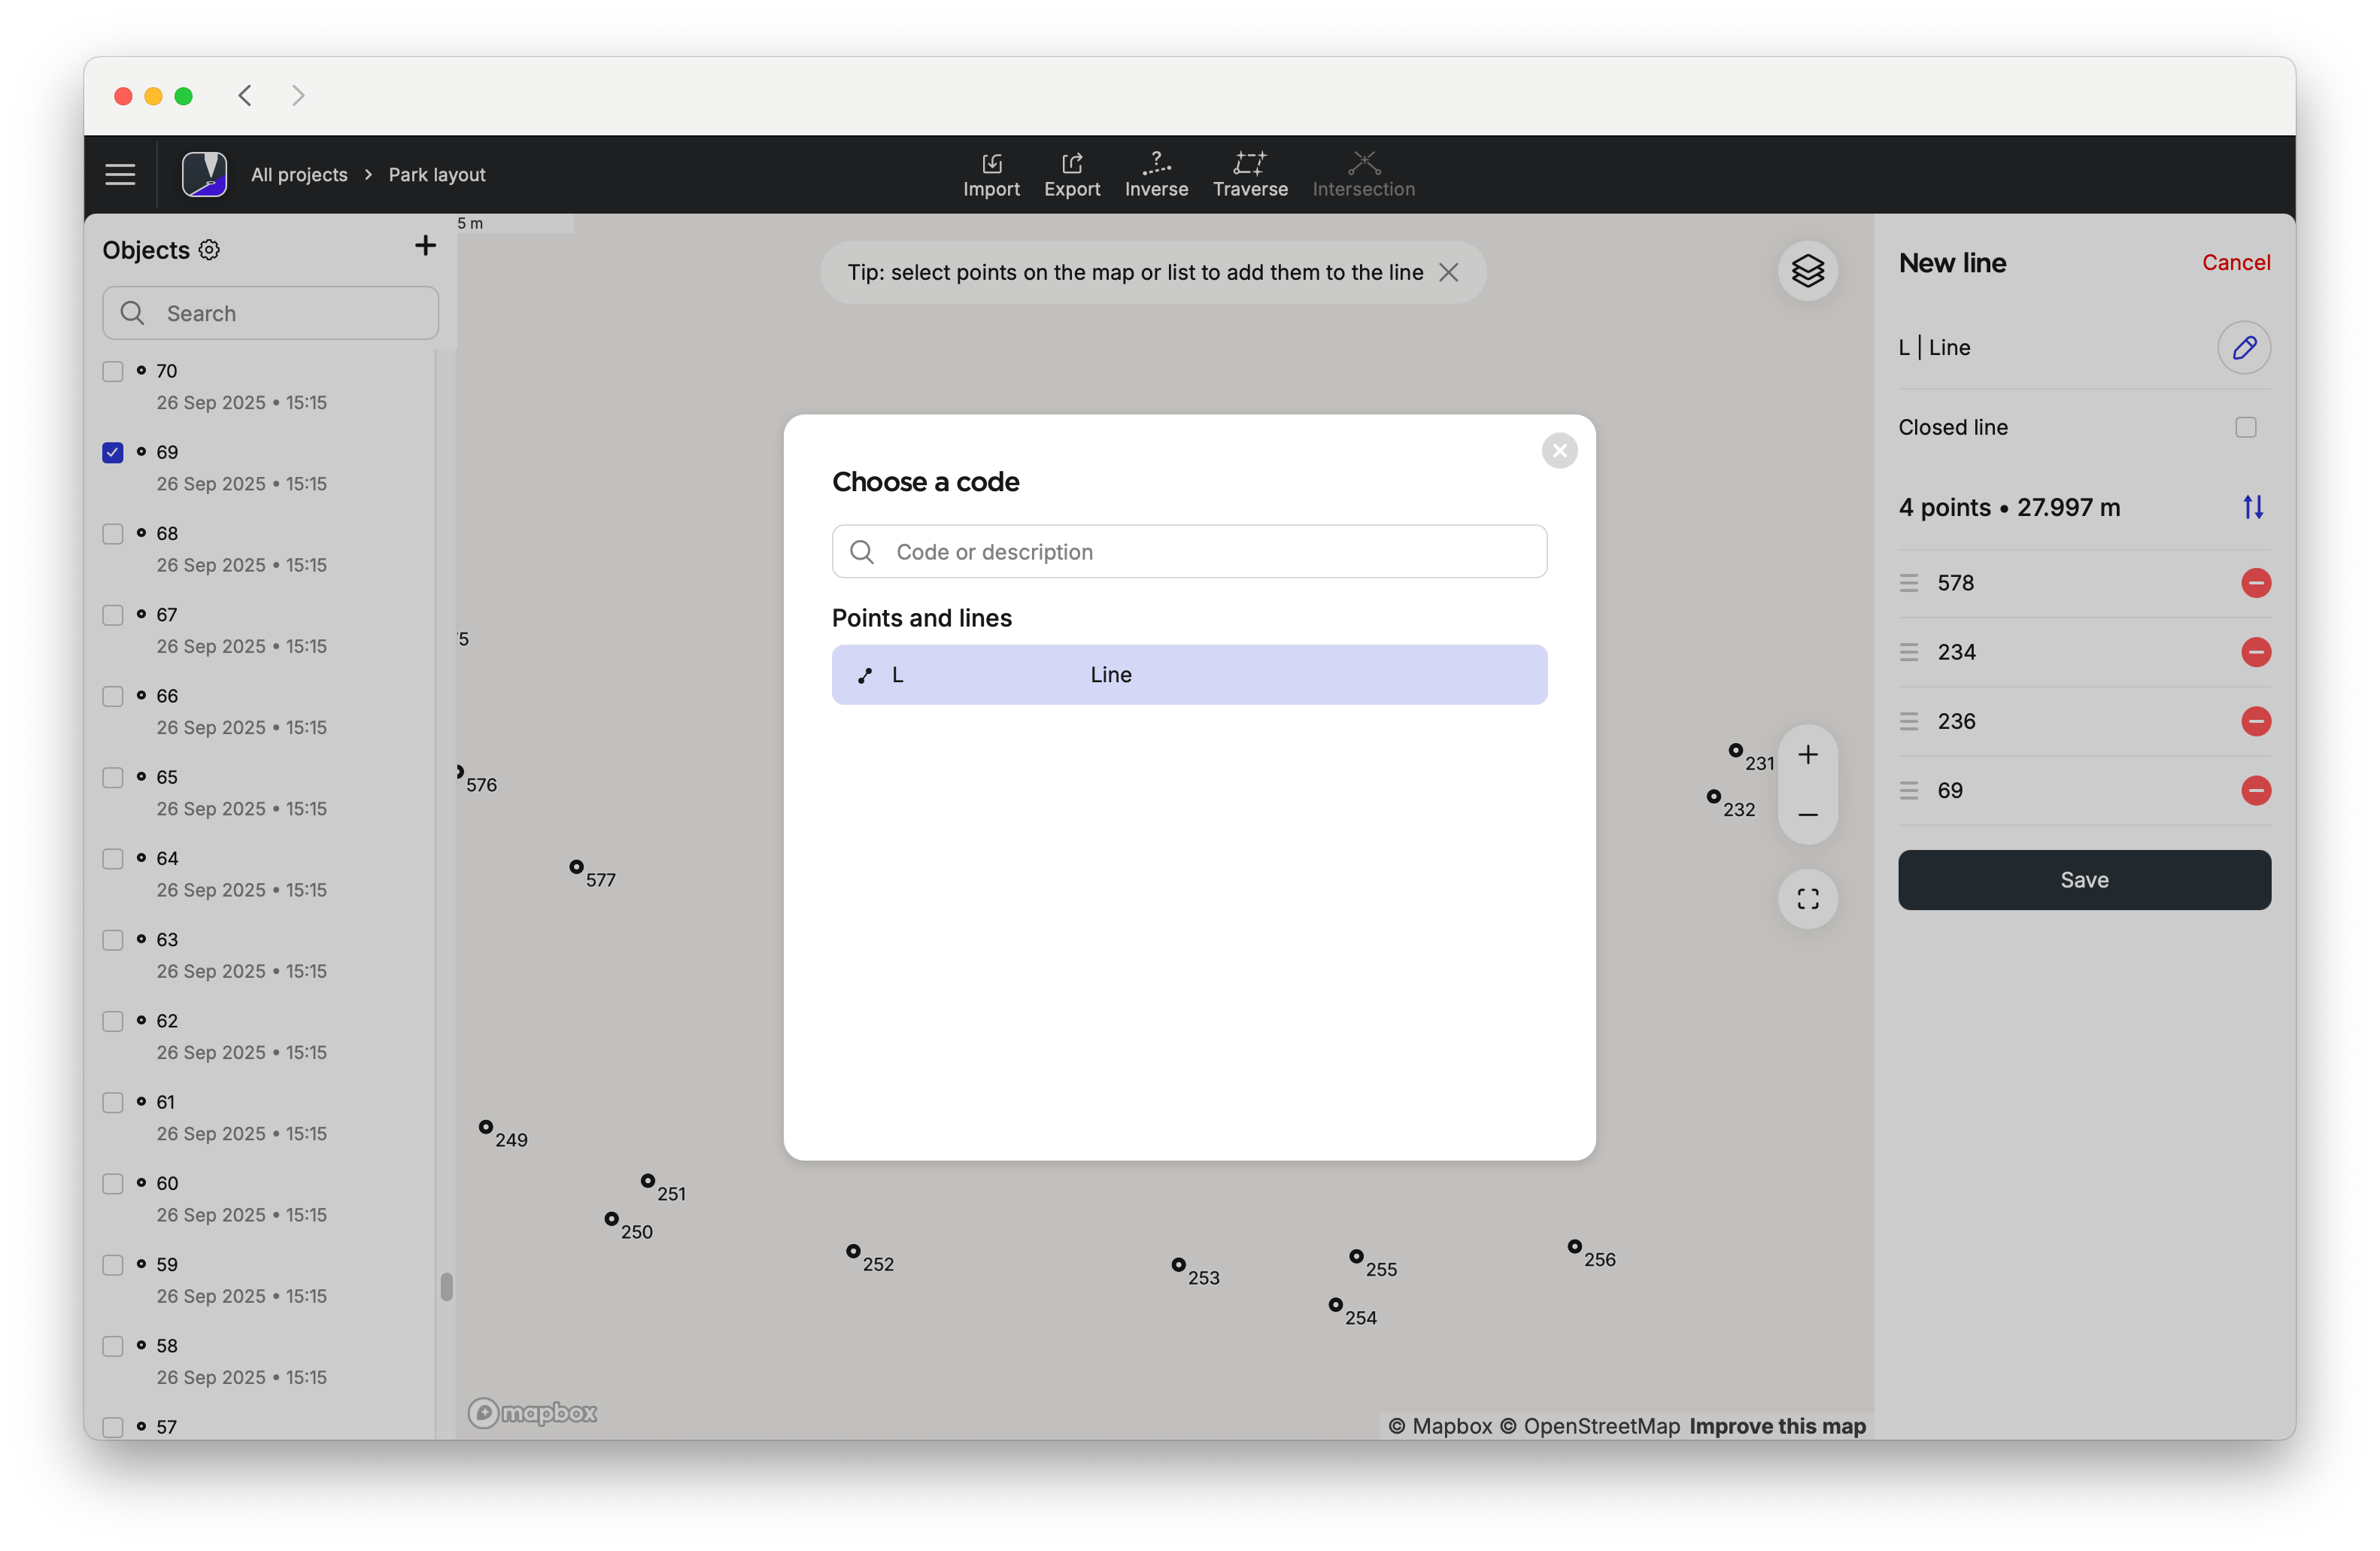
Select points on the map or from the list to add them to the line.
 tip
tipYou can change the order of the points by dragging them.
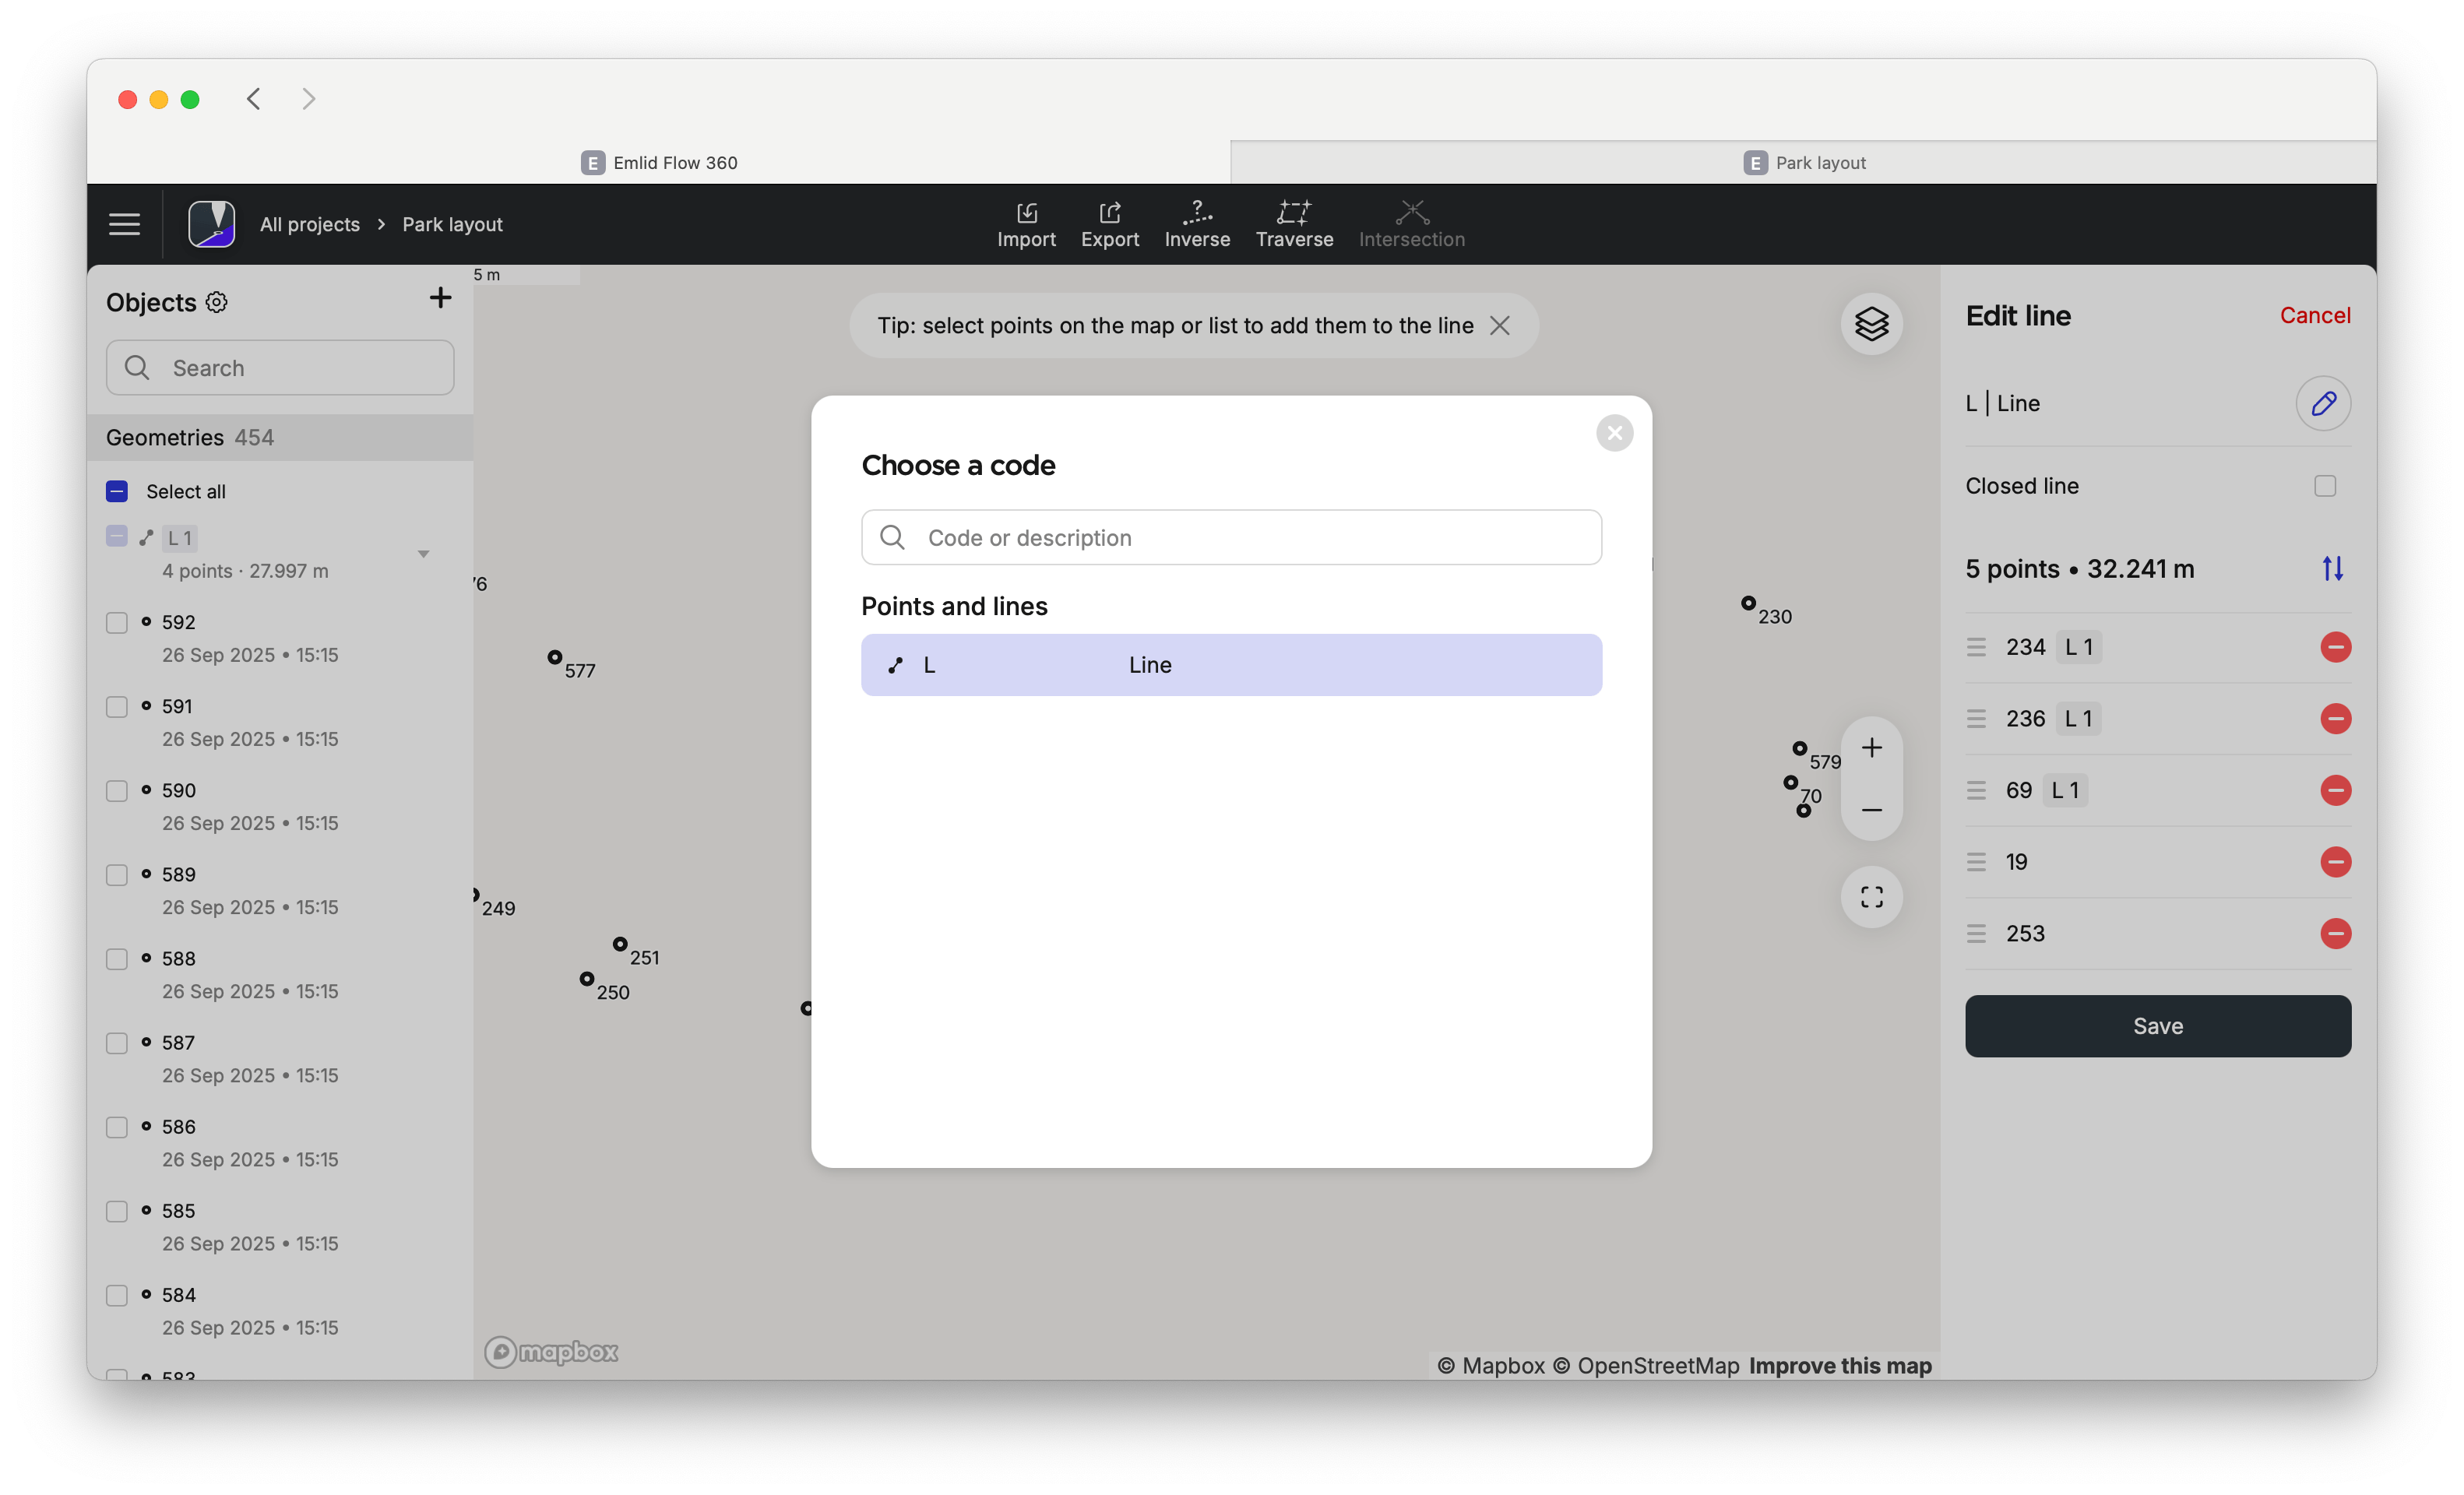
-
Select a code for your line from your Code library list. Tap Save to create a line.
After you create a new line, it appears in the list of objects.
Now you can add new lines or keep working with the line you've just created.
Editing lines
Emlid Flow 360 allows you to edit lines in your survey projects in the office to correct the data collected in the field. With the Edit line feature, you can adjust the vertices of a line or change its code. The feature is available for both created and imported projects and includes the following editing options:
- Change point order.
- Delete points from a line.
- Add points to a line.
- Change the code of a line.
- Close the line and create a polygon.
The Emlid Flow 360 app also allows you to delete a line while keeping or deleting its points.
When importing a project into Emlid Flow, make sure you follow the requirements for each format. See the Create or Import Project guide to learn more about importing a project into Emlid Flow 360.
To edit a line in Emlid Flow 360, follow these steps:
-
Open the Emlid Flow 360 app on your device.
-
Select the project you want to edit.
-
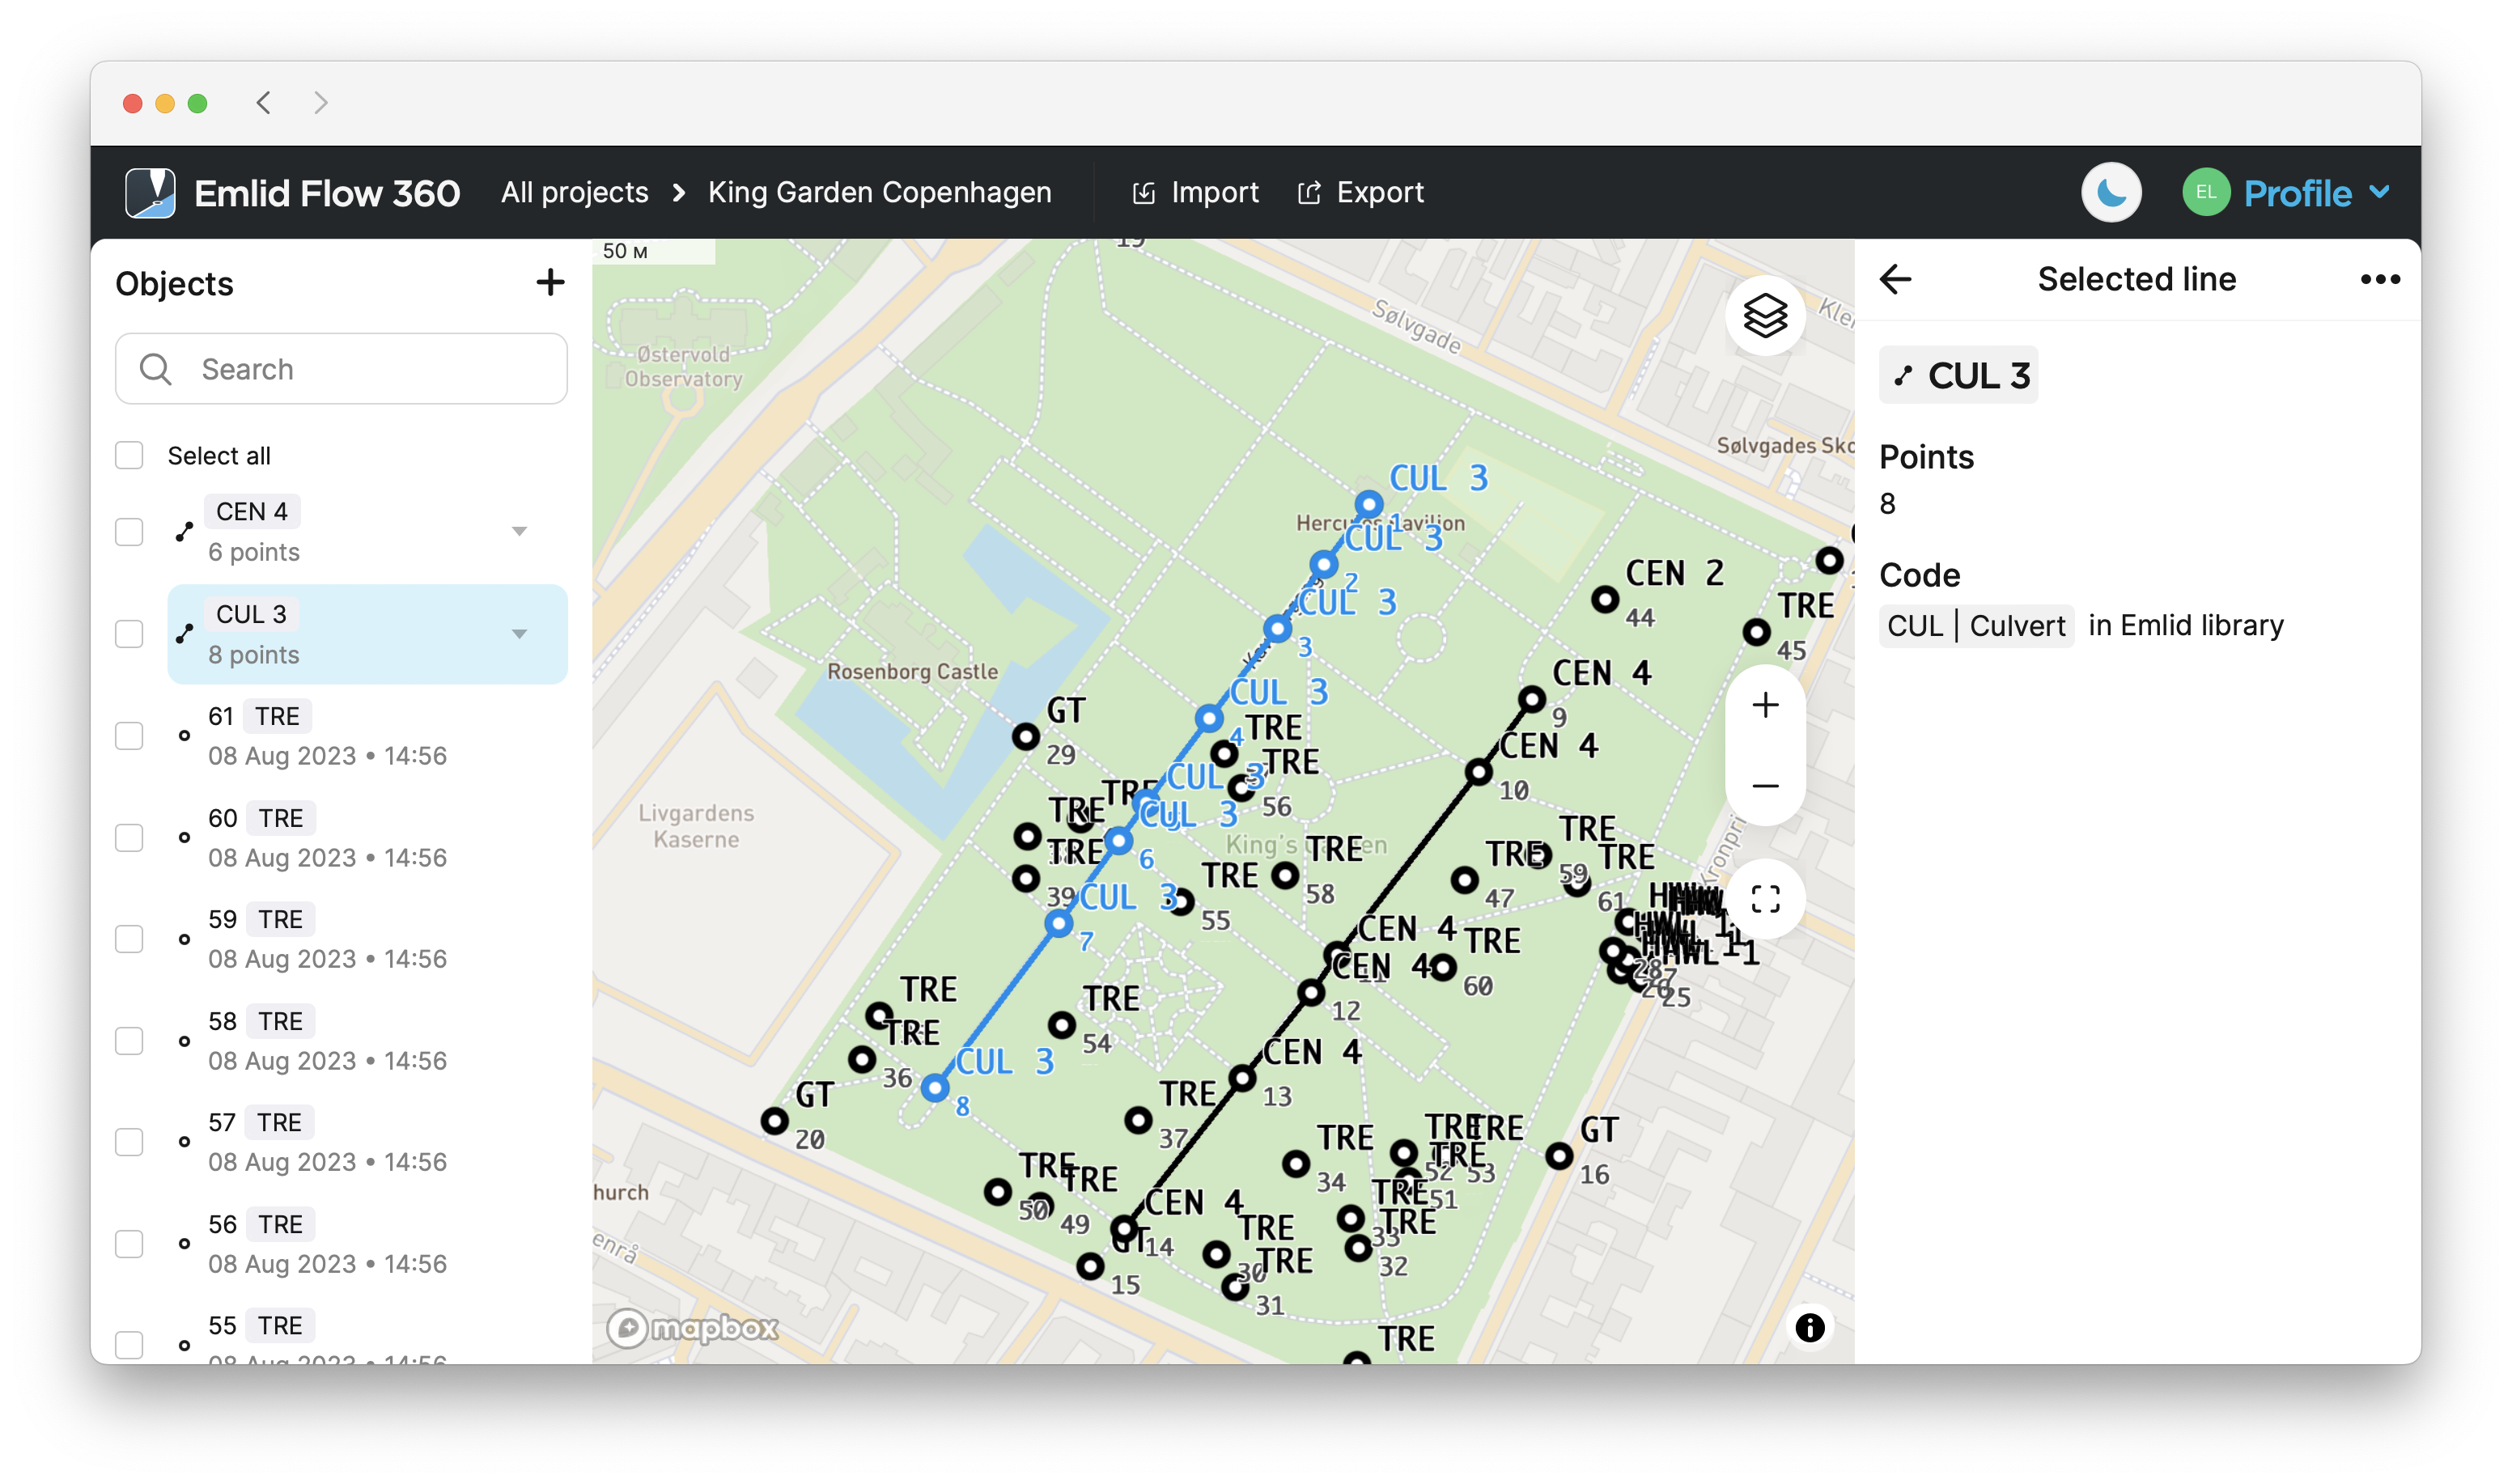
Open the list of objects, and select the line you want to edit.
 tip
tipIn Emlid Flow 360, you can turn point labels on and off on the map. To do this, follow these steps:
- Open your project in Emlid Flow 360.
- Click the Layers button.
- Click Labels on the map, turn on or turn off the following:
- Point name
- Code
tipTap the parameters icon next to Objects to customize the information you want to display for each object. You can customize the display of the following data:
- Point Name
- Code
- Date and Time
- Solution
-
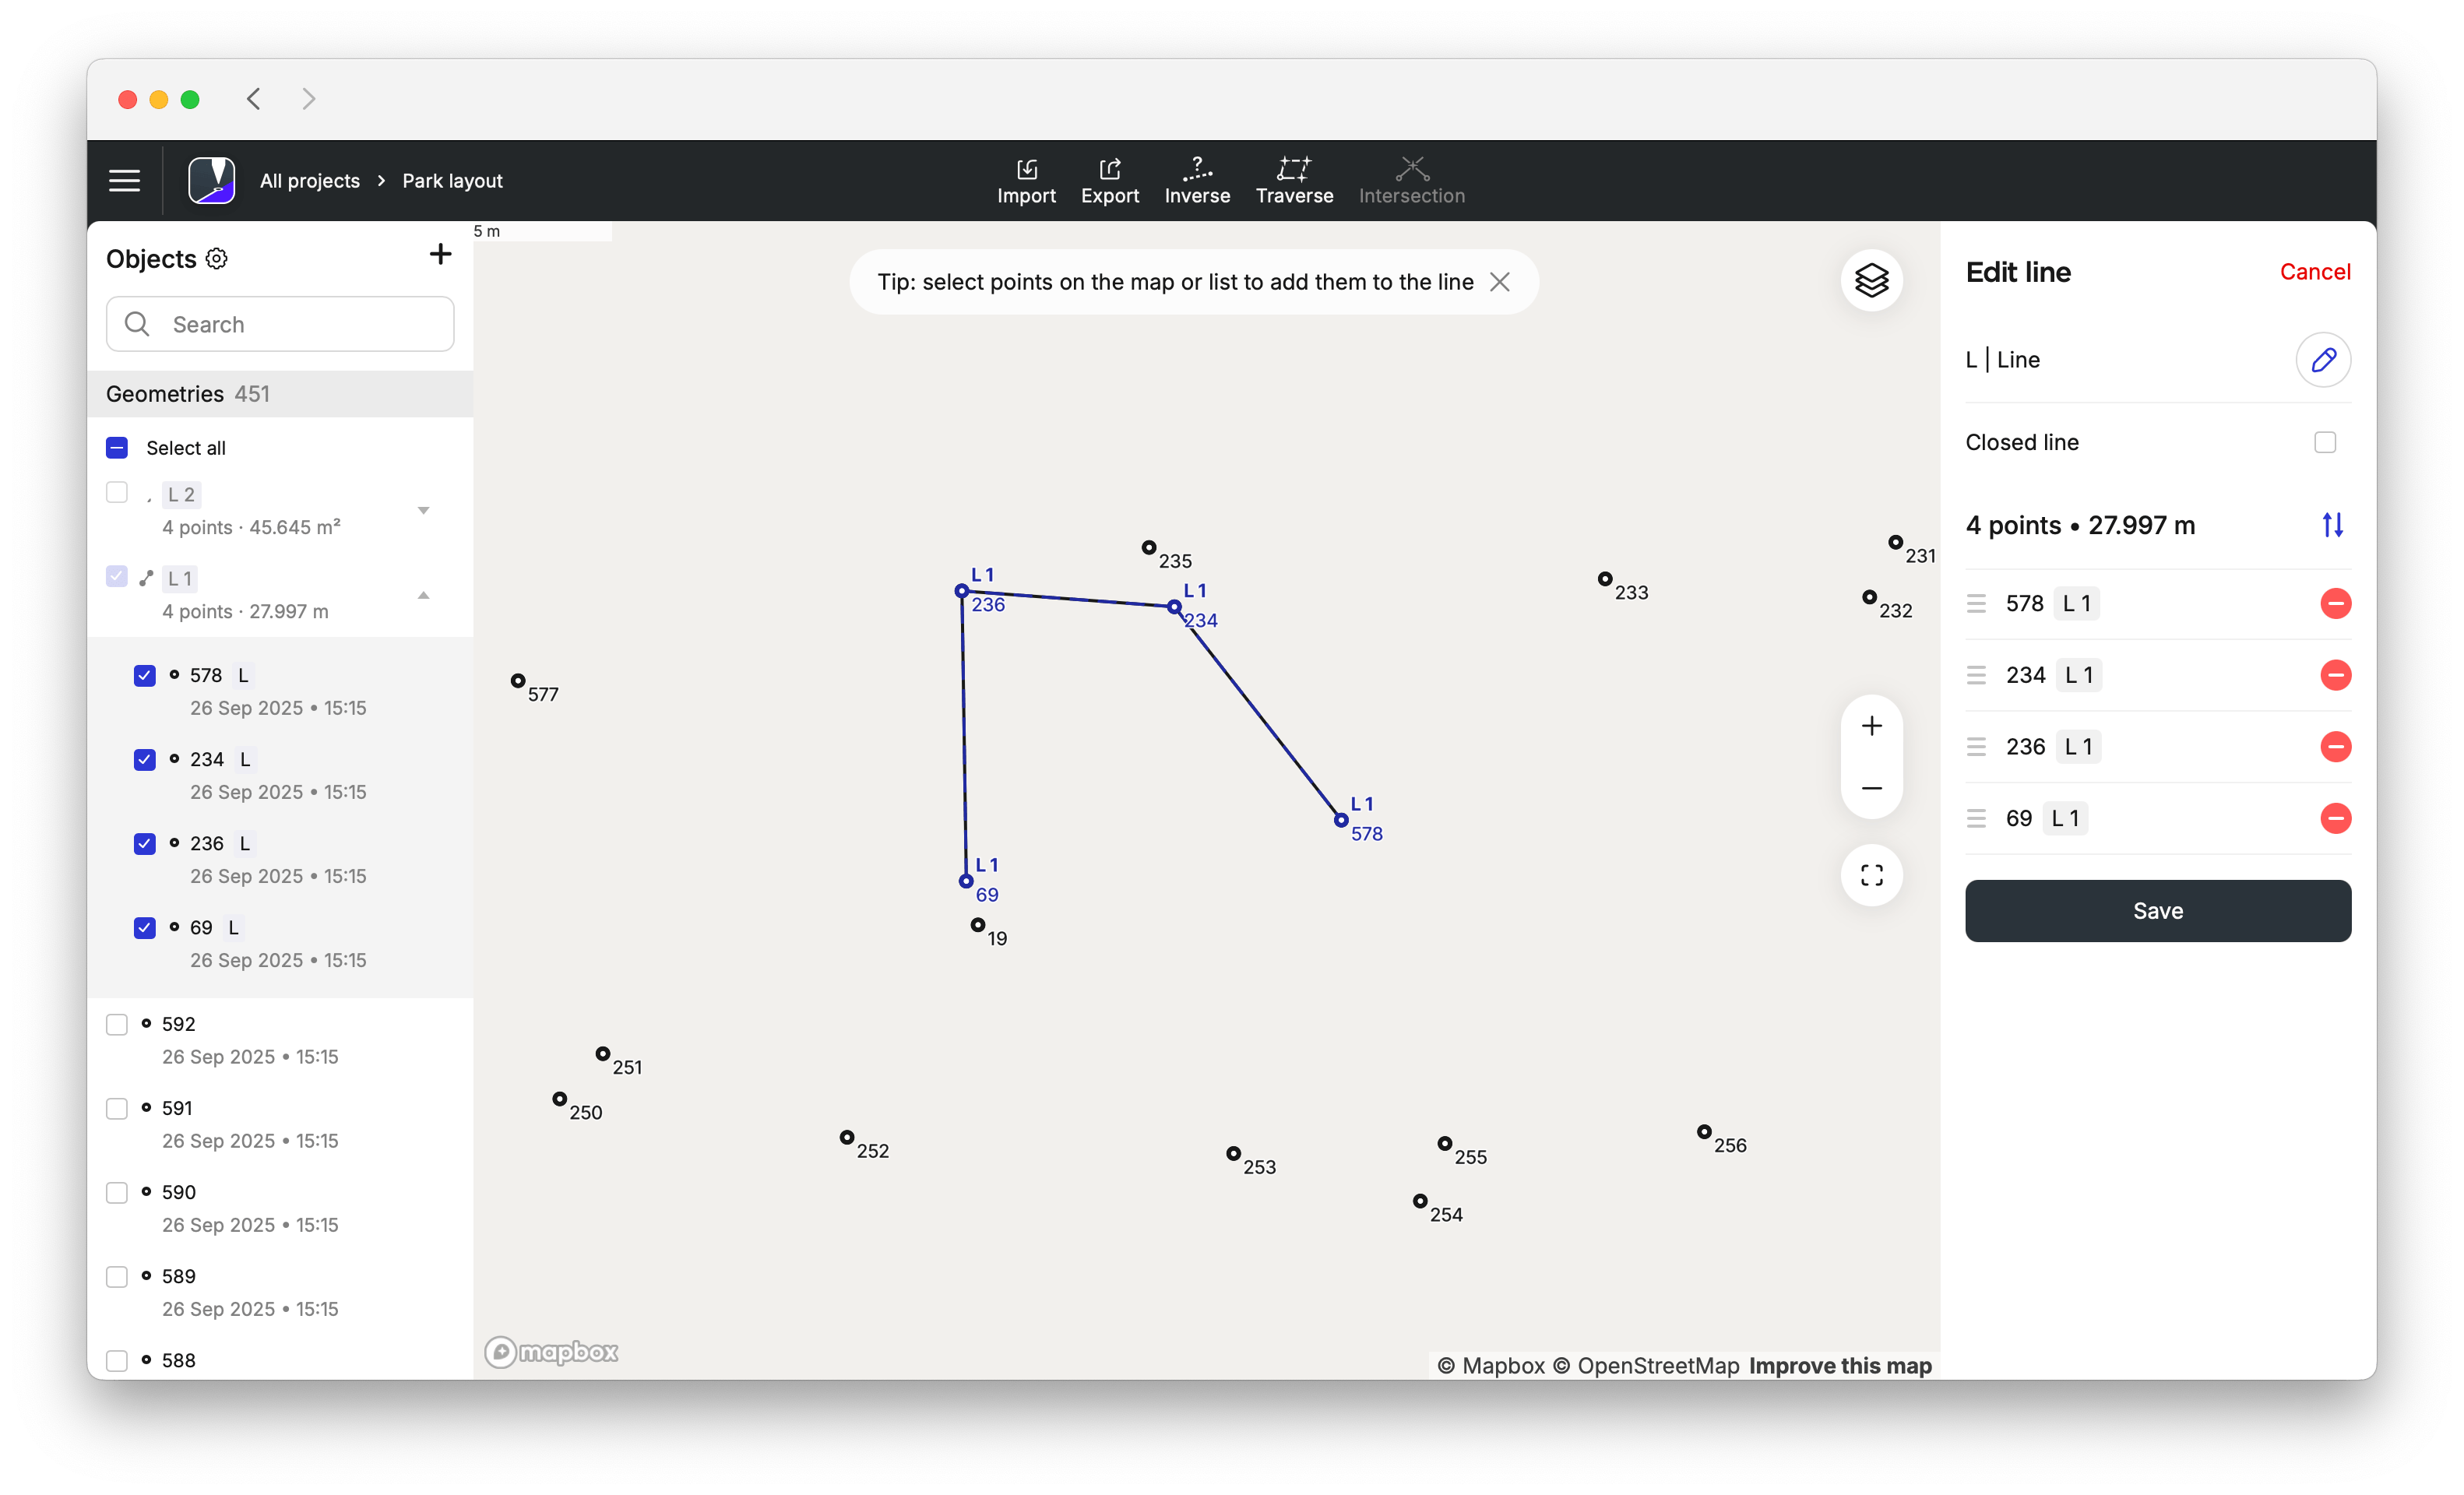
In the line editor, tap the three dots, then choose Edit line from the drop-down menu.

Now, you can:
-
Add points/lines by selecting them directly on the map or from the list.
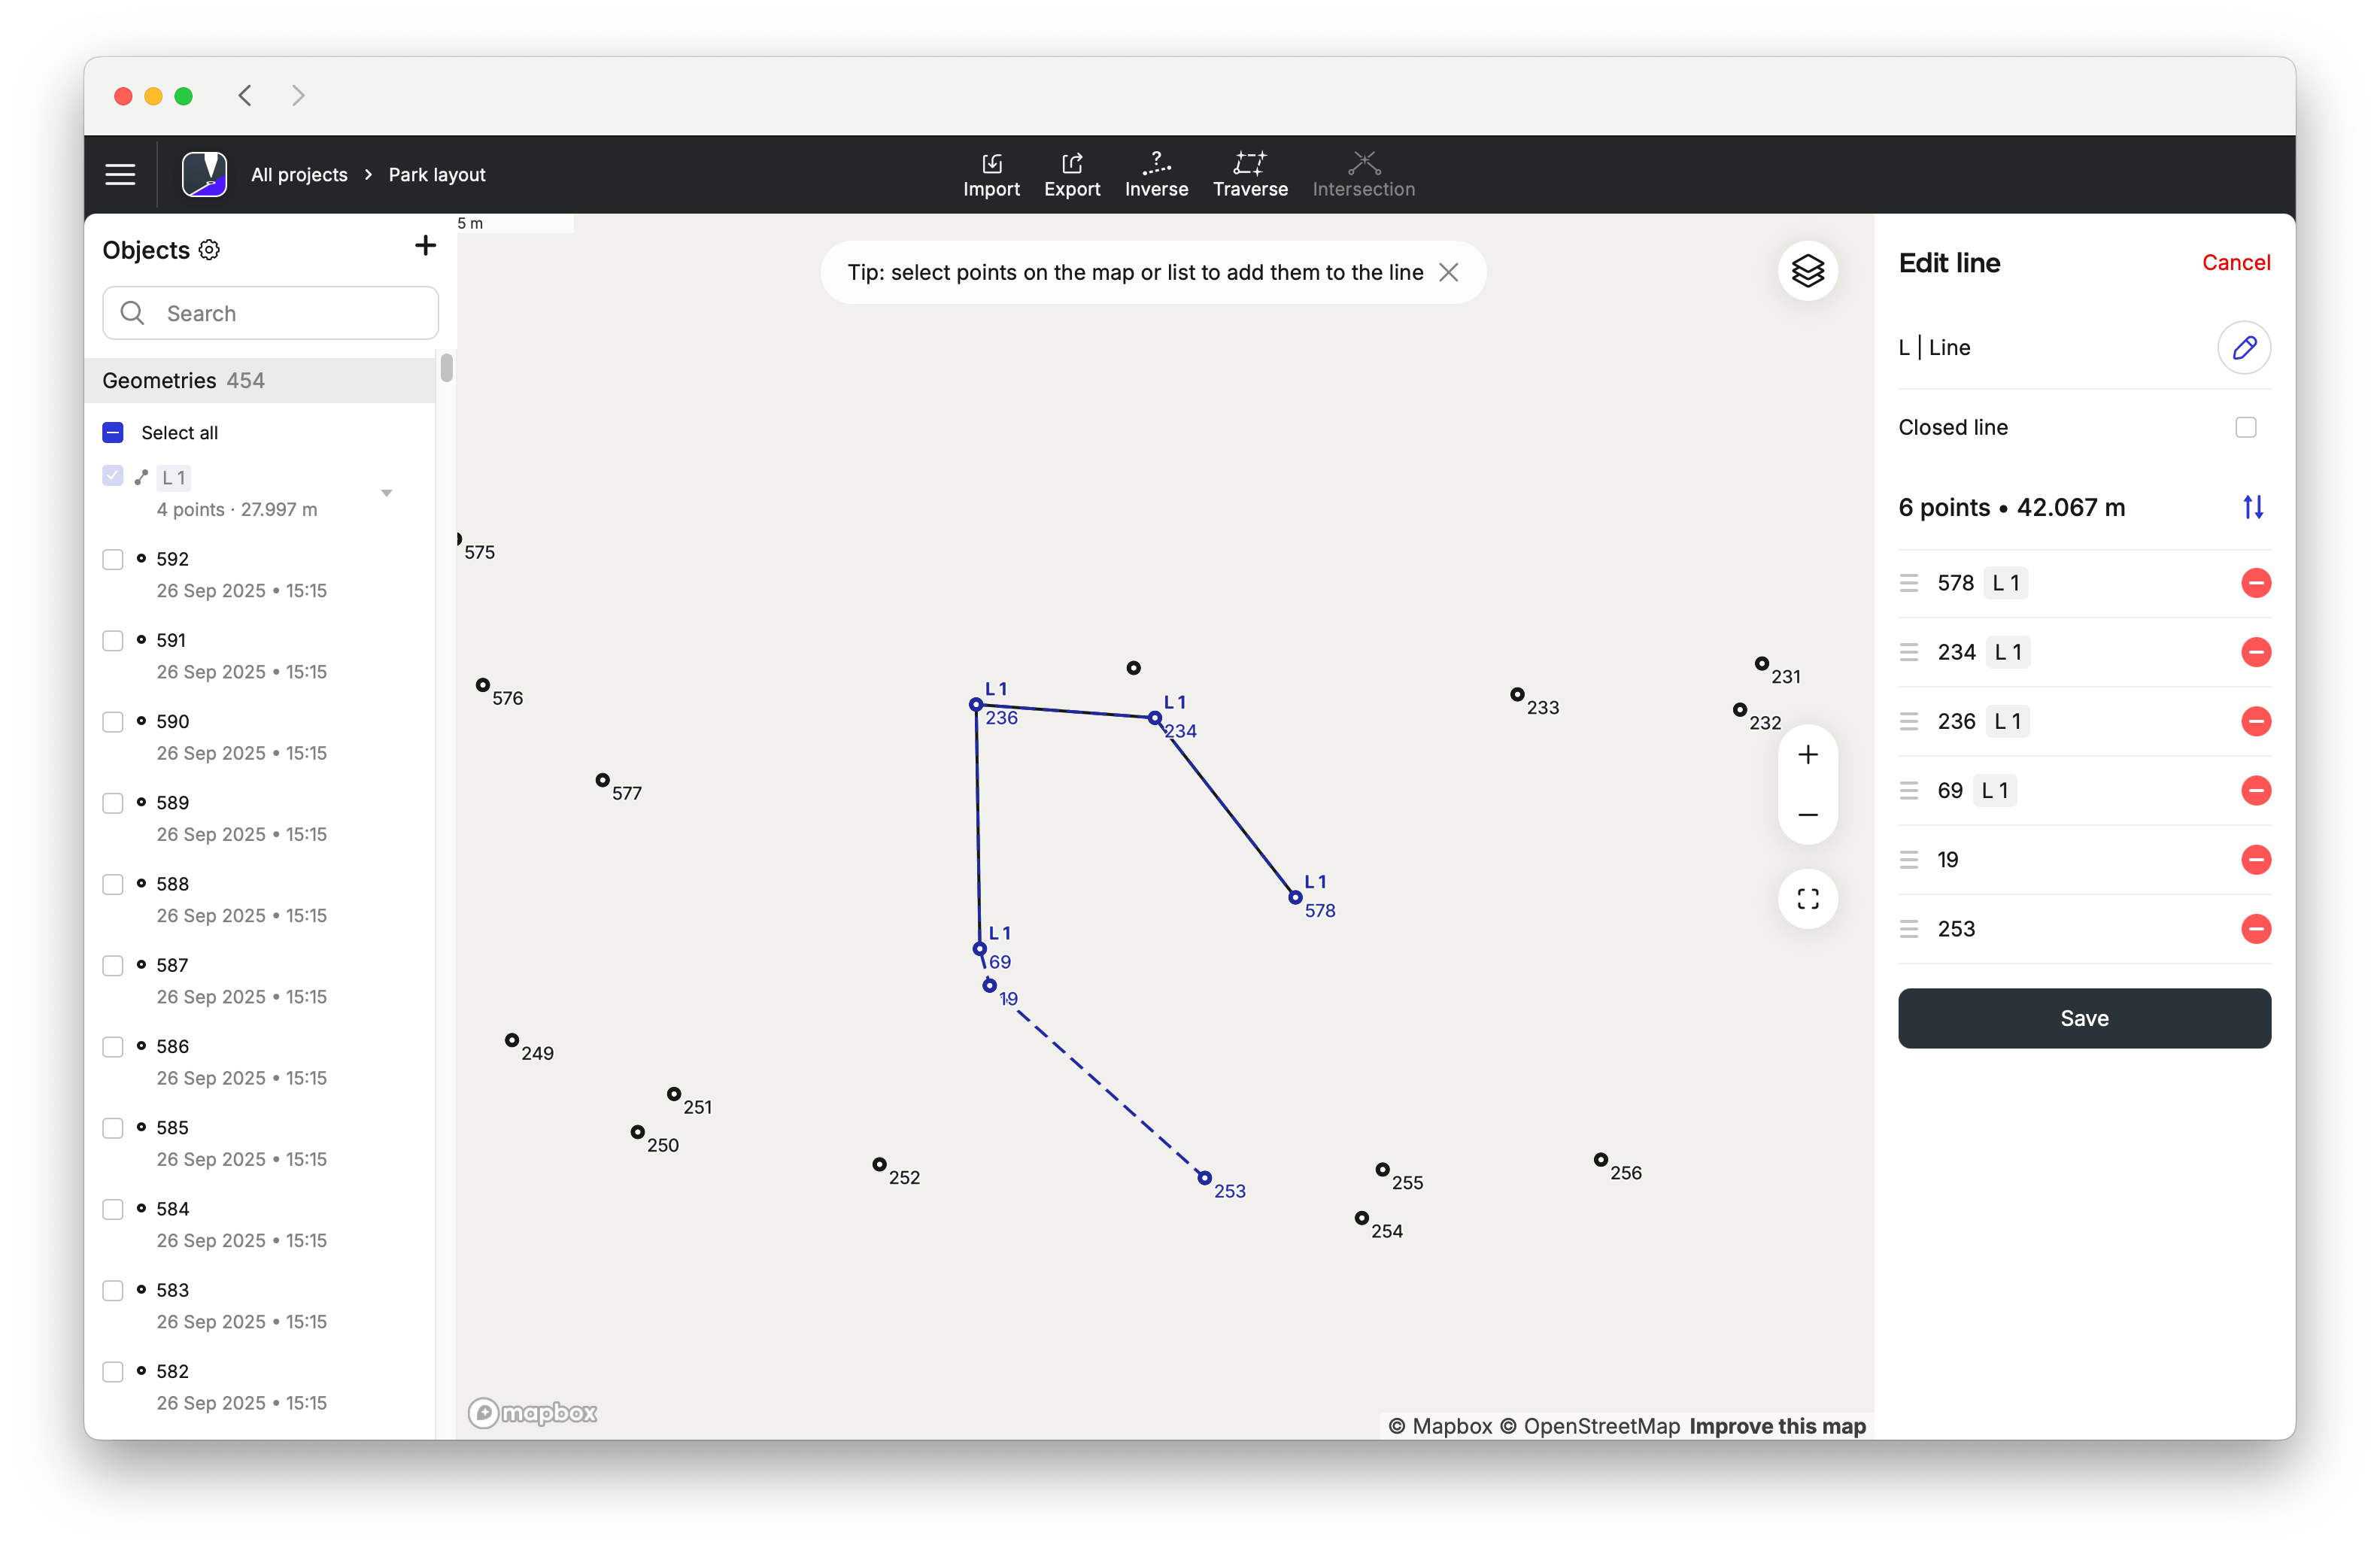
-
Delete points by tapping the red minus button or tapping the point on the map.
-
Rearrange points by dragging them to change the line geometry.
-
Change the code by tapping the blue pencil button.
-
Create a polygon by tapping Closed line.

Tap "Save" to apply the edits.
Deleting lines
If you want to delete a line, you can choose to keep or delete the associated points. Do the following:
-
Select the line you want to delete from the list of objects in your project.
-
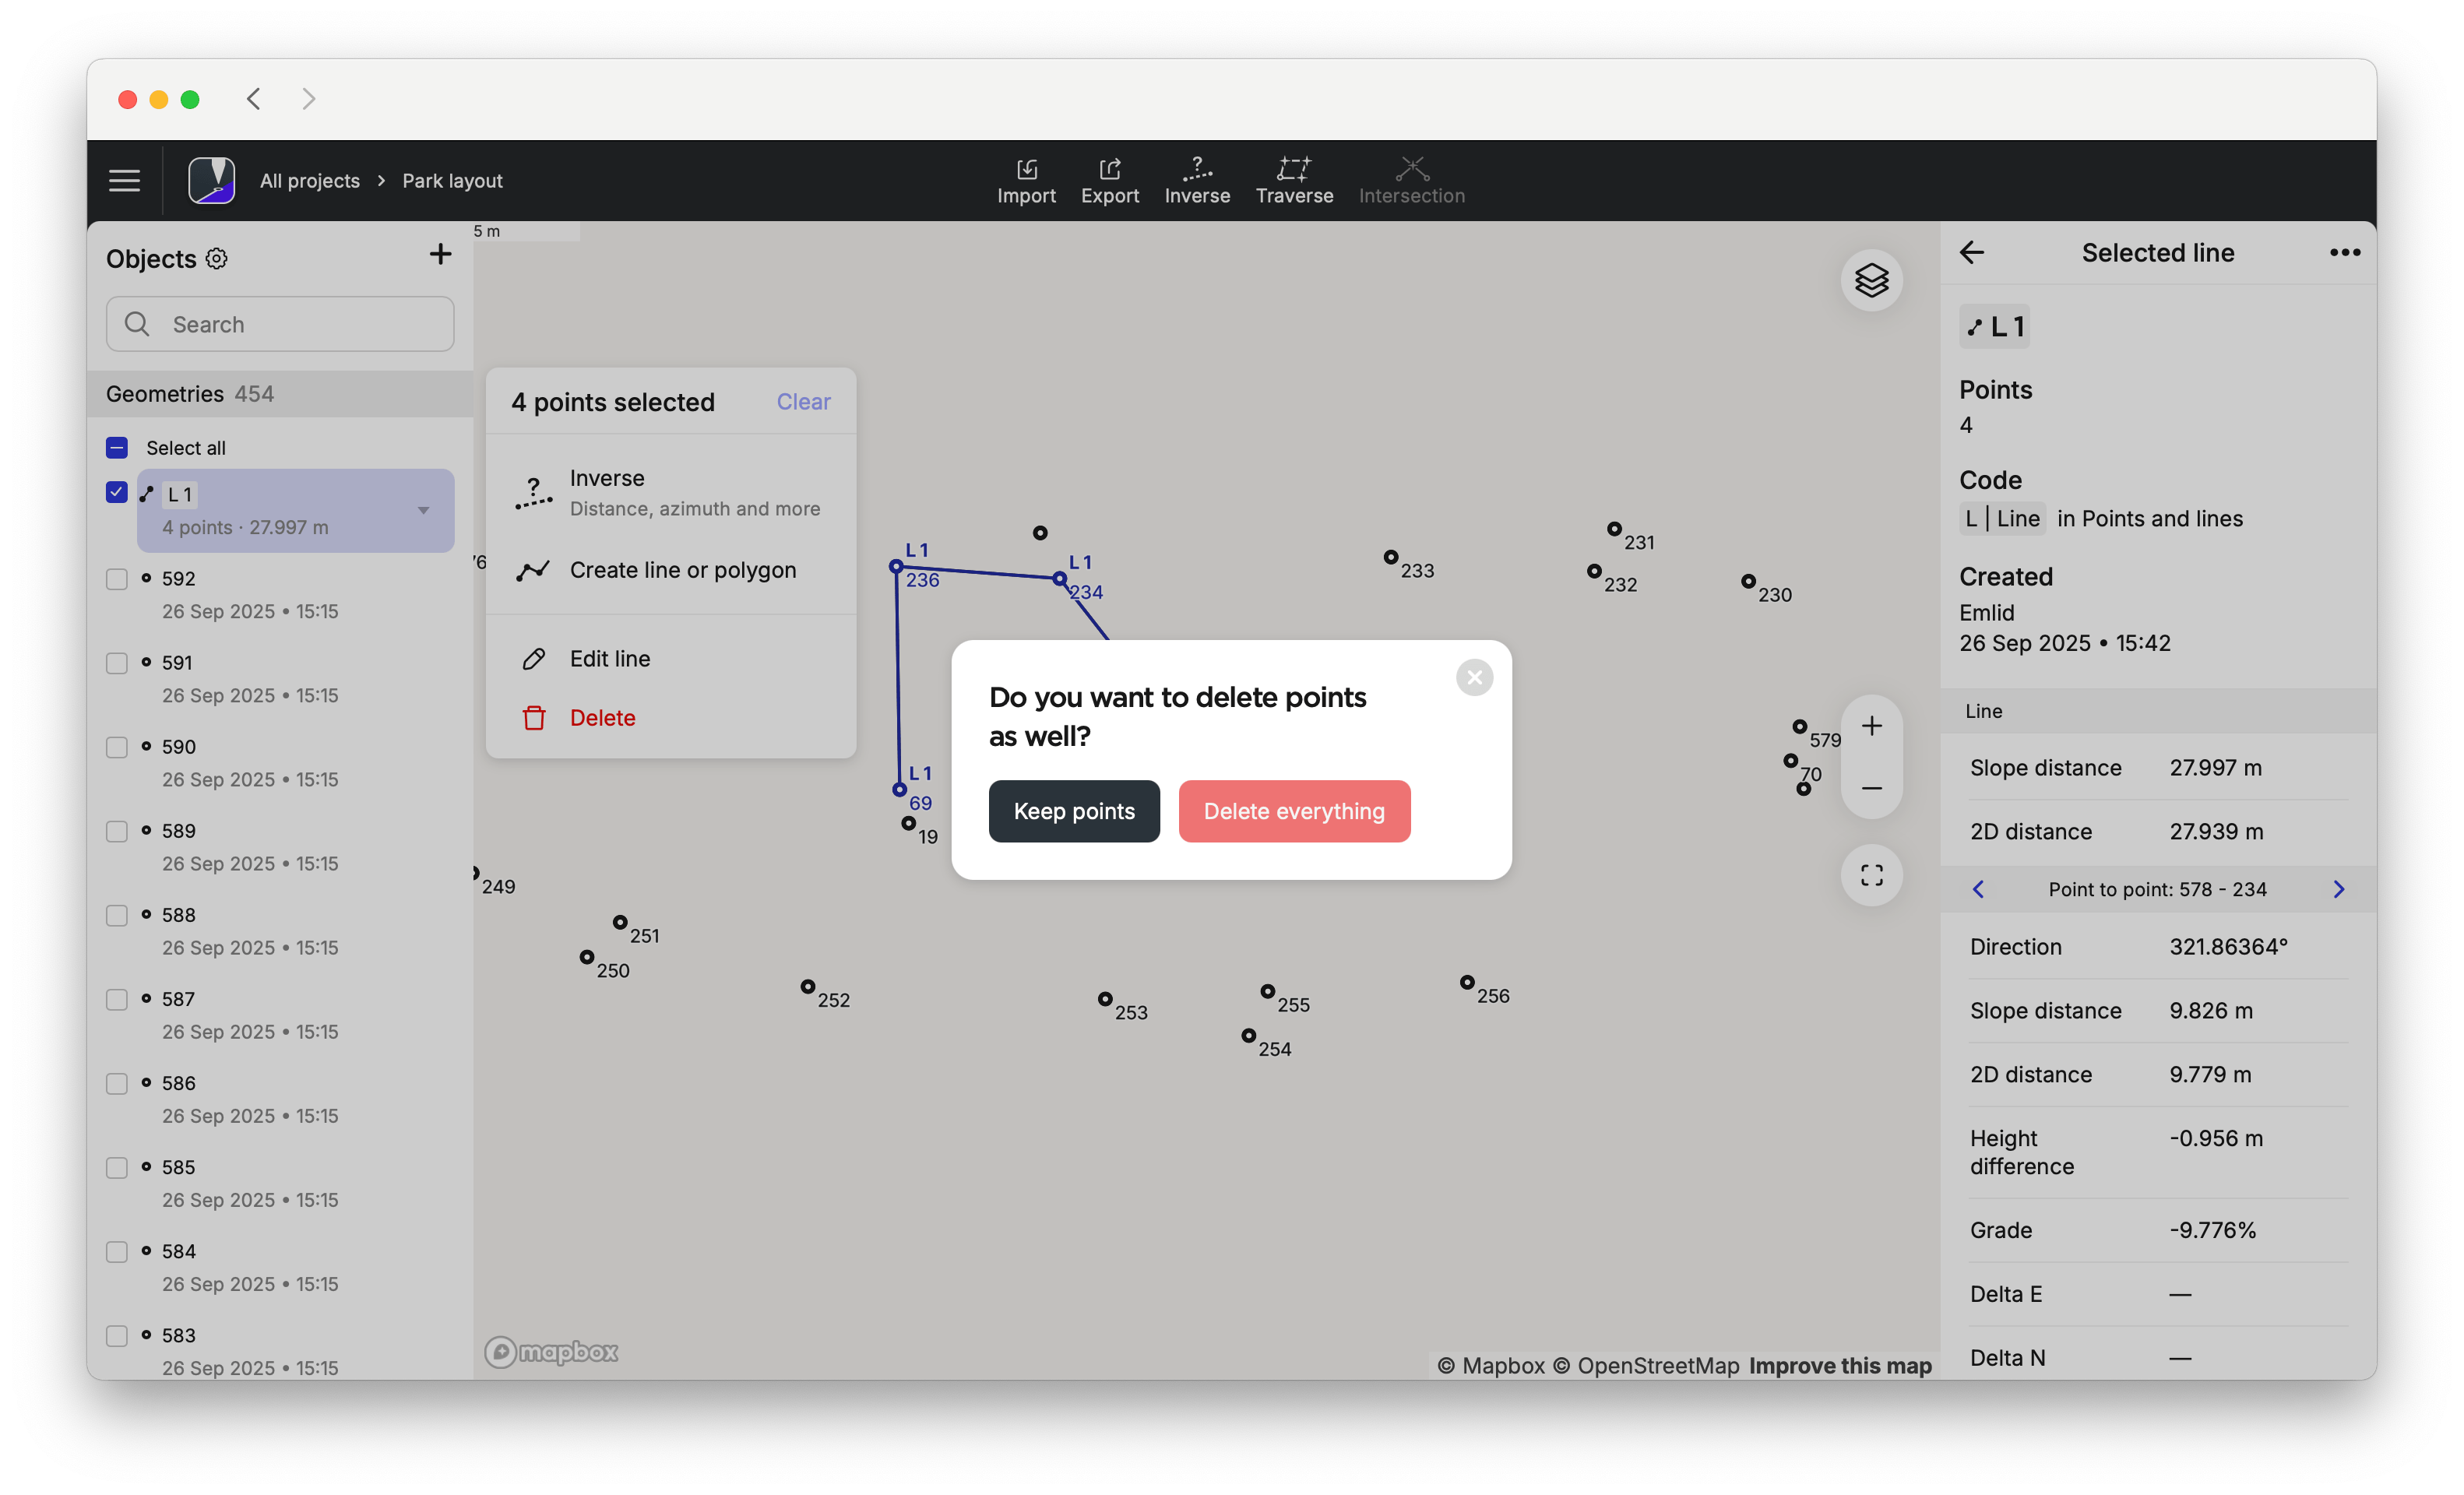
In the line editor, tap the three dots, then select Delete from the drop-down menu.
-
Select the appropriate option.
Now you can edit other lines or keep working with the line you've just edited.