Skydio X10 RTK drone and Reach RS3 base integration
This guide shows how to set up your Reach RS3 as a base for the Skydio X10 RTK drones to geotag drone images for further mapping in photogrammetry software.
Learn more about RTK in the How RTK works article.
Overview
Skydio X10 RTK drones use NTRIP to receive corrections, which allows you to use Reach RS3 as a base station. Reach can send NTRIP corrections via Emlid Caster through the internet or using the Local NTRIP option in Emlid Flow without connection to the internet.
To set up your Reach RS3 as a base for the Skydio RTK drone, you will need the following:
- Skydio X10 RTK drone attachment with VT300-L or VT300-Z
- Skydio X10 Controller
- Reach RS3 as a base
- A smartphone or tablet with the Emlid Flow app installed
- Internet connection on both devices if you use Emlid Caster
- Emlid account to access Emlid Caster
The list of sensor packages may change as Skydio adds more gimbals and sensors. For the most accurate information, check the latest recommendations.
Set up Reach RS3 as base using Local NTRIP
This setup will only work for your Skydio RTK drone if it supports a Wi-Fi connection.
To set up your Reach as a base for the Skydio RTK drone using the Local NTRIP option in Emlid Flow, follow the steps below:
-
Place your Reach on the tripod and provide it with a clear sky view.
tipLearn more about base placement and setup in the Placement and Choosing base setup method guides.
-
Open Emlid Flow and connect to your Reach.
-
Tap Base output and select the Local NTRIP option. You will see the credentials for your drone.
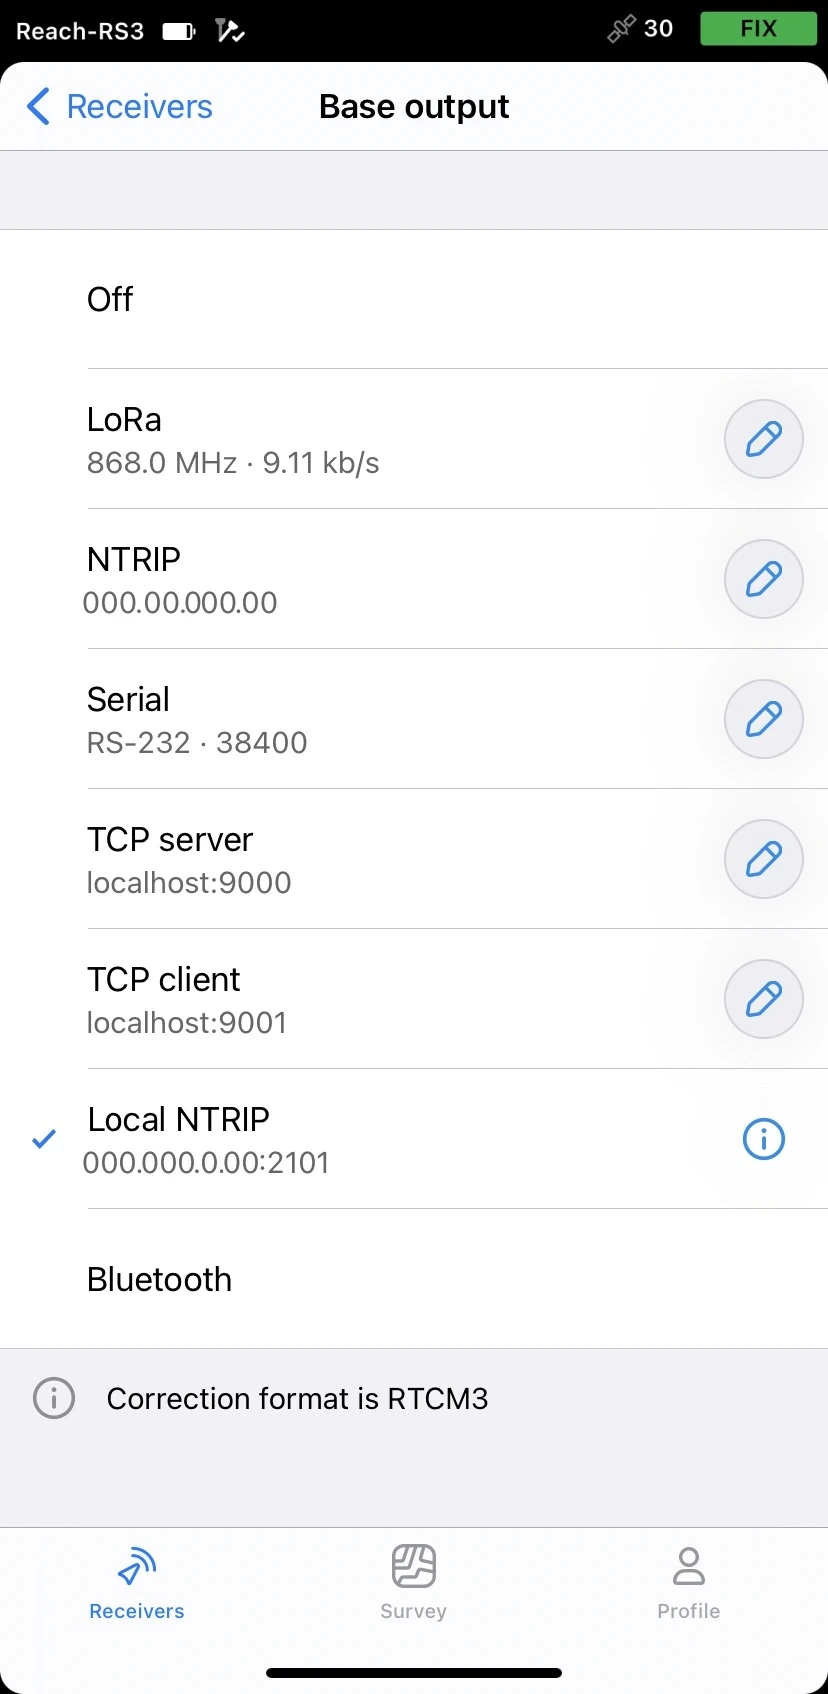

Now, you need to connect your drone’s controller to Reach’s hotspot and enter the credentials you obtained to establish corrections transmission.
Set up Reach RS3 as base using Emlid Caster
This setup will only work for your Skydio RTK drone if it supports an internet connection.
To set up your Reach RS3 as a base for the Skydio RTK drone using Emlid Caster, you need to access Emlid Caster and get NTRIP credentials. Follow the steps below:
-
Access Emlid Caster and get NTRIP credentials for both base and rover.
tipTo learn more, check the Emlid Caster docs.
-
Place your Reach on the tripod and provide it with a clear sky view.
tipLearn more about base placement and setup in the Placement and Choosing base setup method guides.
-
Open Emlid Flow and connect to your receiver.
-
Connect your Reach to the internet.
tipTo learn more about connecting your Reach RS3 to the internet, check the following guides:
-
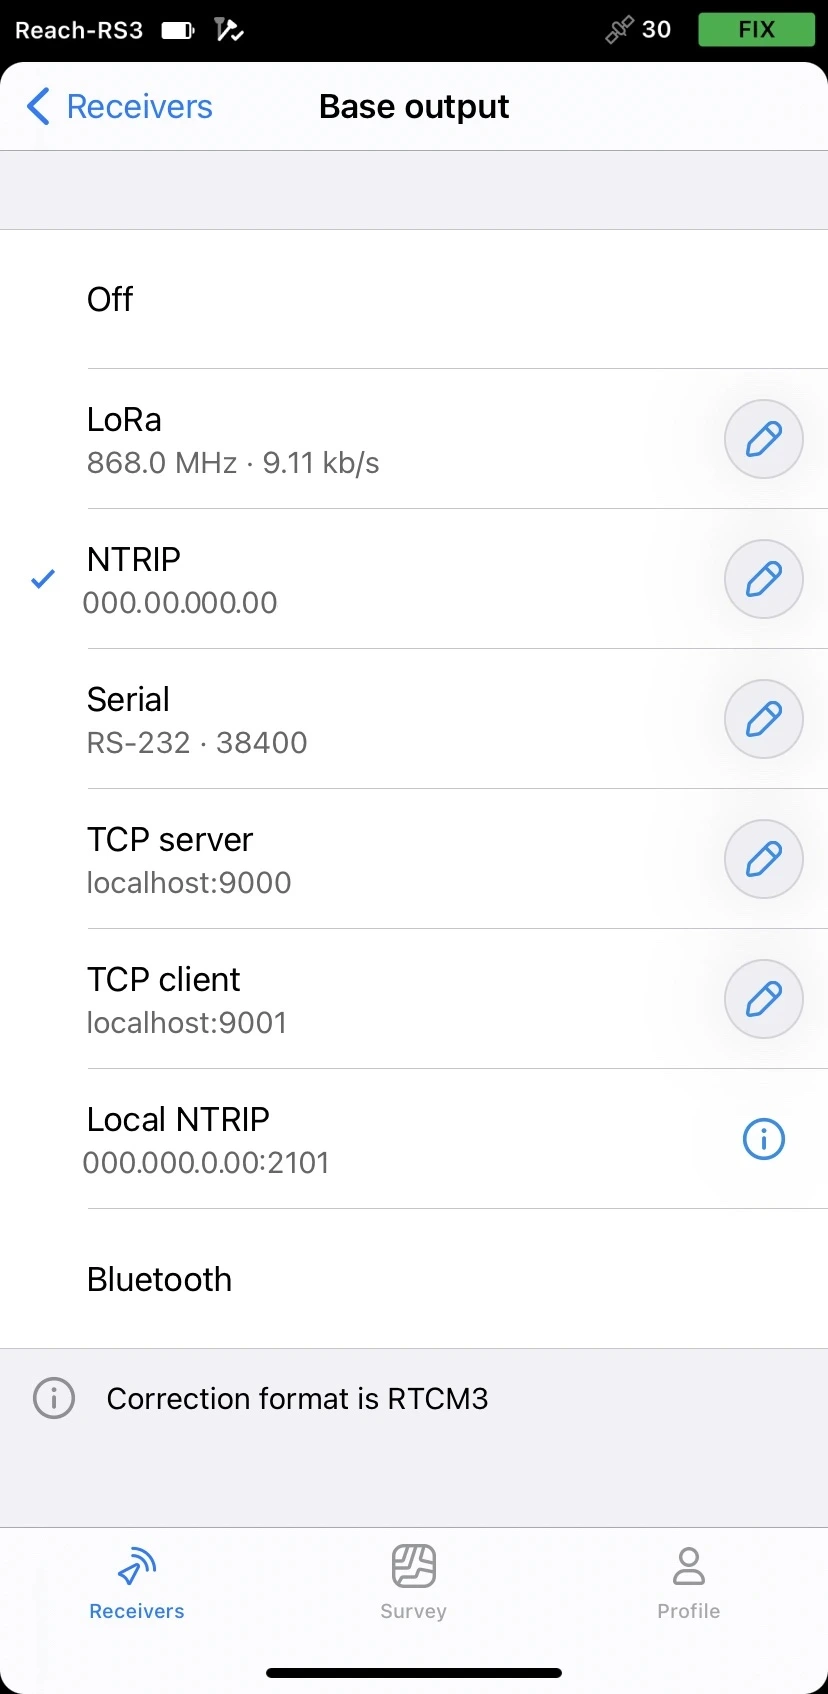
On the Receivers screen, tap Base output and select the NTRIP option.
-
Tap the Edit button and insert the NTRIP credentials for the base you obtained earlier:
-
Address: The URL or IP address of the NTRIP caster.
-
Port: The port used to connect to the caster. The default value is usually 2101 unless your provider specifies a different port.
-
Username: The username used to authenticate with the NTRIP service. In some cases, it may be your name or email address.
-
Password: The password associated with the username.
-
Mount Point: The name of the correction stream provided by the NTRIP service.
tipTo find out which mount point suits you better, check the website of your NTRIP provider. In general, shorter distances to the reference station improve RTK performance.

noteTo ensure successful corrections transmitting, double-check the credentials you entered.
-
Now, you need to enter the rover credentials on your drone’s controller to establish a corrections transmission.
Set up Skydio drone as rover
To set up the Skydio drone using the X10 controller, follow the steps below:
-
Install the RTK/PPK attachment on your drone. Learn more about the process in the Skydio documentation.
-
Power on your drone and controller.
-
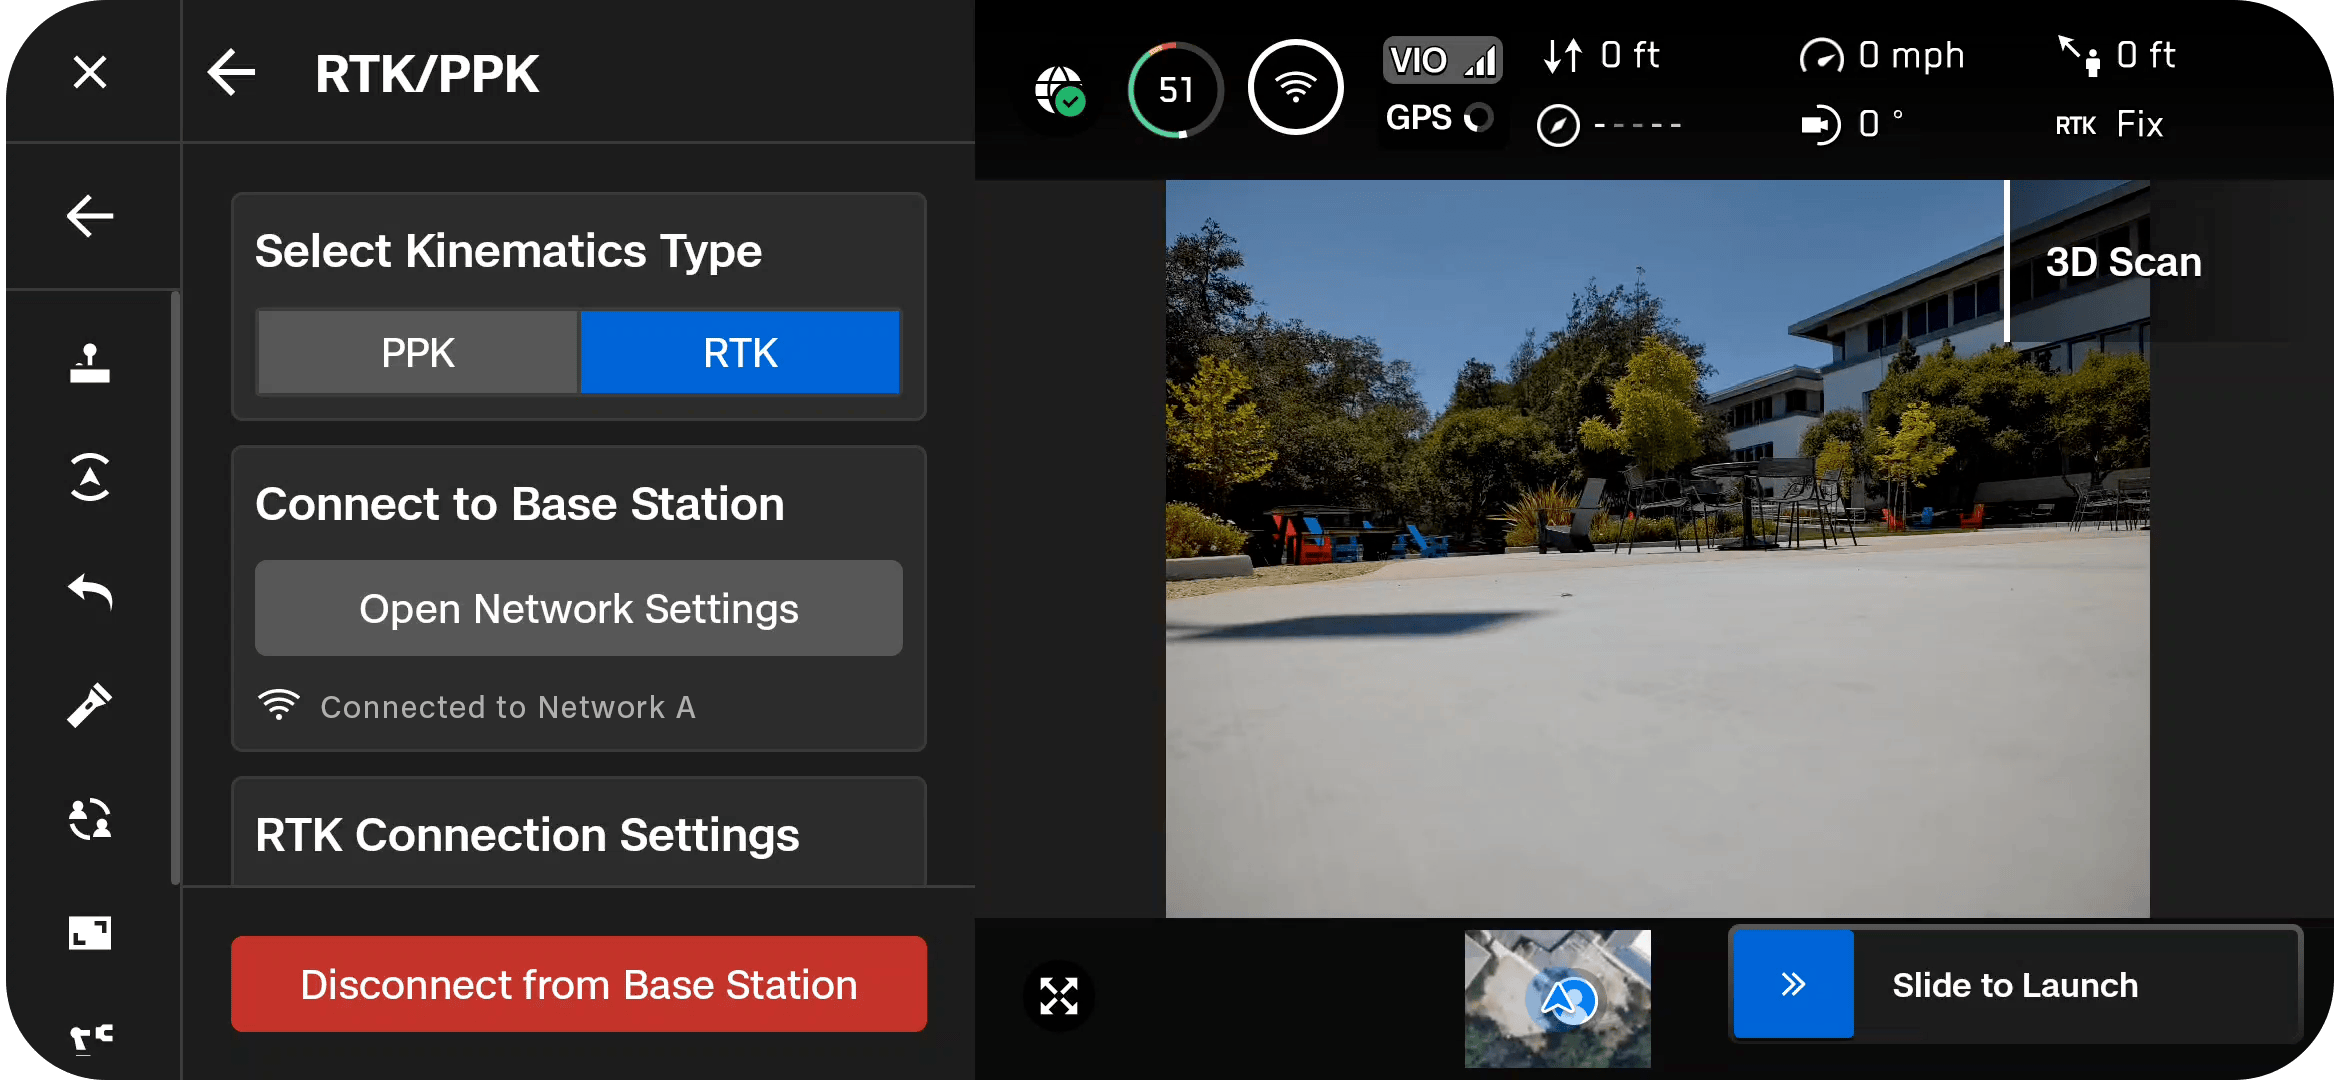
Once the attachment is connected, select Set Up RTK in the controller.

-
Under Connect to Base Station, tap Open Network Settings to connect to your base station.
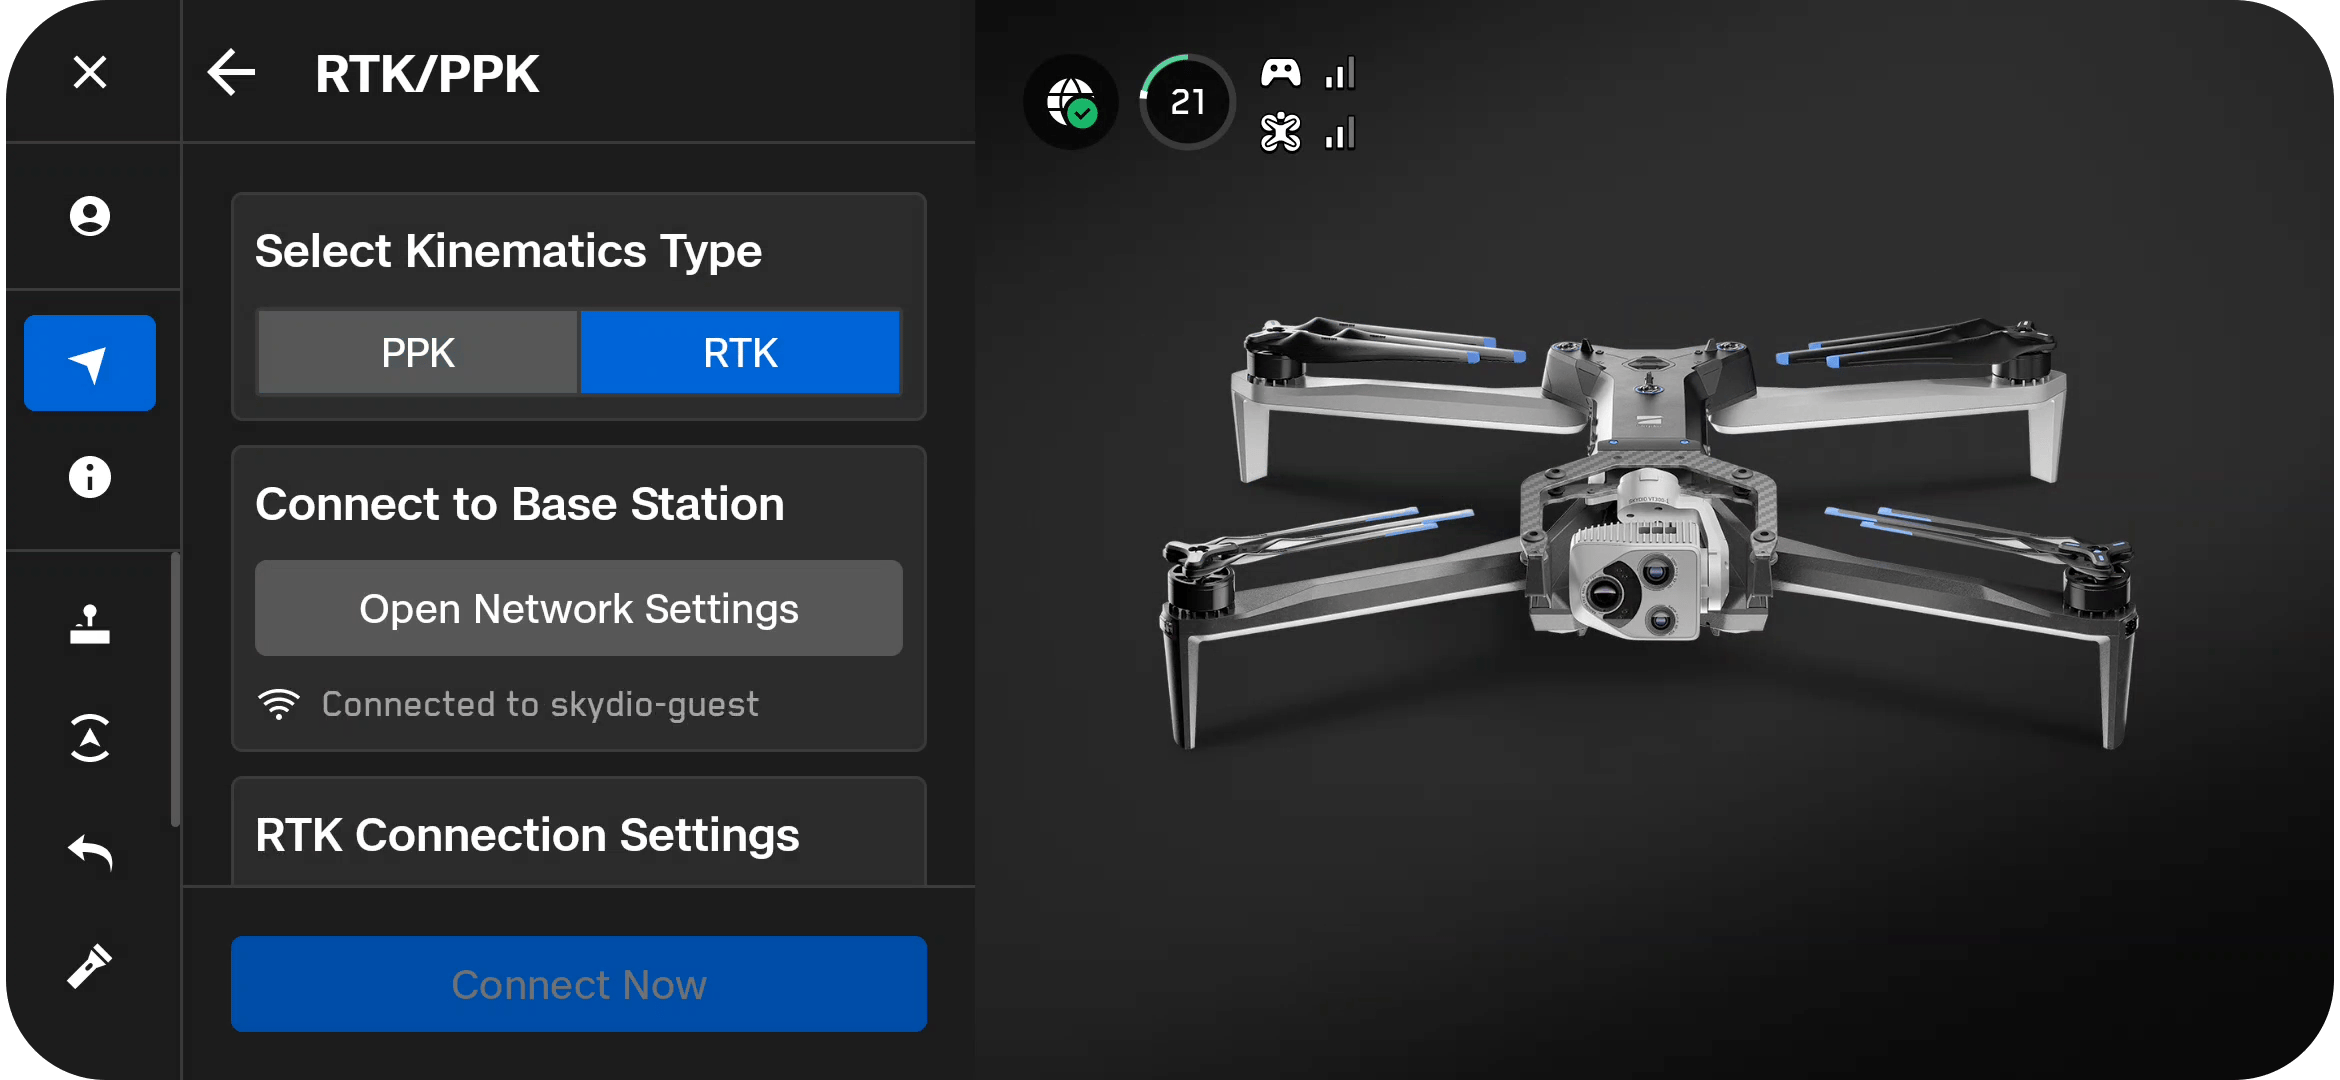
-
Enter the credentials you obtained when accessing Emlid Caster or enabling the Local NTRIP option in Emlid Flow:
- NTRIP Host: The URL or IP address of the NTRIP caster.
- Port: The port used to connect to the caster. The default value is usually 2101 unless your provider specifies a different port.
- Account: The username used to authenticate with the NTRIP service. In some cases, it may be your name or email address.
- Password: The password associated with the username.
- Mount Point: The name of the correction stream provided by the NTRIP service.
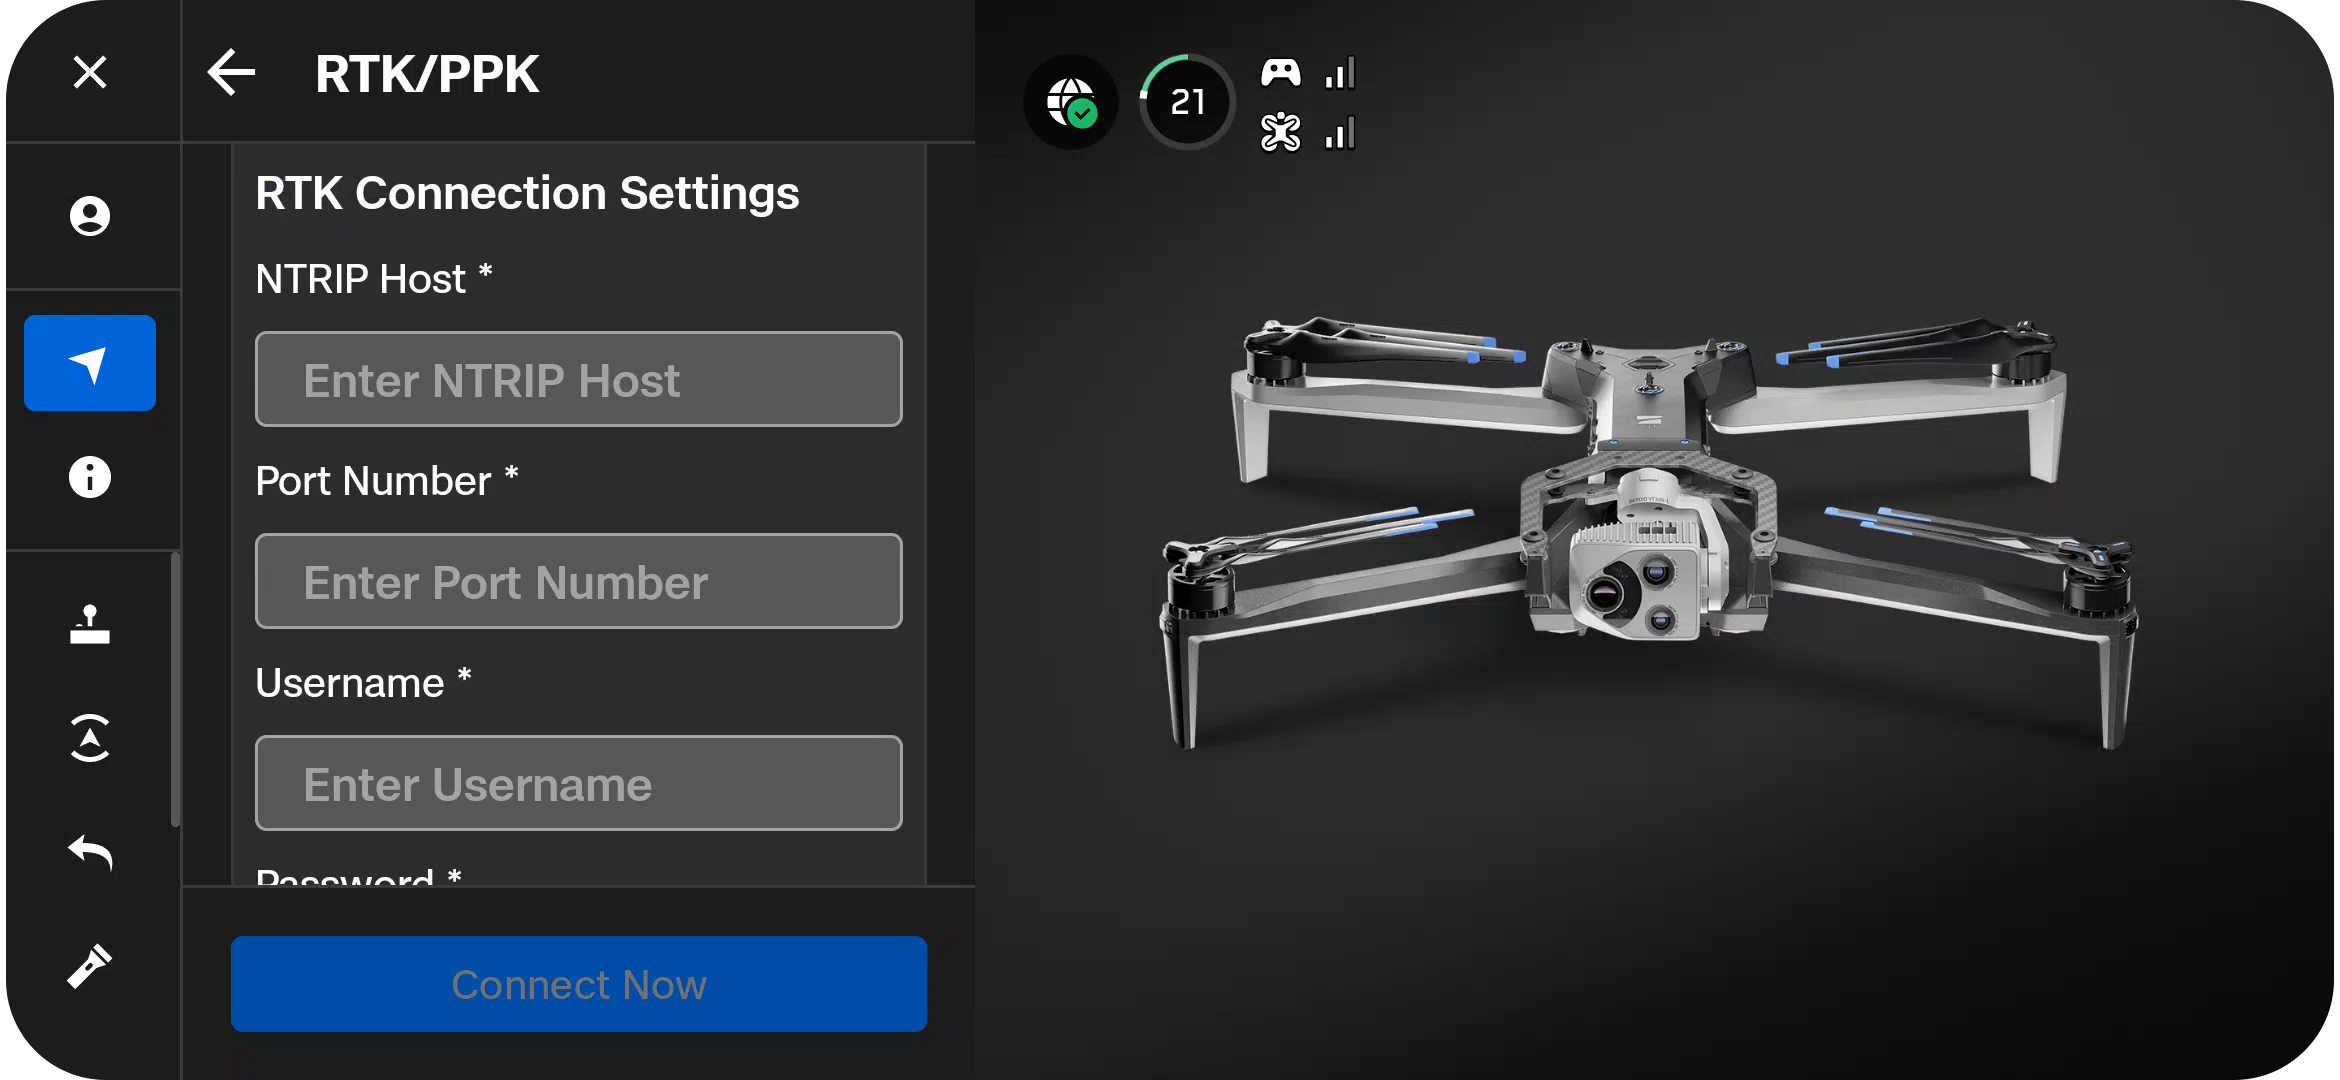
Make sure that you use the credentials for the rover.
- Tap Connect Now. Once connected, the option Disconnect from Base Station will appear, and the telemetry indicator in the top right corner will display the solution status. A FIX status is required to proceed with the flight.

Perform flight
Once communication between your Reach RS3 and the Skydio drone is established, you can proceed with configuring the flight mission and carrying out the flight.
Learn more about flight mission configuration following the Complete a Map Capture section in the Skydio documentation.