Integration with ArcGIS Field Maps for Android
This tutorial provides step-by-step instructions on how to integrate your Reach RX2 with ArcGIS Field Maps using a device on Android or WSA (Windows Subsystem for Android) via Bluetooth.
Overview
ArcGIS Field Maps is a mobile app that allows you to collect data in the field, view and edit maps, and share information with team members in real time.
To integrate your Reach RX2 with ArcGIS Field Maps via Bluetooth, you will need the following:
- Reach RX2
- A device on Android or WSA (Windows Subsystem for Android)
- ArcGIS Field Maps mobile app installed on your Android device
- ArcGIS account
Workflow
To integrate your Reach RX2 with ArcGIS Field Maps follow the steps below.
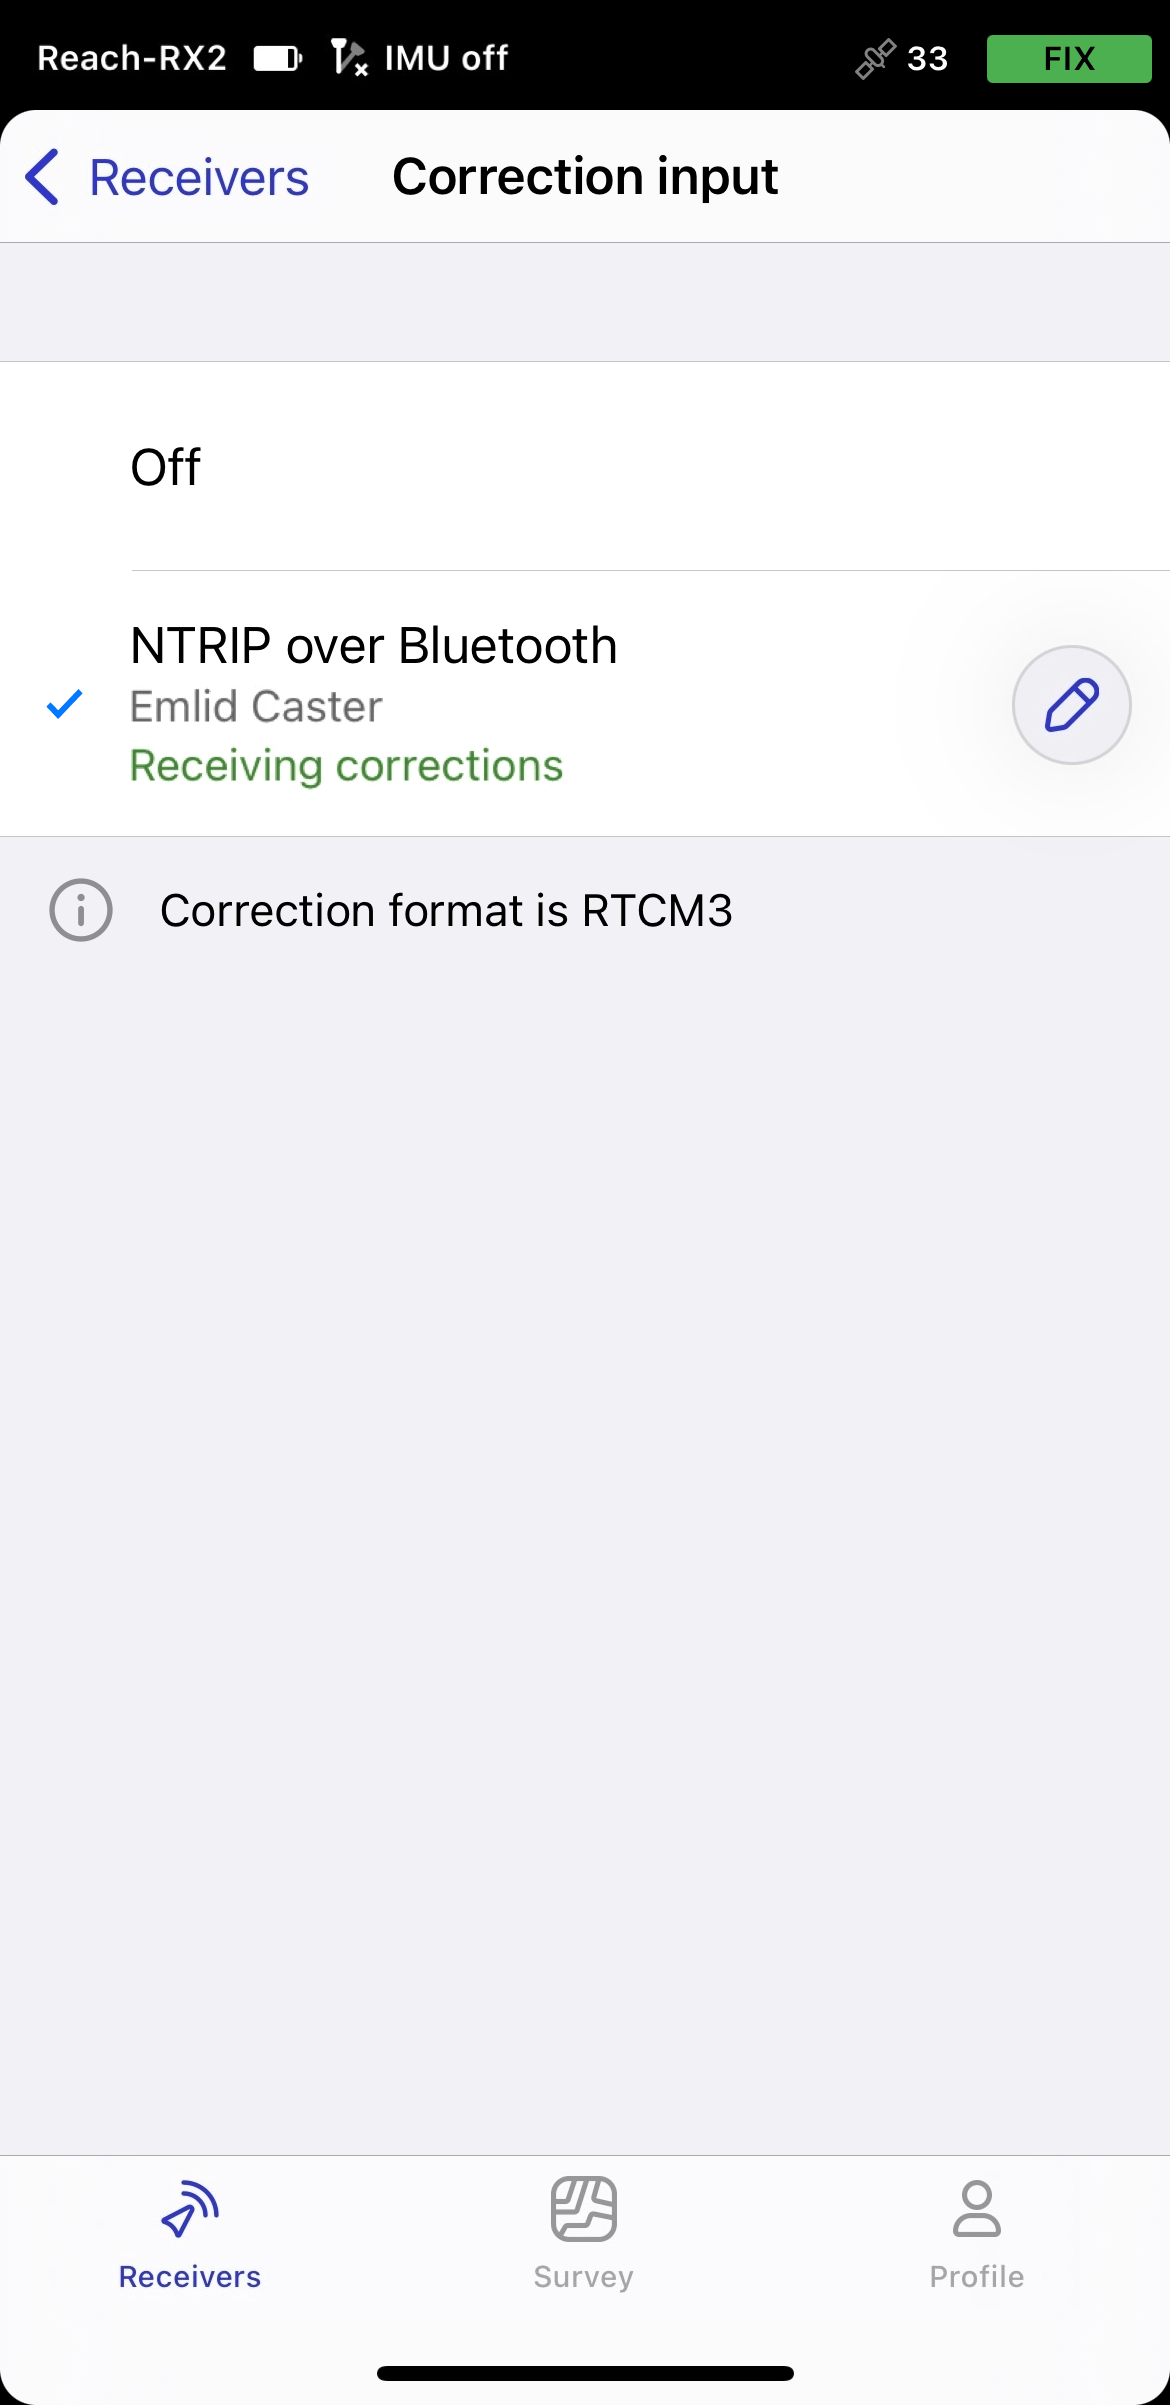
Configuring corrections in Emlid Flow
Reach RX2 uses Bluetooth and streams its position in the NMEA format by default. No pre-configuration is needed.
For more information on how to receive corrections on your Reach RX2, refer to the Quickstart section.
To achieve centimeter-level accuracy when surveying with Reach RX2, set up your receiver to receive NTRIP corrections in the Emlid Flow app. Do as follows:
-
Open Emlid Flow and connect to your Reach.
-
Go to Correction input and tap Internet over mobile device.
noteOn Android, this option has been renamed to NTRIP via mobile device. This now also includes dynamic statuses with setup hints to help you configure the correction input. On iOS, these improvements will be available in upcoming releases.
-
Tap the Edit button to configure receiving corrections from the NTRIP base.
noteTo start receiving corrections, make sure that your receiver has satellite visibility.
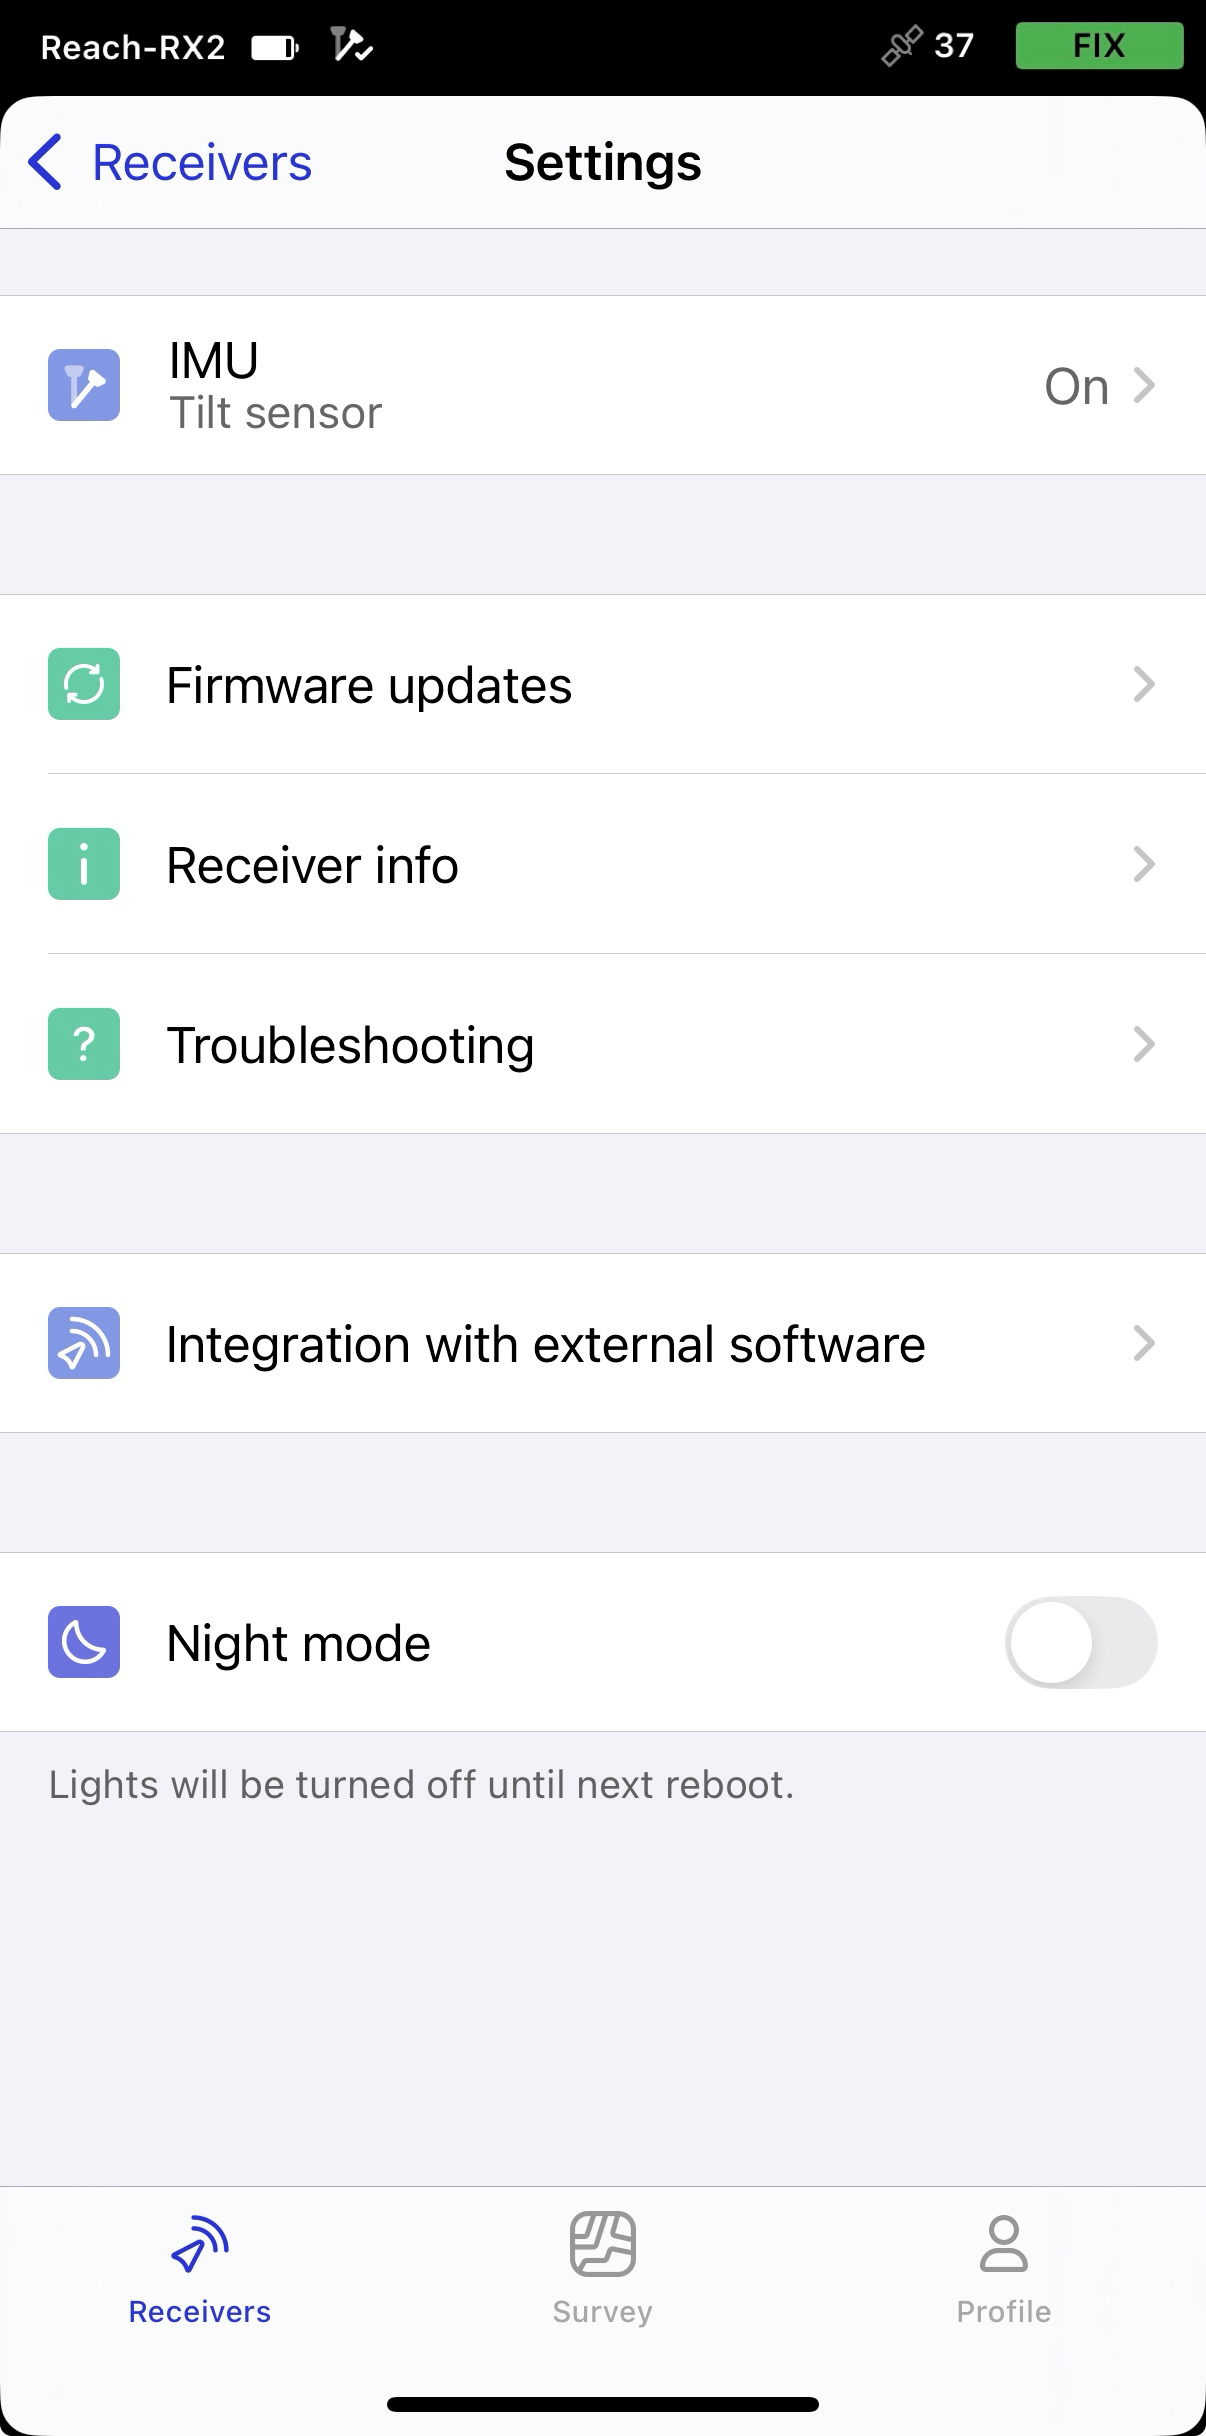
Enabling tilt compensation
Reach RX2 supports IMU-based tilt compensation, allowing you to collect and stake out points even when the survey pole is tilted. The software calculates the tilt angle and distance to determine the pole tip position on the ground. To enable tilt compensation, follow the How to enable tilt compensation guide.
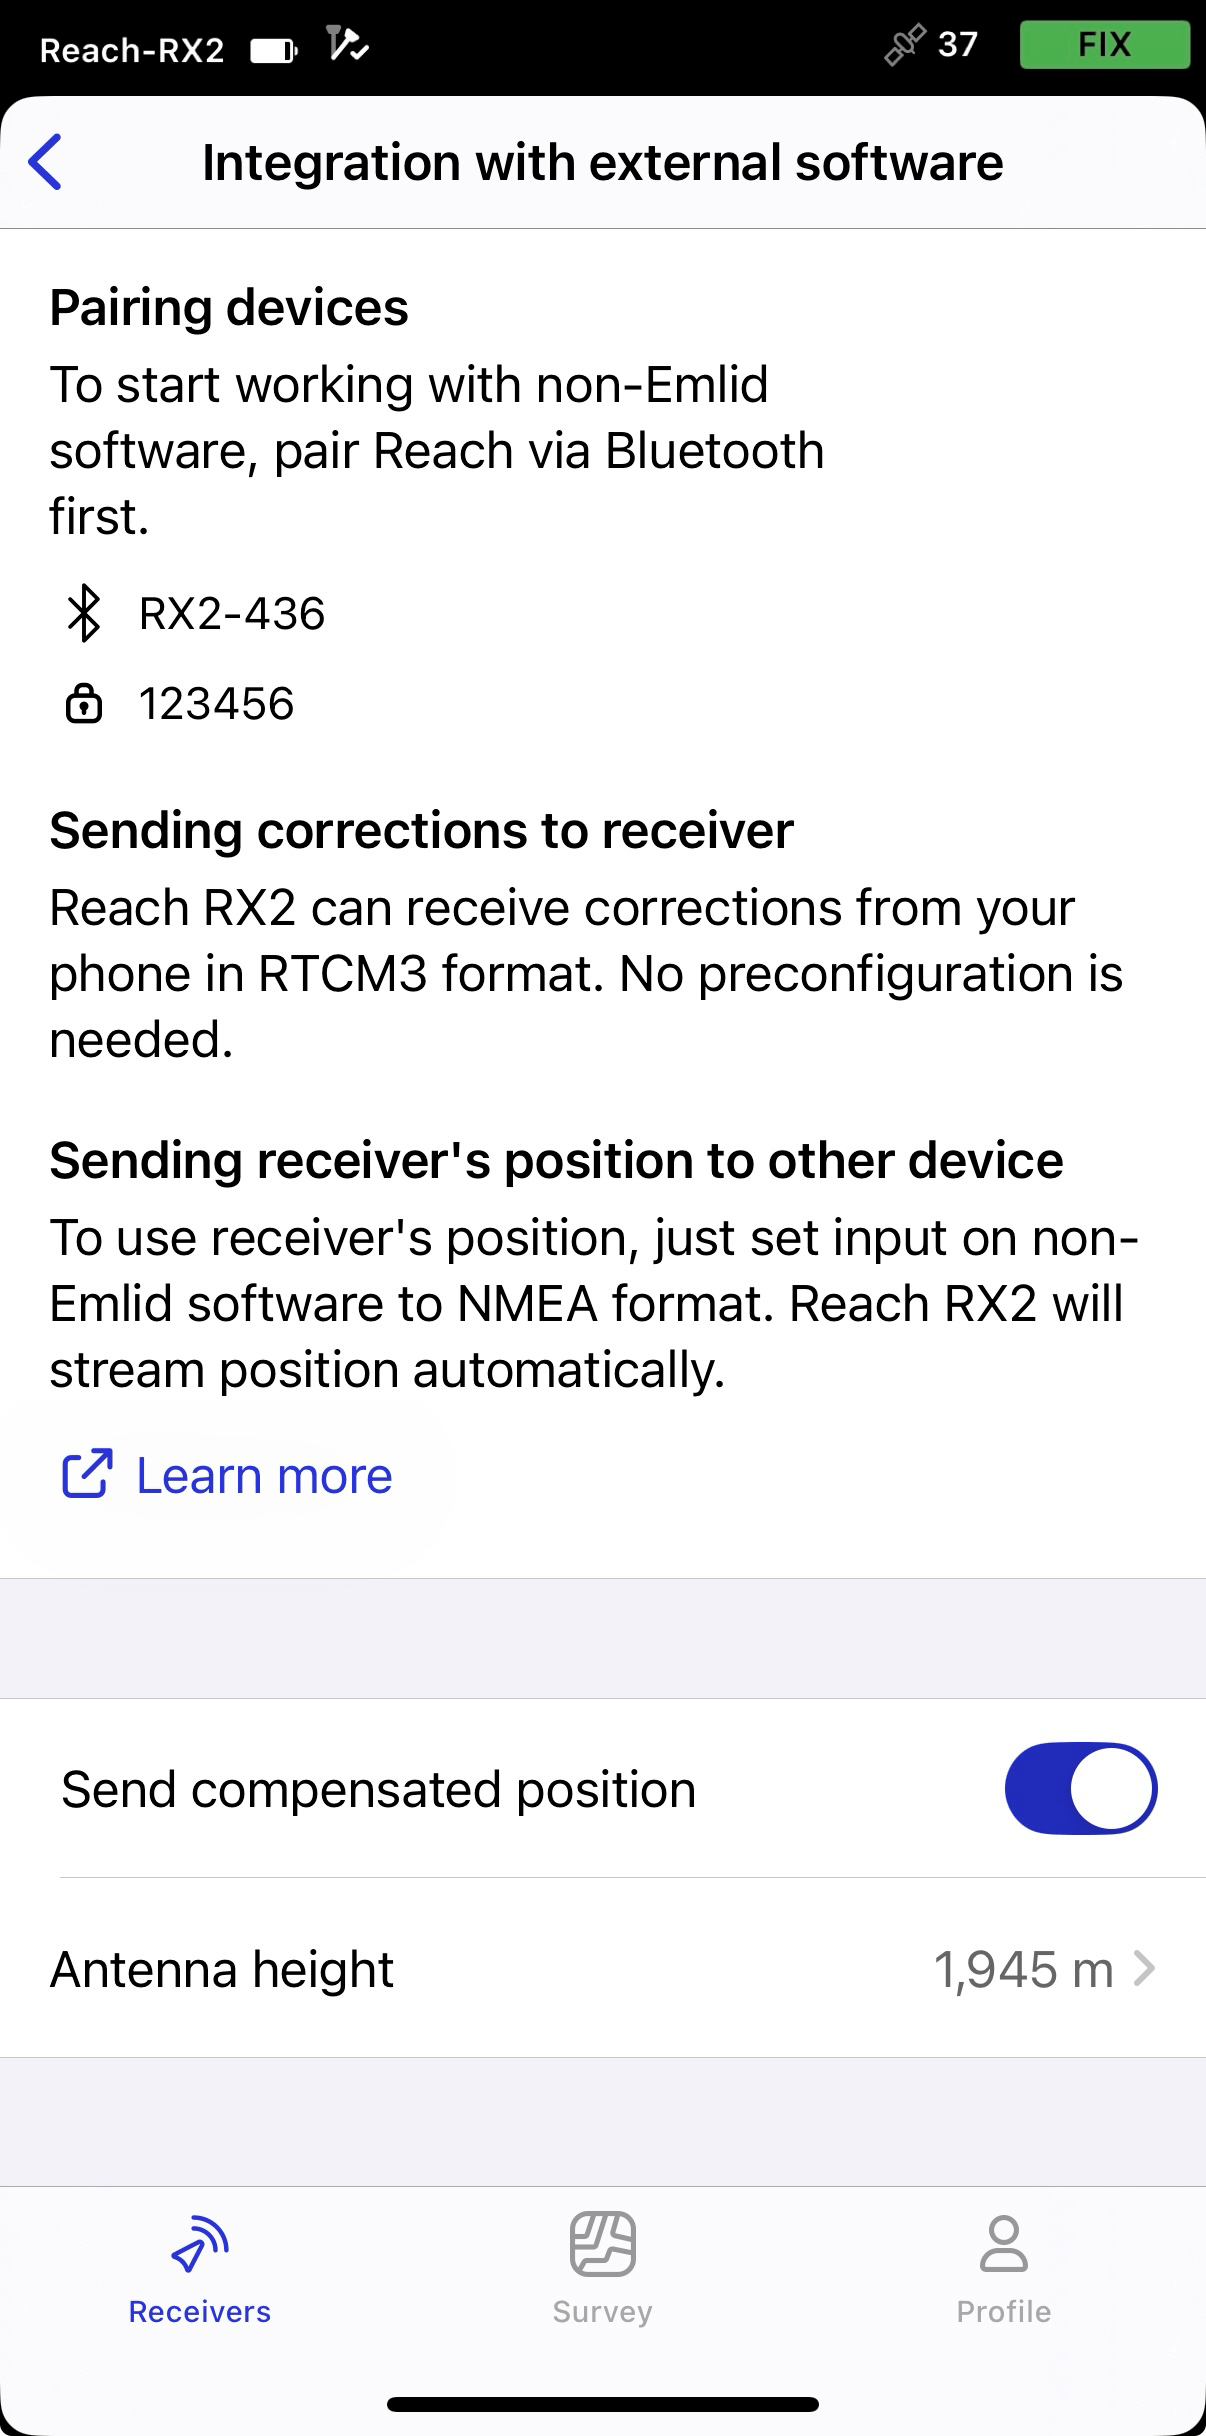
Setting up NMEA stream in Emlid Flow
By default, Reach RX2 automatically streams the standard NMEA messages set. In this case, you need to set up your Reach receiver’s antenna height in your third-party software.
If you want to stream a compensated position of your Reach receiver, you need to enable it in Emlid Flow. In this case, the antenna height is included in the output, so you don’t need to set it up in your third-party app. To set up compensated NMEA messages, do as follows:
-
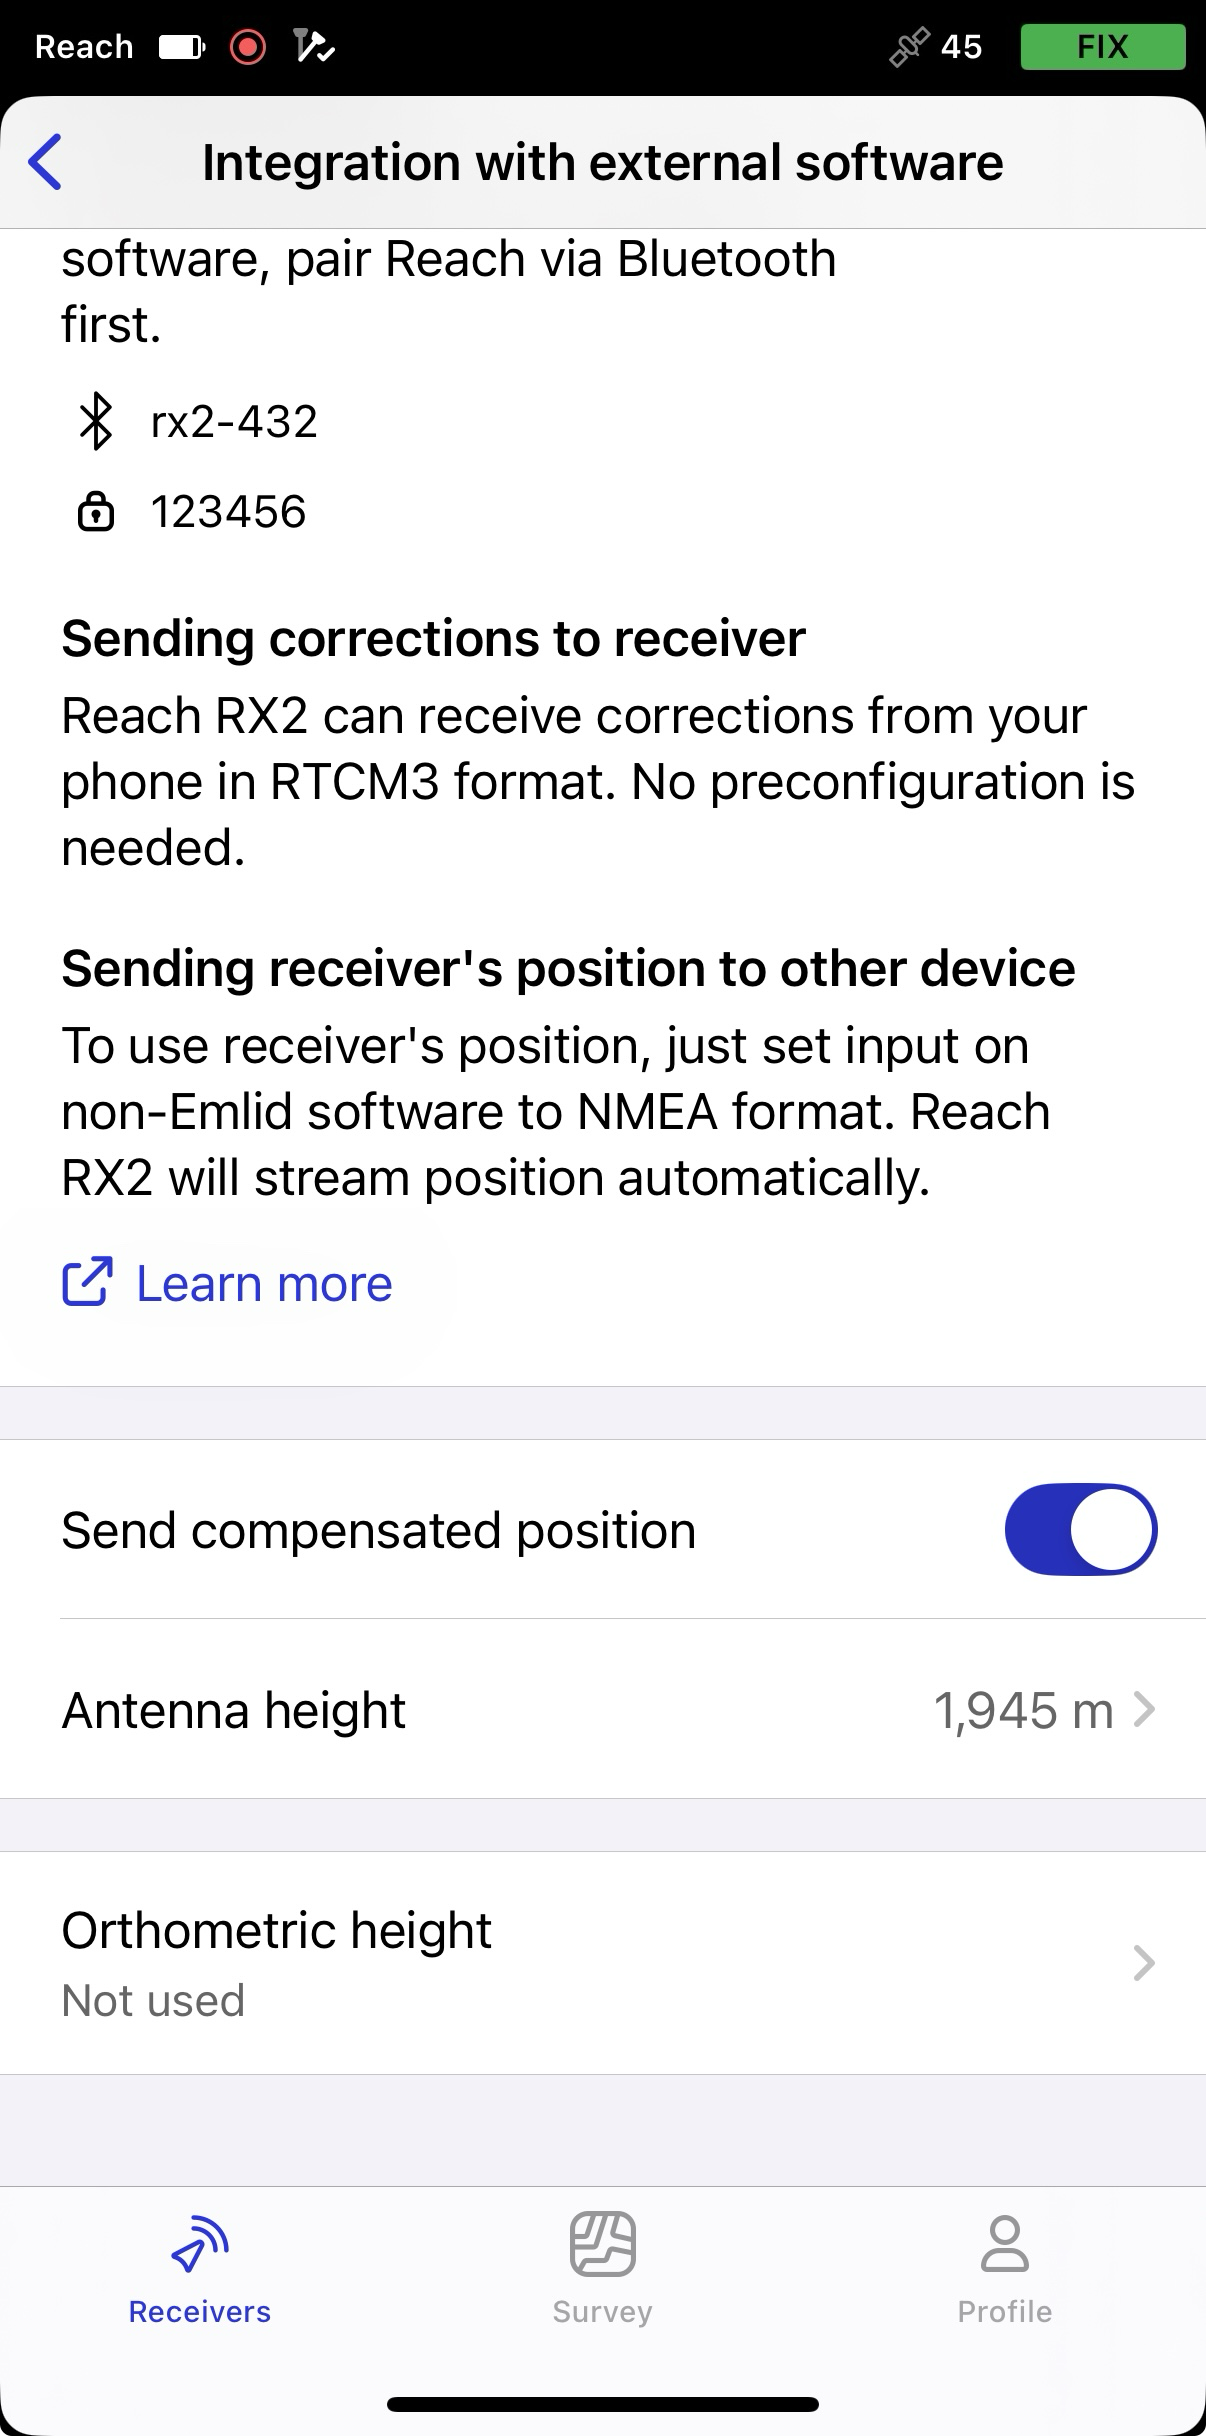
In Emlid Flow, open Settings and go to Integration with external software.
-
Turn on the toggle to enable streaming compensated position.
-
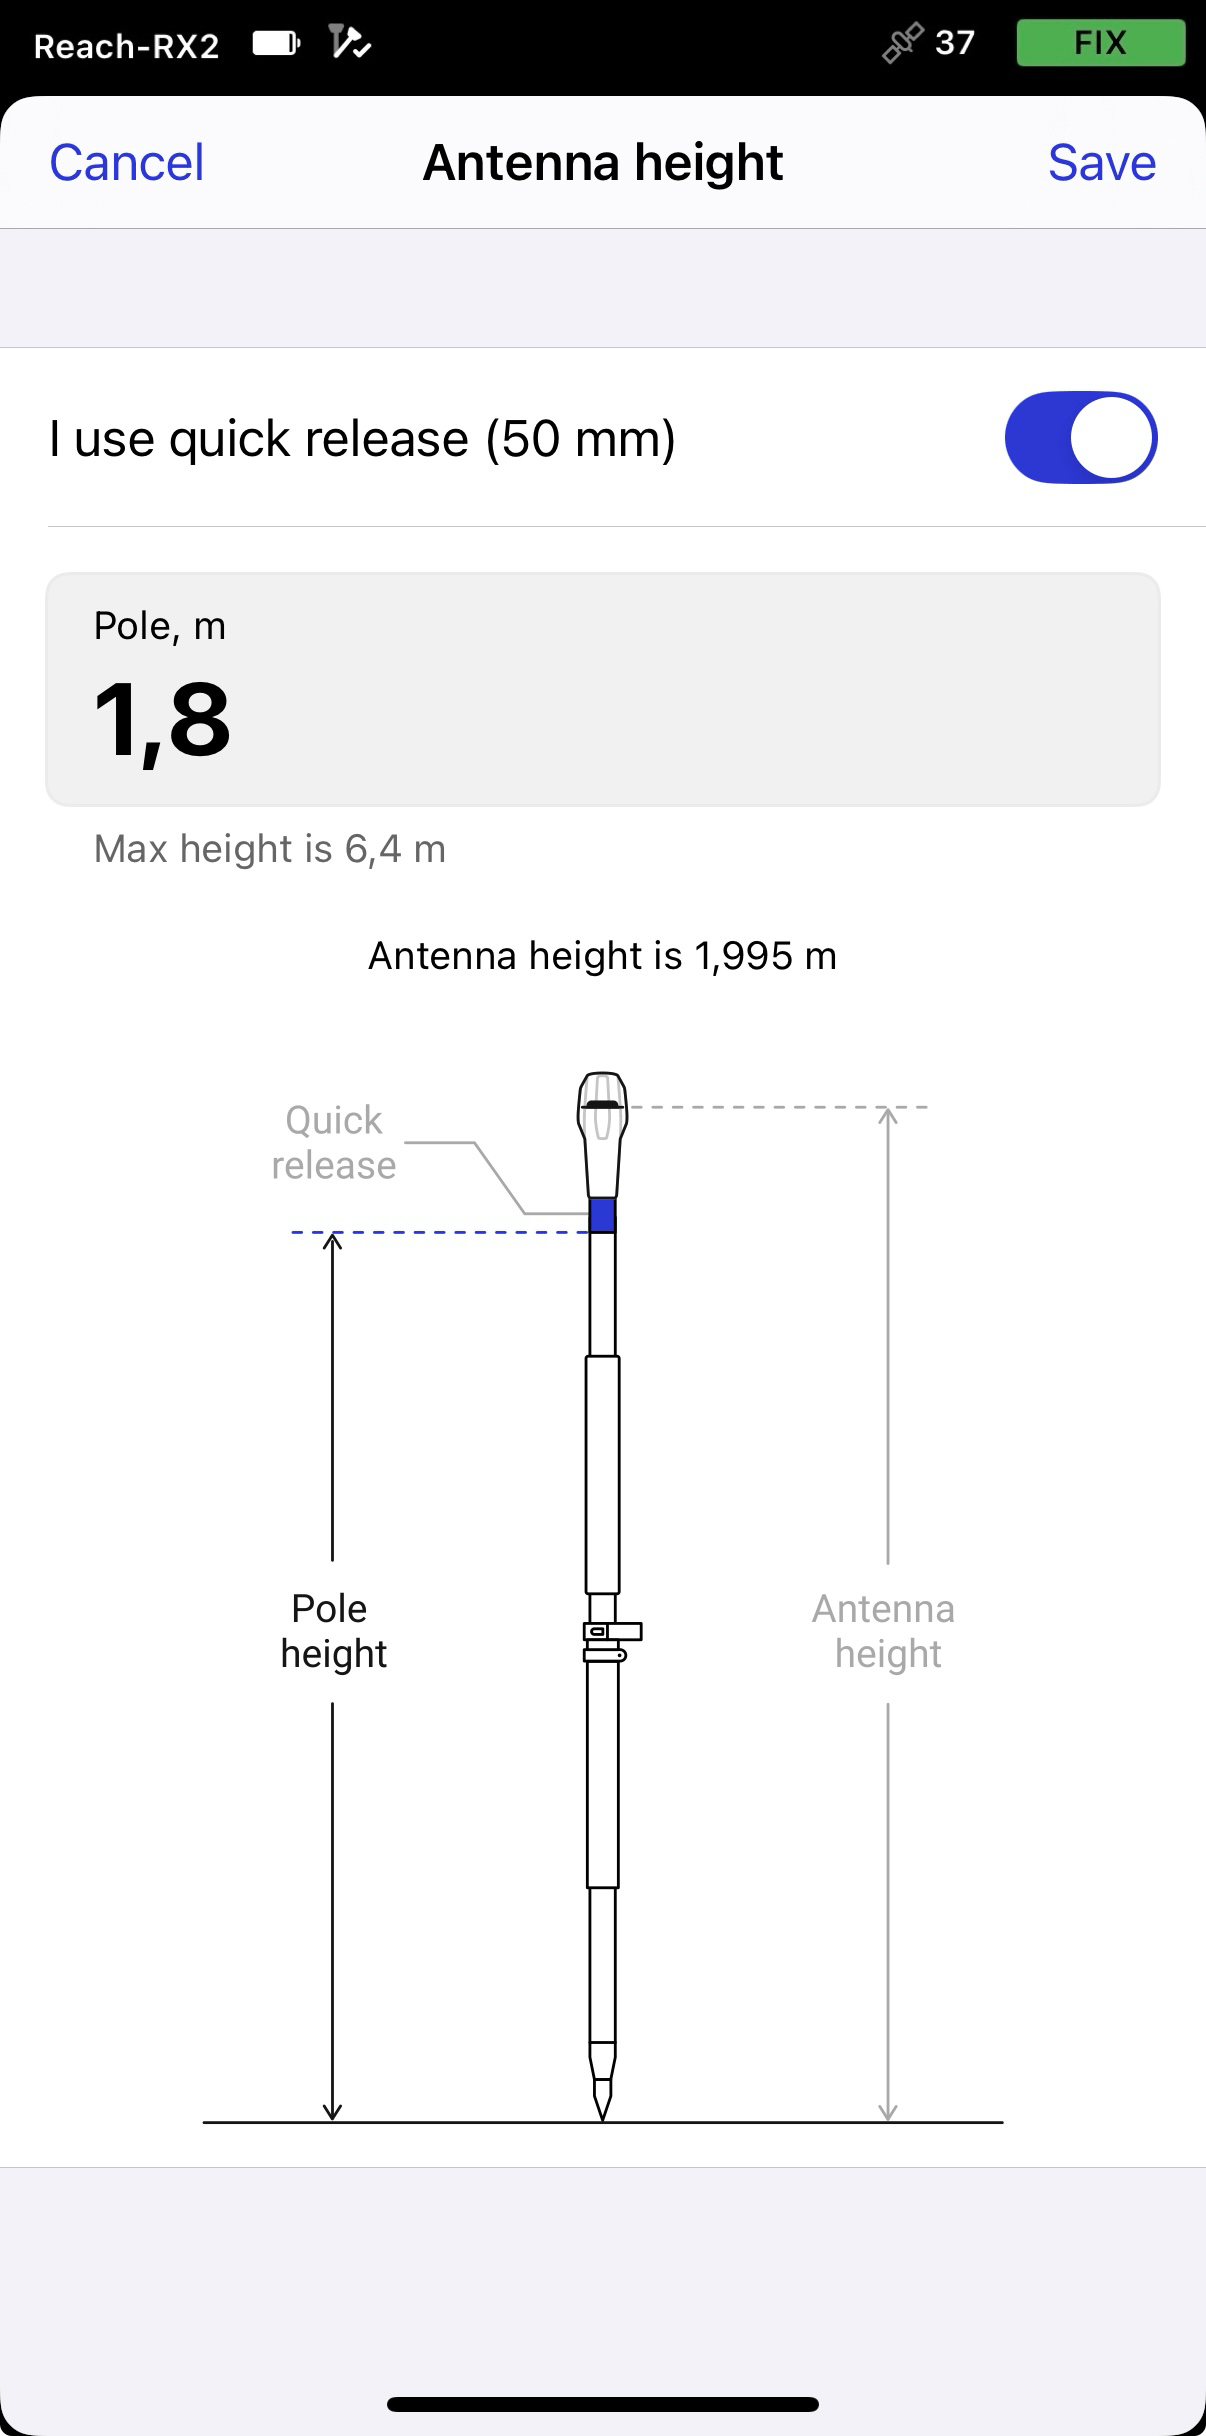
Set the antenna height. You only need to enter the pole height. Emlid Flow automatically applies the antenna phase center offset and adjusts the measurements accordingly.
tipIf you use a quick release, turn on the toggle to include its height in the antenna height calculation.
 caution
When sending compensated NMEA messages, set the antenna height only in Emlid Flow. Setting it in third-party apps as well may cause discrepancies.
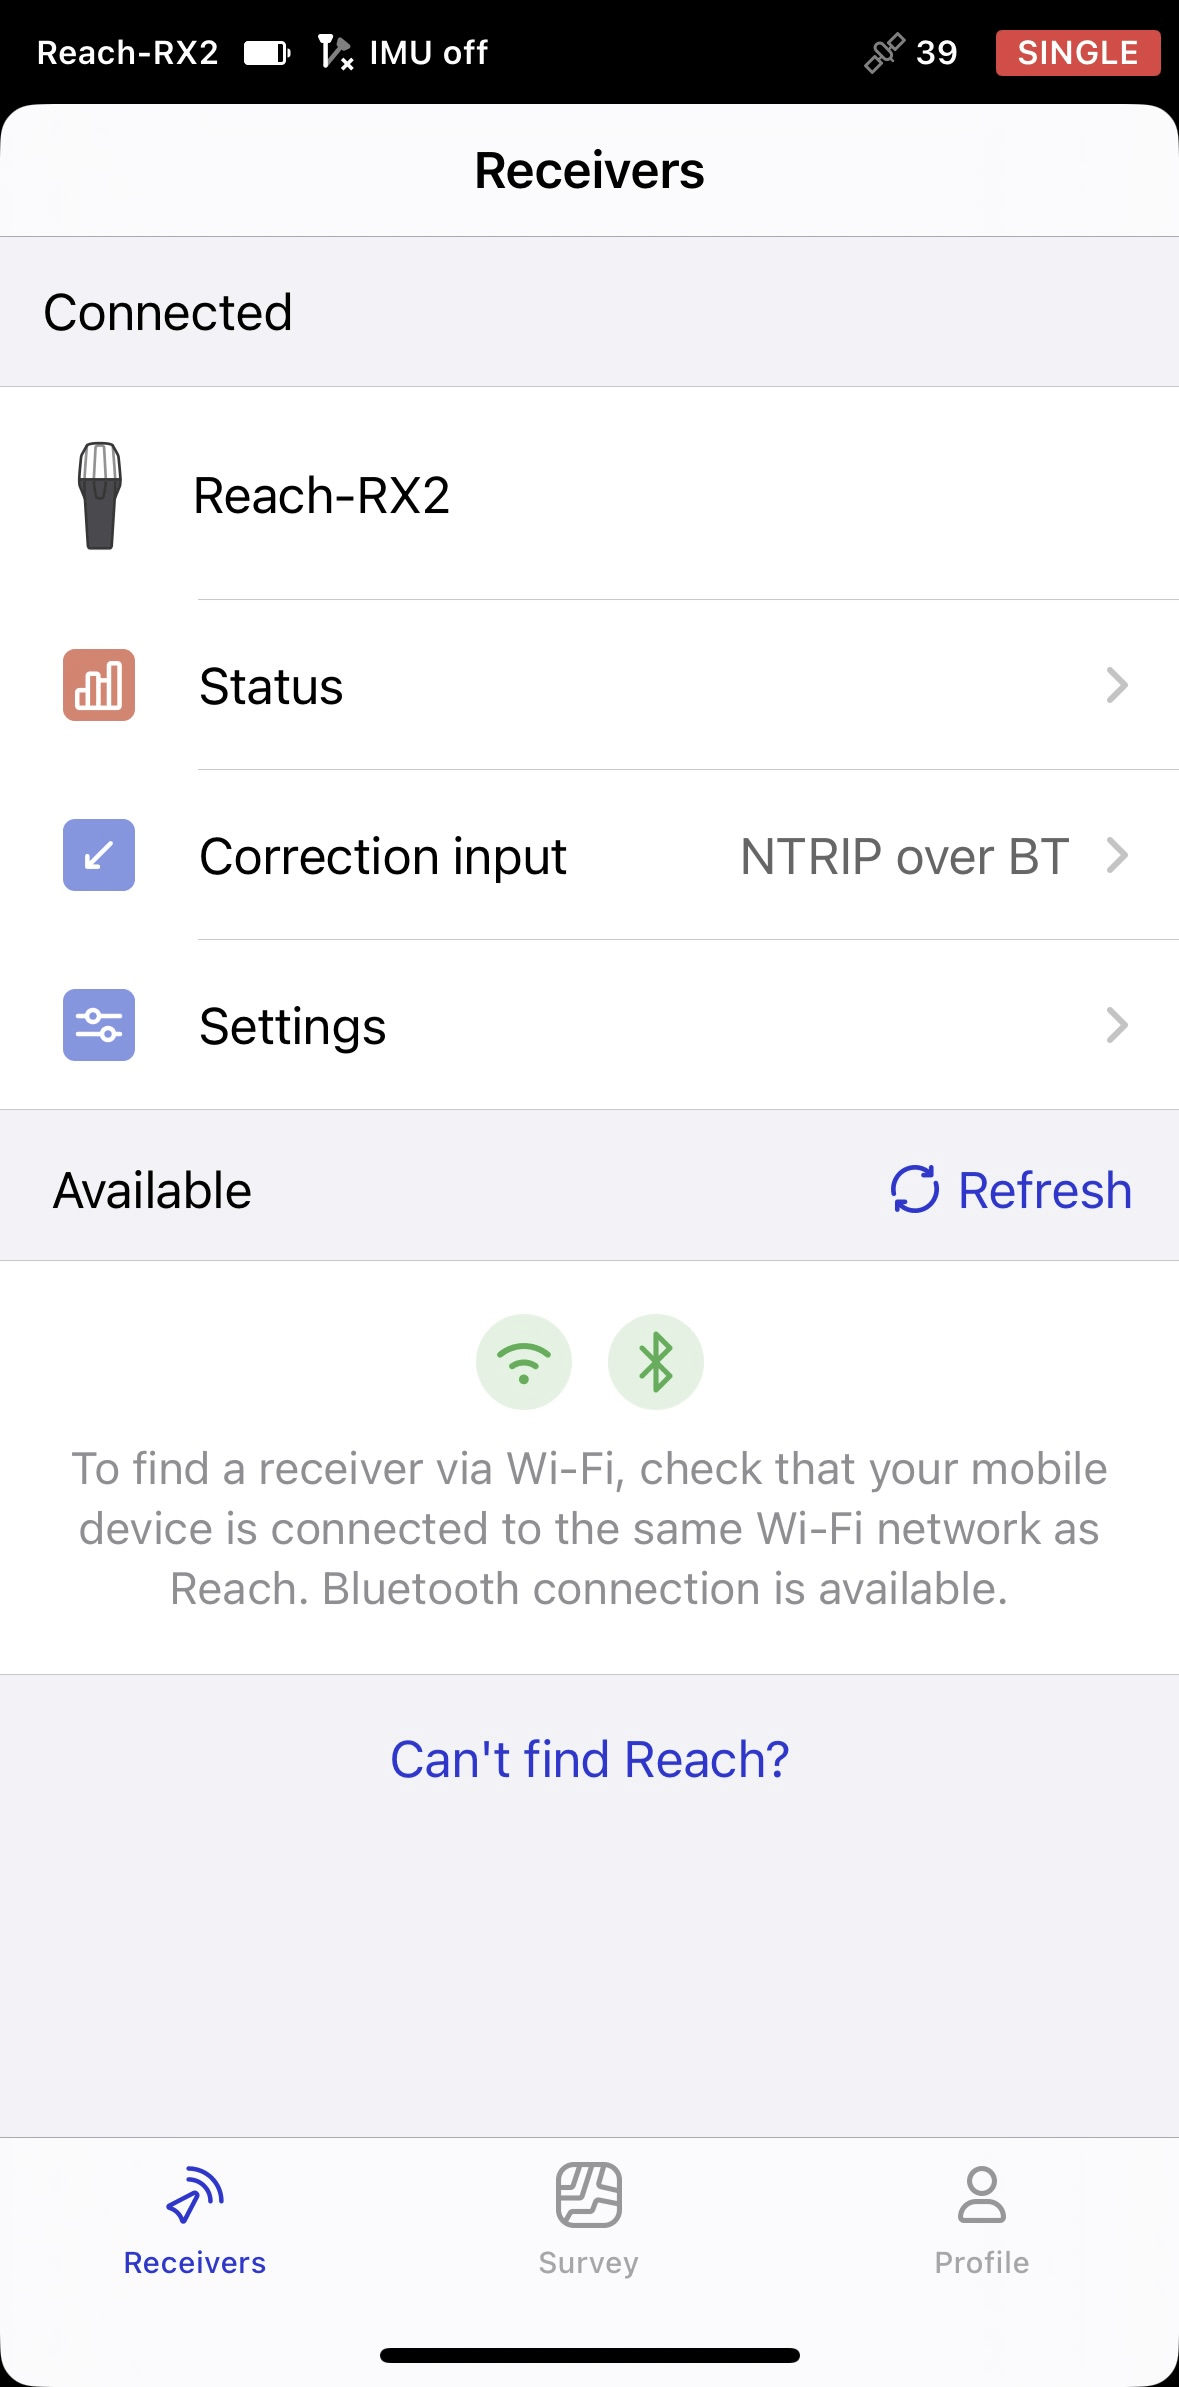
Paring Reach RX2 and Android device
To find your Reach RX2 in the list of devices in Field Maps, you need to pair it with the Android device as follows:
-
Navigate to the Bluetooth configuration screen on your Android device and enable Bluetooth.
-
Wait for your Reach RX2 to be listed as an available device.
tipKeep Reach within a few meters from the device.
-
Tap the name of your Reach in the list of available devices on the Android device.
noteIf your device requires a PIN code, enter 123456.
-
Pair Reach with the Android device.
Configuring communication between ArcGIS Field Maps and Reach RX2
-
Open the ArcGIS Field Maps app.
-
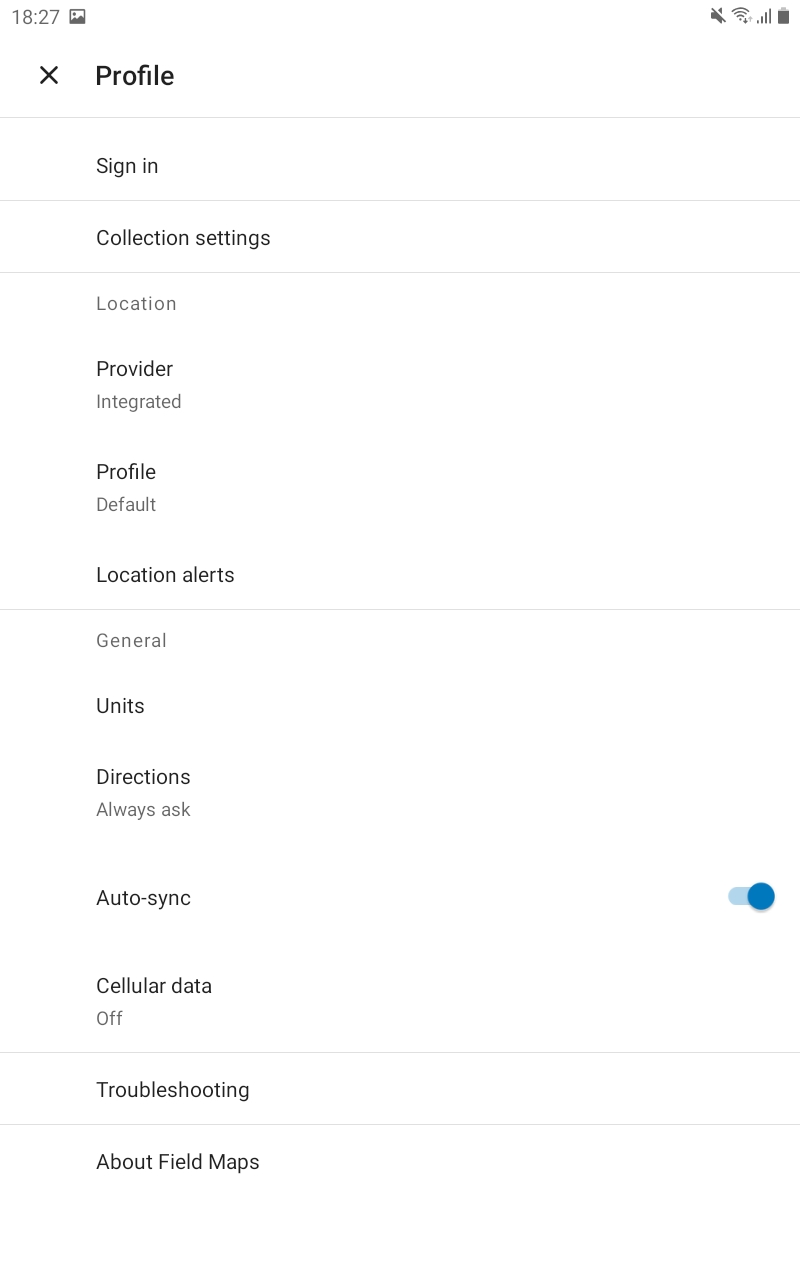
Tap the Profile icon in the upper-right corner to open the settings.
-
Tap Provider in the Location section.
-
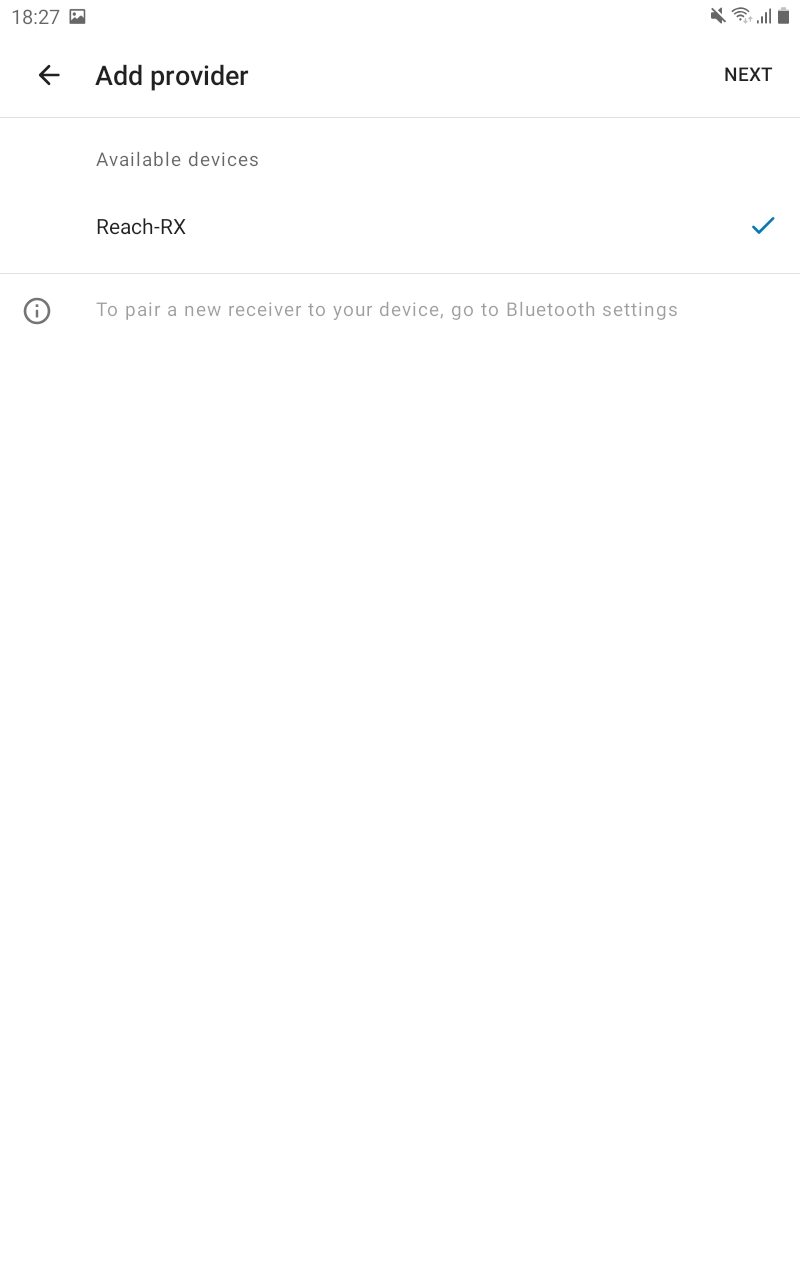
Tap the Plus button to add a provider.
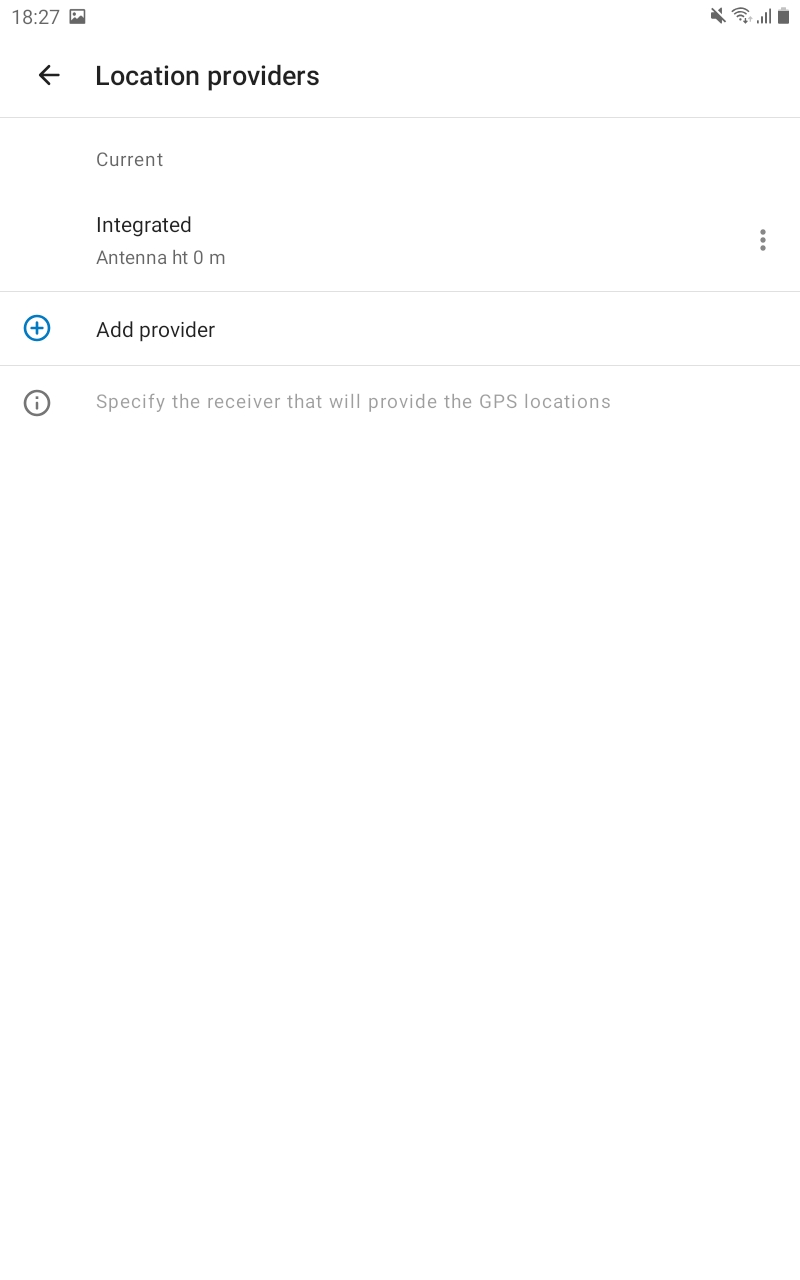
-
Select your Reach in the list of available devices. Tap NEXT.
-
caution
This step is only required when you don’t stream compensated NMEA position.
Set the antenna height and tap DONE.
noteAntenna offset is not added automatically in the Field Maps. So the value you enter should be the sum of the pole height and 145 mm.
-
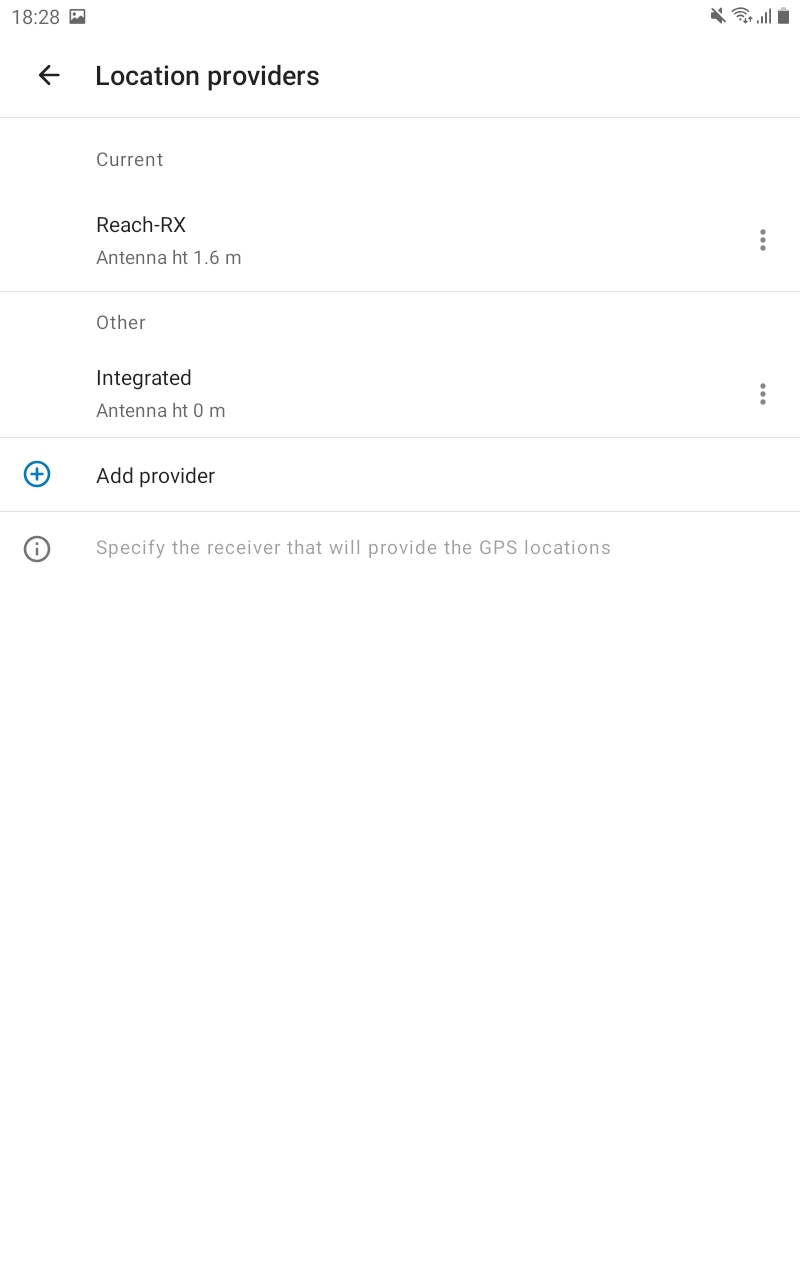
Tap Current, set the antenna height. Click on your Reach in the Other section. This Reach will be set as a current one.

-
Tap the back arrow to come back to your Profile settings.

You are now ready to proceed with the measurement of the GNSS data!
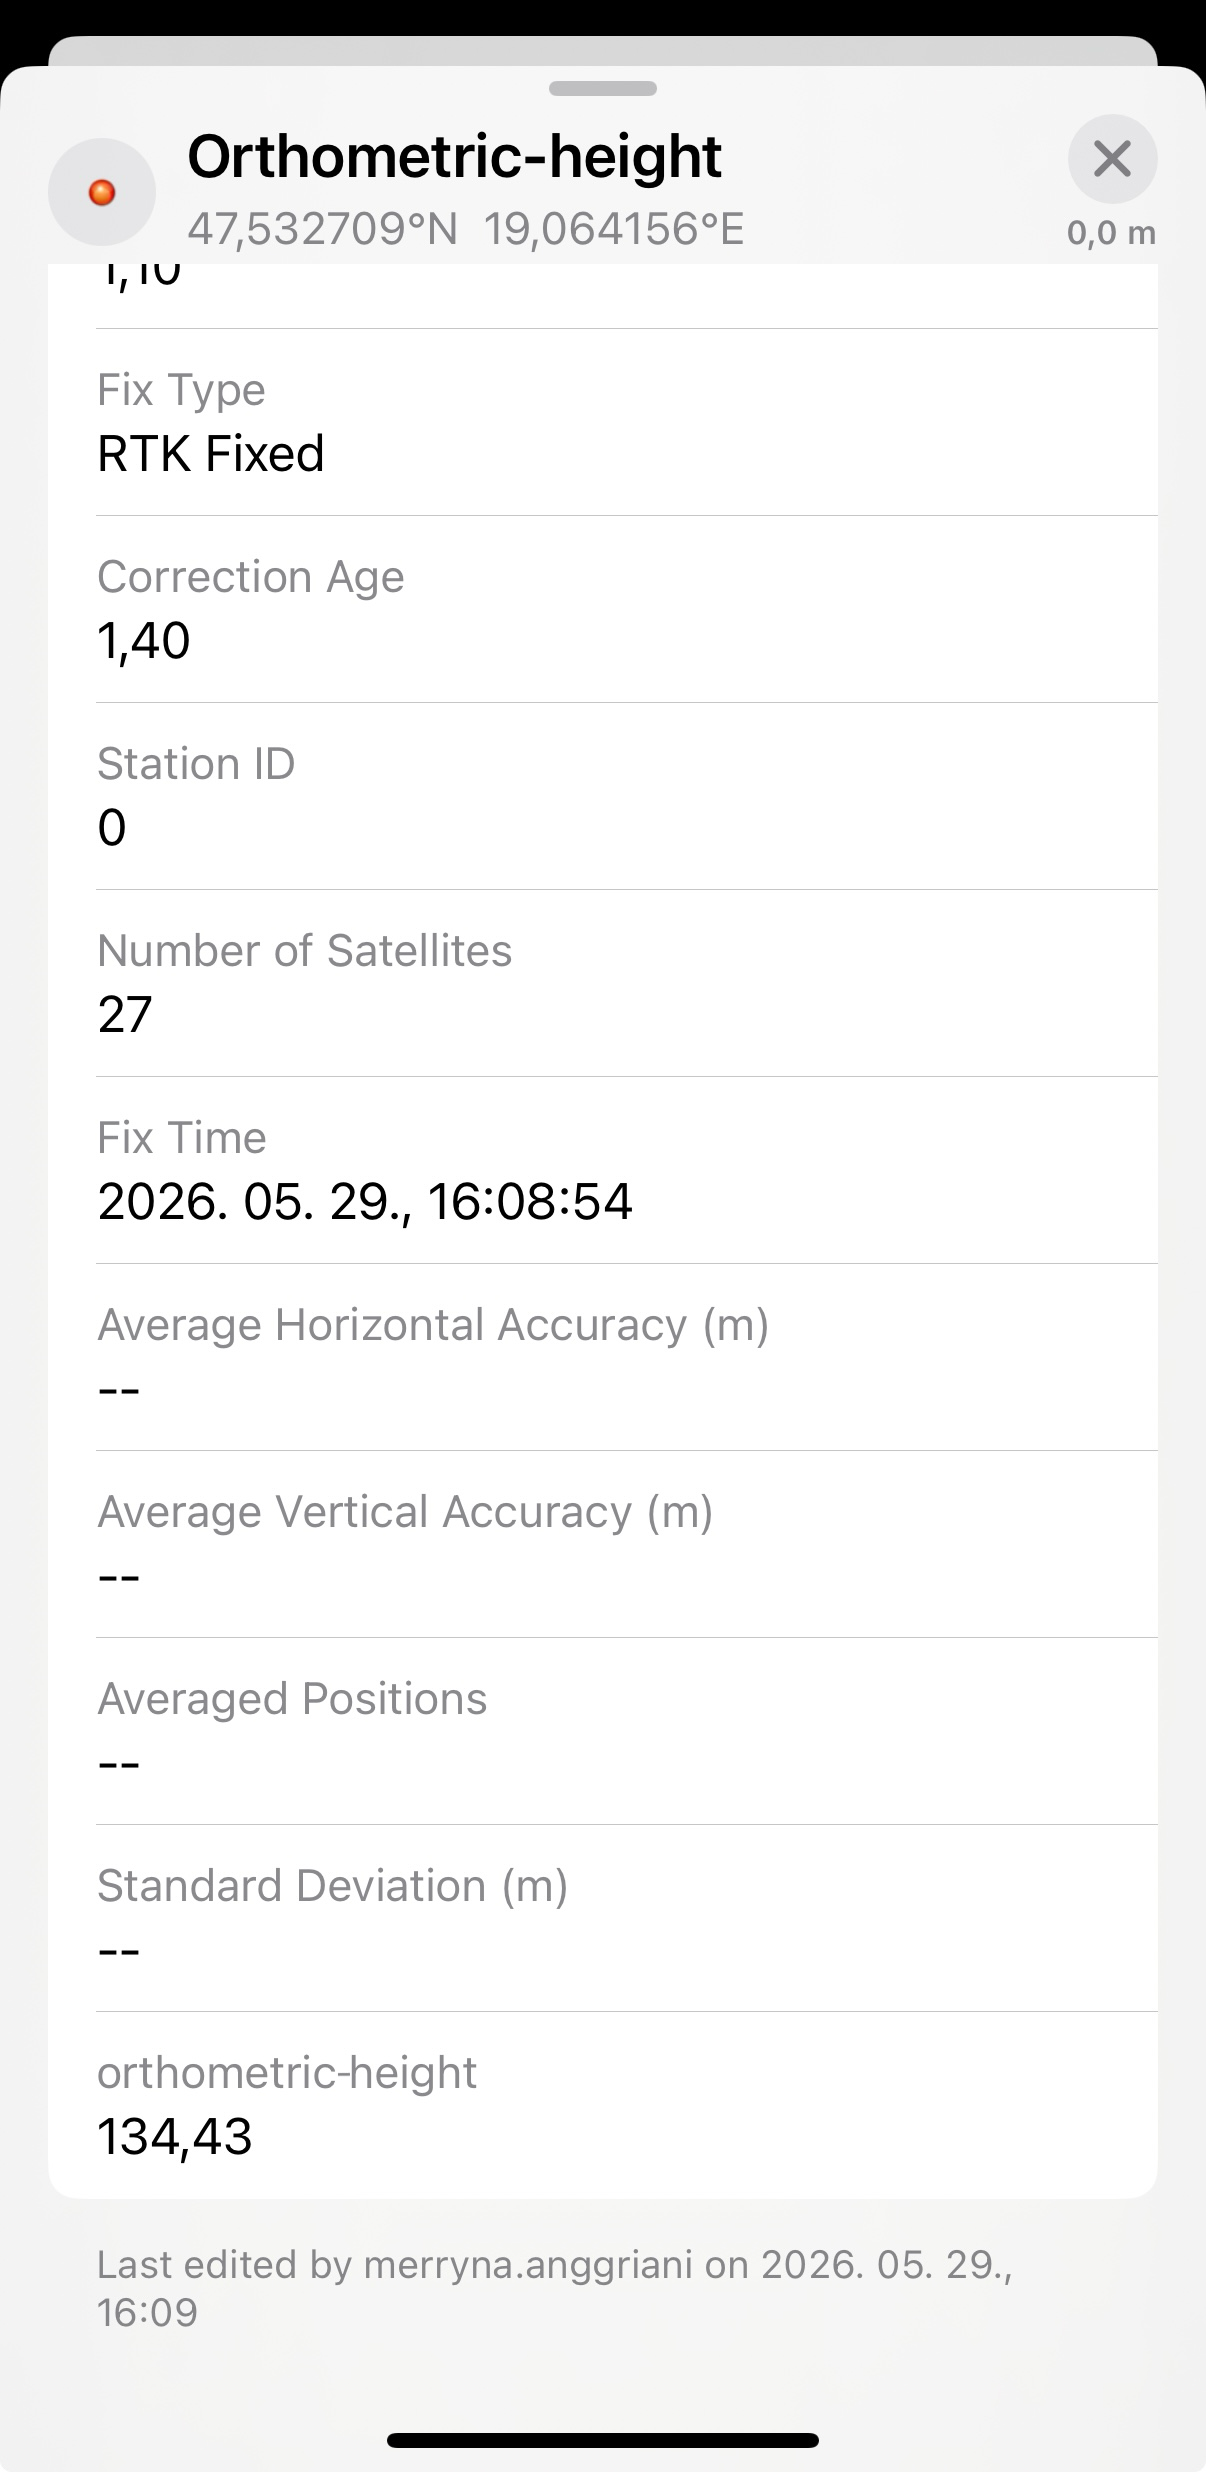
Streaming orthometric heights to ArcGIS Field Maps from Reach RX2
This section is optional and only required if you want to collect and display orthometric height values.
Construction, utility, and municipal projects require orthometric height rather than ellipsoidal height because it is referenced to mean sea level and represents real-world elevation used in engineering and infrastructure workflows.
GNSS receivers calculate ellipsoidal height relative to an ellipsoid, which is a simplified mathematical model of the Earth. However, engineering workflows use elevation relative to mean sea level. To convert GNSS measurements into orthometric height, the receiver applies a geoid model, which approximates mean sea level and defines the difference between the ellipsoid and the geoid at a given location.
To provide mean sea level elevation, Emlid Flow applies the selected geoid model to GNSS height measurements. You only need to enable streaming to send corrected elevations to your third-party app.
To stream orthometric height to a third-party application, follow the steps below:
-
In Emlid Flow, go to the Integration with external devices tab.
-
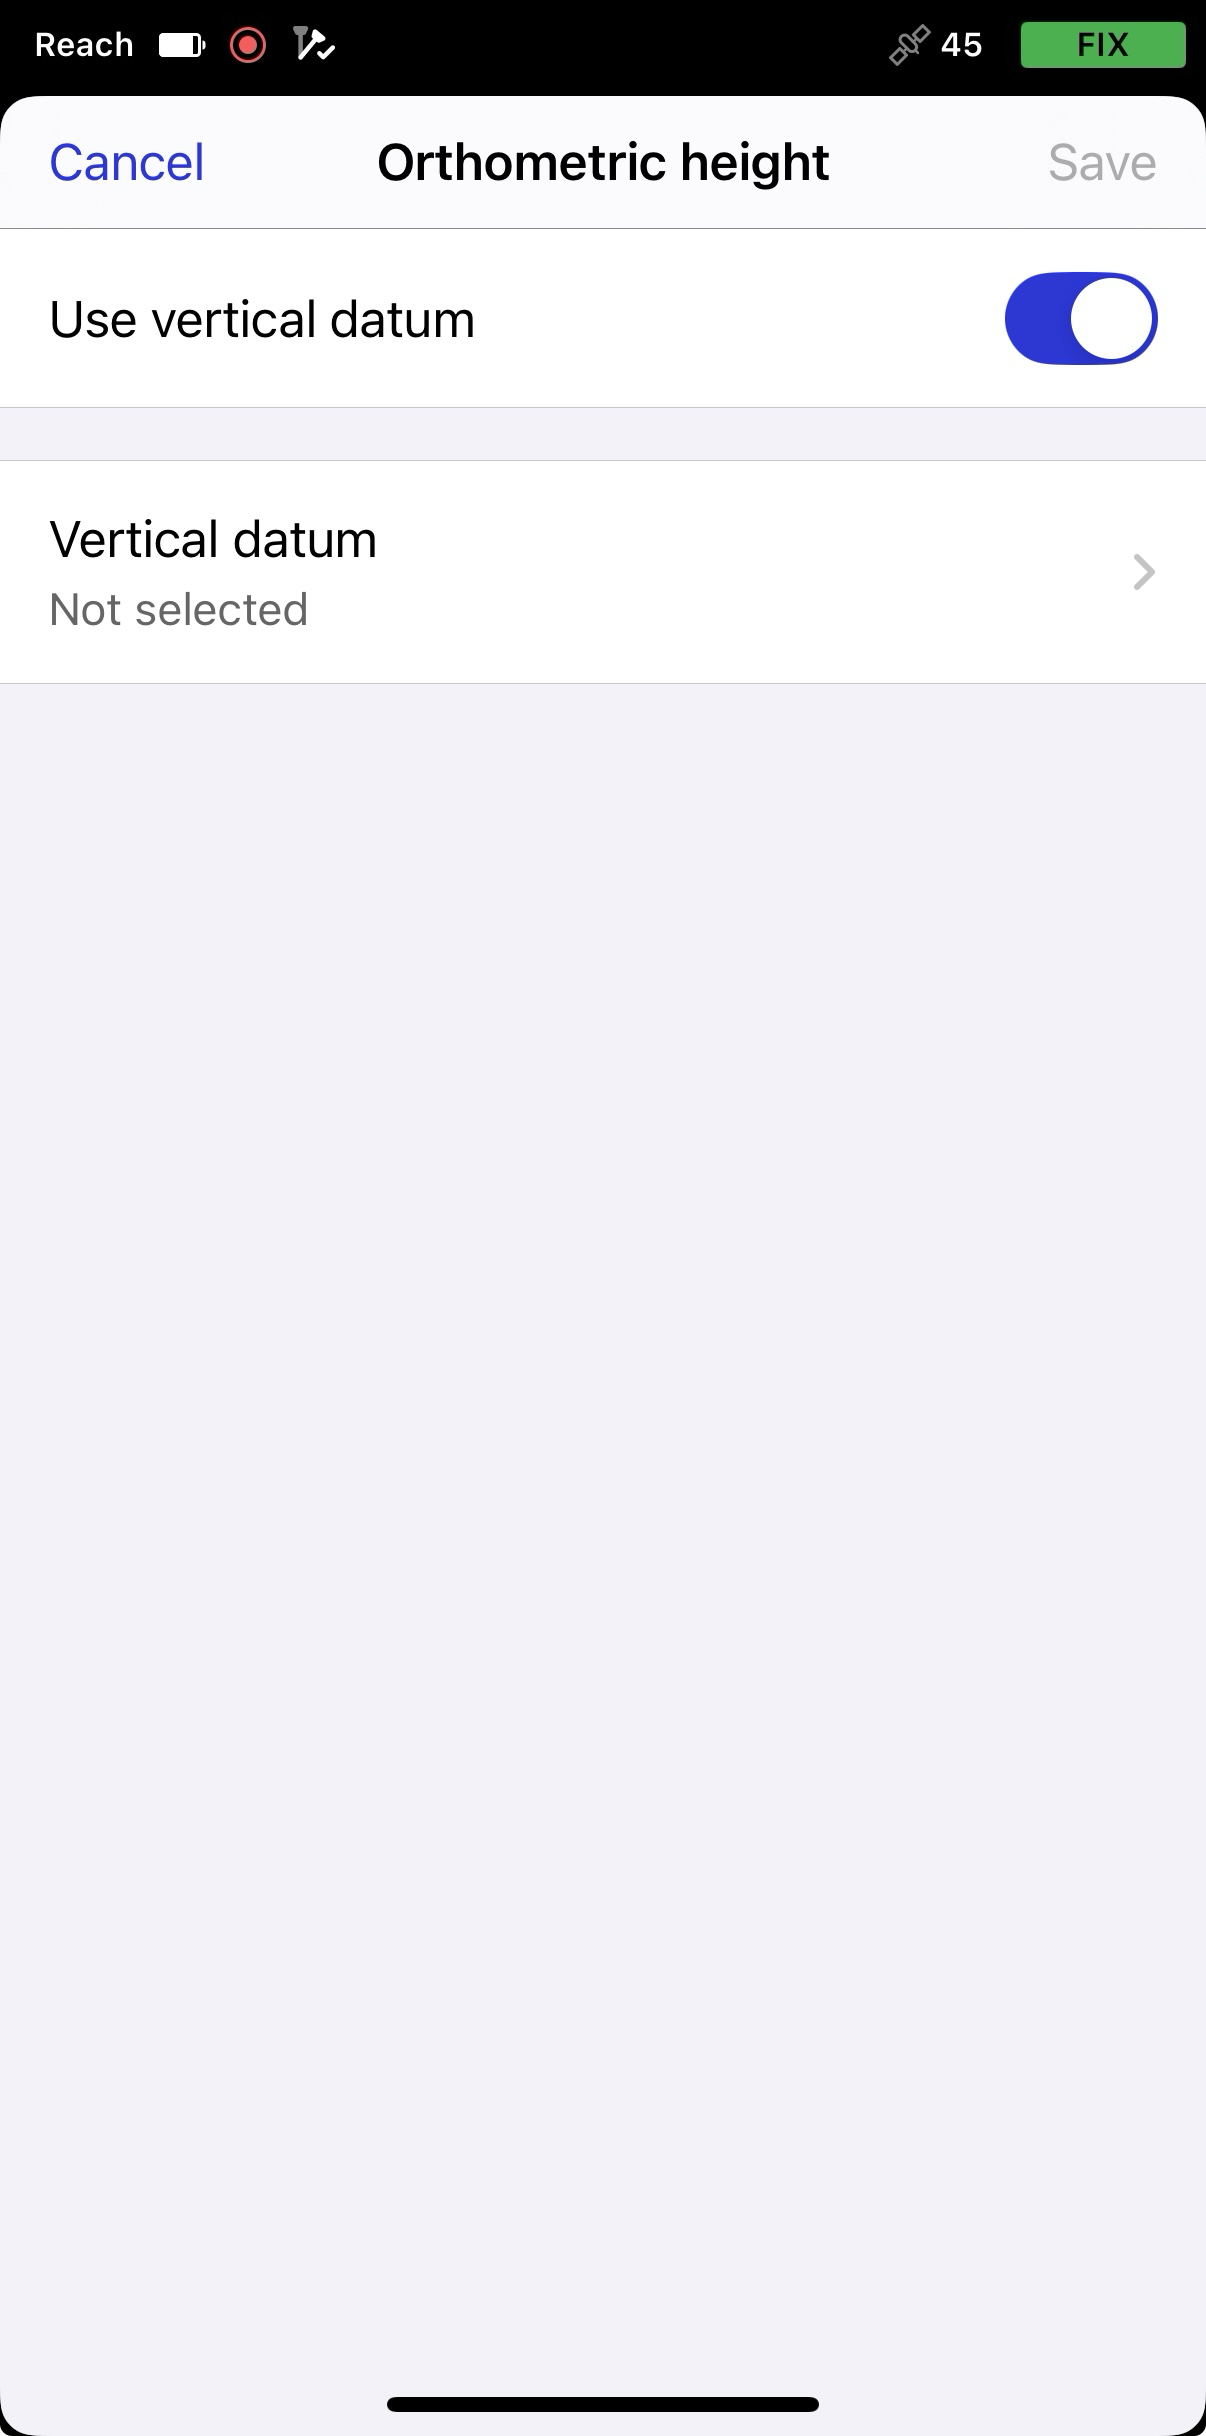
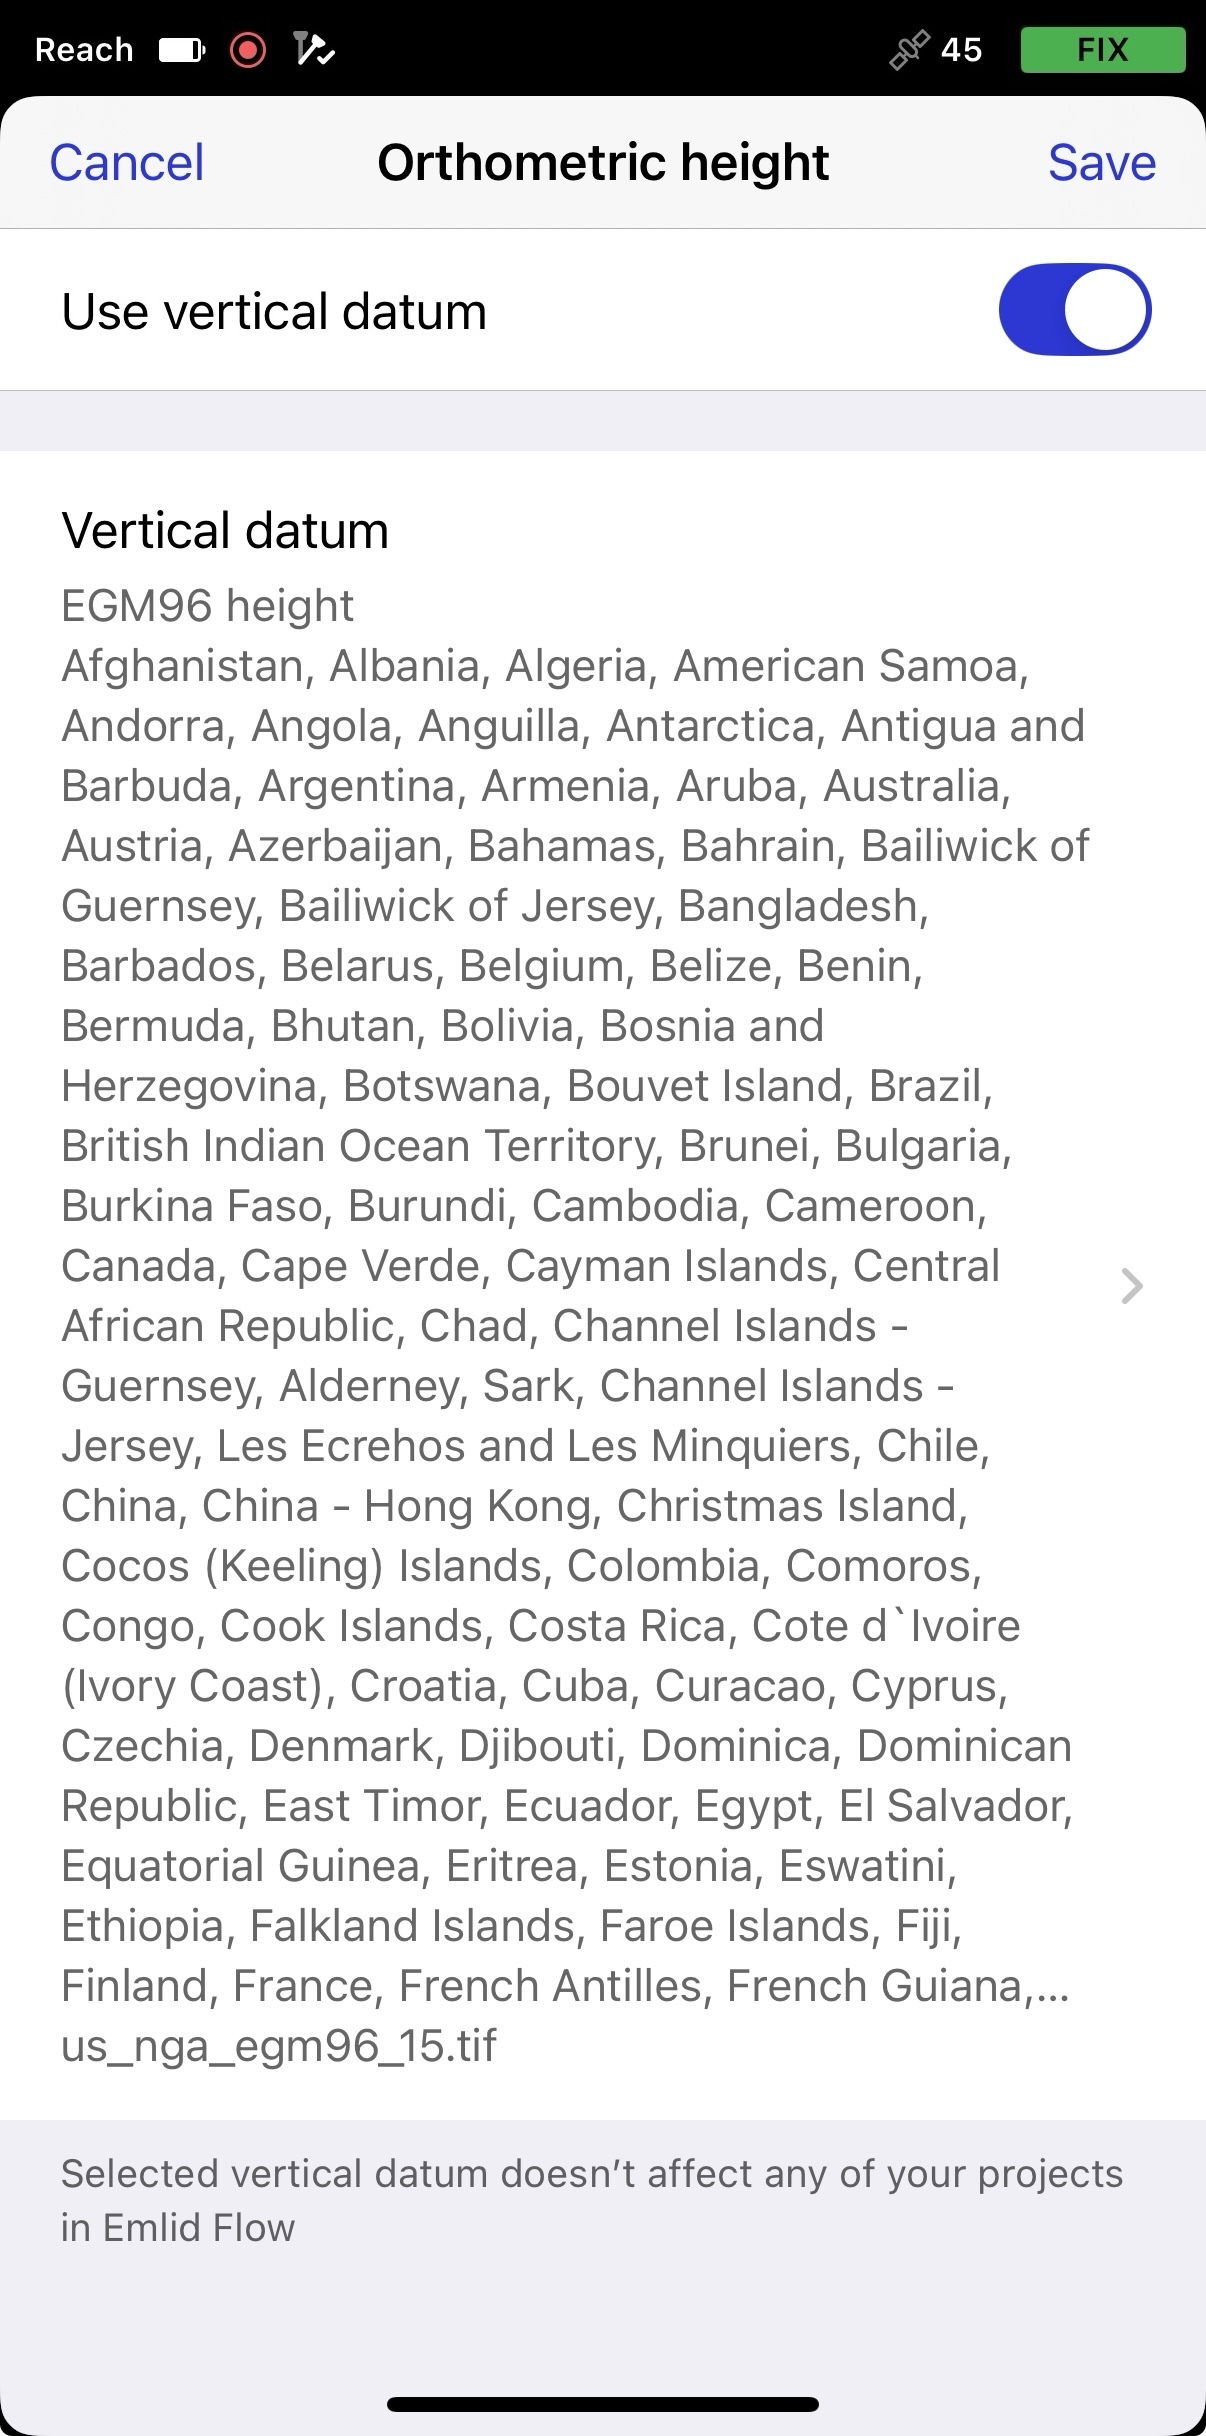
Tap Orthometric height and turn on the toggle to use vertical datum.
-
Tap Vertical datum, then select the geoid for your location. If needed, download the geoid by tapping Download.
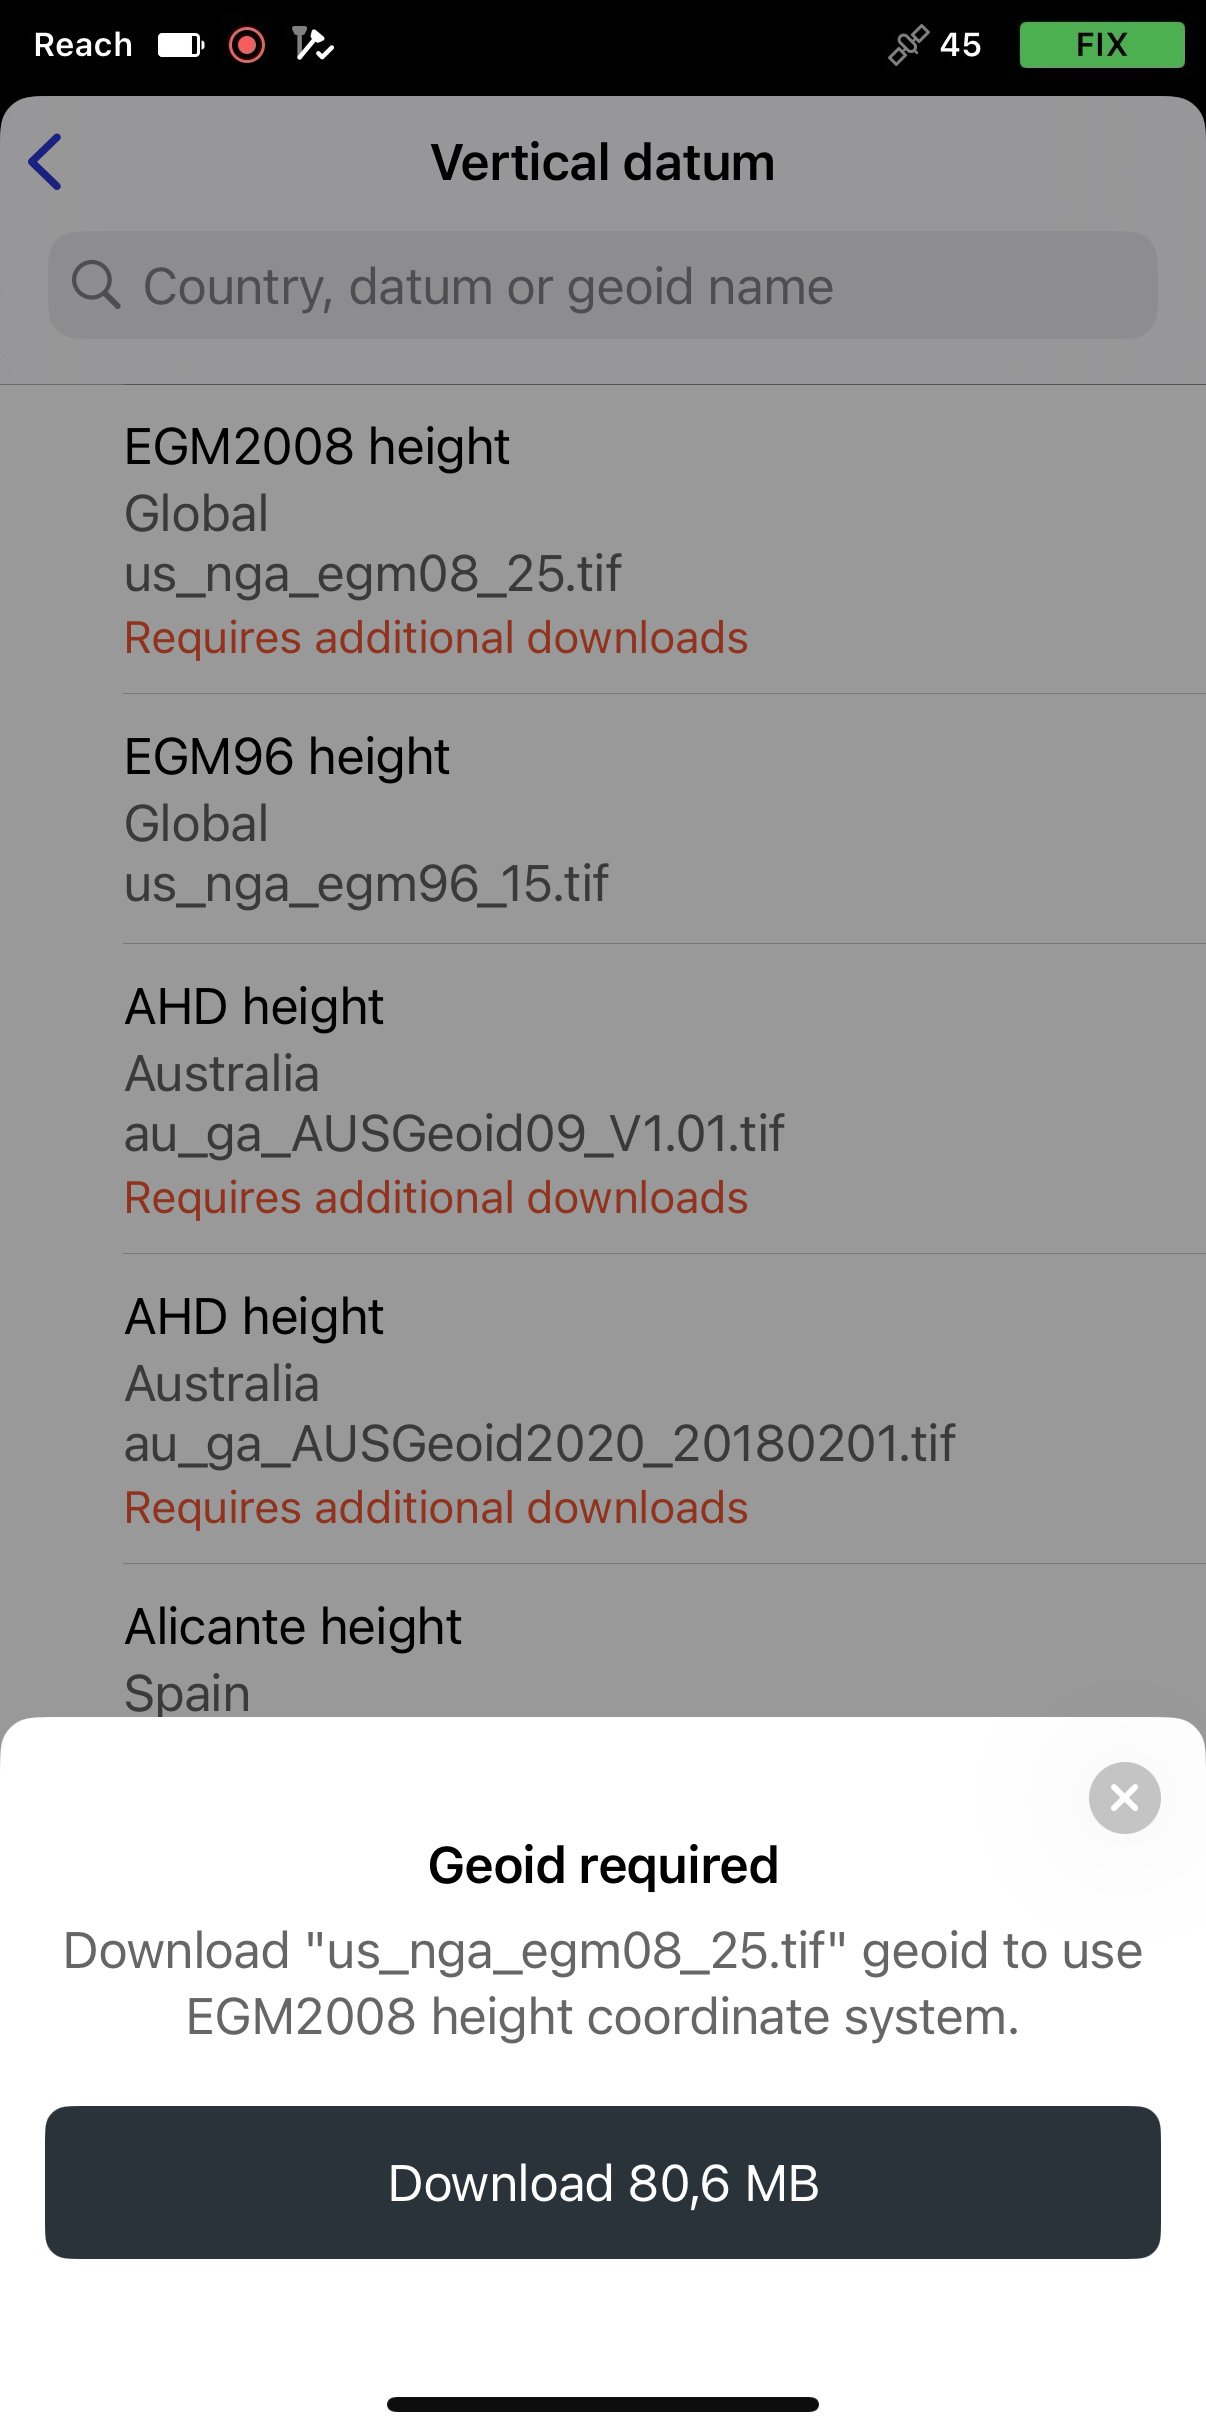
-
Tap Save.
Orthometric height output requires the app to remain active in the background. If the app is force-closed or geoid correction updates are interrupted for more than 10 seconds, the altitude accuracy is marked as invalid (999m).
Before proceeding, verify that your third-party app supports orthometric height values, or check whether any additional setup is required beforehand.
Now, RX2 outputs NMEA with the correct orthometric height, which will be included in the NMEA GGA.
Enable orthometric heights in ArcGIS Field Maps
Before collecting field data with ArcGIS Field Maps, you need to create and configure your web map in ArcGIS Design, using a feature layer with Z-values enabled to support orthometric heights. Follow the steps below:
-
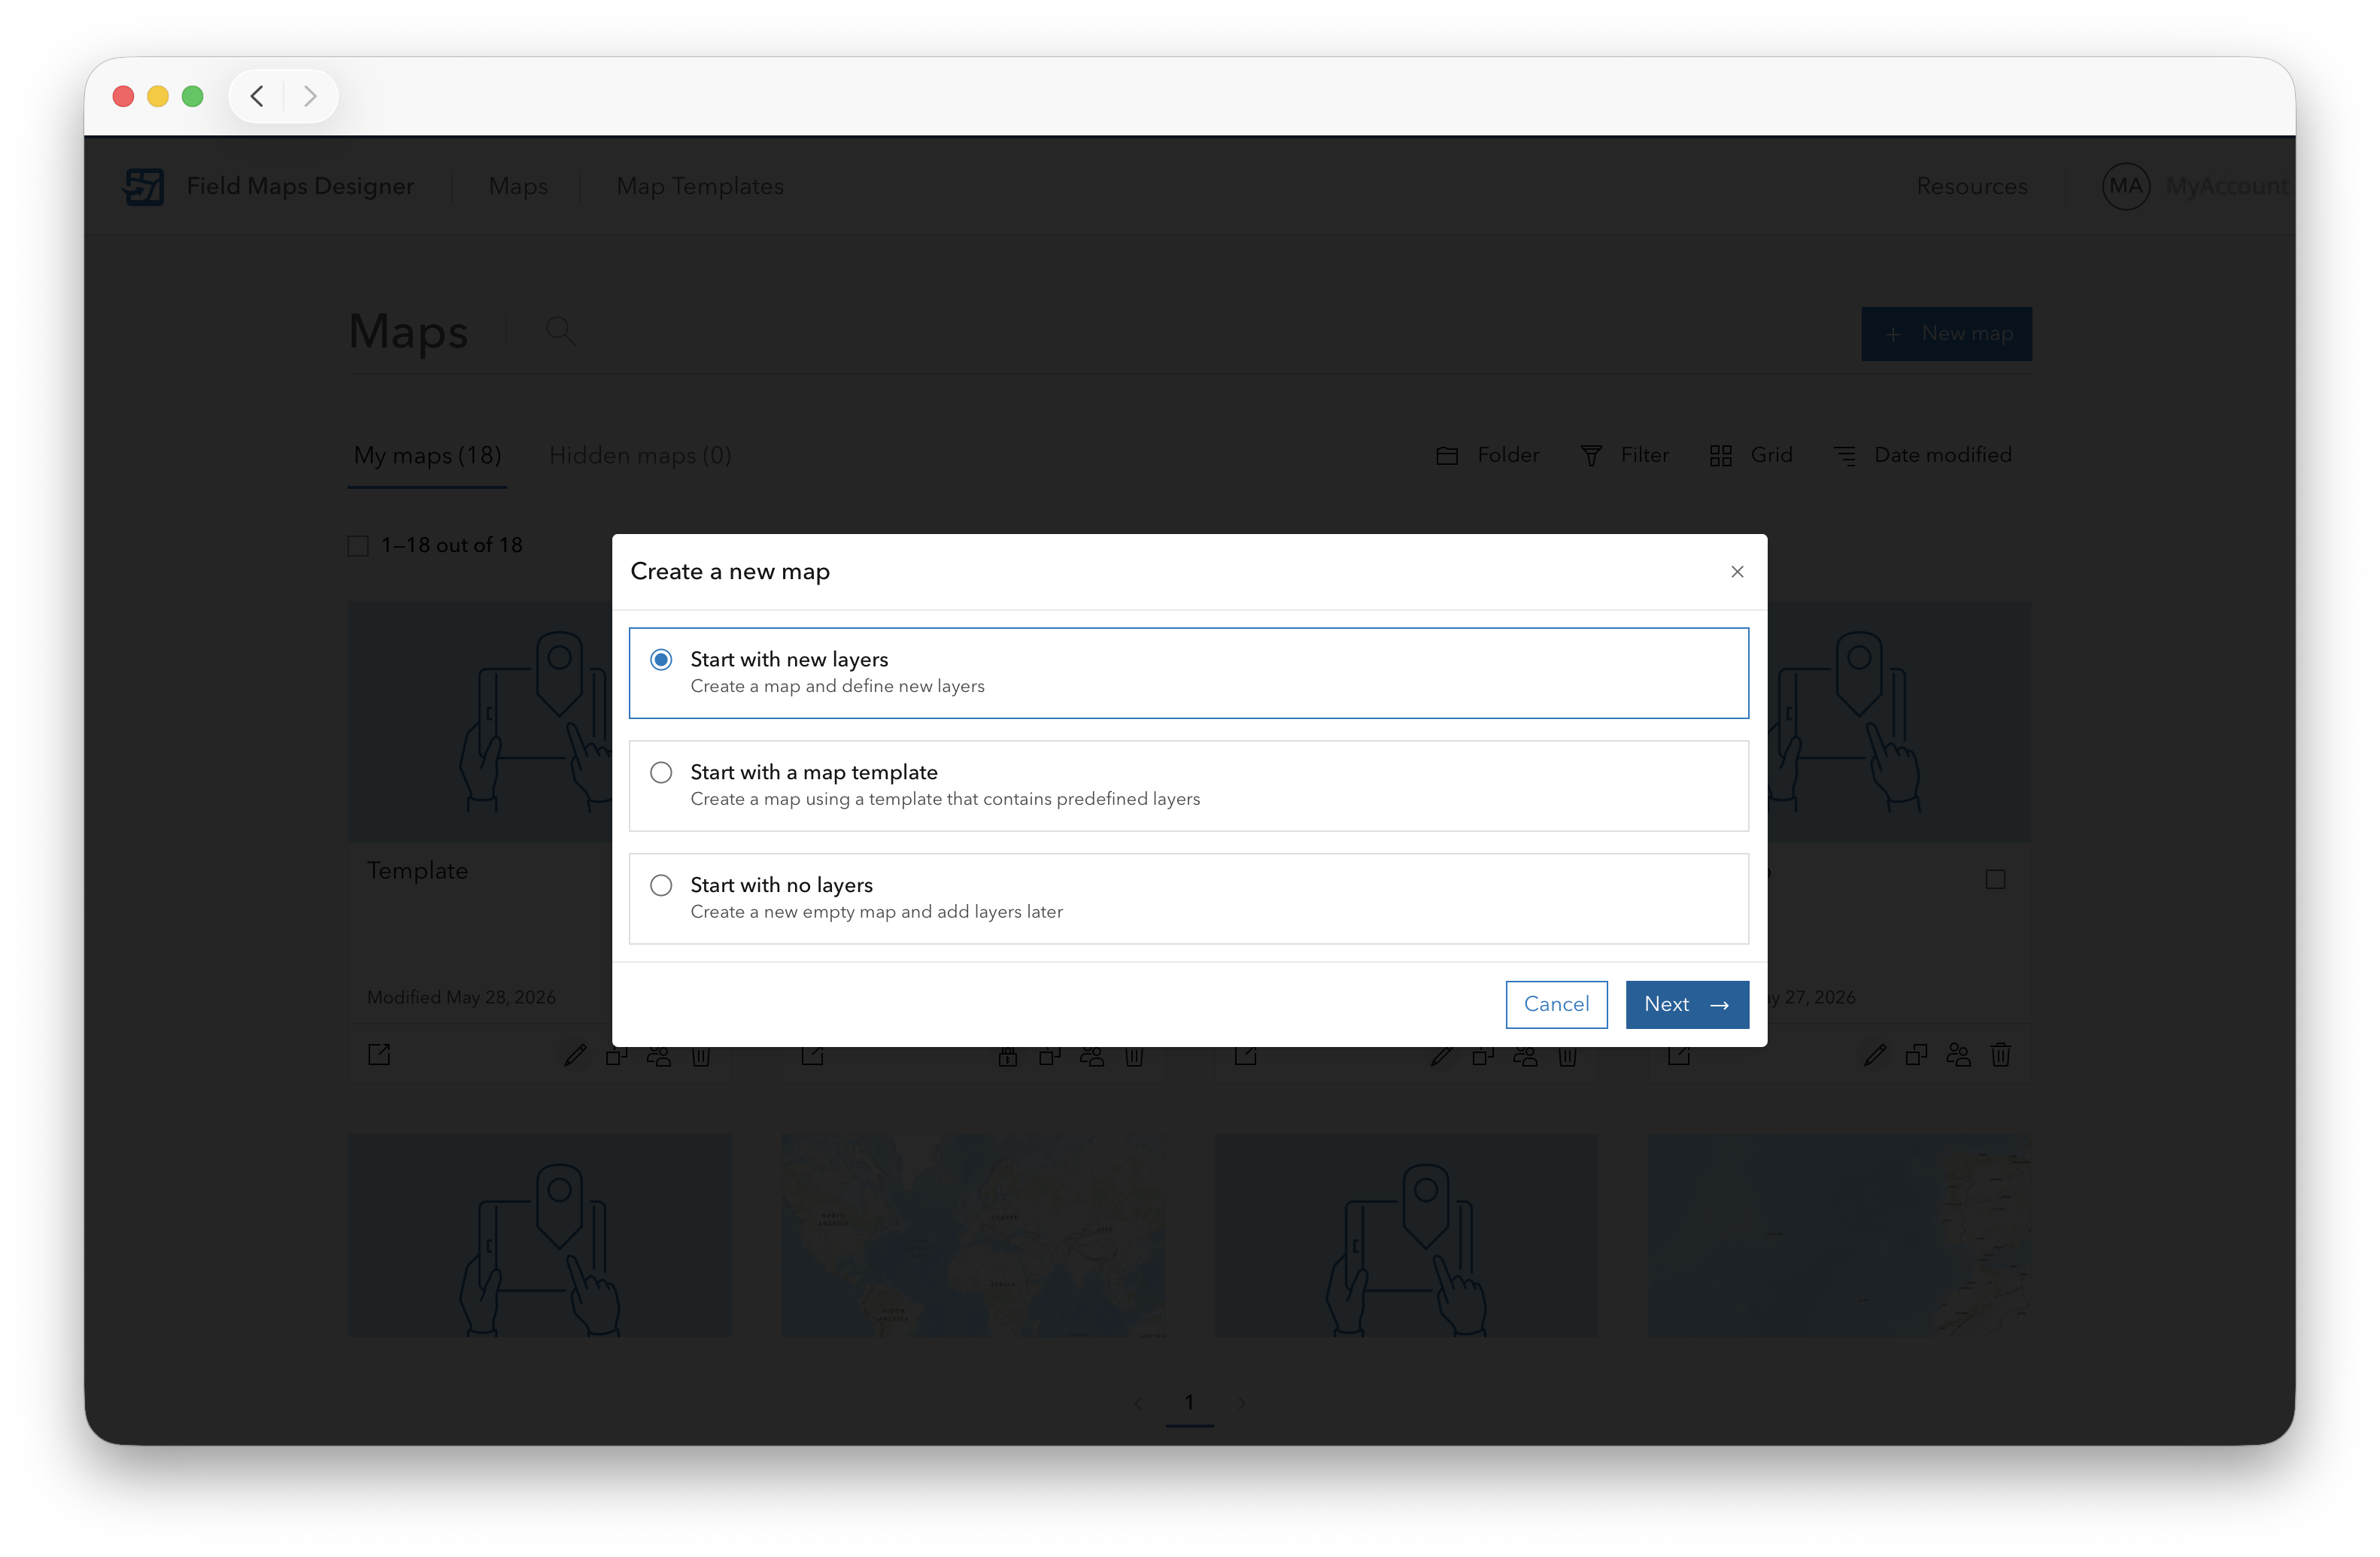
Sign in to ArcGIS Design using your Esri account.
-
Click +New Map, then Start with new layers, and Next.
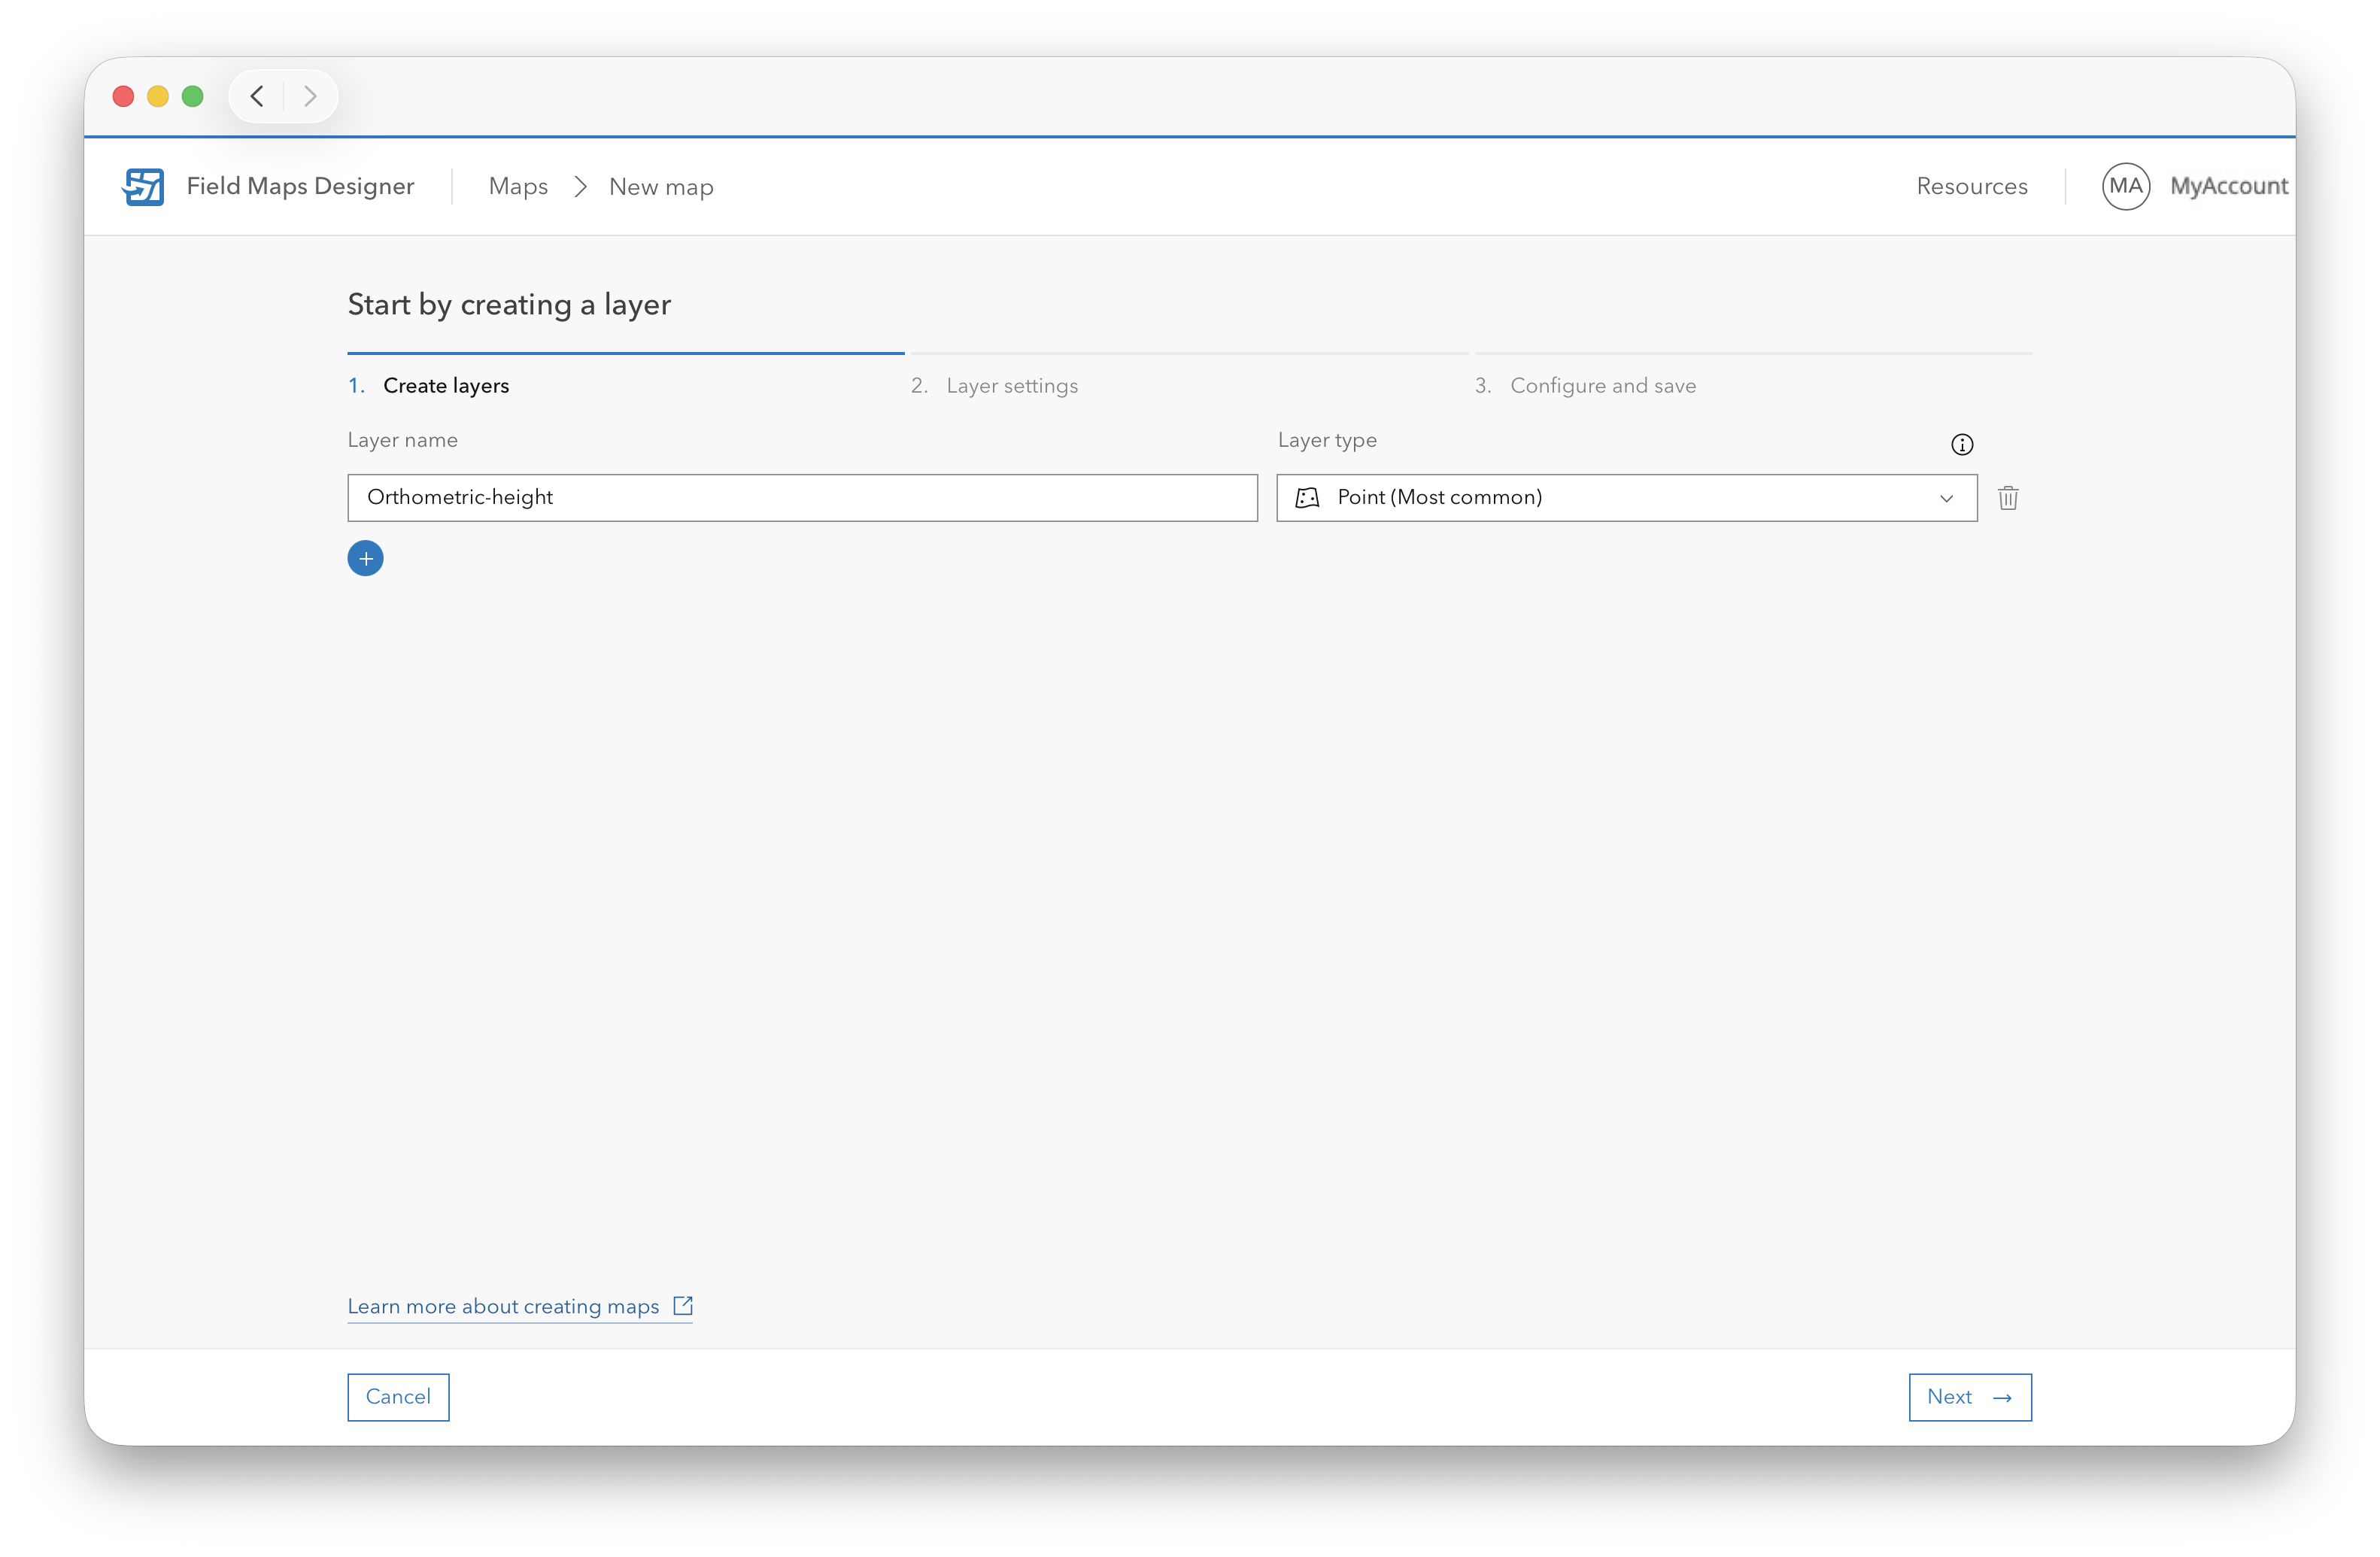
-
Enter a name for the layer and choose the geometry type required for your workflow:
- Point
- Line
- Polygon
-
Click Next to open the layer settings.
Settings cannot be changed after the layers are created.
-
Enable the settings for high-accuracy data collection:
- Will high-accuracy GPS receivers be used to collect data?
- Will 3D spaces be modeled or analyzed?
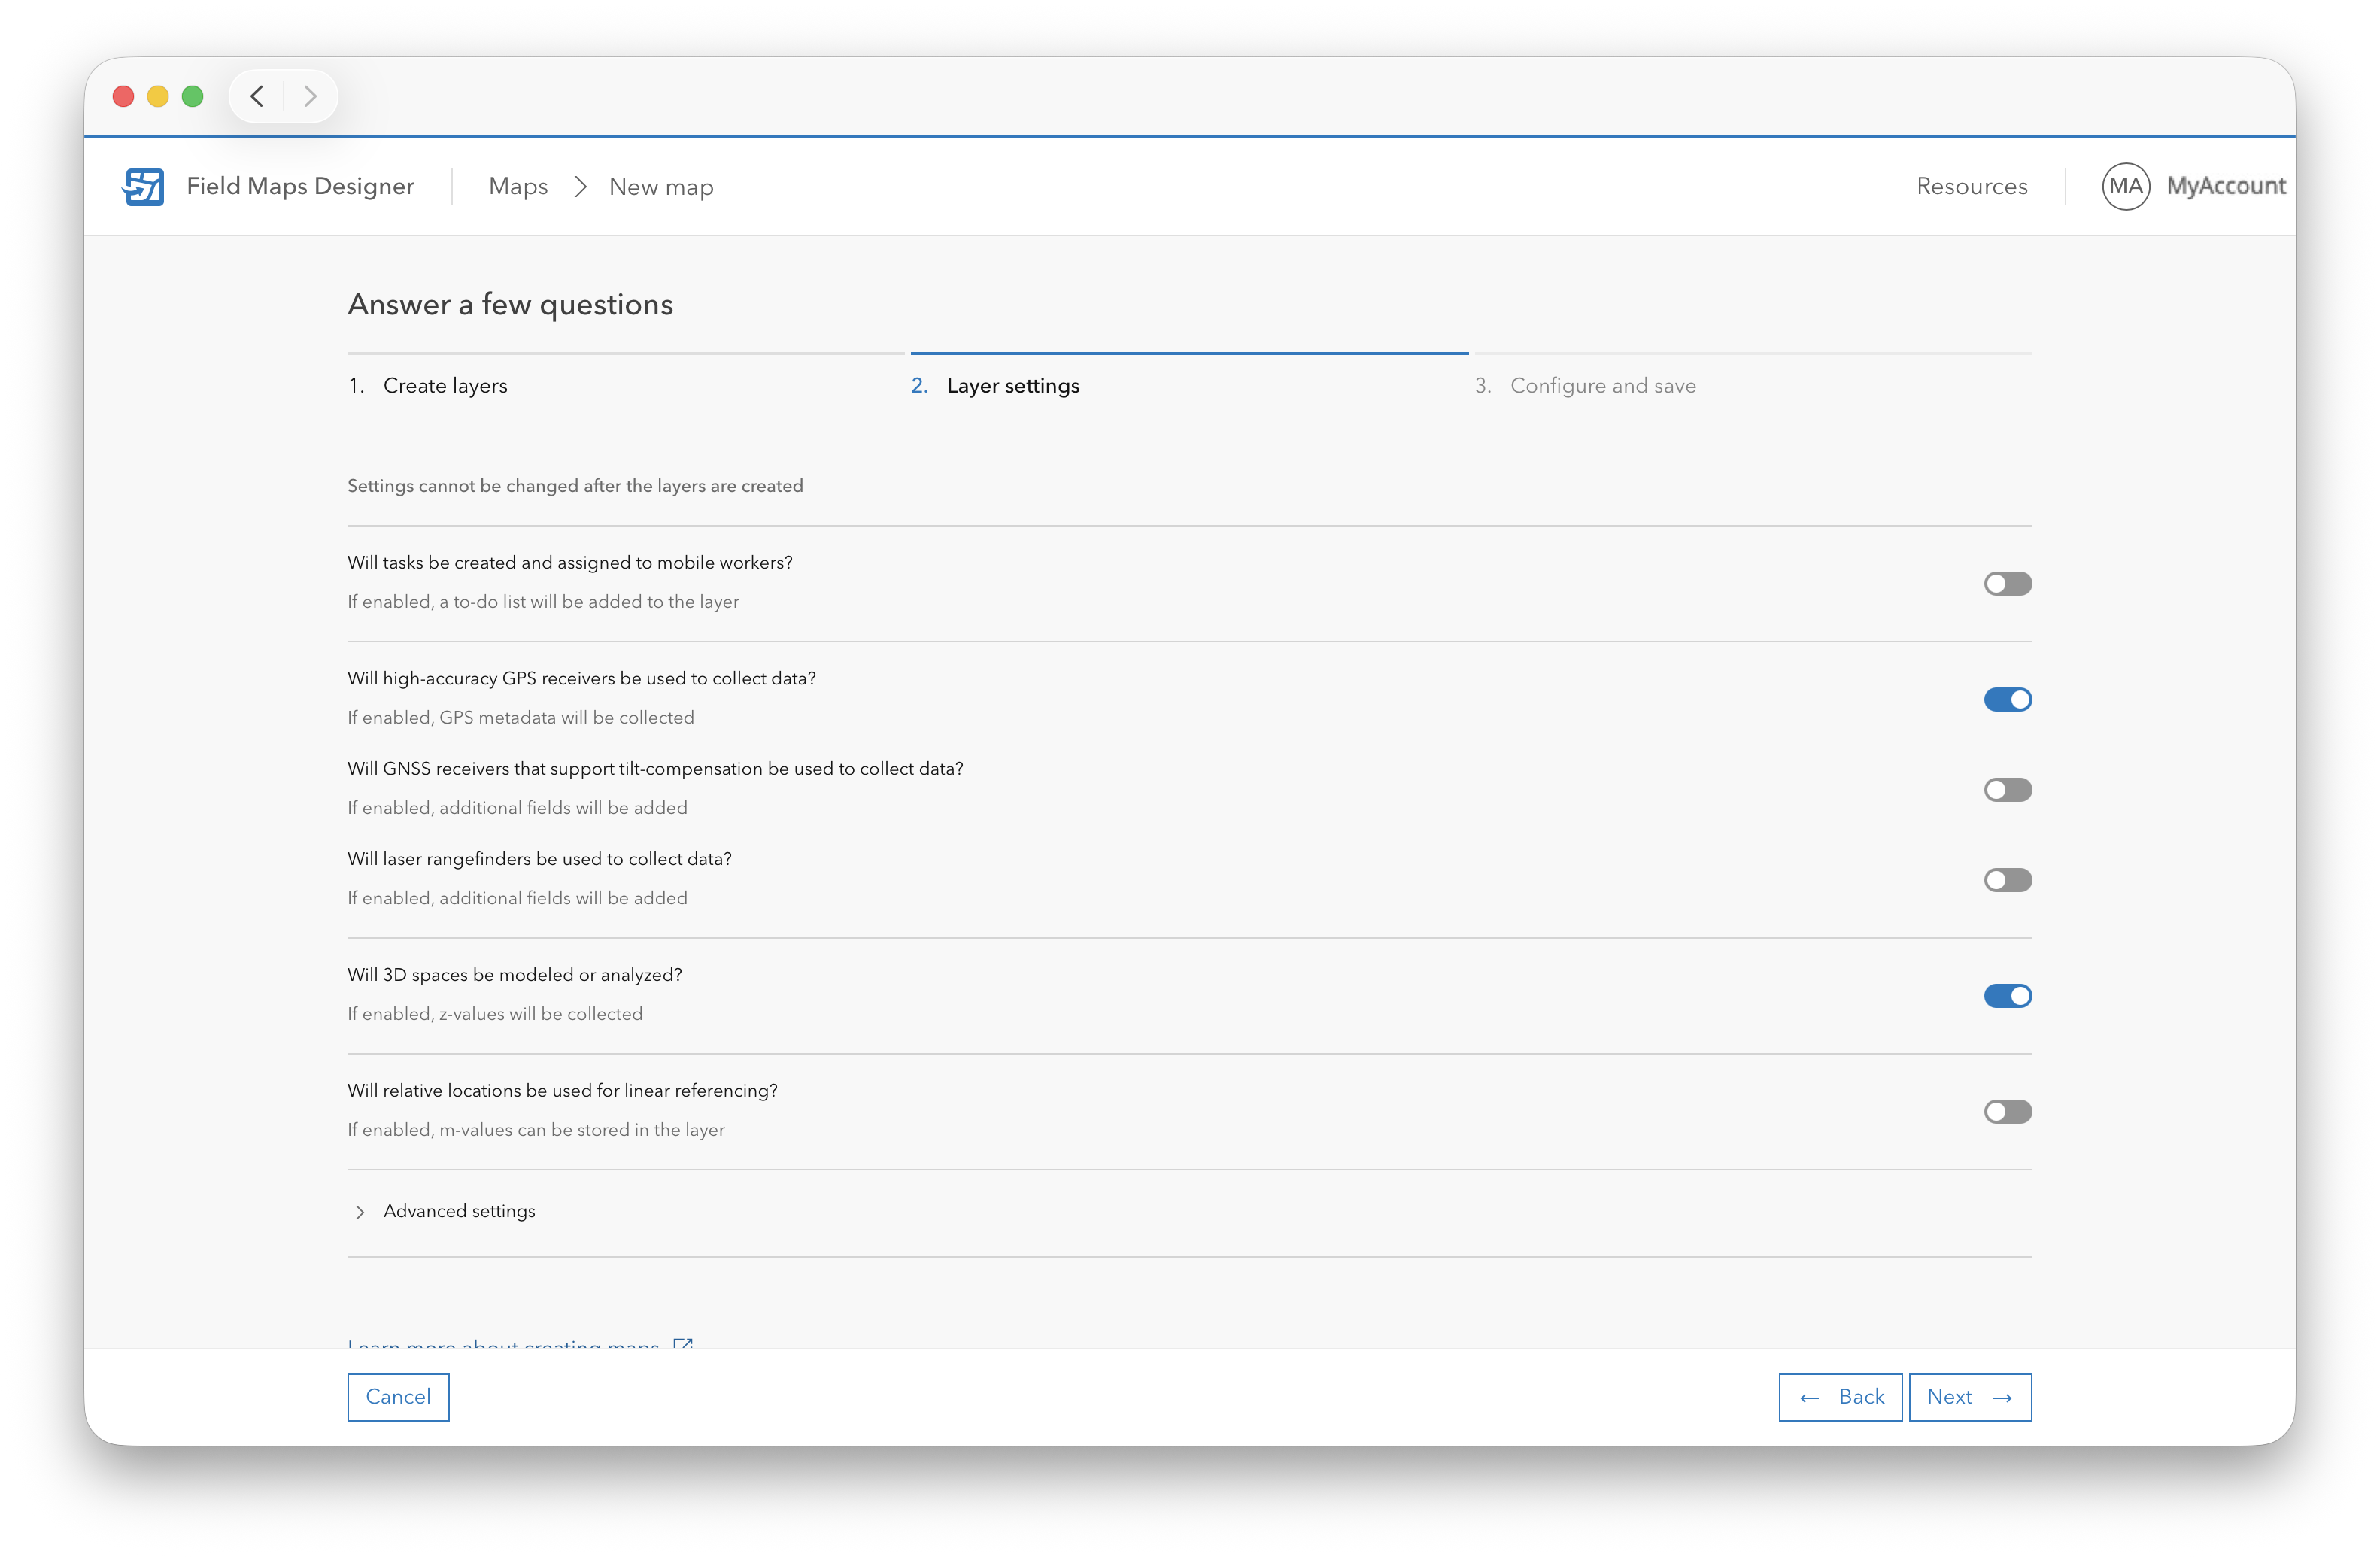
-
Open Advanced settings to configure the coordinate system for the project.
You can:
- Use the same coordinate system as the basemap.
- Select a different projected coordinate system appropriate for your region.
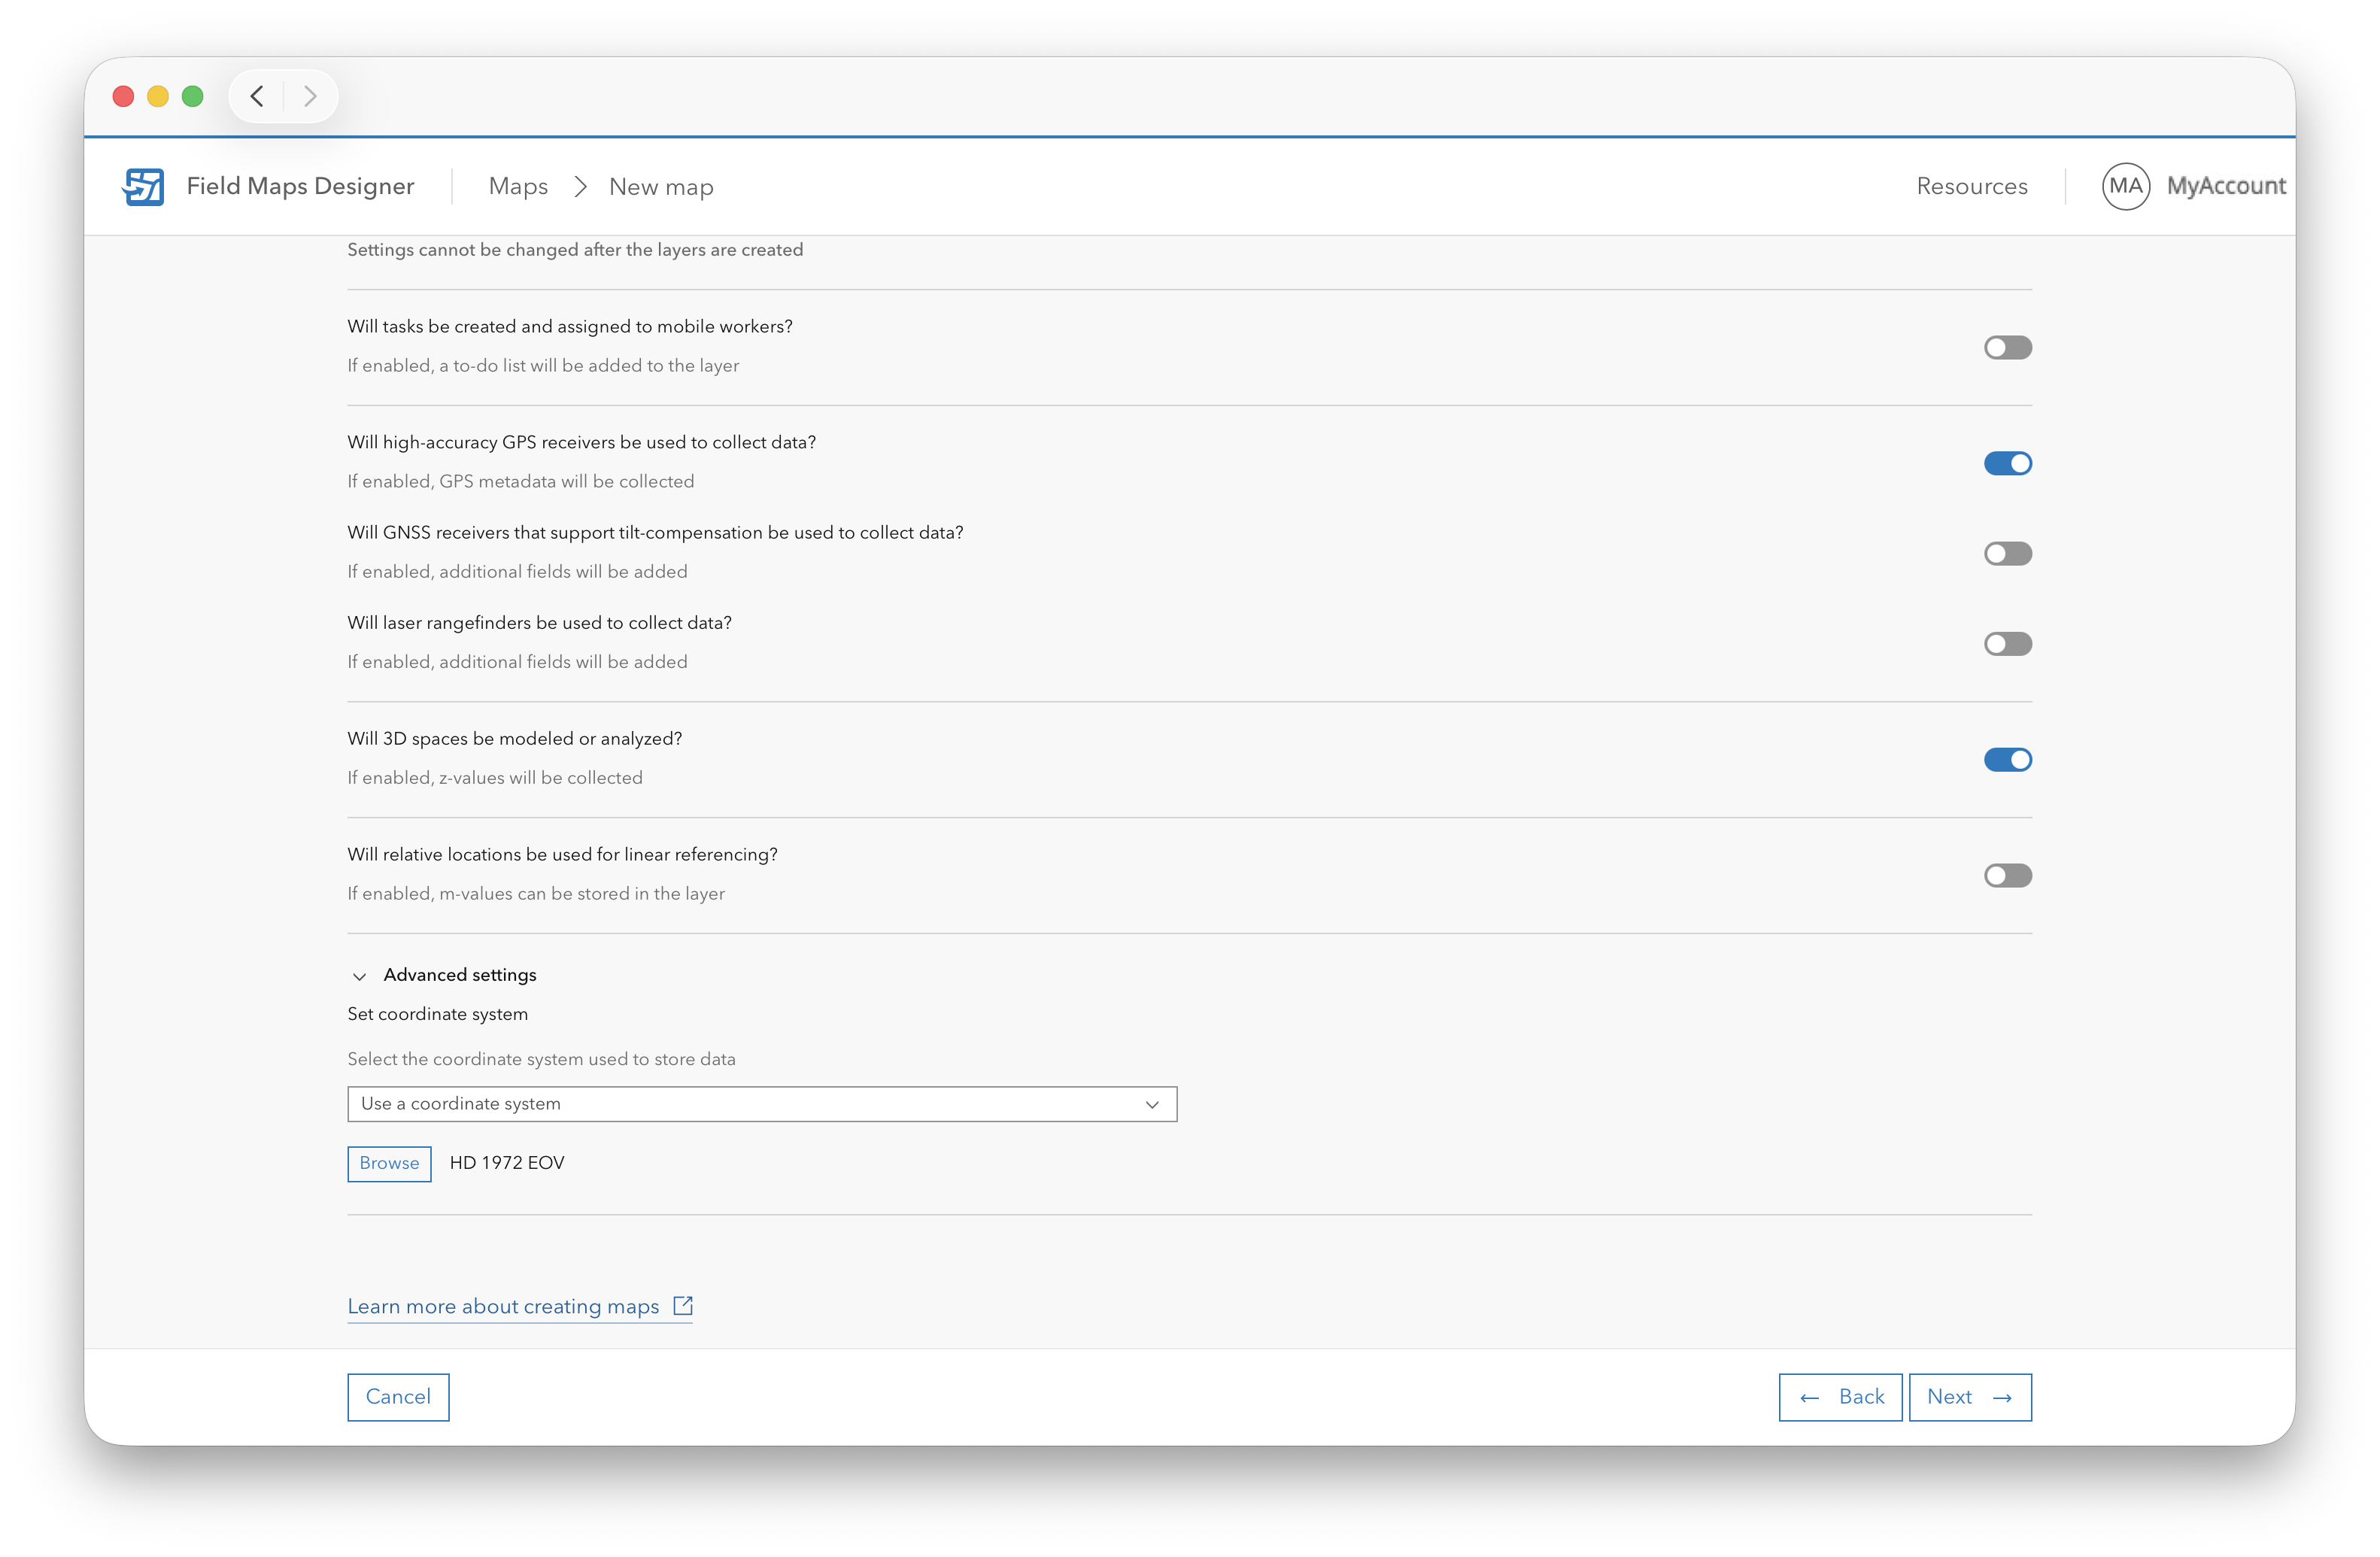
Make sure the selected coordinate system matches the region and survey requirements of your project.
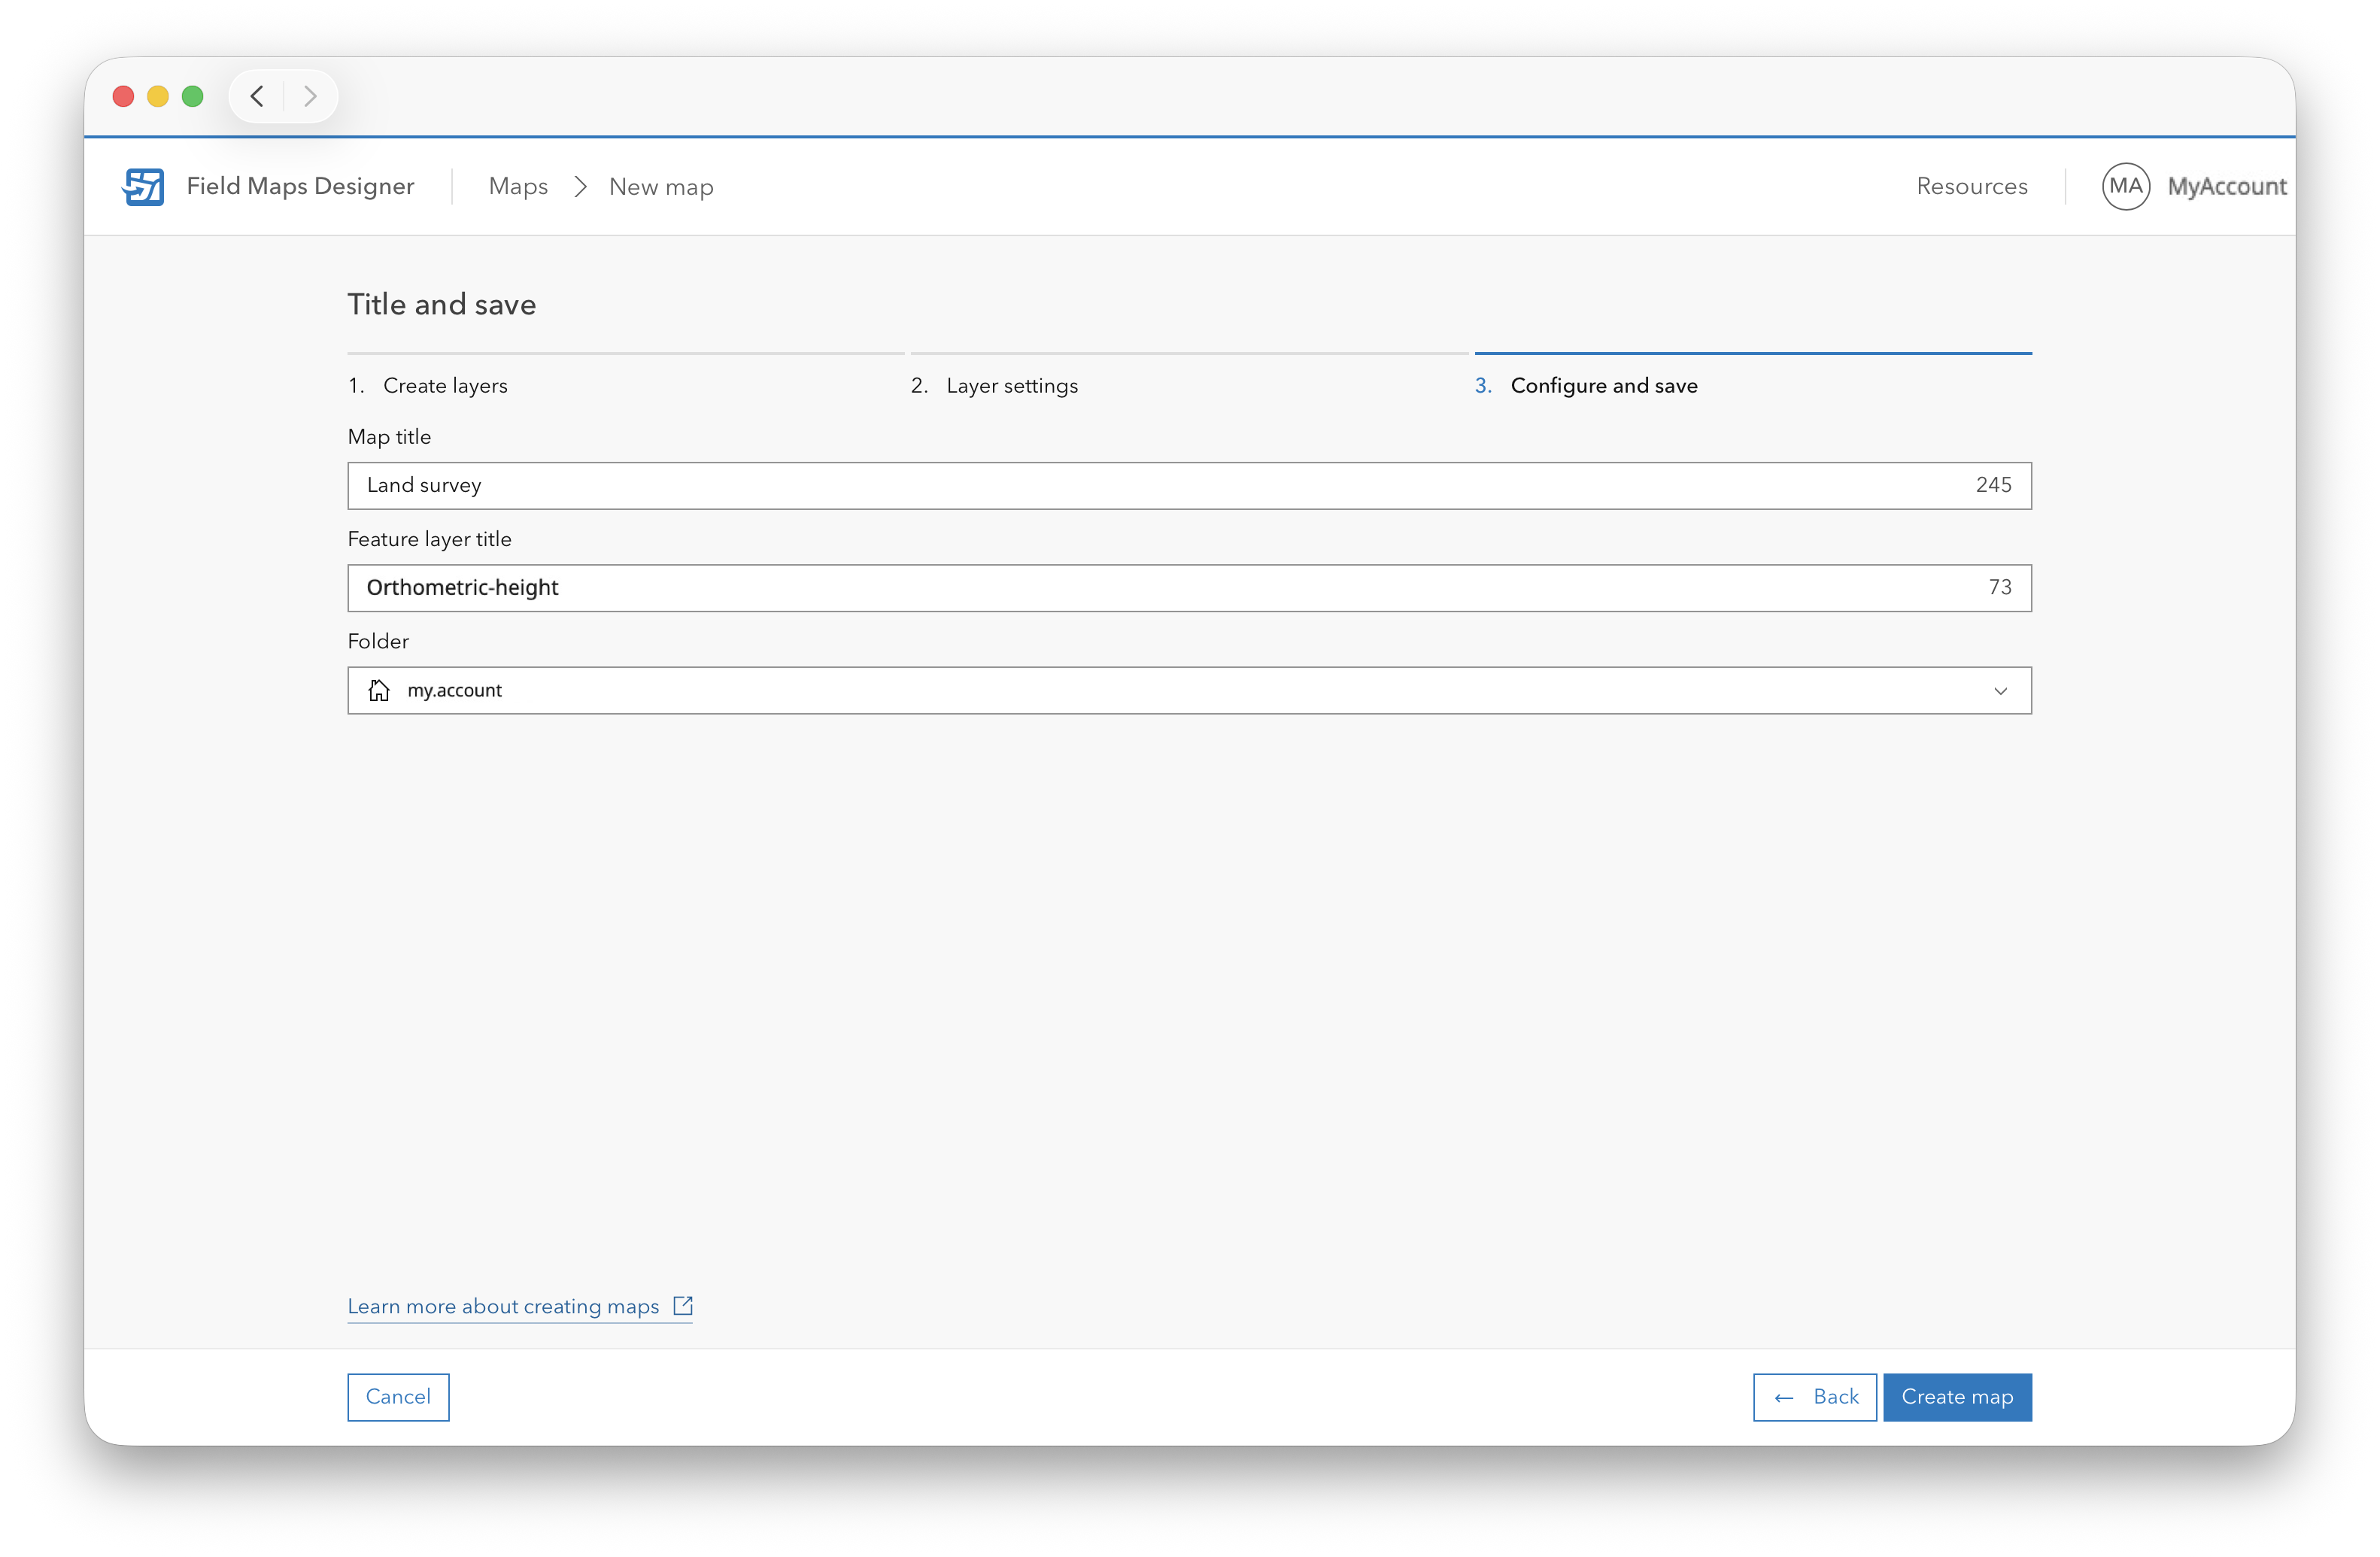
-
Enter the map title and layer title, select the folder where you want to place it, and click Create map.
-
Once the map is created, open the Forms section.
-
Select the feature layer you created and add the Number→Double field. A double-precision field is required because orthometric heights contain decimal values and survey-grade workflows require centimeter-level accuracy.
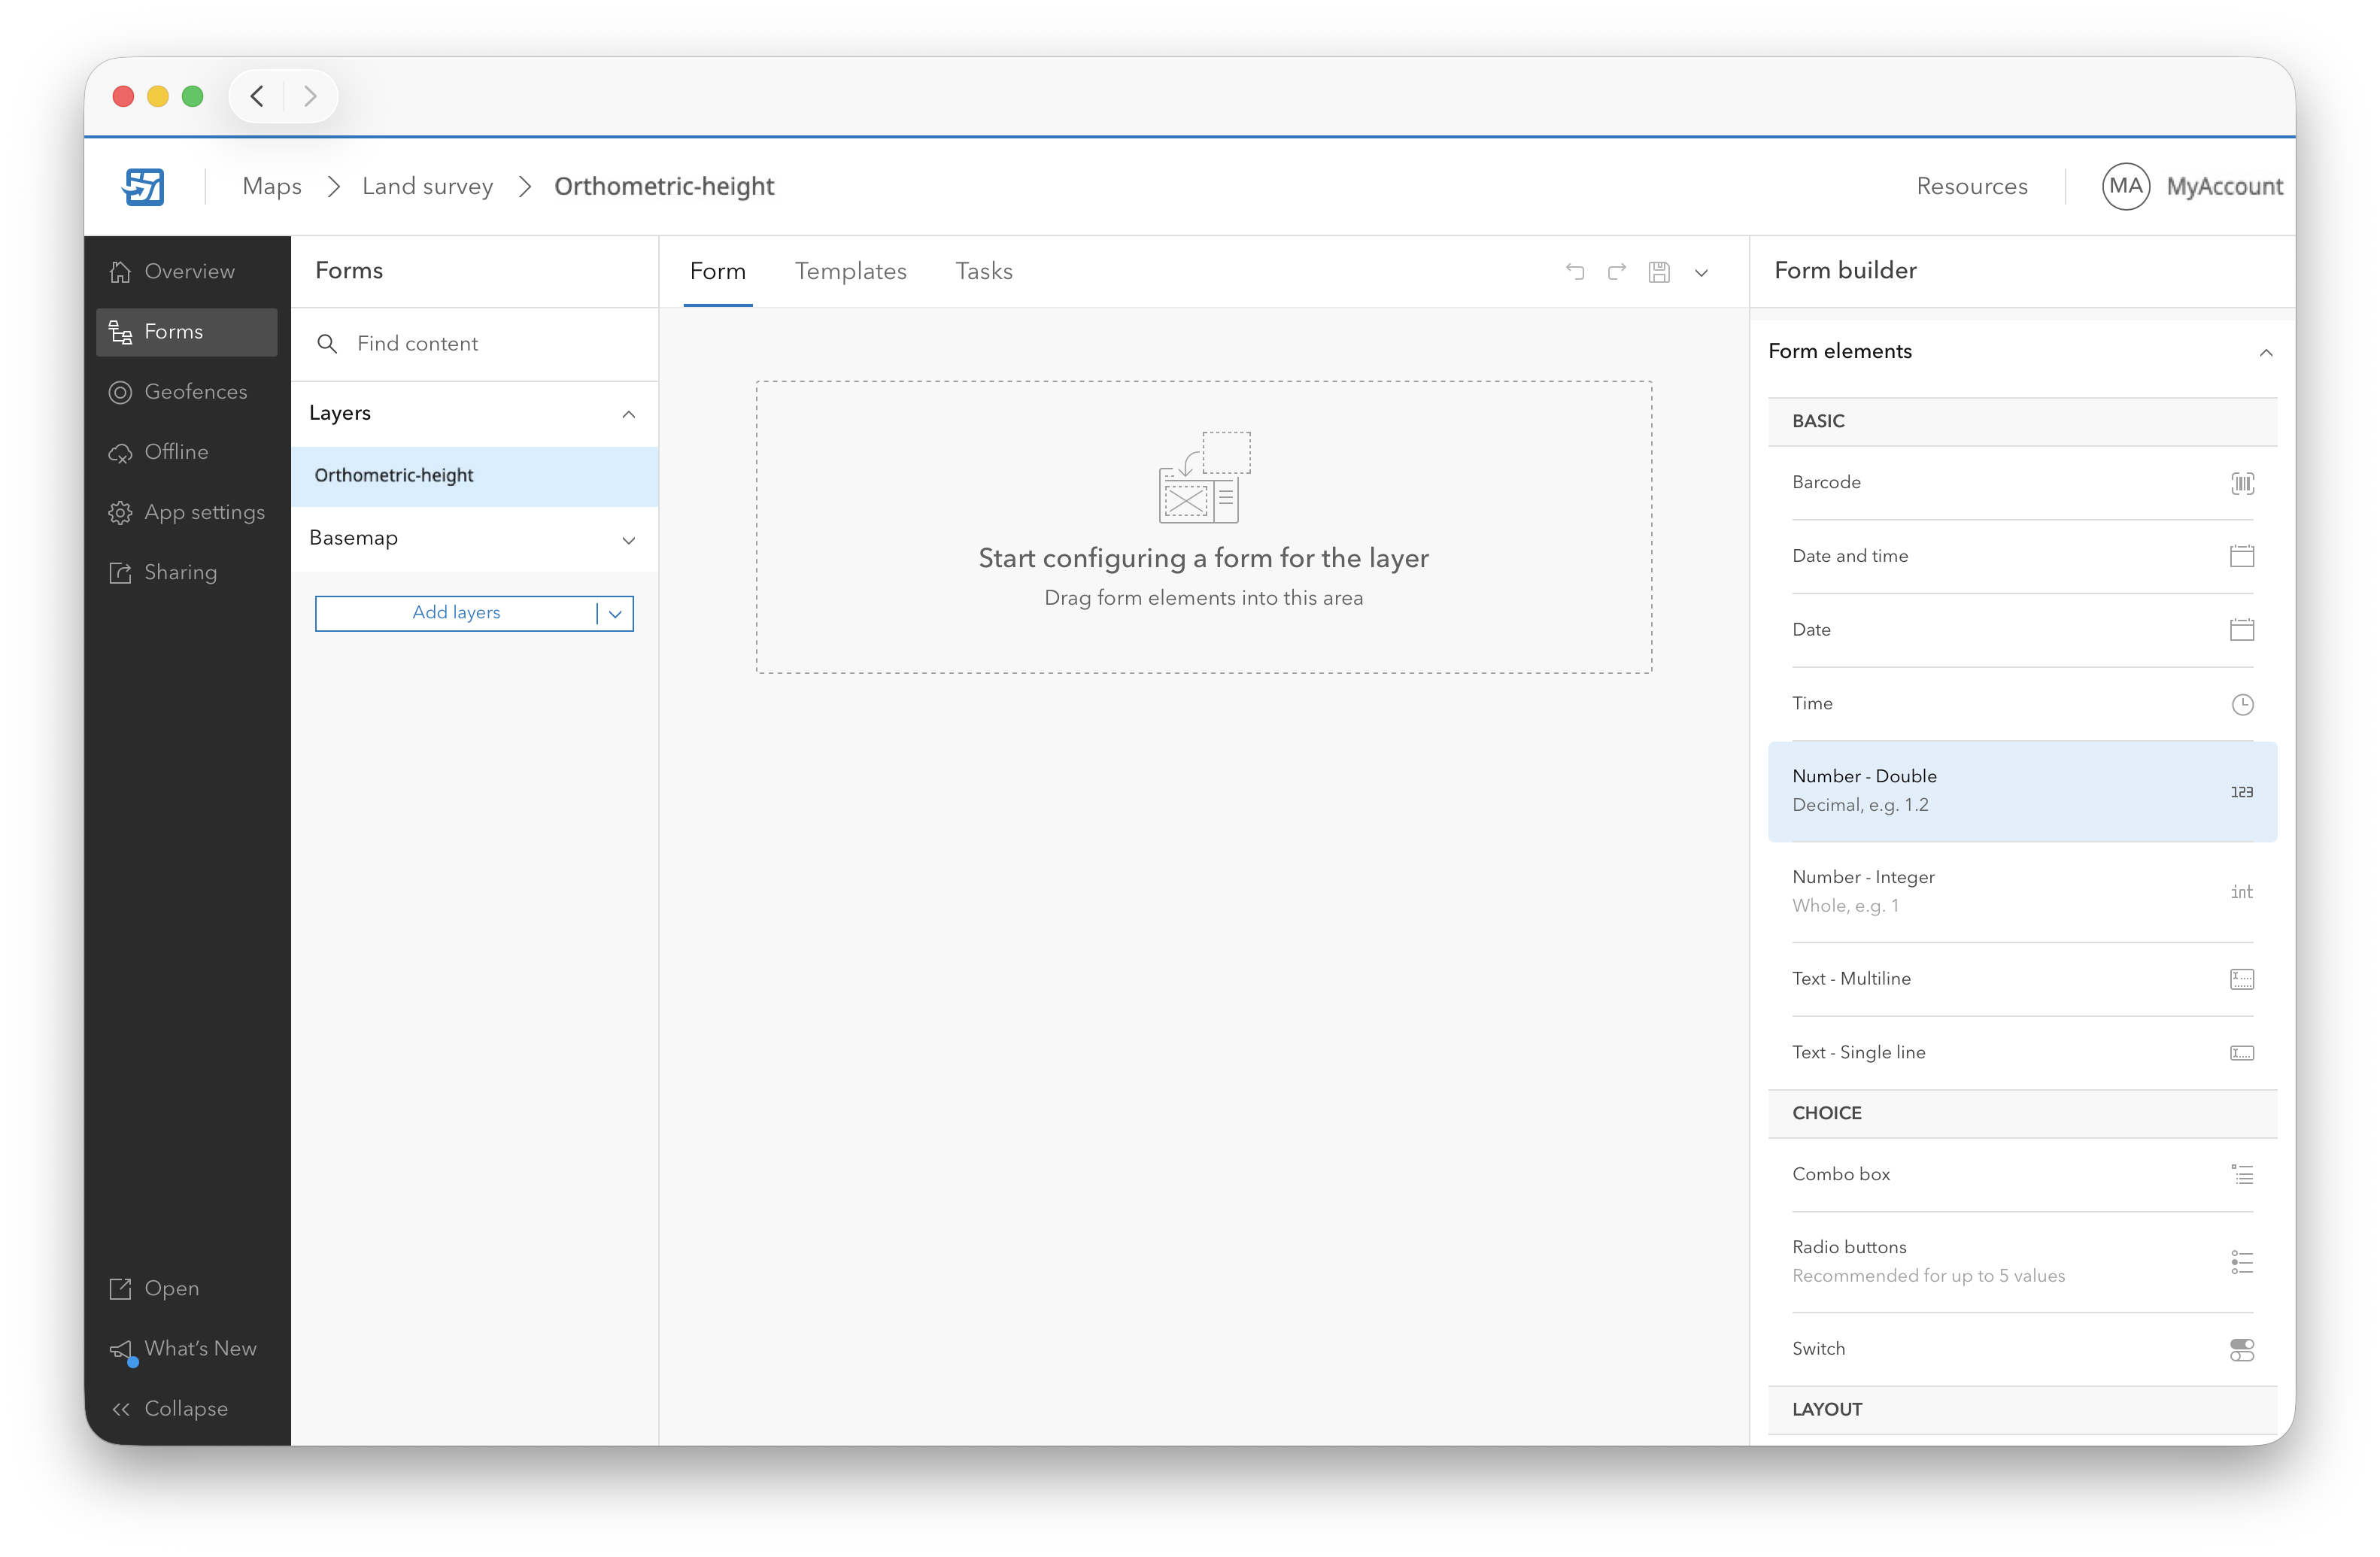
-
Enter a display and a field name.

-
Save the field configuration using the save icon.
-
In the right-hand panel, scroll to Calculated expression.
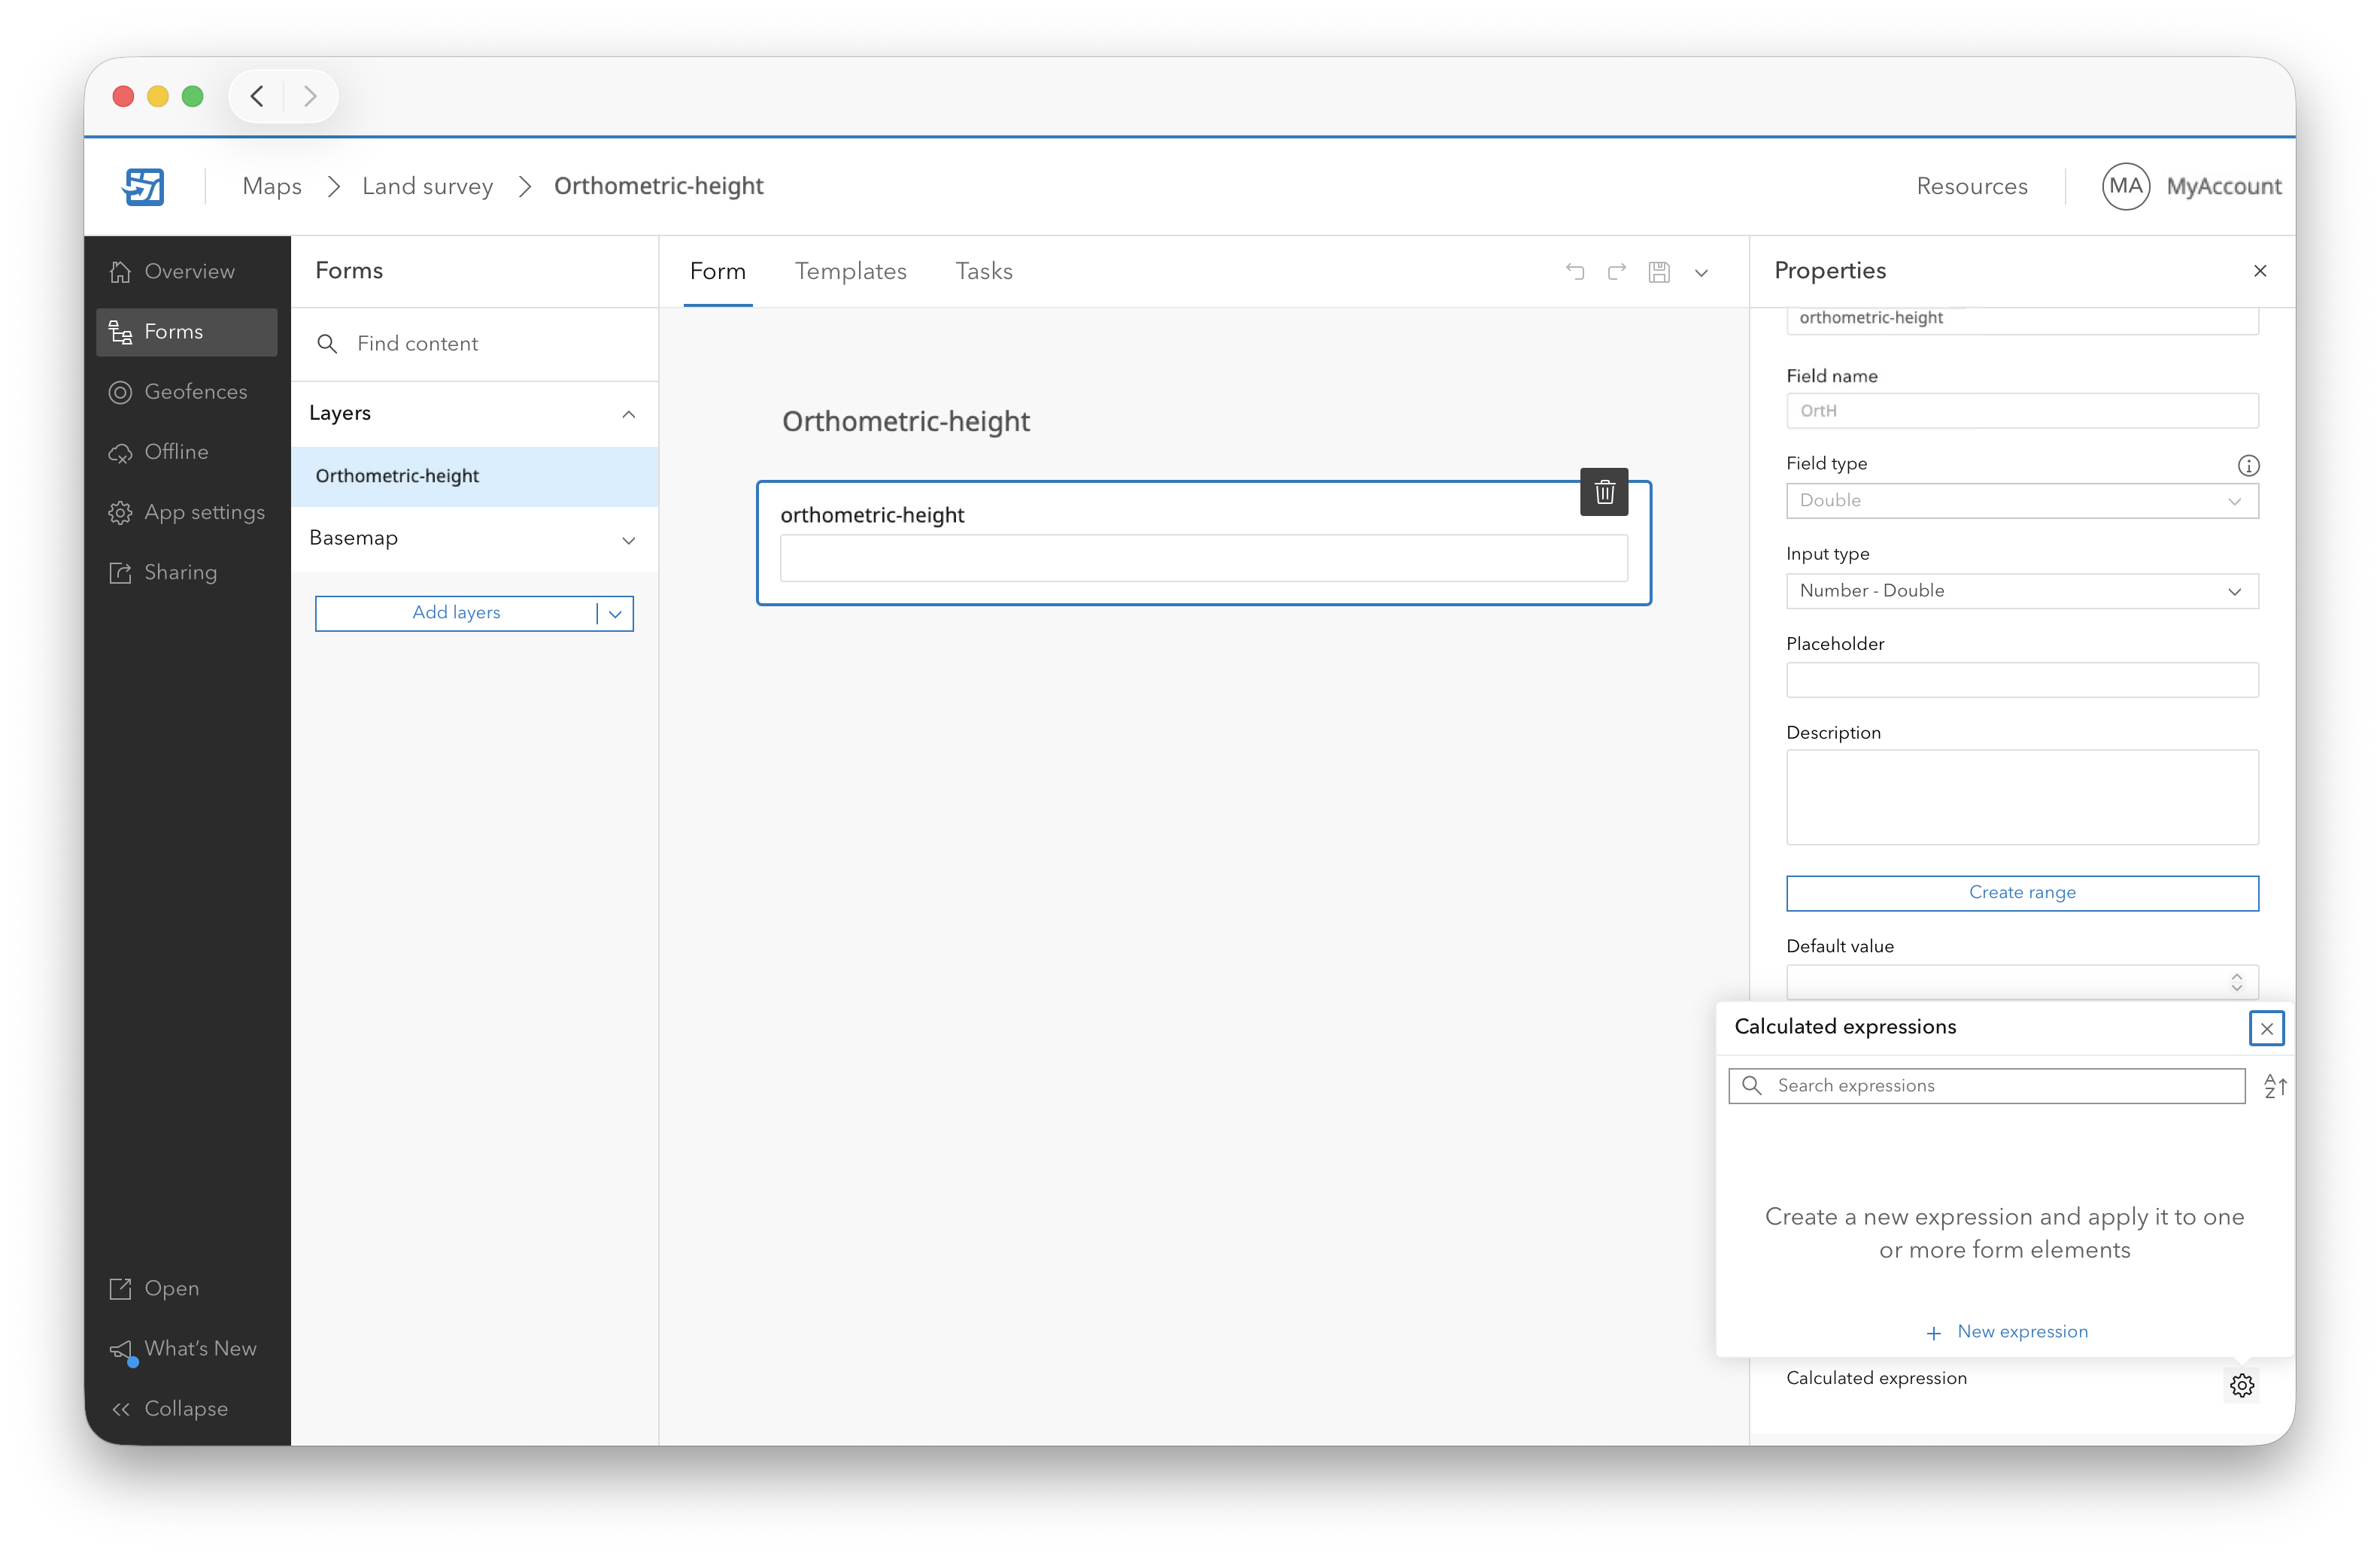
-
Click the gear icon and select New expression.
-
Add the following Arcade expression to extract the Z-value from the feature geometry and use it as the orthometric height value:
var geom = Geometry($feature)

if (IsEmpty(geom)) {
    return null
} else {
    return geom.Z
}
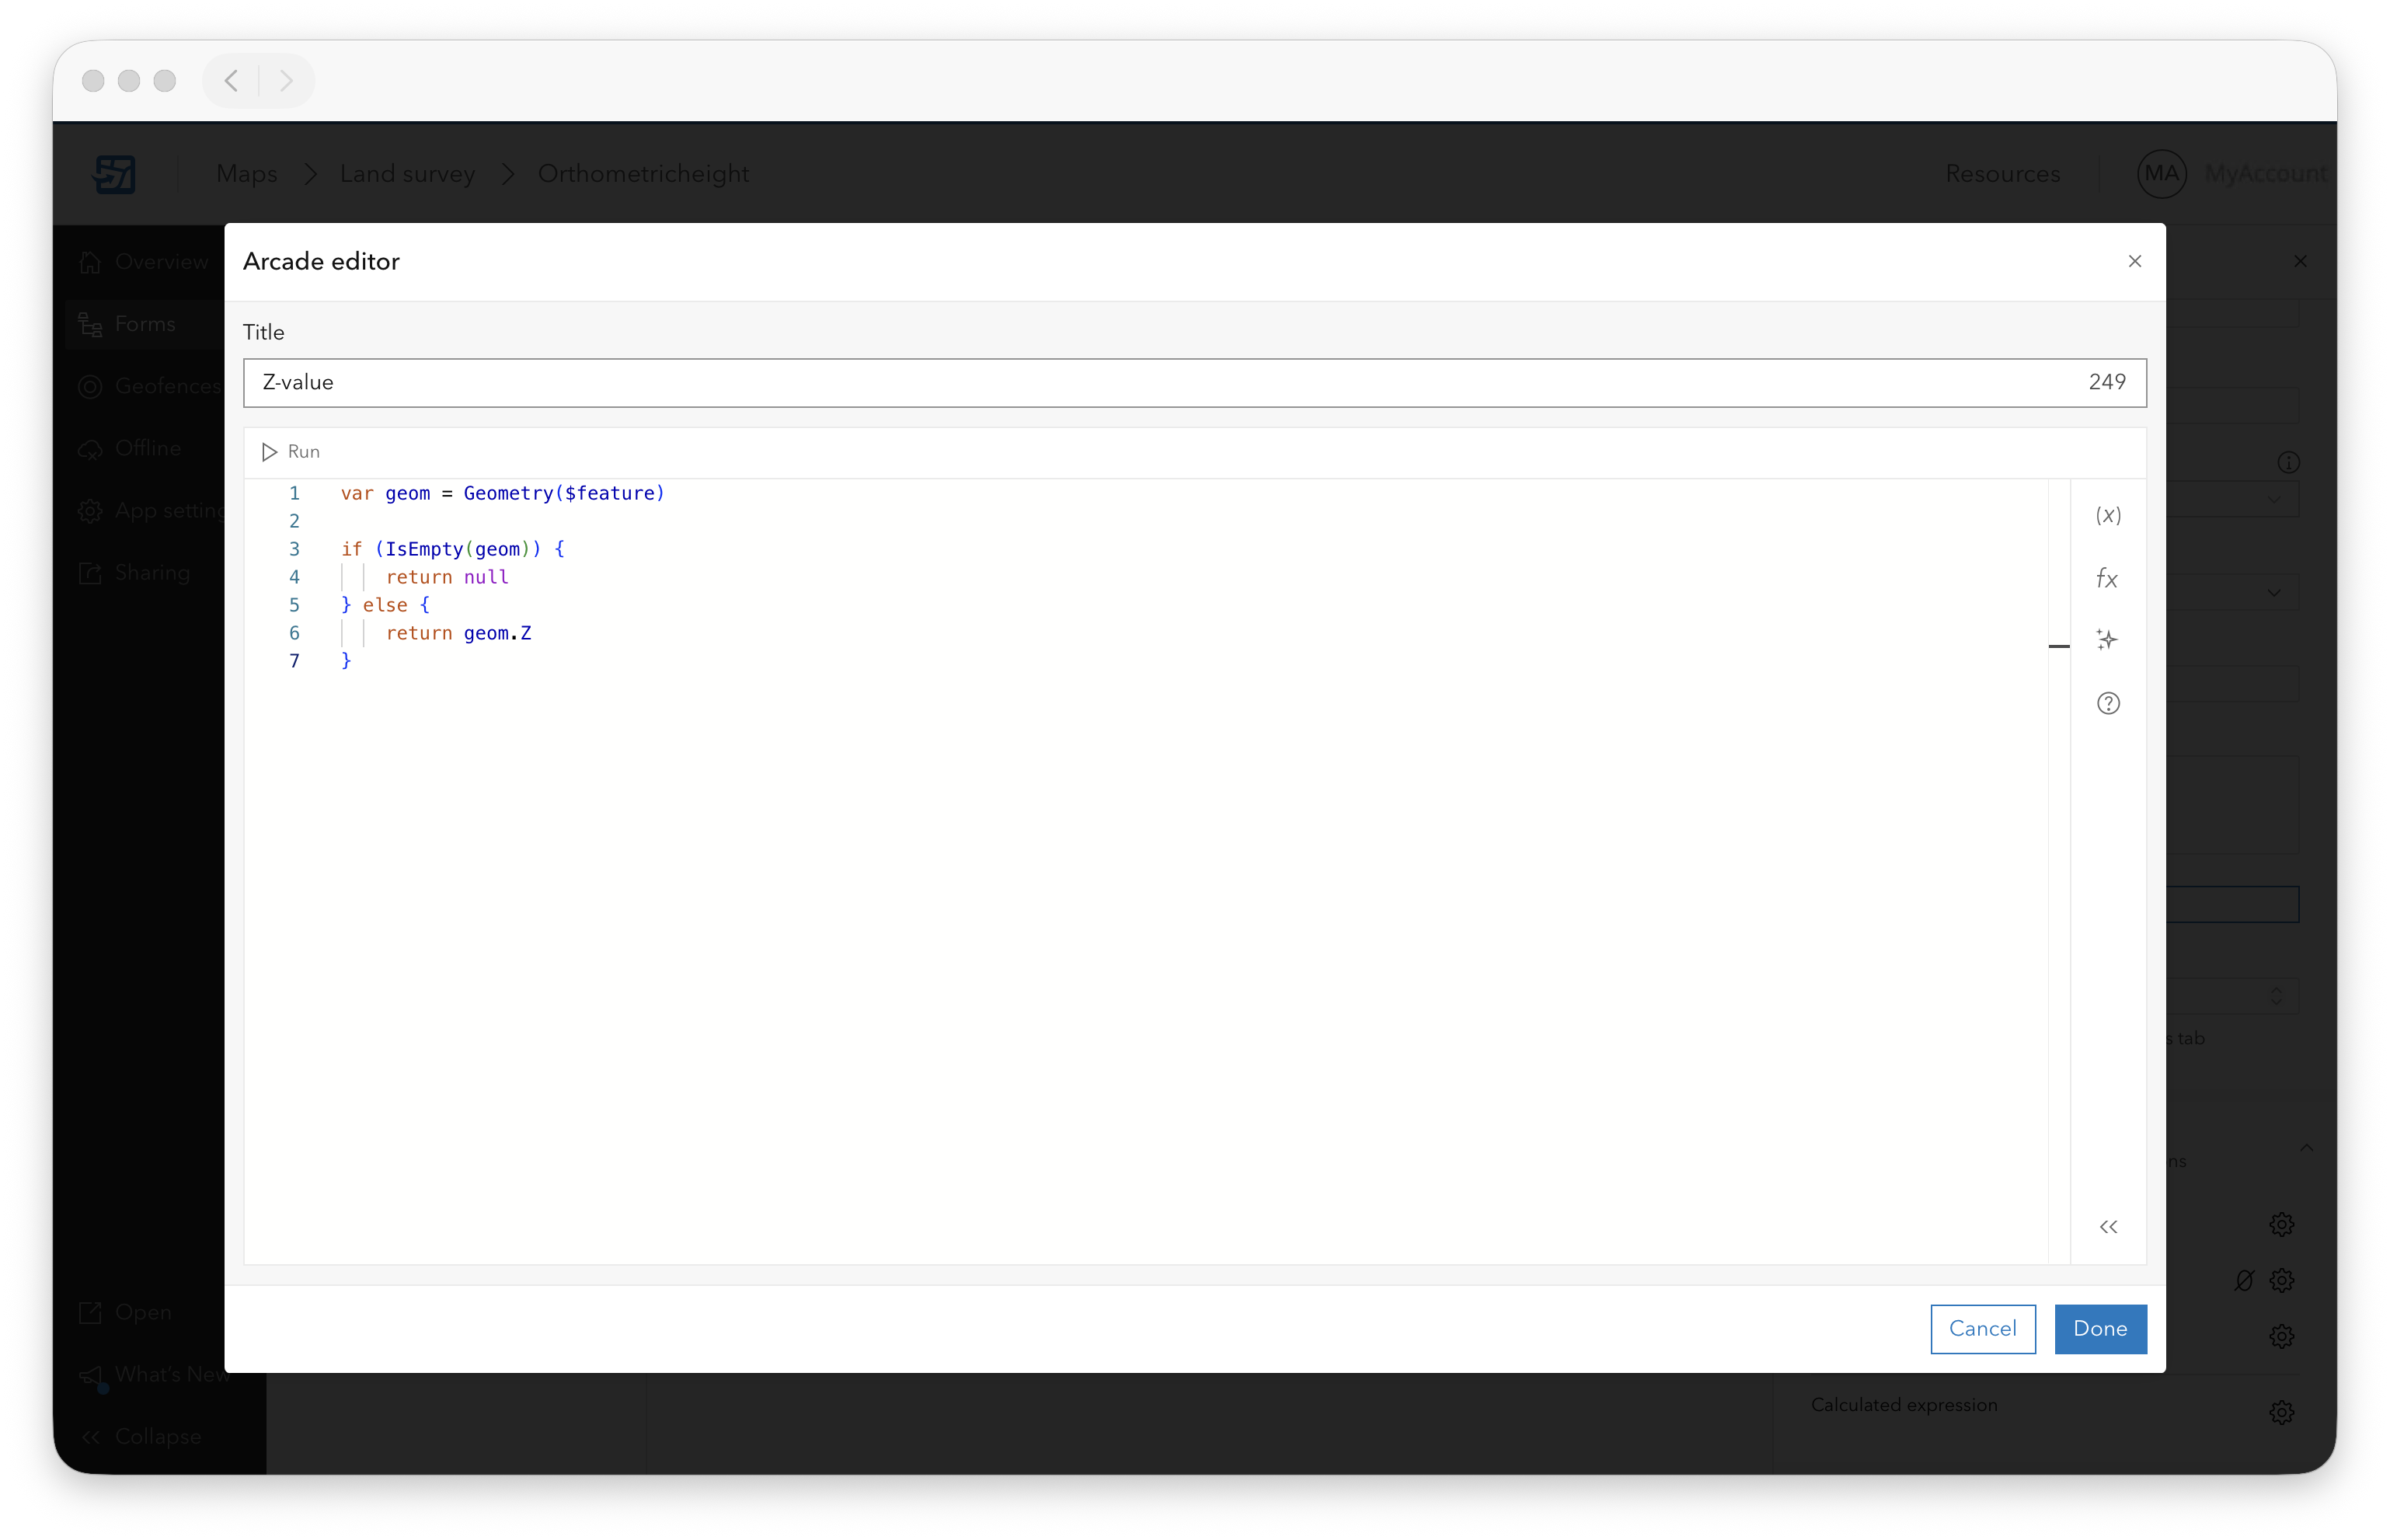
-
Click Done.
-
Save the form configuration again using the save icon.
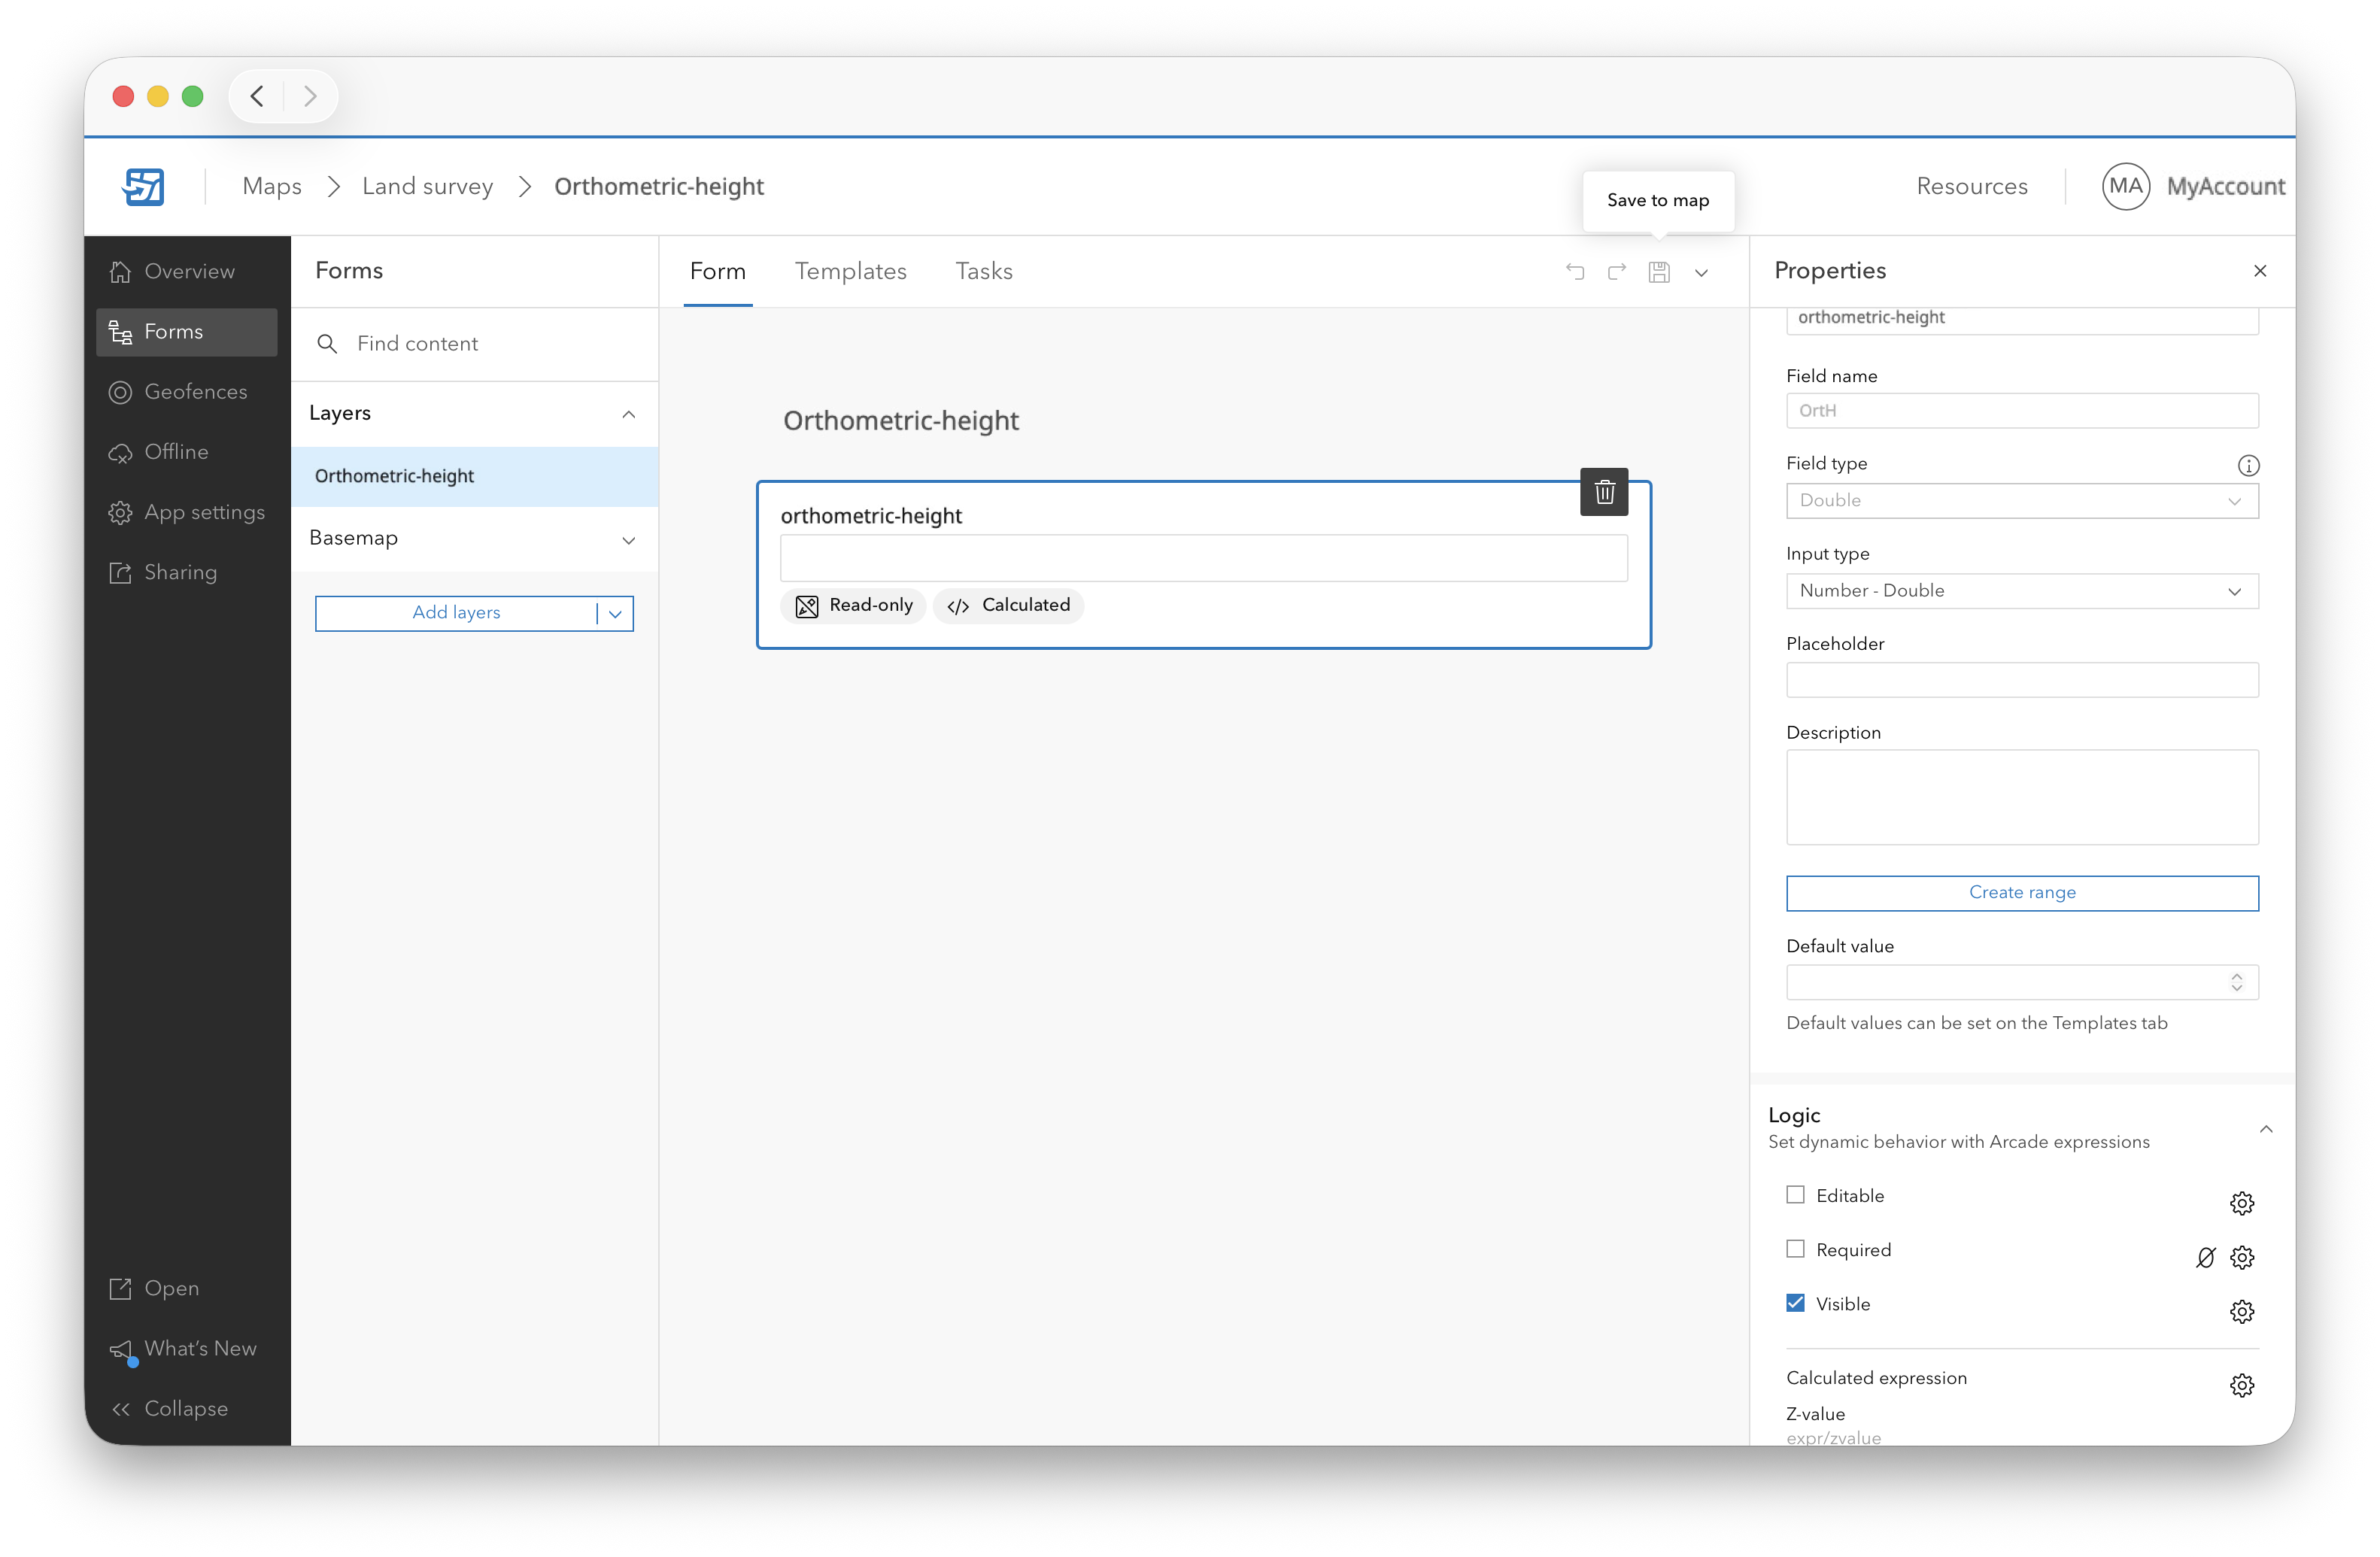
You can now return to your web map in ArcGIS Field Maps on your mobile device with the feature layer applied. When used with the Reach RX2 receiver, ArcGIS Field Maps will display orthometric heights for the collected objects.