Work with polygons
Unlock the full set of features for topo, set-out, and as-built surveys
This guide explains how to collect, create, and edit polygons in Emlid Flow.
Overview
Emlid Flow allows you to collect polygons on the go and create ones from previously collected points and lines made up of a minimum of three points to define precise boundaries for land parcels, properties, and other areas and calculate their surface area and perimeter.
You can also import and export polygons in various formats, including DXF, SHP, KML, and CSV, to integrate with third-party software.
Collect polygons
To collect a polygon, do the following:
-
Start collecting a line.
tipTo learn more about collecting a line in Emlid Flow, check the Collect line guide.

-
Collect at least three points of a line.
-
Open Menu and select Close. The line will form a polygon.


-
Tap the resulting polygon on the map and swipe up the drawer to learn more about the polygon:
 tip
tipTo convert a polygon to a simple line, tap Menu, select to edit it and uncheck the Closed line box.
You can now continue collecting another lines or polygons.
If your polygons share a side, make sure to collect two separate sets of points for each polygon. Otherwise, you won't be able to create two distinct polygons.
Stake out polygons
Polygons are closed lines, and the stakeout process is the same as for lines. Learn more about staking out lines and line stakeout modes in the Stake out lines guide. This guide shows the polygon stakeout process using the Along line stakeout mode.
To stake out a polygon, do the following:
-
Select the polygon you want to stake out from the list of objects or on the map. The selected polygon will be highlighted in blue on the map.

-
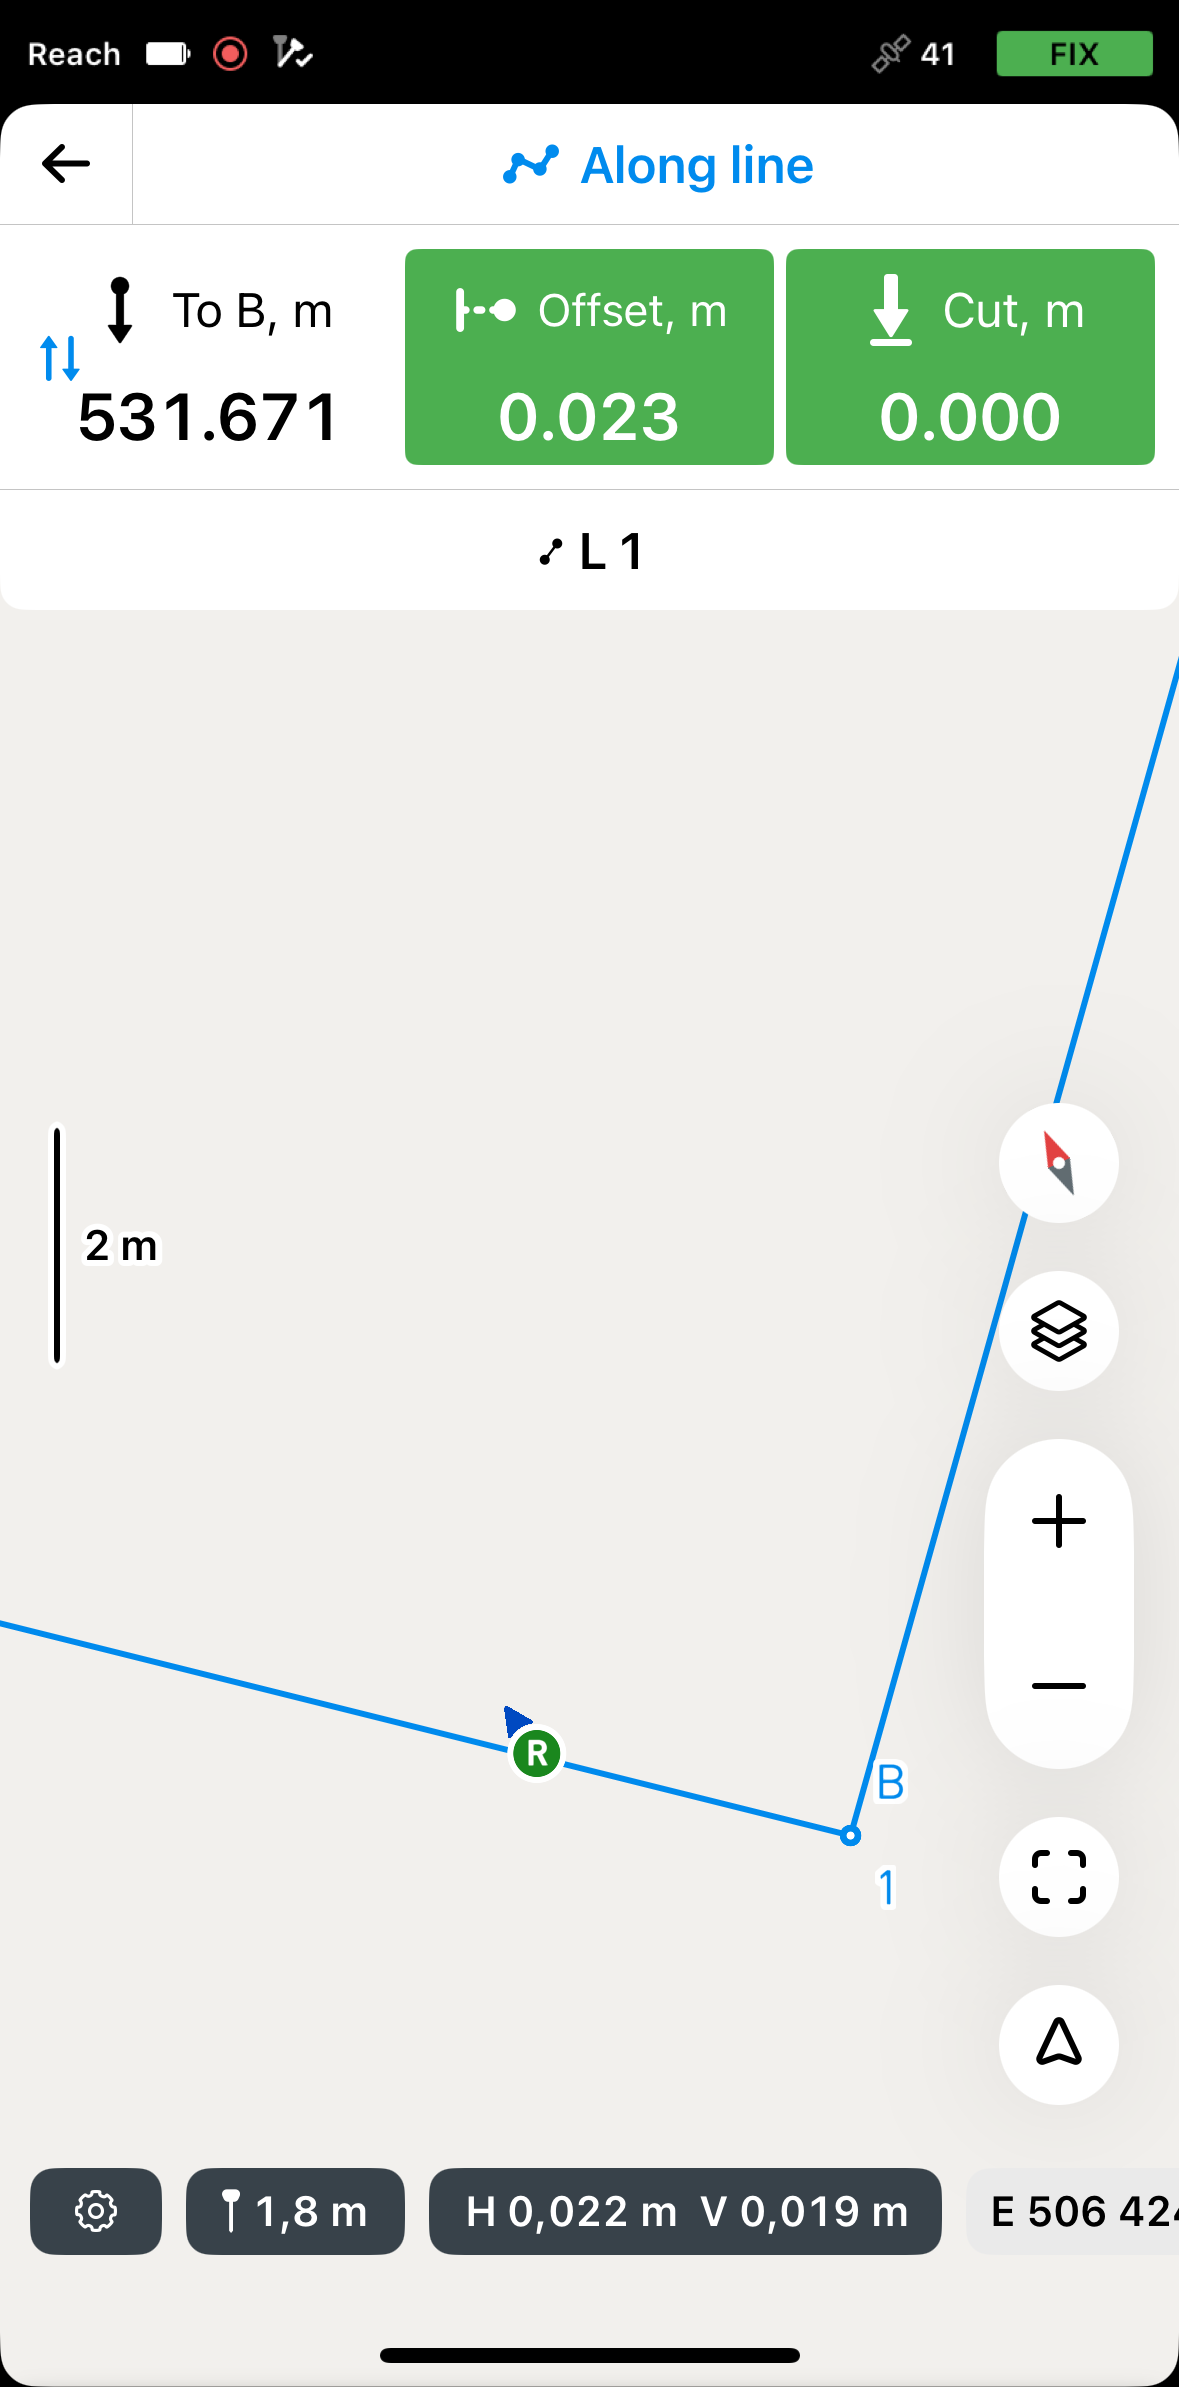
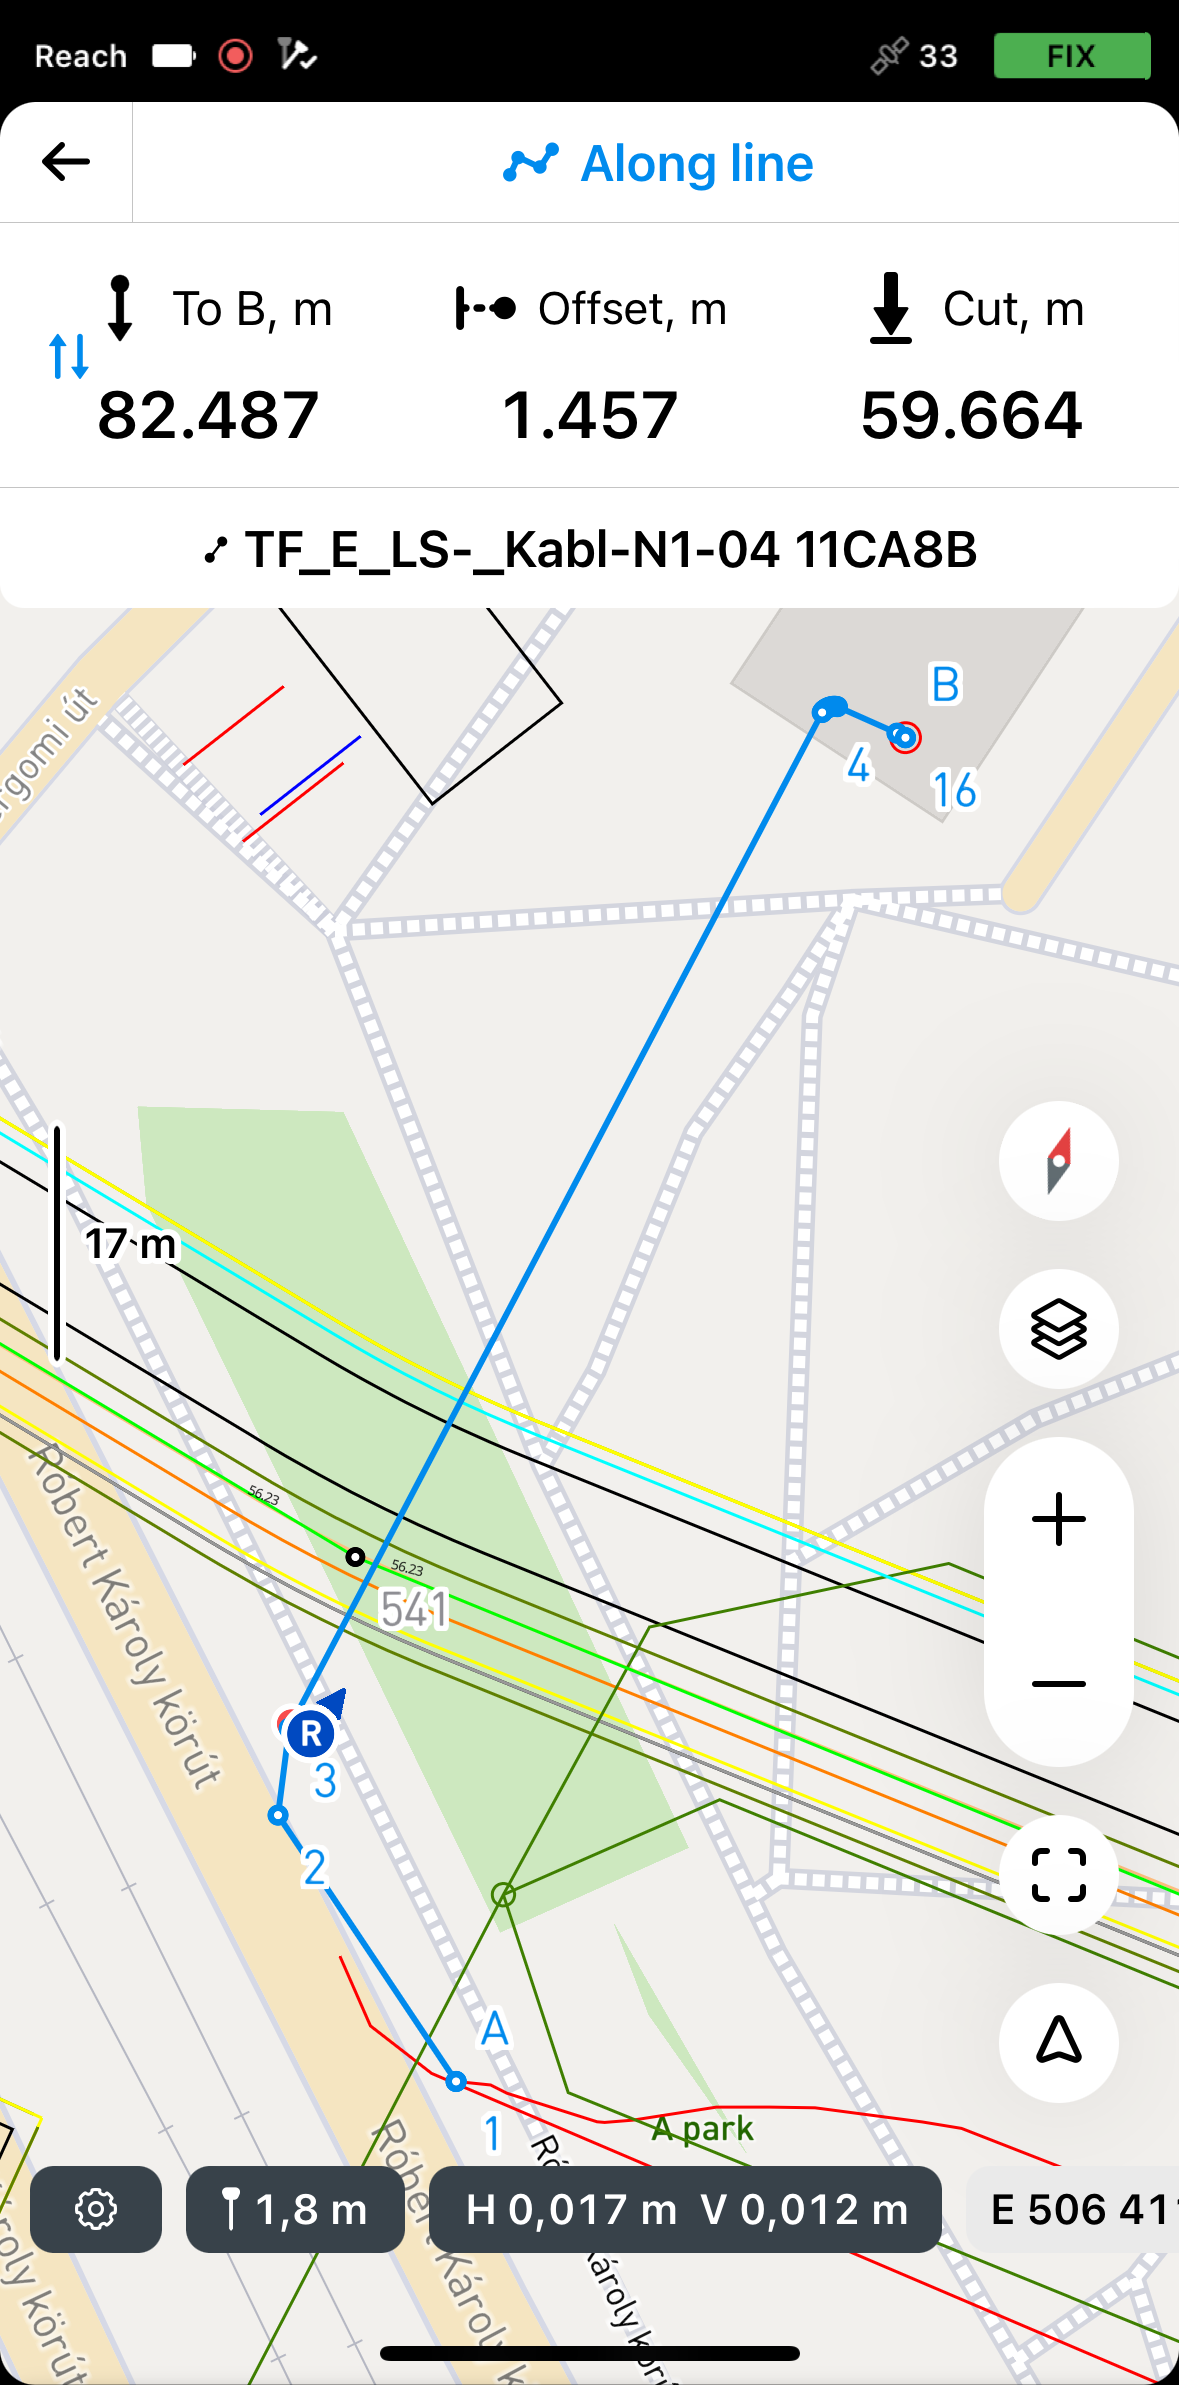
Tap the Stake out button. The Along line mode is applied by default.
tipTo change the stakeout mode, tap the stakeout plate and choose the one you need.

-
Tap the To B section to choose the end of the line from which the stakeout will begin.
Now, you can stake out right over the line or stake out with the offset:
Staking out over line
To stake out over the line, do the following:
-
Move your Reach so that the Offset section turns green, showing that your Reach is less than 2.5 cm (0.08 ft) away from the polygon you are staking out.
 note
noteEnsure the pole isn't tilted if you use a Reach receiver model other than Reach RS3.
-
Watching the Offset section, check if the polygon is set out according to the project.
tipYou can also stake out a line with a chainage watching the To A or To B section.
-
Watching the Cut & Fill section, check the height value, if necessary.
-
To finish staking out the polygon, tap the back button on the Stakeout plate.
Staking out with offset from reference polygon
-
Position your Reach at the required distance from the line.
 tip
tipThe offset plate section turns green when your Reach is less than 2.5 cm (0.08 ft) away from the line you are staking out.
-
Watching the Offset plate, continue staking out the line.
-
Watching the Cut & Fill section, check the height value, if necessary.
Once you've finished staking out the polygon, you can either tap another geometry on the map to start a new stakeout or tap the back button to exit the Line stakeout tool.
Create polygons from points
You can create polygons from existing points, do as follows:
-
In the list of objects in Emlid Flow, tap the Plus button to add line or polygon.


-
Select at least 3 points on the map or from the list.


-
Check the Closed line checkbox to create a polygon.
tipYou can also create a polygon by tapping the first point of the line.

If you create several polygons and some of them share a side, make sure to use two separate sets of points for each polygon. Otherwise, you won’t be able to create two distinct polygons.
Edit polygons
To edit the polygon, do as follows:
-
Select the polygon on the map or from the list of objects and tap Menu.

-
Select to edit the polygon:
-
Uncheck the Closed line box if you want to convert it to a line.
-
Add or delete points by selecting them from the list or on the map.
 note
noteIf after deletion less than three points are left, the polygon will automatically turn into line.
tipLearn more about editing options in the Edit lines guide.
-