Set up custom coordinate system
We recommend setting up the projects indoors before the survey as some
Coordinate system is a coordinate-based local, regional or global system used to locate geographical entities. A spatial reference system defines a specific map projection, as well as transformations between different spatial reference systems.
This guide describes how to set up a custom
Coordinate system is a coordinate-based local, regional or global system used to locate geographical entities. A spatial reference system defines a specific map projection, as well as transformations between different spatial reference systems.
Overview
You can only configure the
Coordinate system is a coordinate-based local, regional or global system used to locate geographical entities. A spatial reference system defines a specific map projection, as well as transformations between different spatial reference systems.
To configure the custom
Coordinate system is a coordinate-based local, regional or global system used to locate geographical entities. A spatial reference system defines a specific map projection, as well as transformations between different spatial reference systems.
- Ellipsoid your datum is based on
- Projection type and its parameters
- Transformation type and its parameters
- Geoid model
Since not every group of parameters is required for a coordinate system configuration, you may omit some of them and only use the parameters that you have for your projection.
- If the projection is based on the same datum as the base, skip the transformation step.
- If you decide to work with ellipsoidal height, don’t select the geoid model.
On some Android devices, default keyboards do not provide a minus sign. To get access to it, we recommend downloading Gboard, a virtual keyboard app, from the Google Play Store.
To show you all the steps, we will walk you through the example of transformation from the GDA2020 datum to GDA94, performing MGA zone 51 projection, and applying the AUSgeoid2020 geoid model to the GDA2020 datum.
Workflow
Creating custom CS
- Emlid Flow
- Emlid Flow 360
When picking a coordinate system for your project, follow the steps below:
-
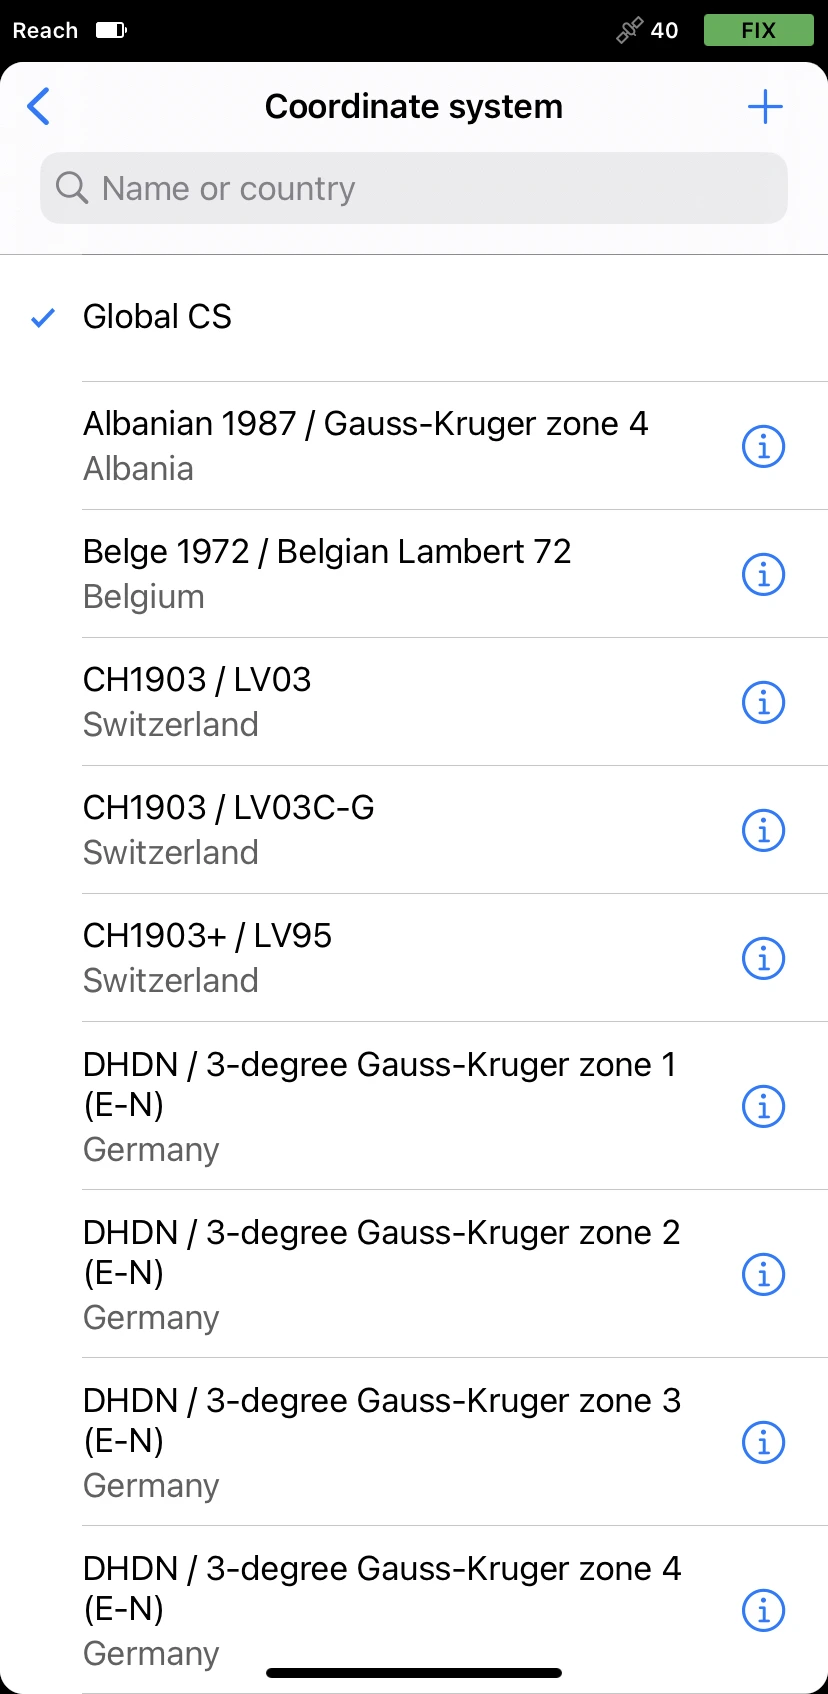
Tap the Coordinate system section.
-
To create a custom coordinate system, tap the Plus button in the top right corner.
-
Enter the name of your custom coordinate system. Using this name, you will be able to find it in the list of coordinate systems later on.
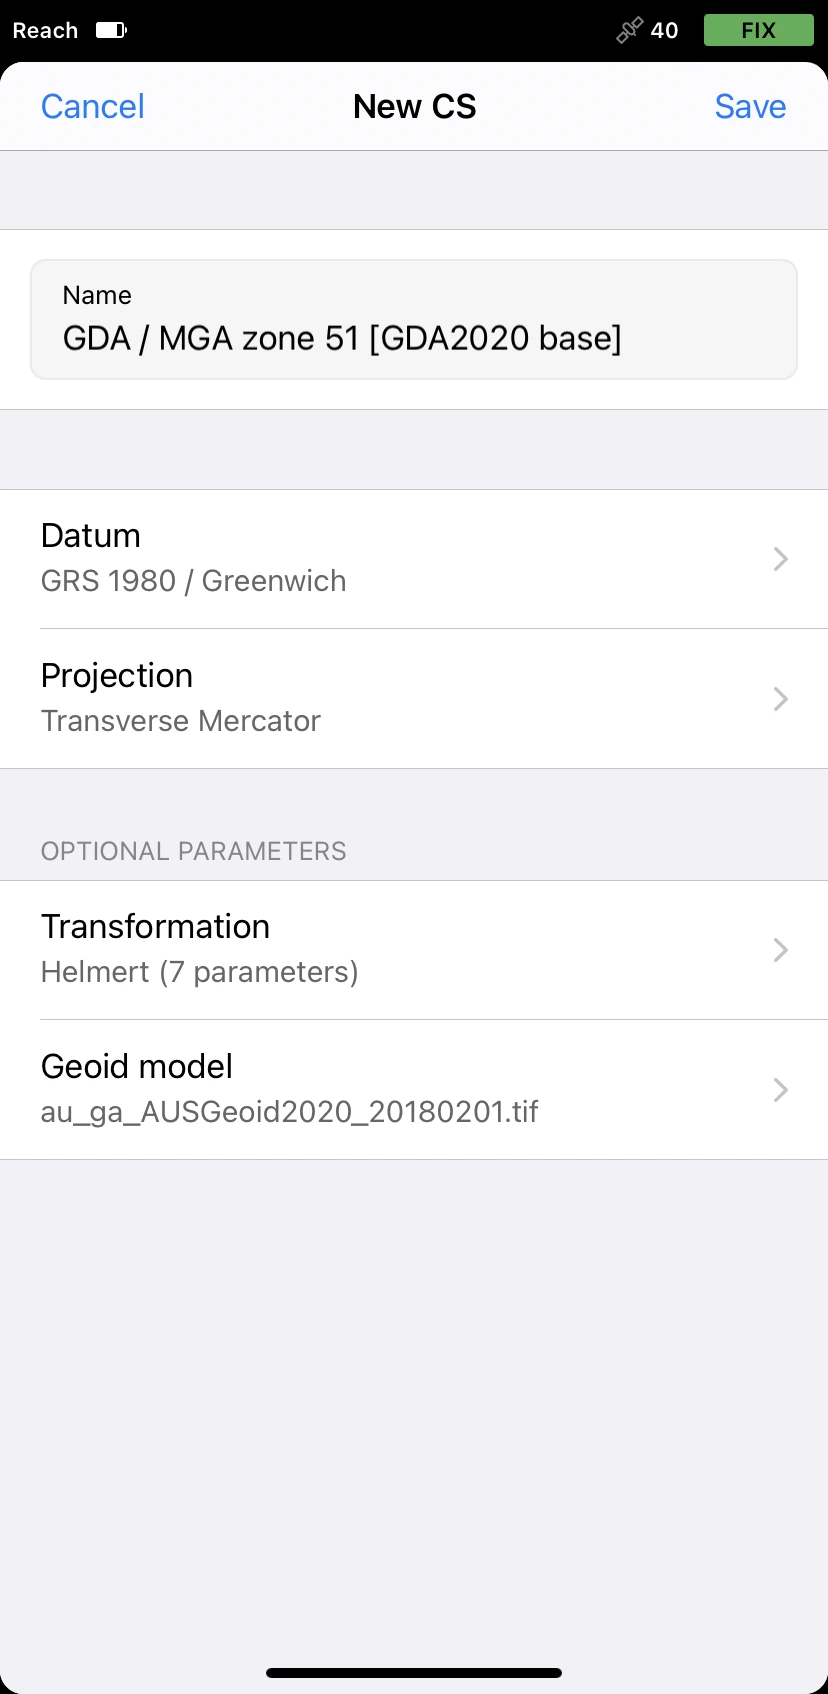
We name the coordinate system
GDA94 / MGA zone 51 [GDA2020 base].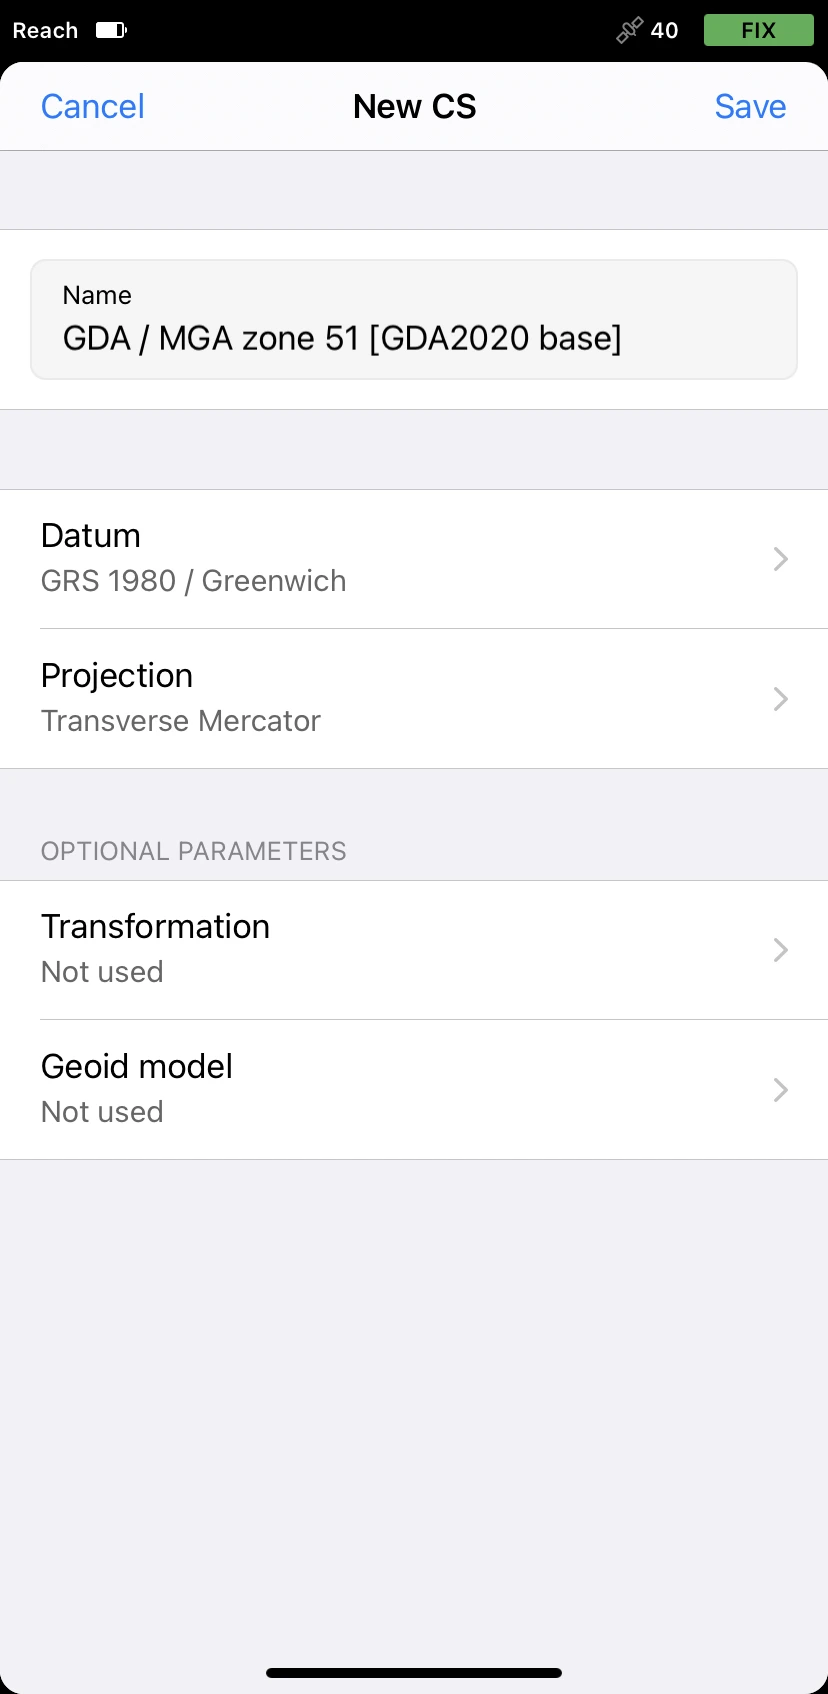
When picking a coordinate system for your project, follow the steps below:
-
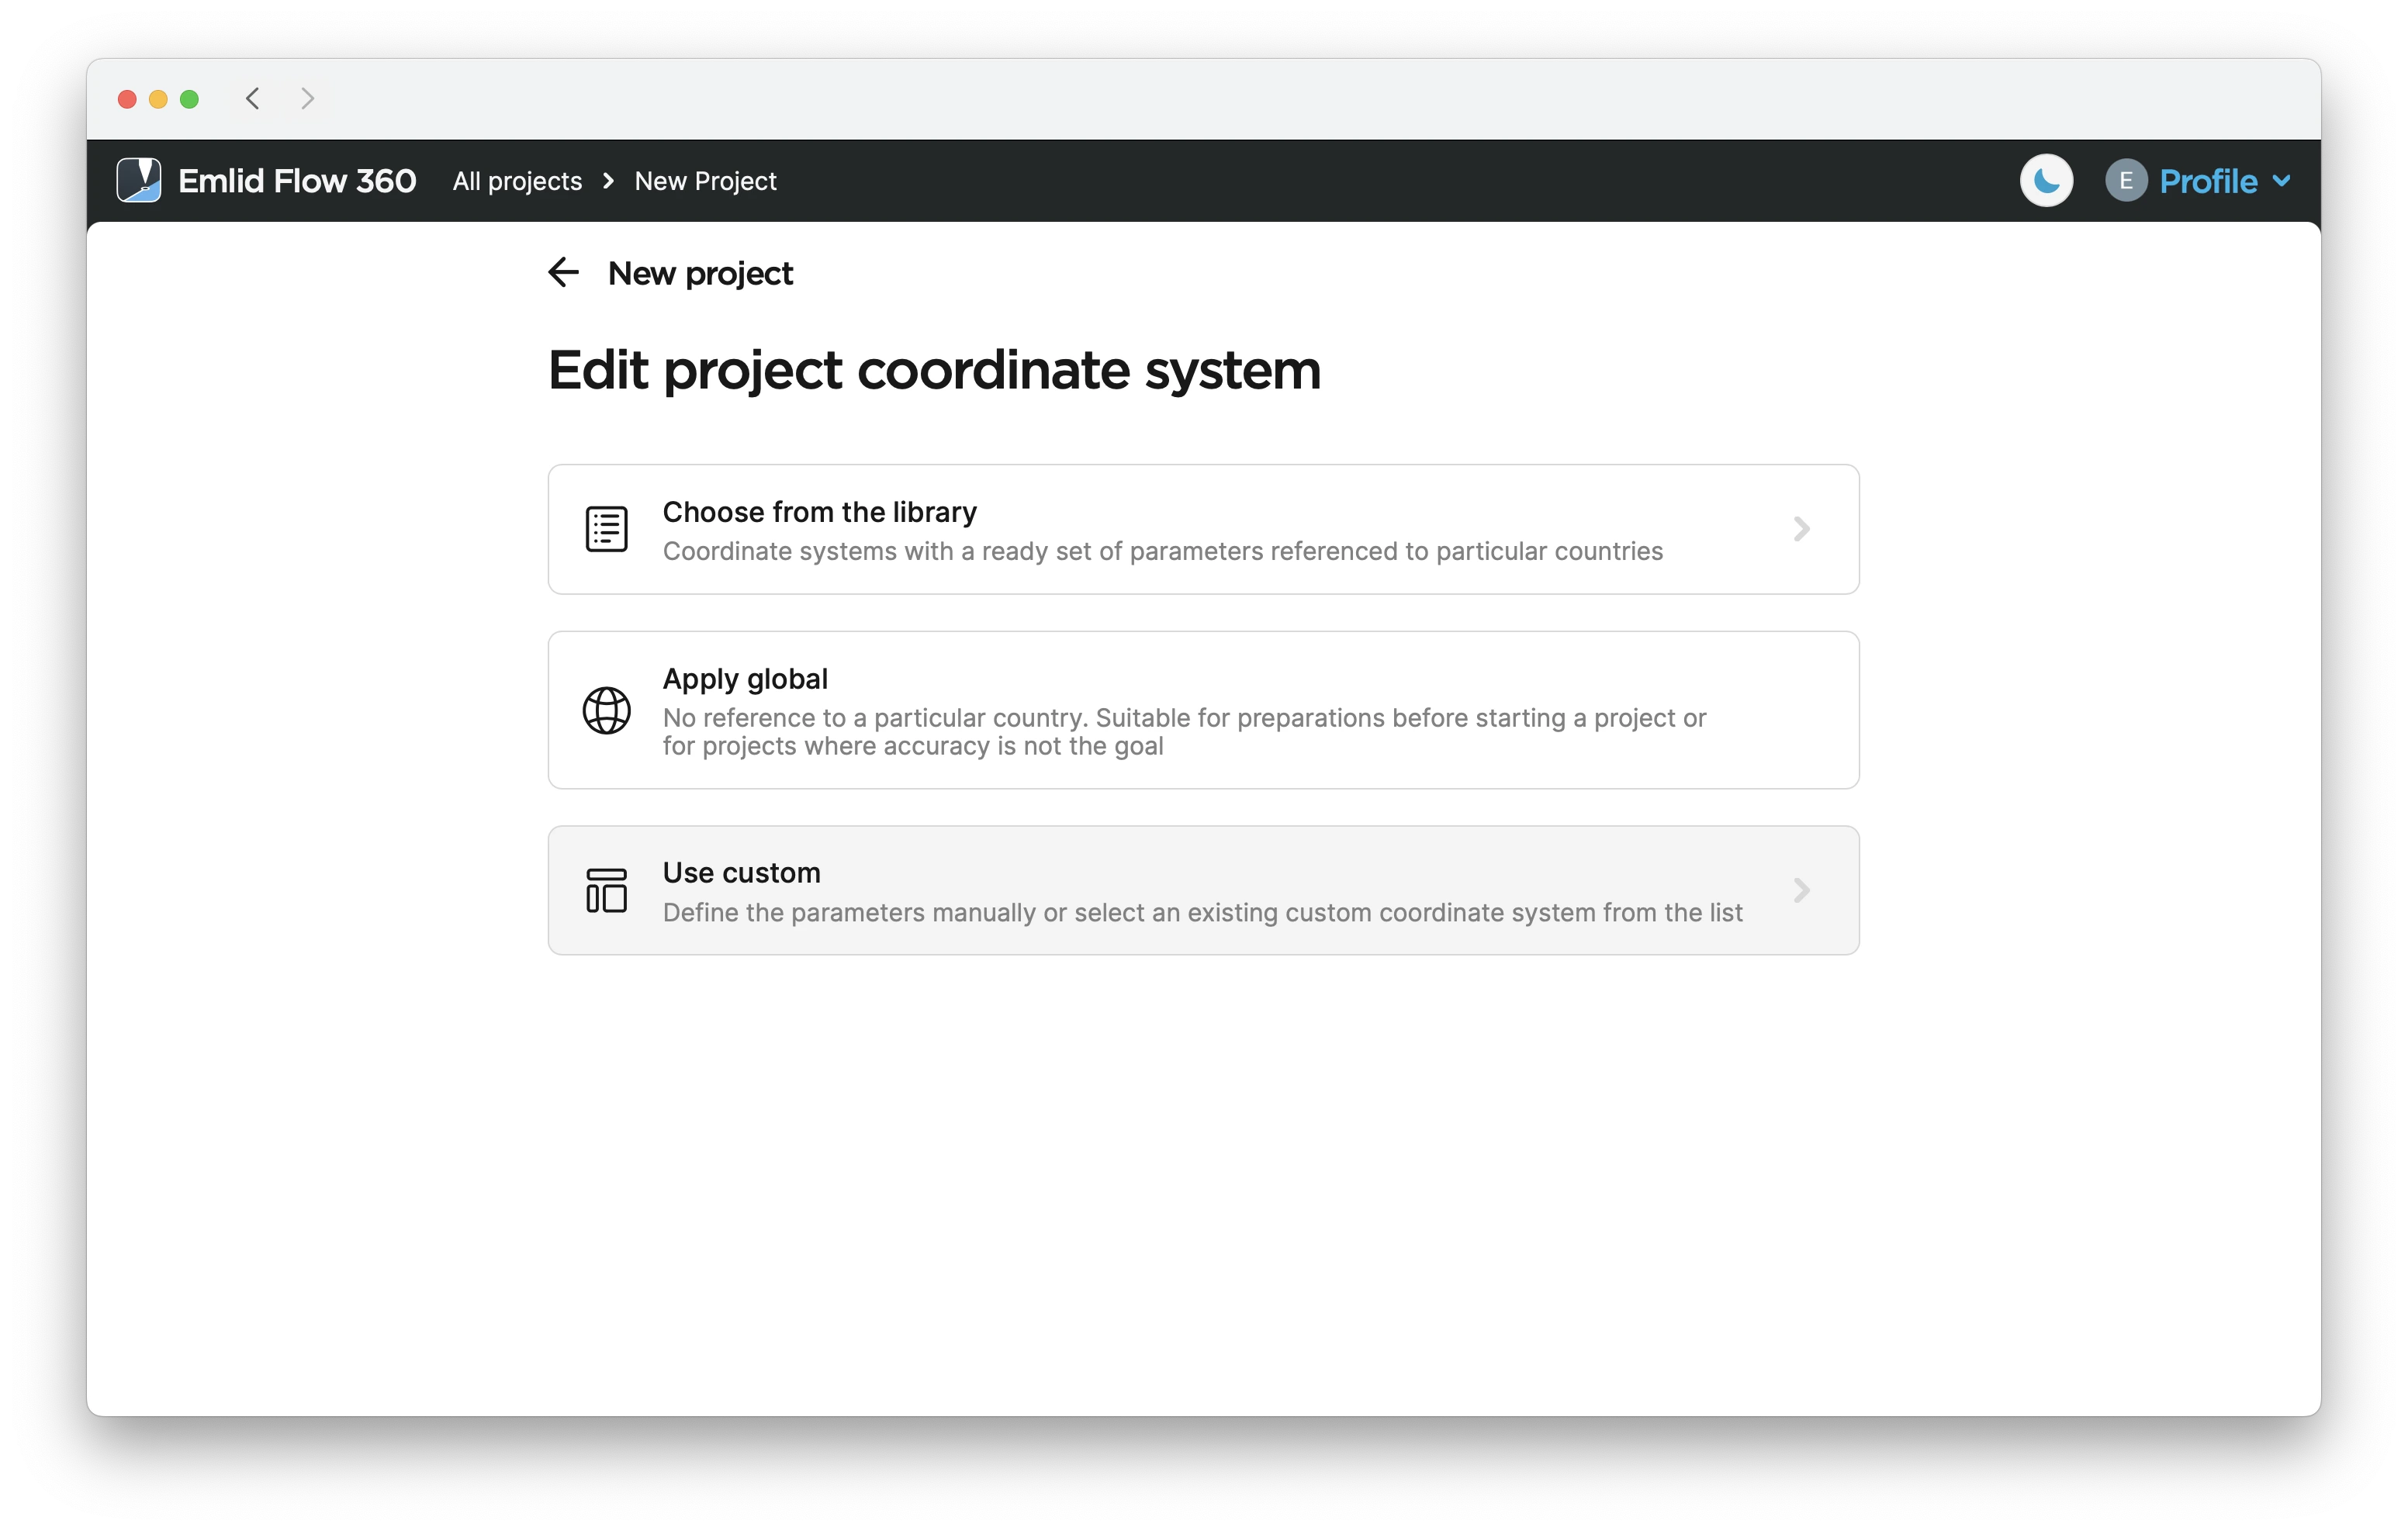
On the Edit project coordinate system screen, click Use custom.
-
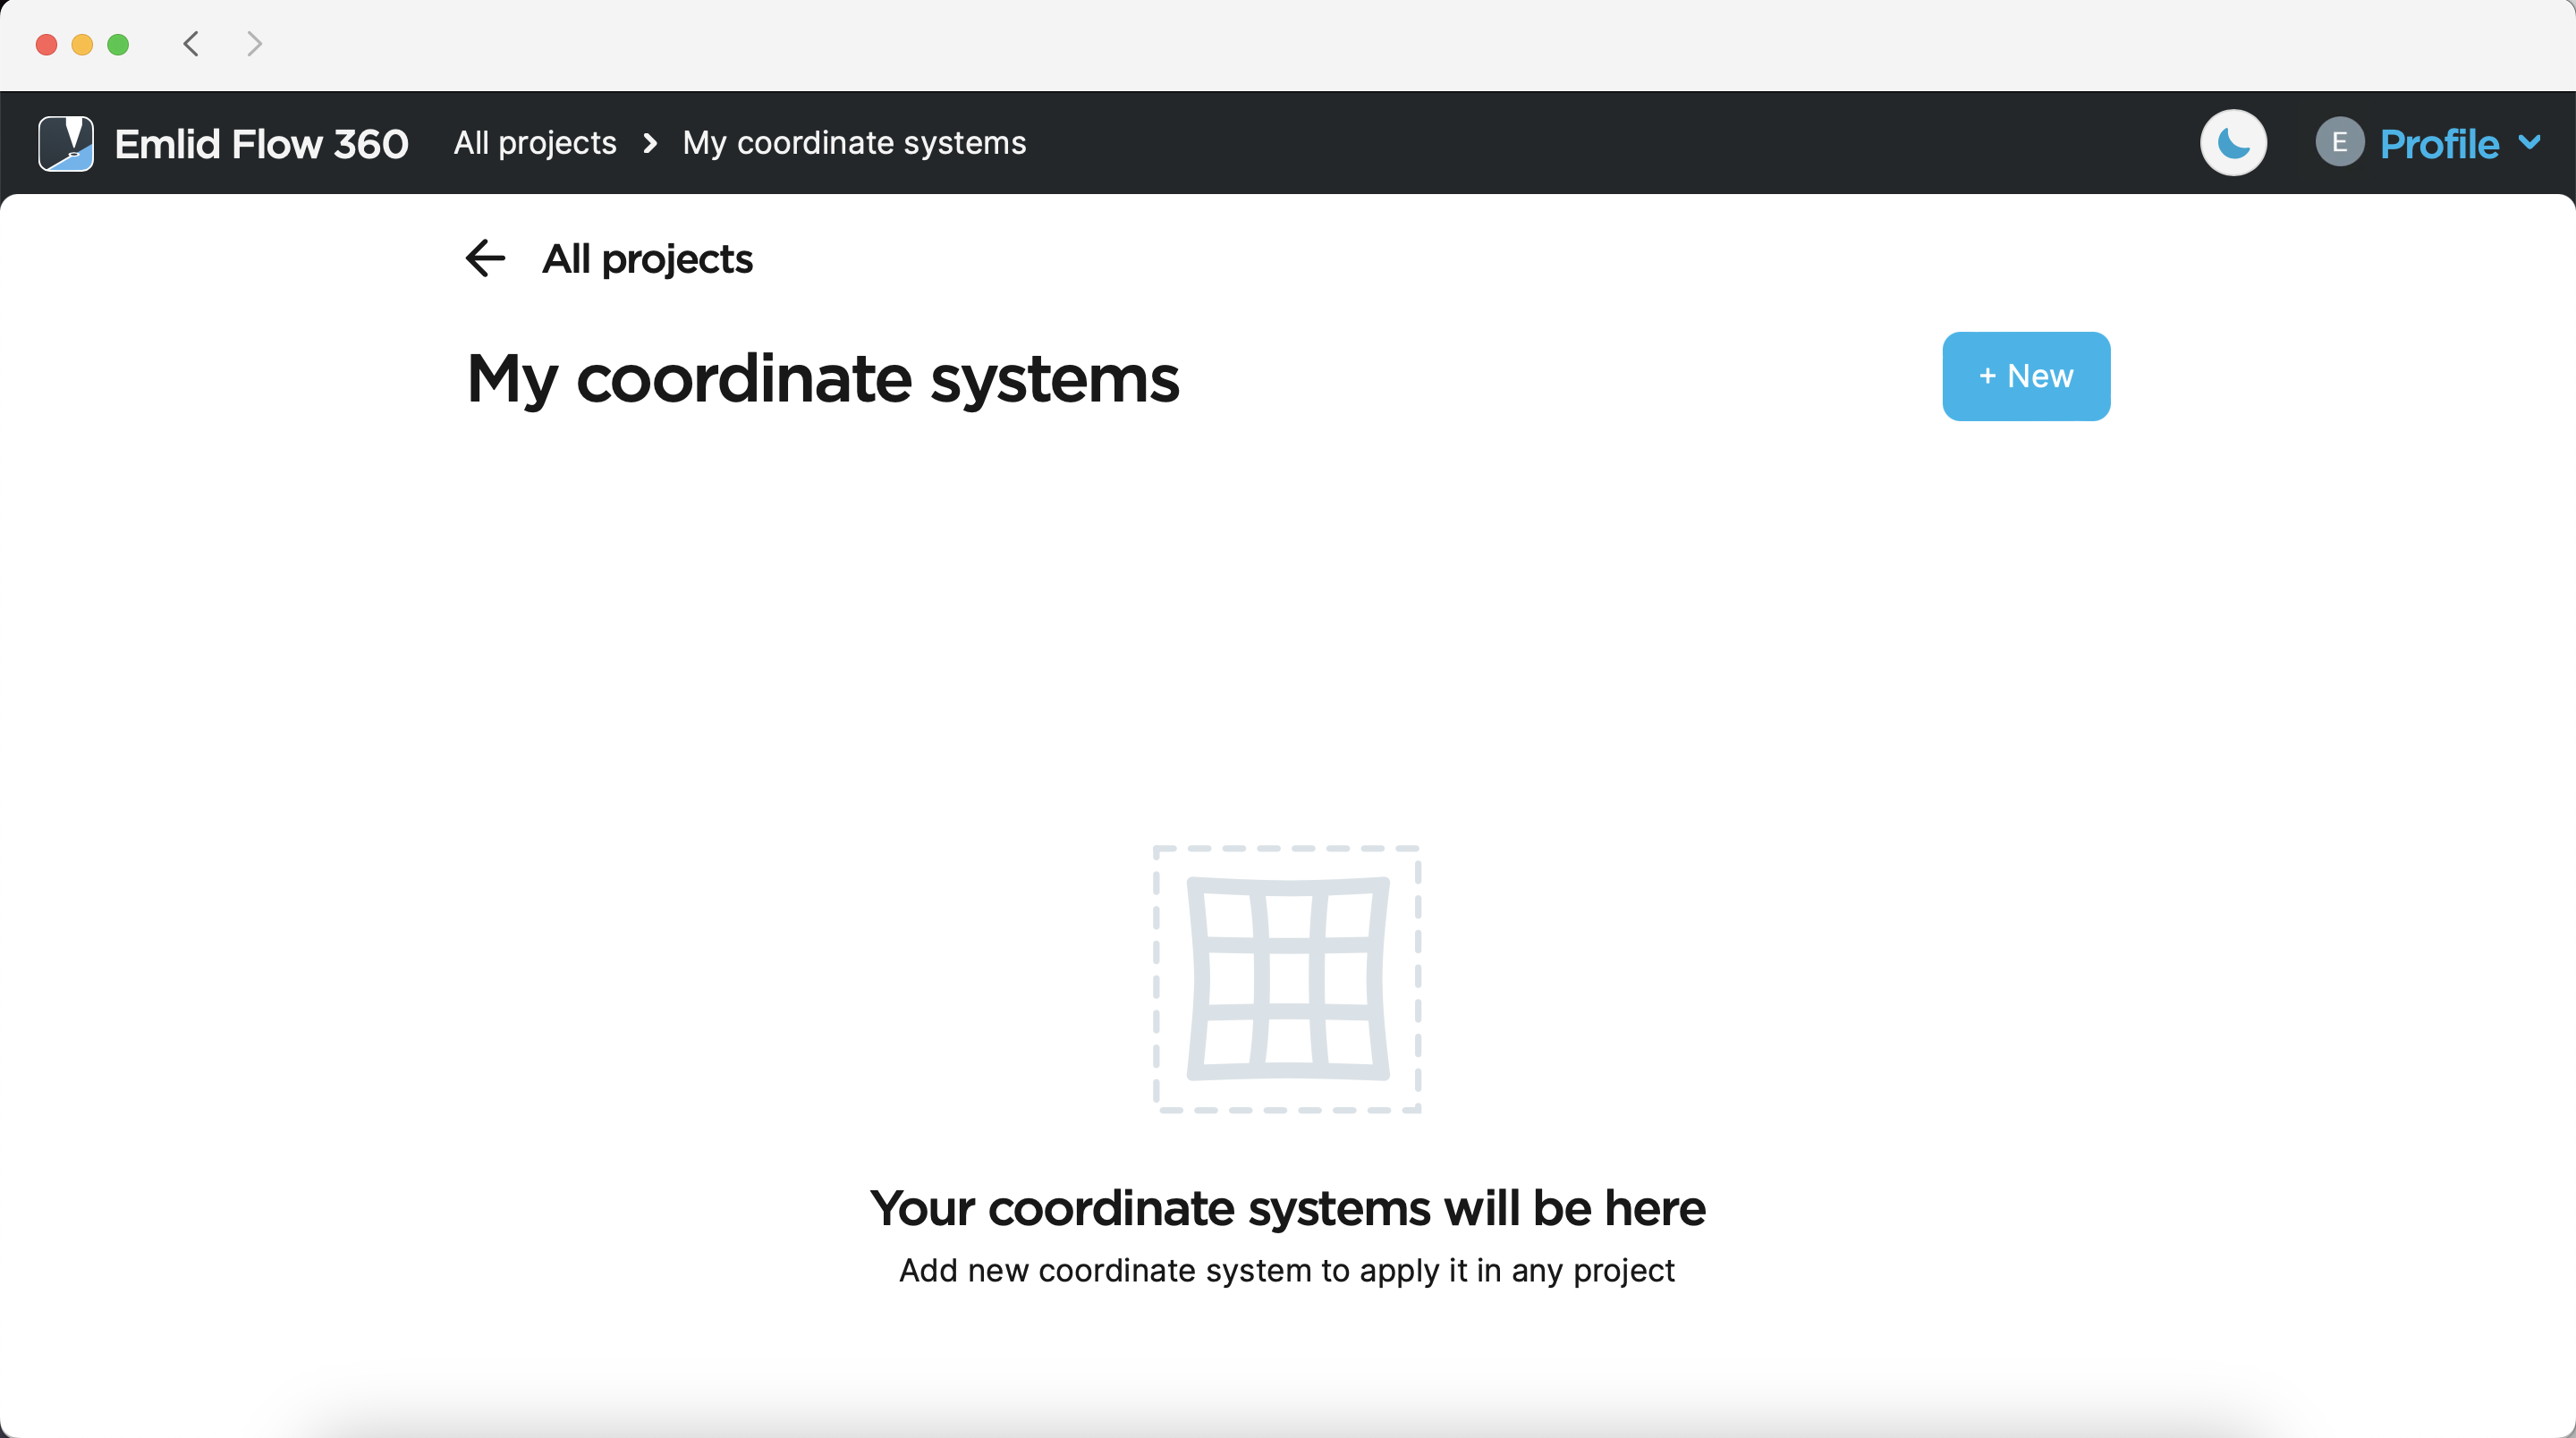
To create a custom coordinate system, click the + New button.
-
Enter the name of your custom coordinate system. Using this name, you will be able to find it in the list of coordinate systems later on.
We name the coordinate system
GDA94 / MGA zone 51 [GDA2020 base].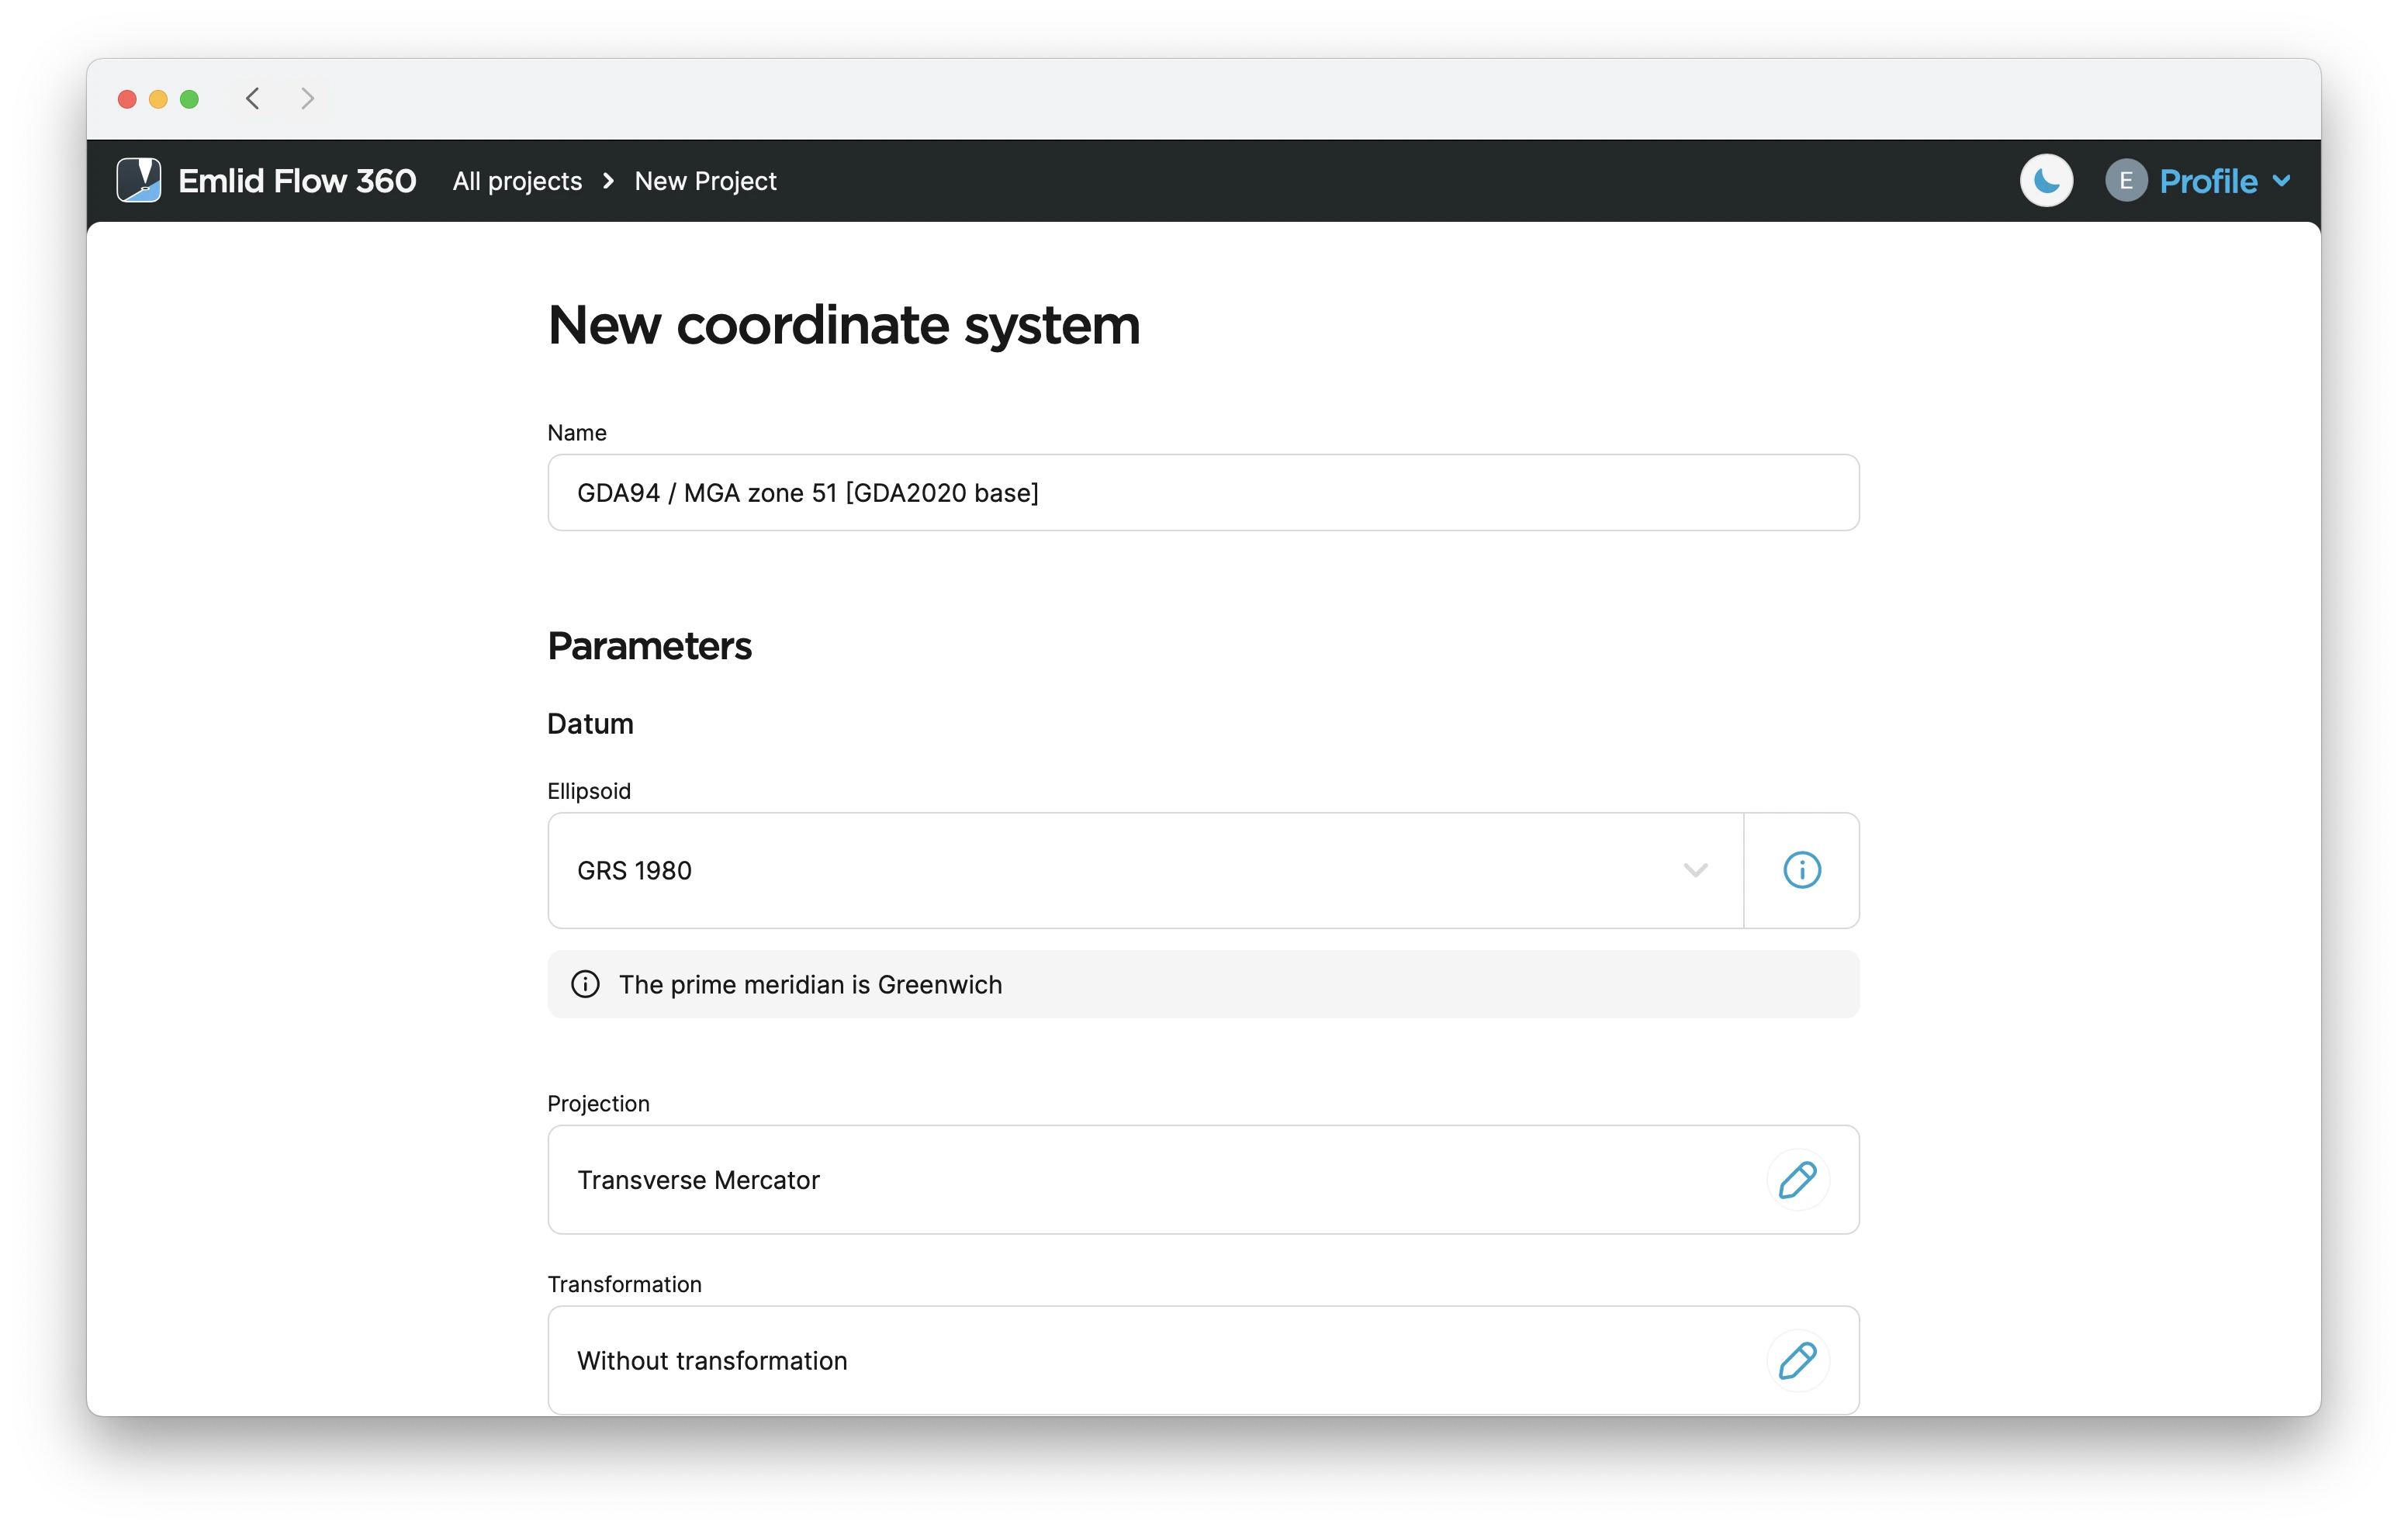
Specifying ellipsoid for datum
This step is mandatory.
- Emlid Flow
- Emlid Flow 360
In this section, we set up the ellipsoid the datum based on. By default, the GRS 1980 ellipsoid is selected. To change it, perform the following steps:
-
Go to the Datum screen.
-
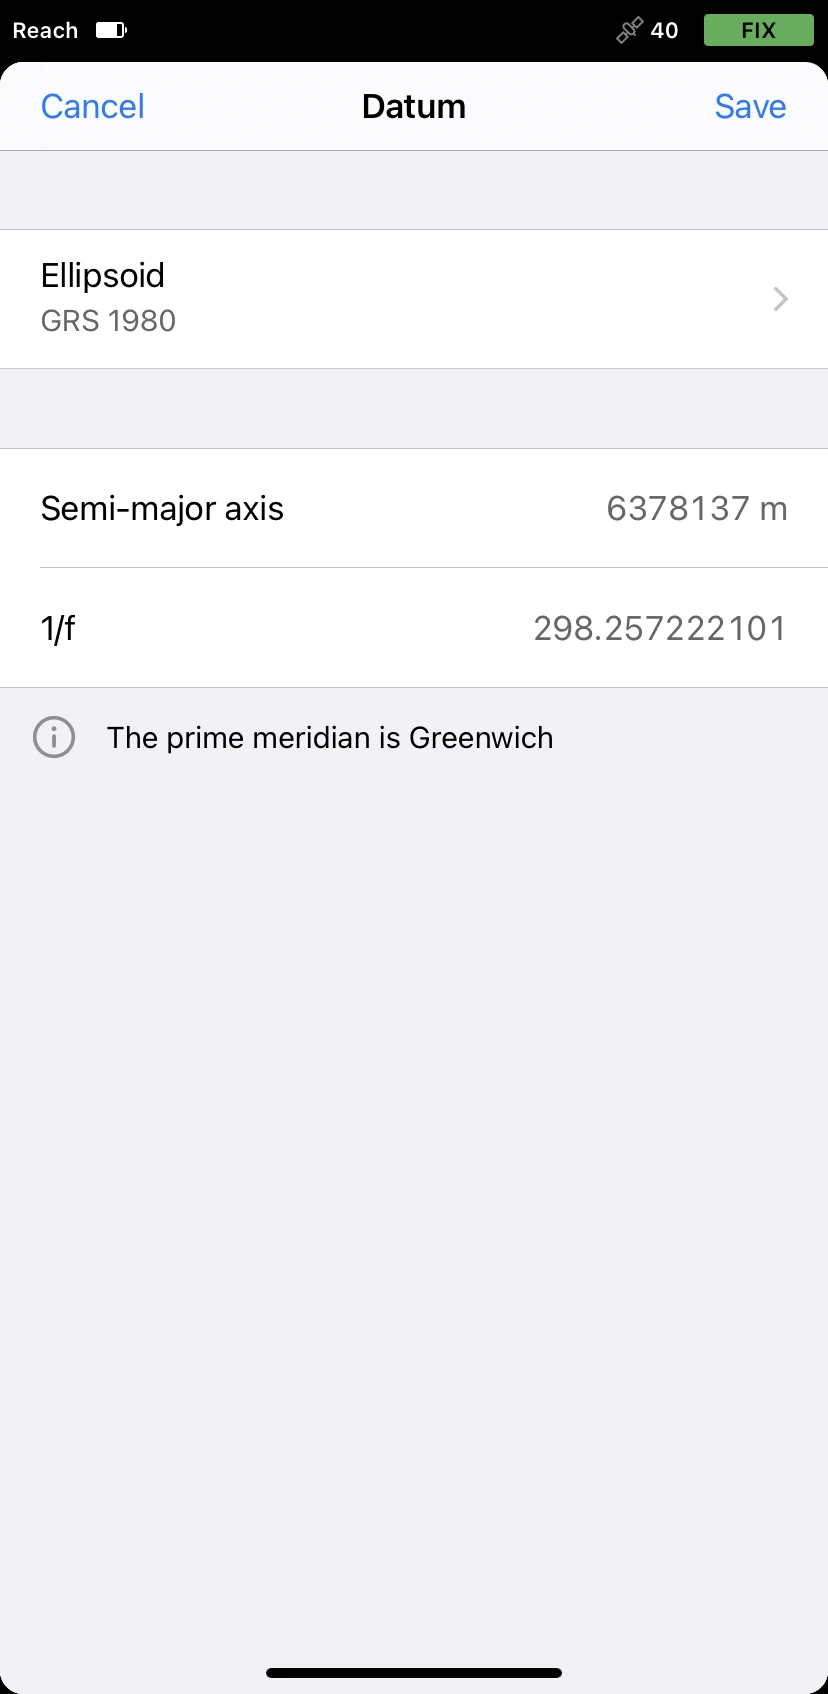
Tap the Ellipsoid cell and choose the required ellipsoid from the list. It will update the Semi-major axis and 1/f parameters accordingly.
The
GDA94datum uses theGRS 1980ellipsoid, so we leave it as is. -
Tap Save to apply changes.
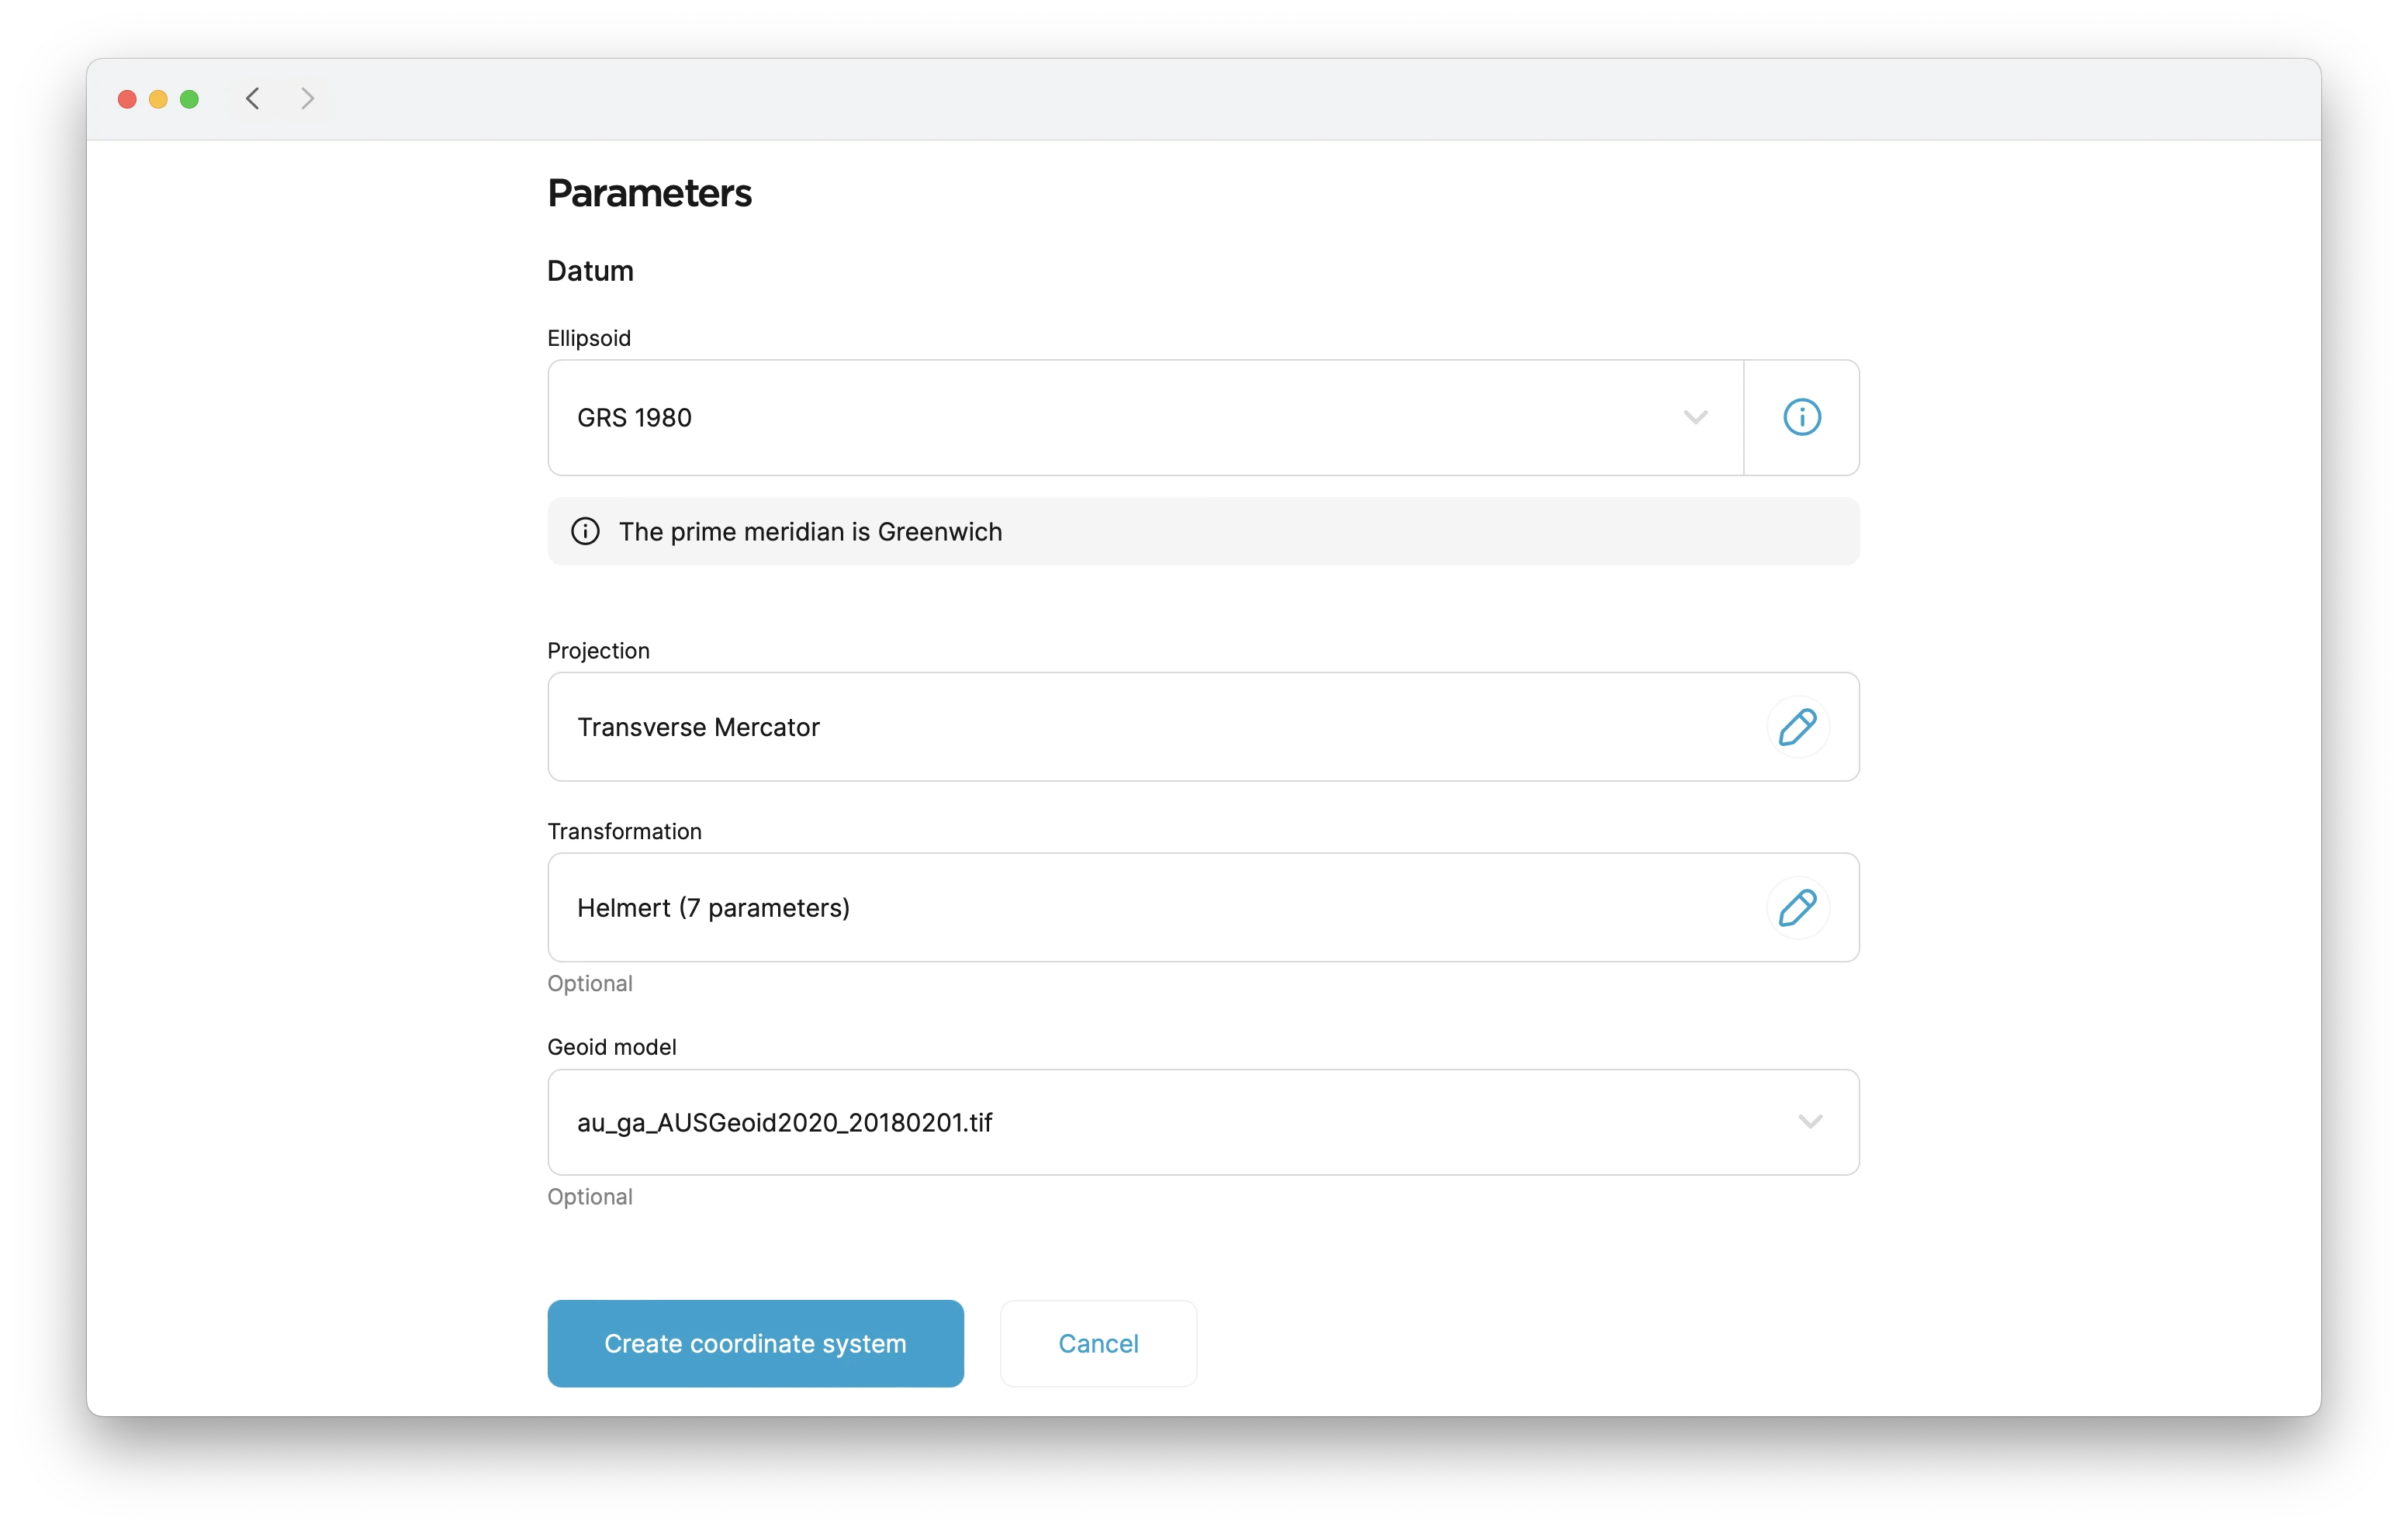
In this section, we set up the ellipsoid the datum based on. By default, the GRS 1980 ellipsoid is selected. To change it, click the Ellipsoid cell and find the required ellipsoid from the list.
It updates the Semi-major axis and 1/f parameters accordingly. You can access these parameters by clicking the information icon on the right side of the Ellipsoid cell.
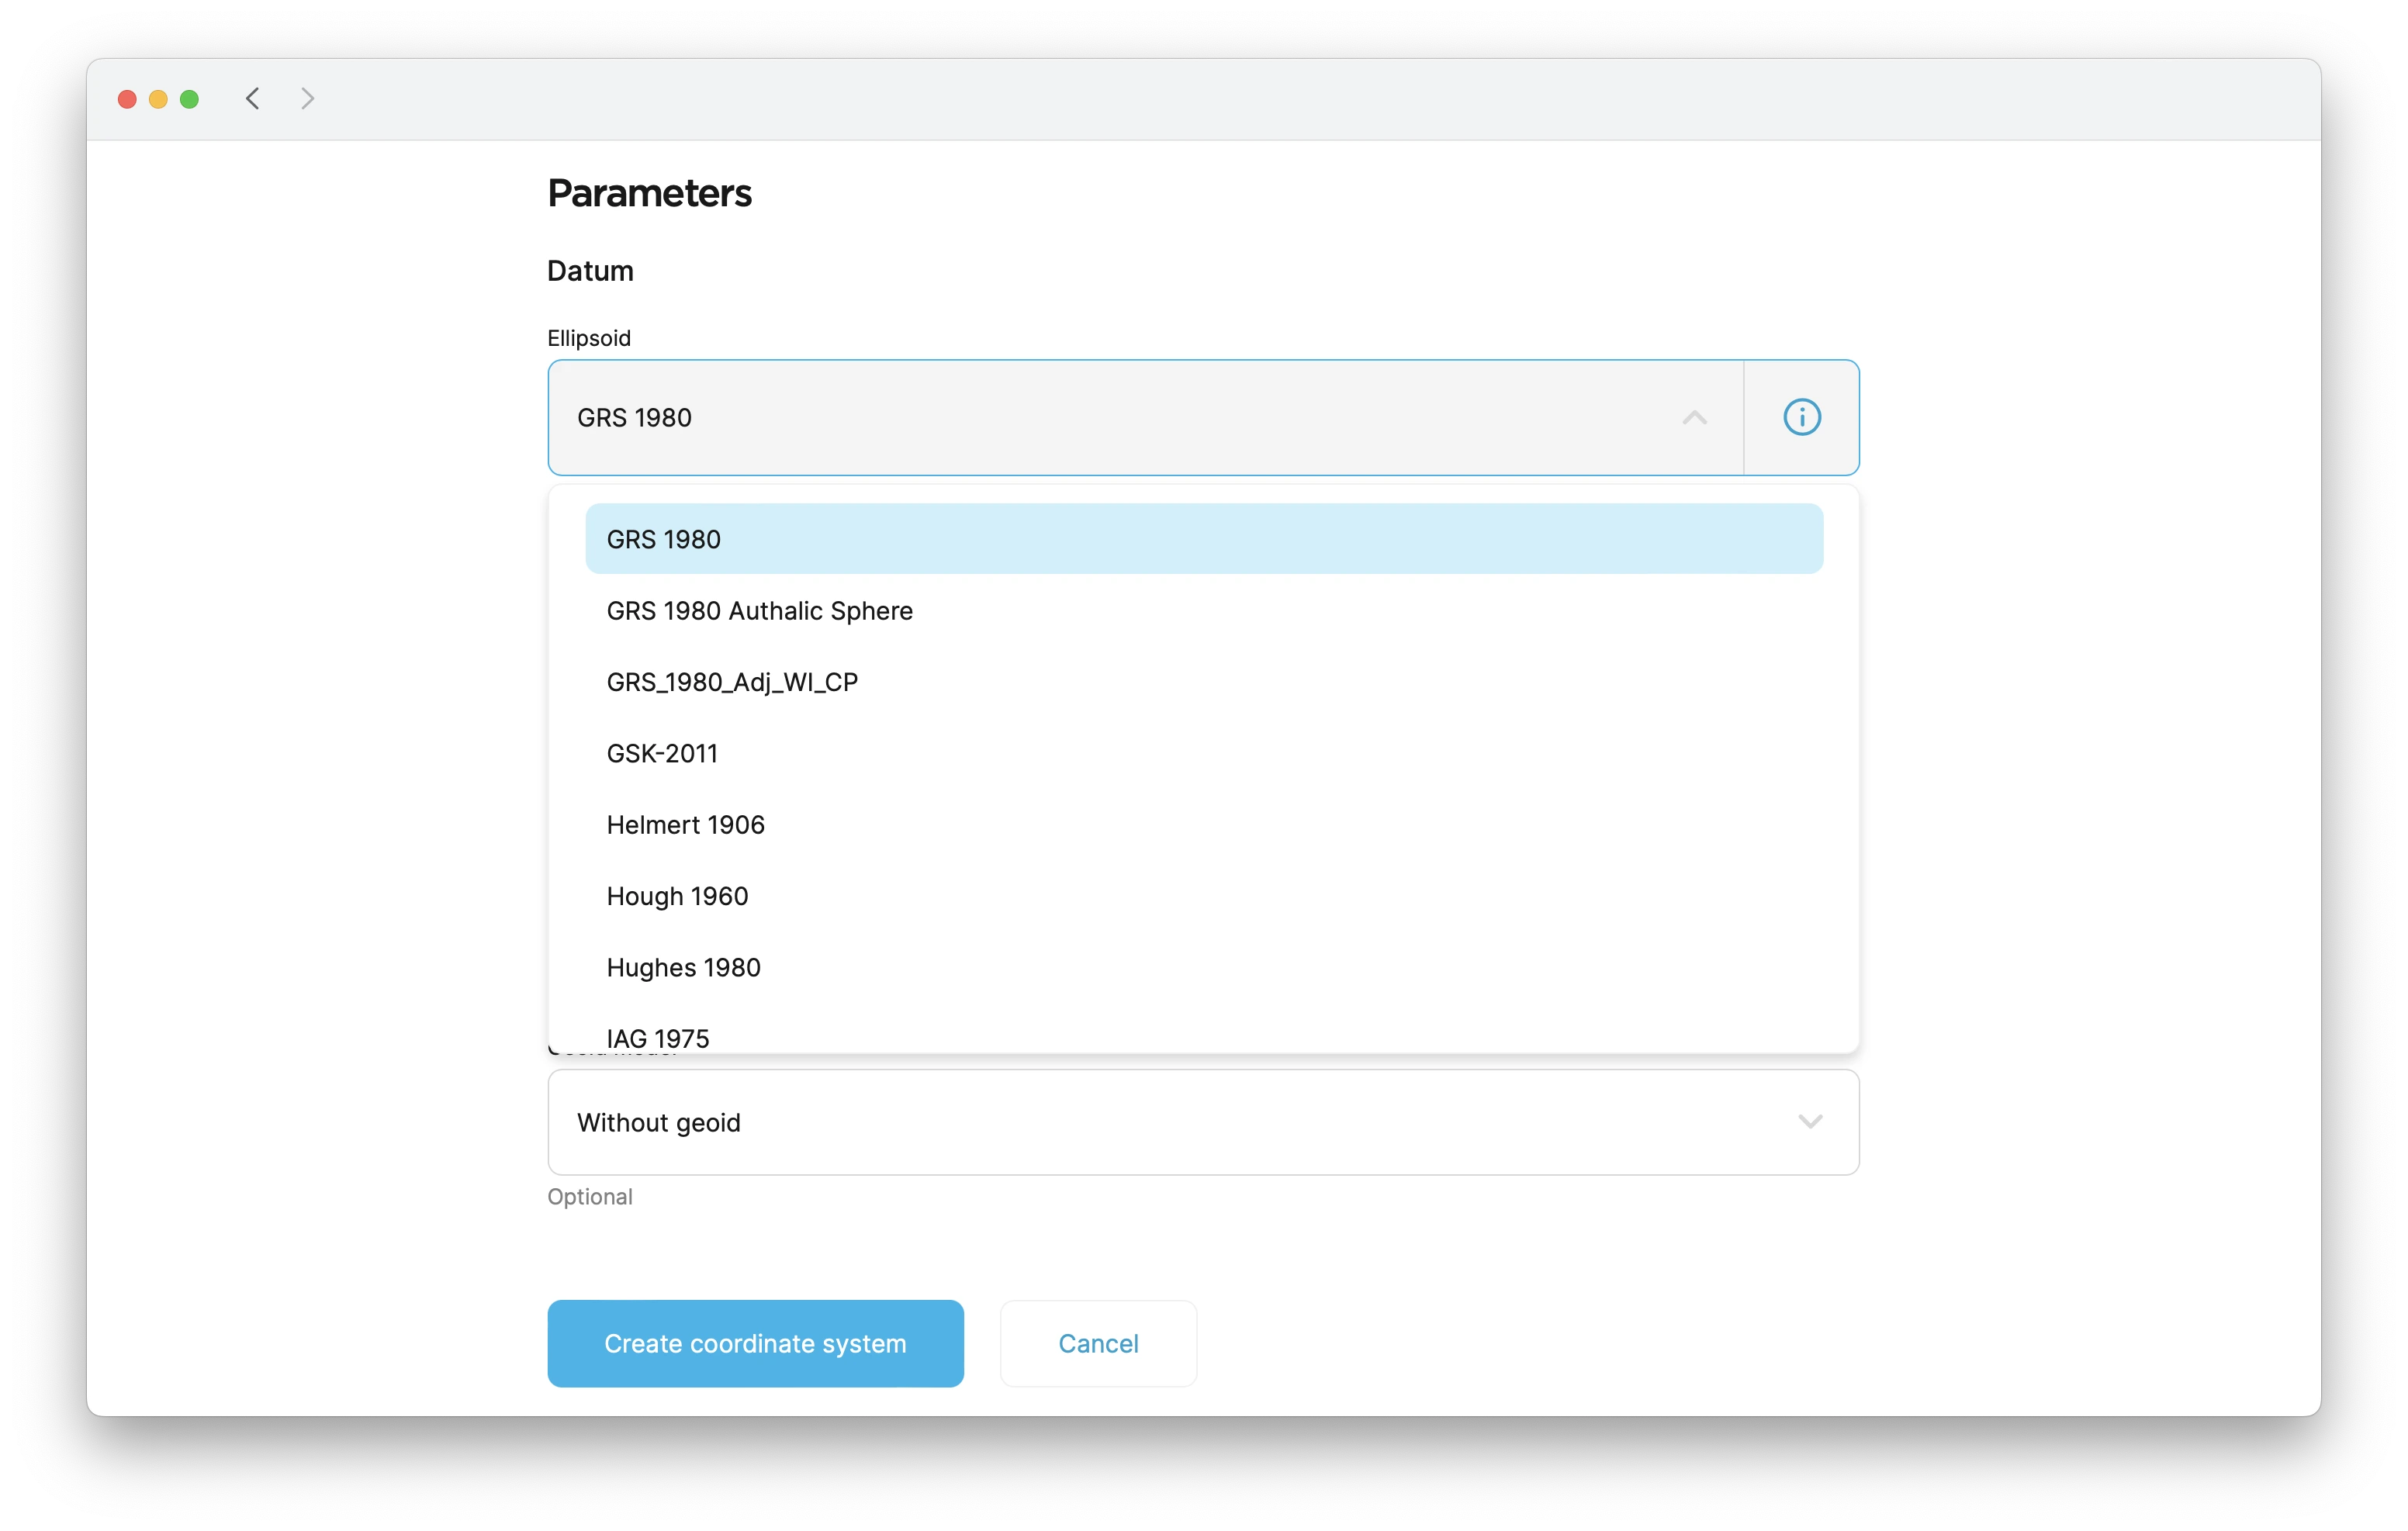
The GDA94 datum uses the GRS 1980 ellipsoid, so we leave it as is.
If the required datum is missing, contact us at support@emlid.com.
Applying projection
- Emlid Flow
- Emlid Flow 360
-
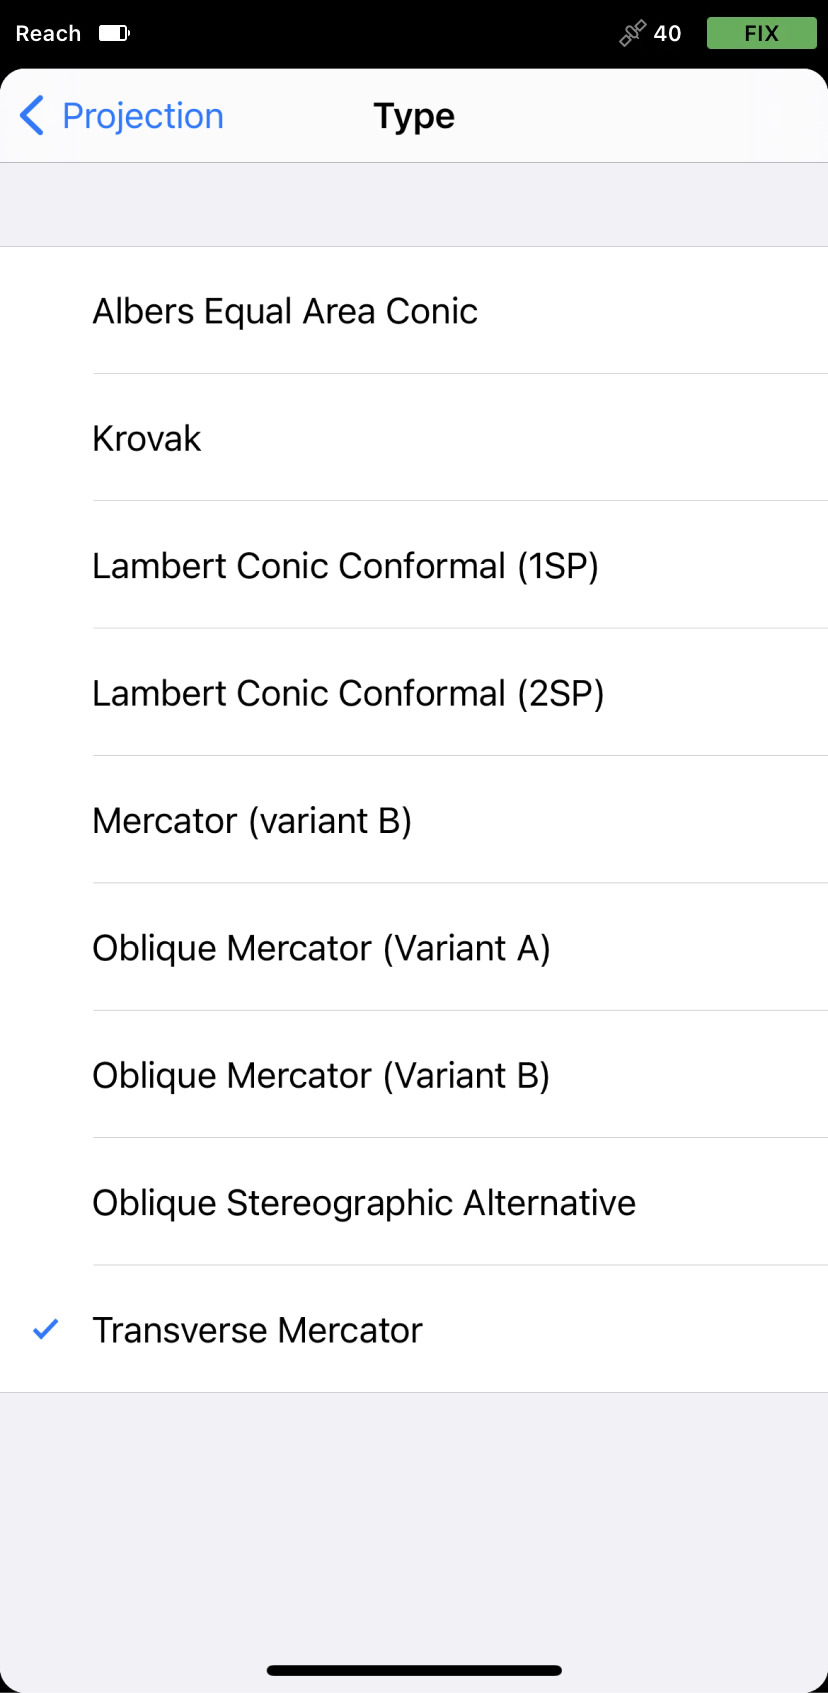
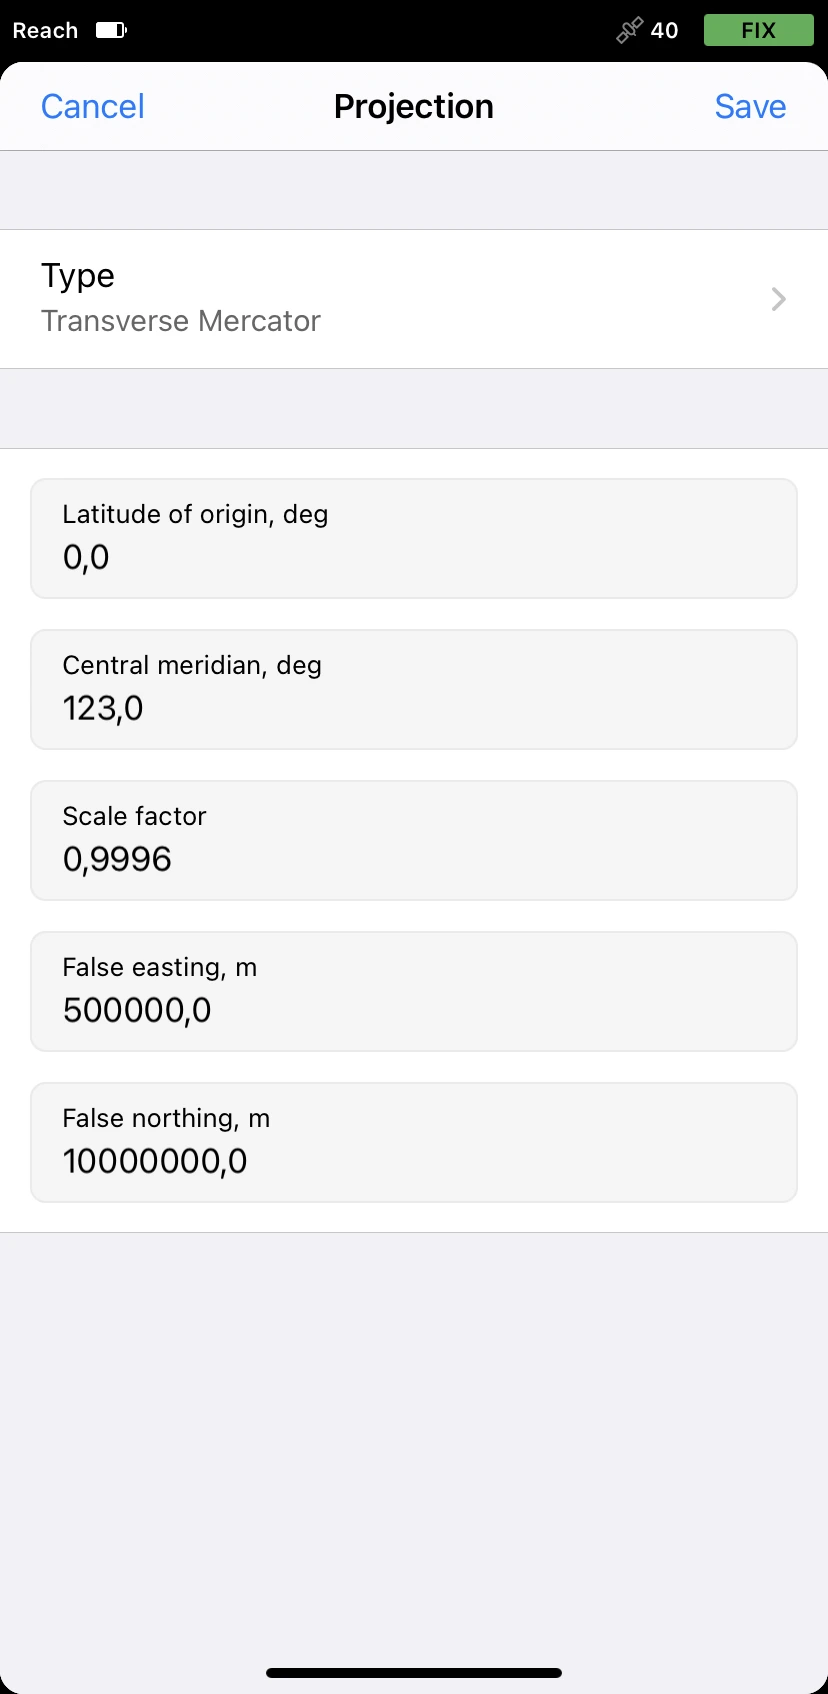
Go to the Projection screen.
-
Choose the required projection type:
- Albers Equal Area Conic
- Krovak
- Lambert Conic Conformal (1SP)
- Lambert Conic Conformal (2SP)
- Mercator (Variant B)
- Oblique Mercator (Variant A)
- Oblique Mercator (Variant B)
- Oblique Stereographic Alternative
- Transverse Mercator
We perform the Transverse Mercator projection.
-
Enter the projection parameters.
-
Save changes.
-
To configure projection, click the Projection cell.
-
Choose the required projection type:
- Albers Equal Area Conic
- Krovak
- Lambert Conic Conformal (1SP)
- Lambert Conic Conformal (2SP)
- Mercator (Variant B)
- Oblique Mercator (Variant A)
- Oblique Mercator (Variant B)
- Oblique Stereographic Alternative
- Transverse Mercator
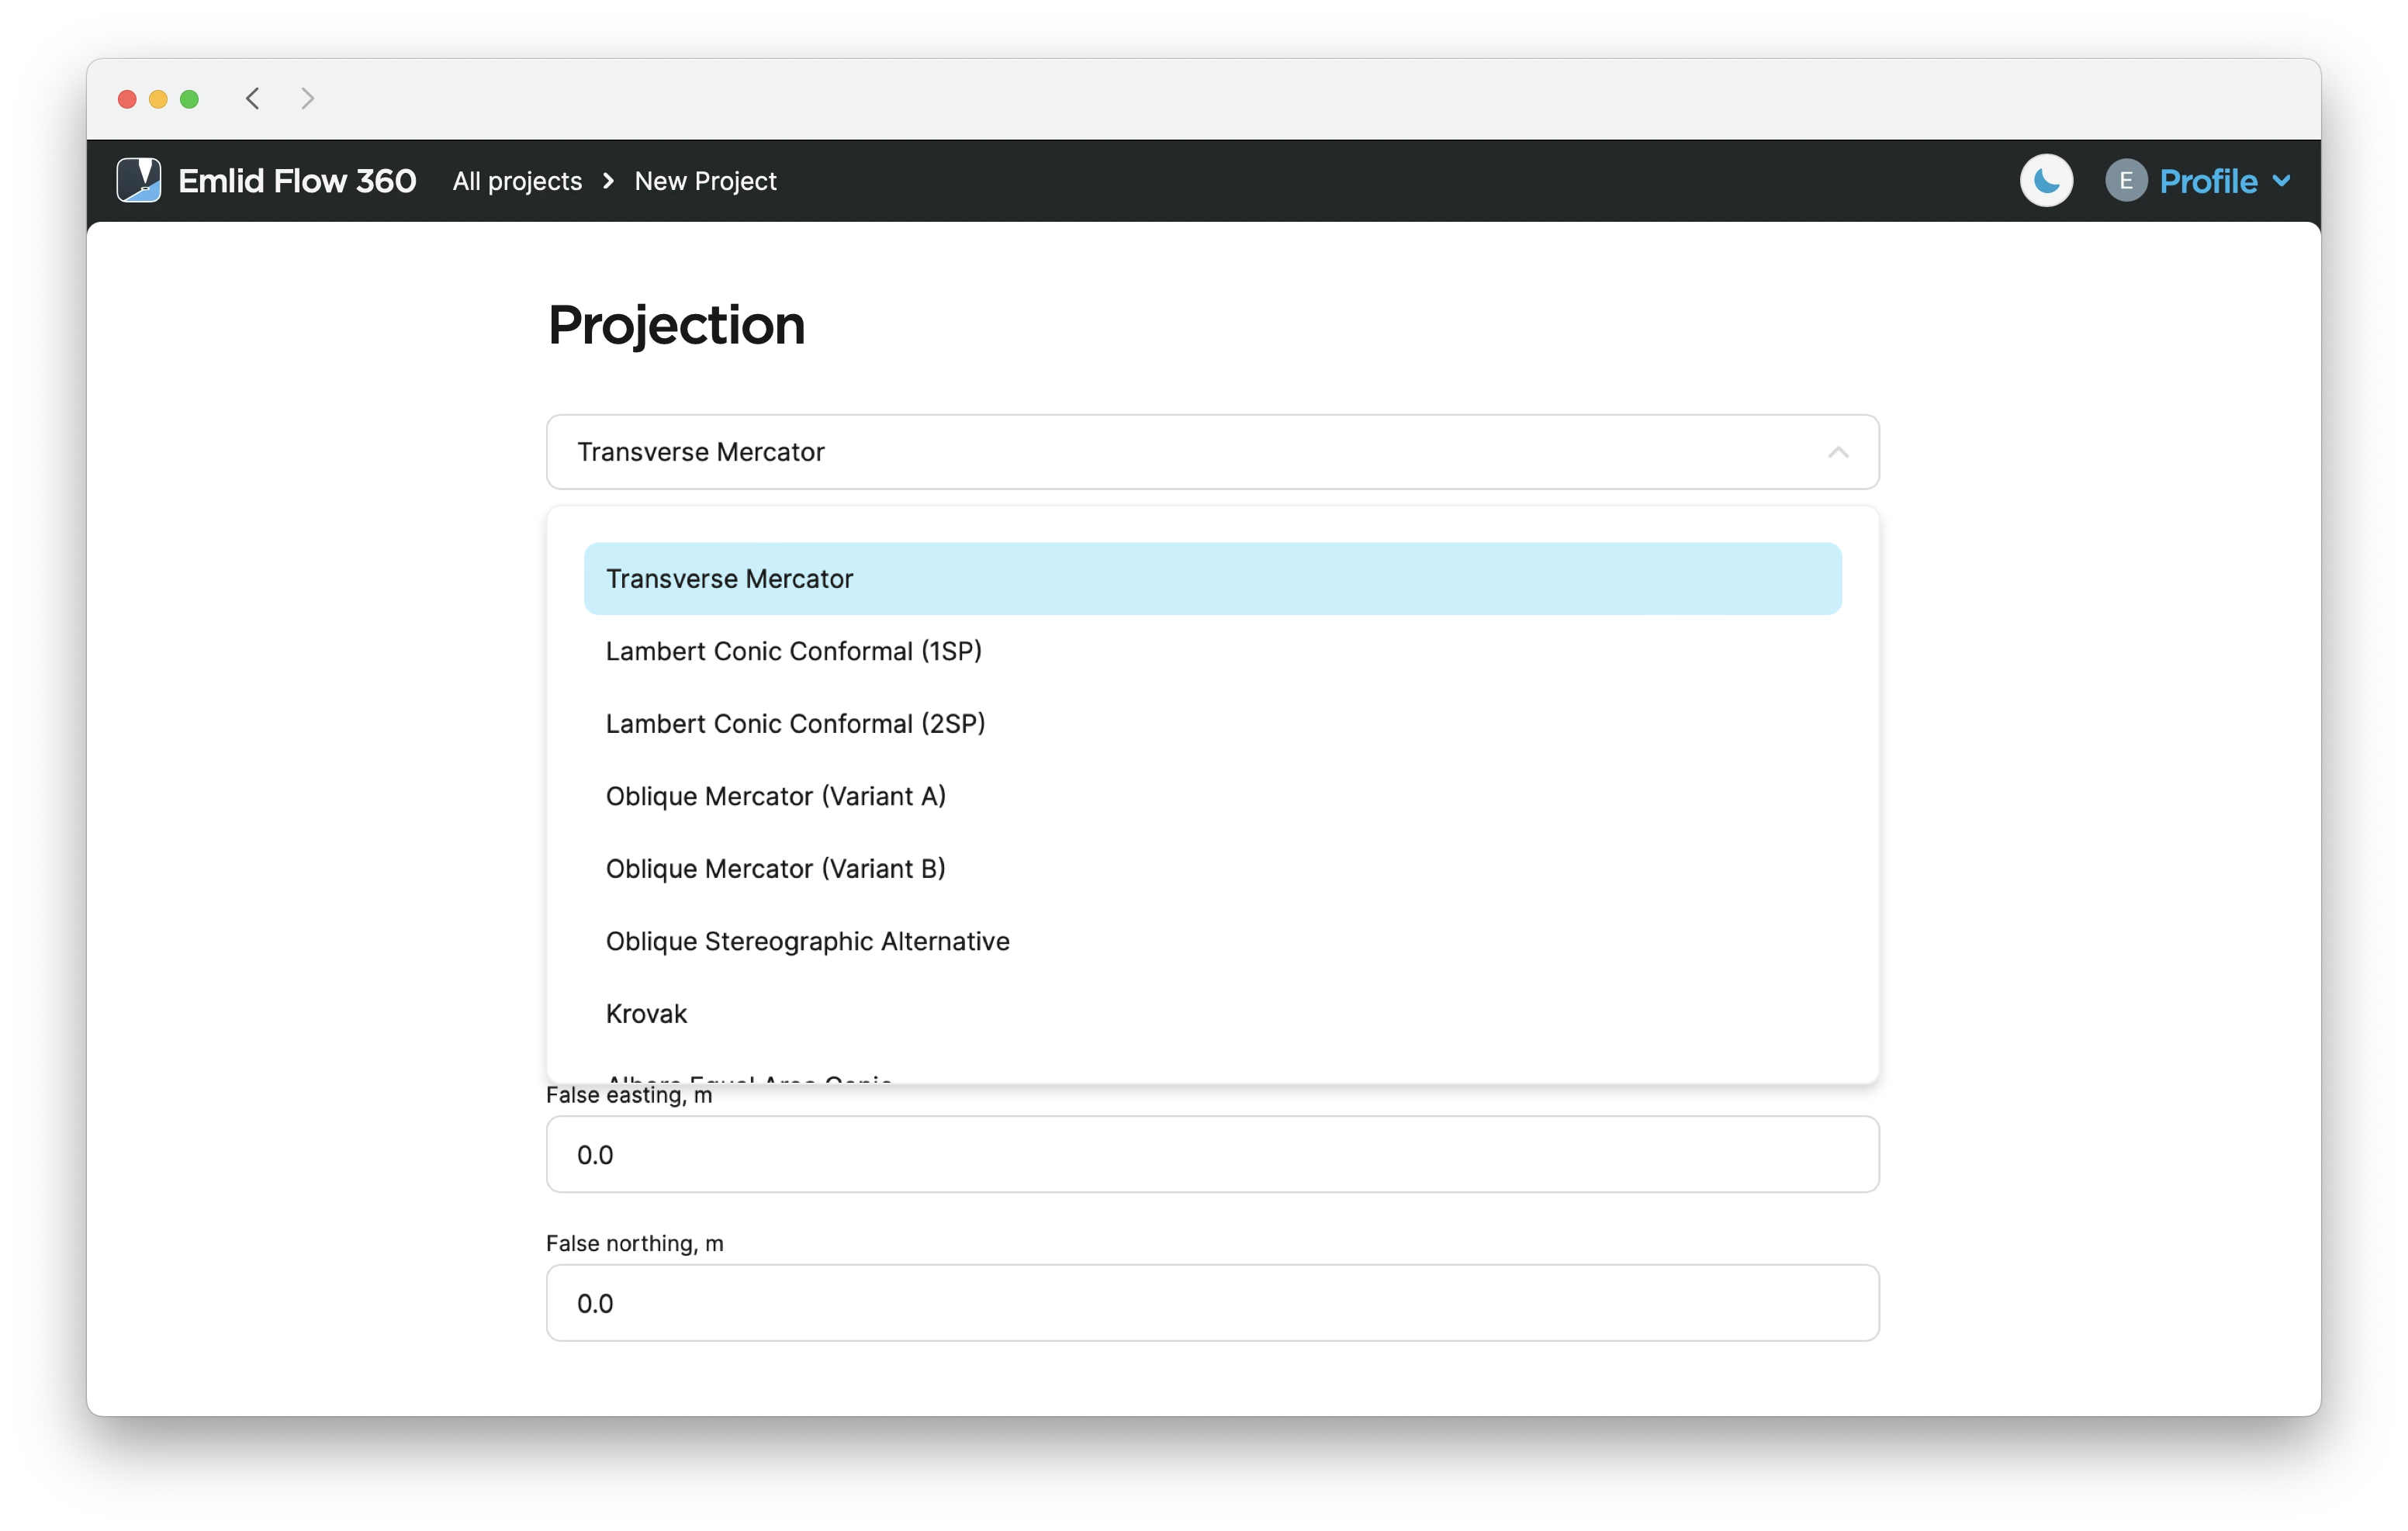
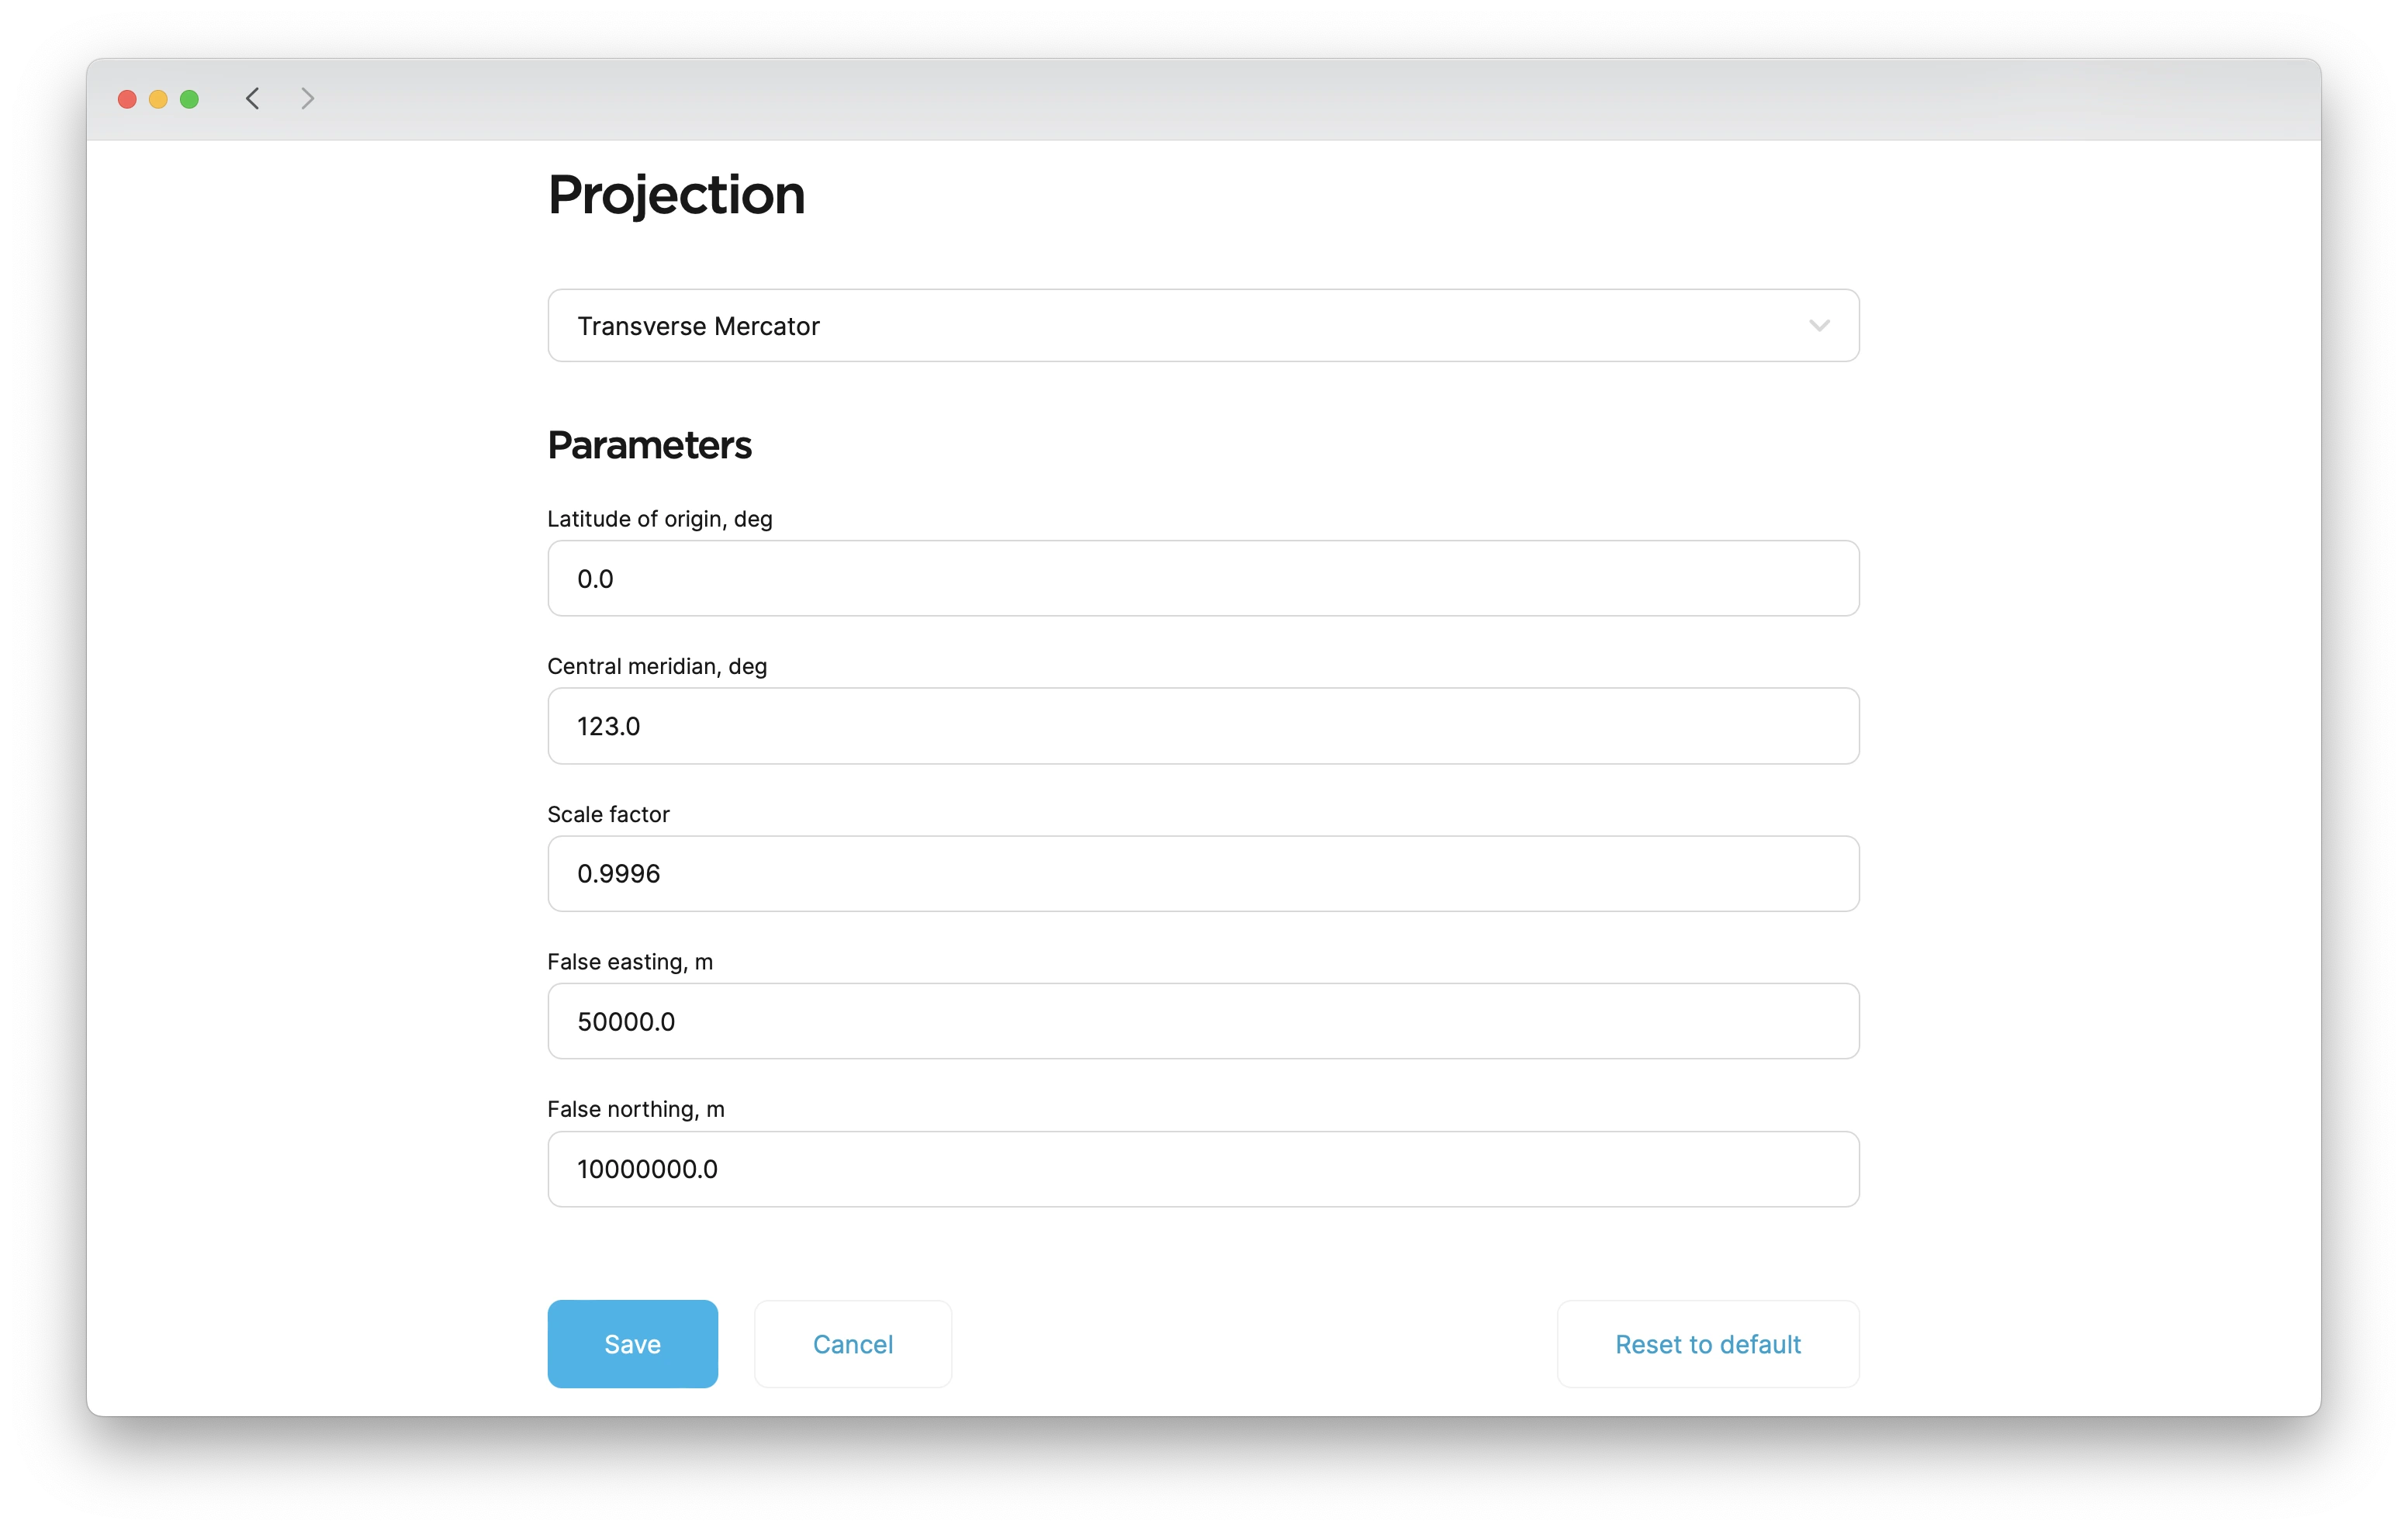
We perform the Transverse Mercator projection.
-
Enter the projection parameters.
-
Save changes.
Specifying transformation parameters
- Emlid Flow
- Emlid Flow 360
You need to configure this option only if your
Coordinate system is a coordinate-based local, regional or global system used to locate geographical entities. A spatial reference system defines a specific map projection, as well as transformations between different spatial reference systems.
-
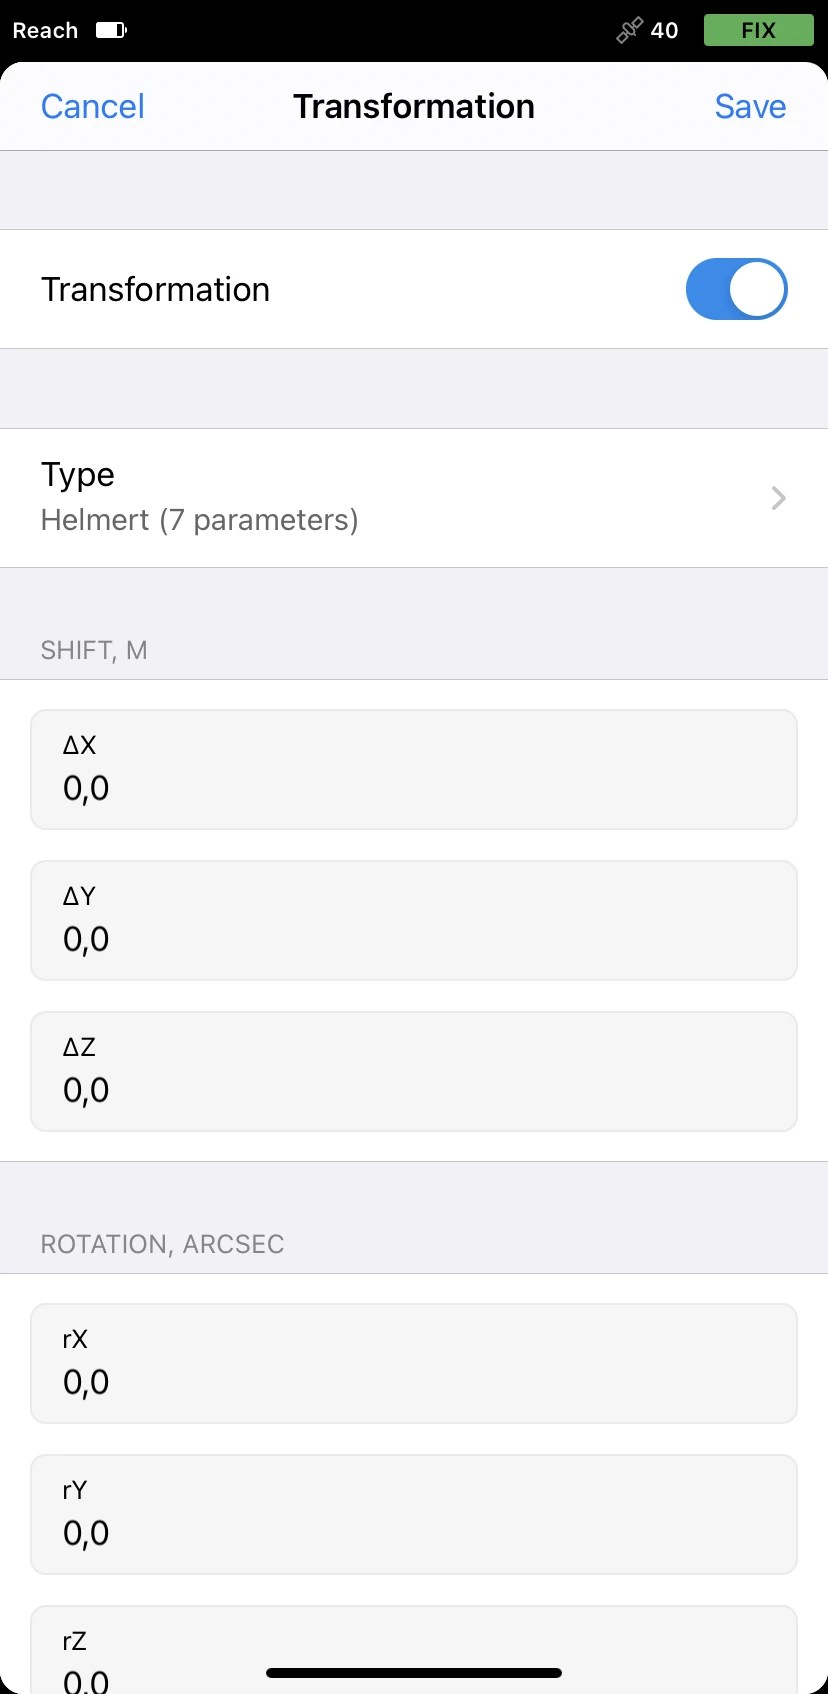
Go to the Transformation screen and turn it on.
-
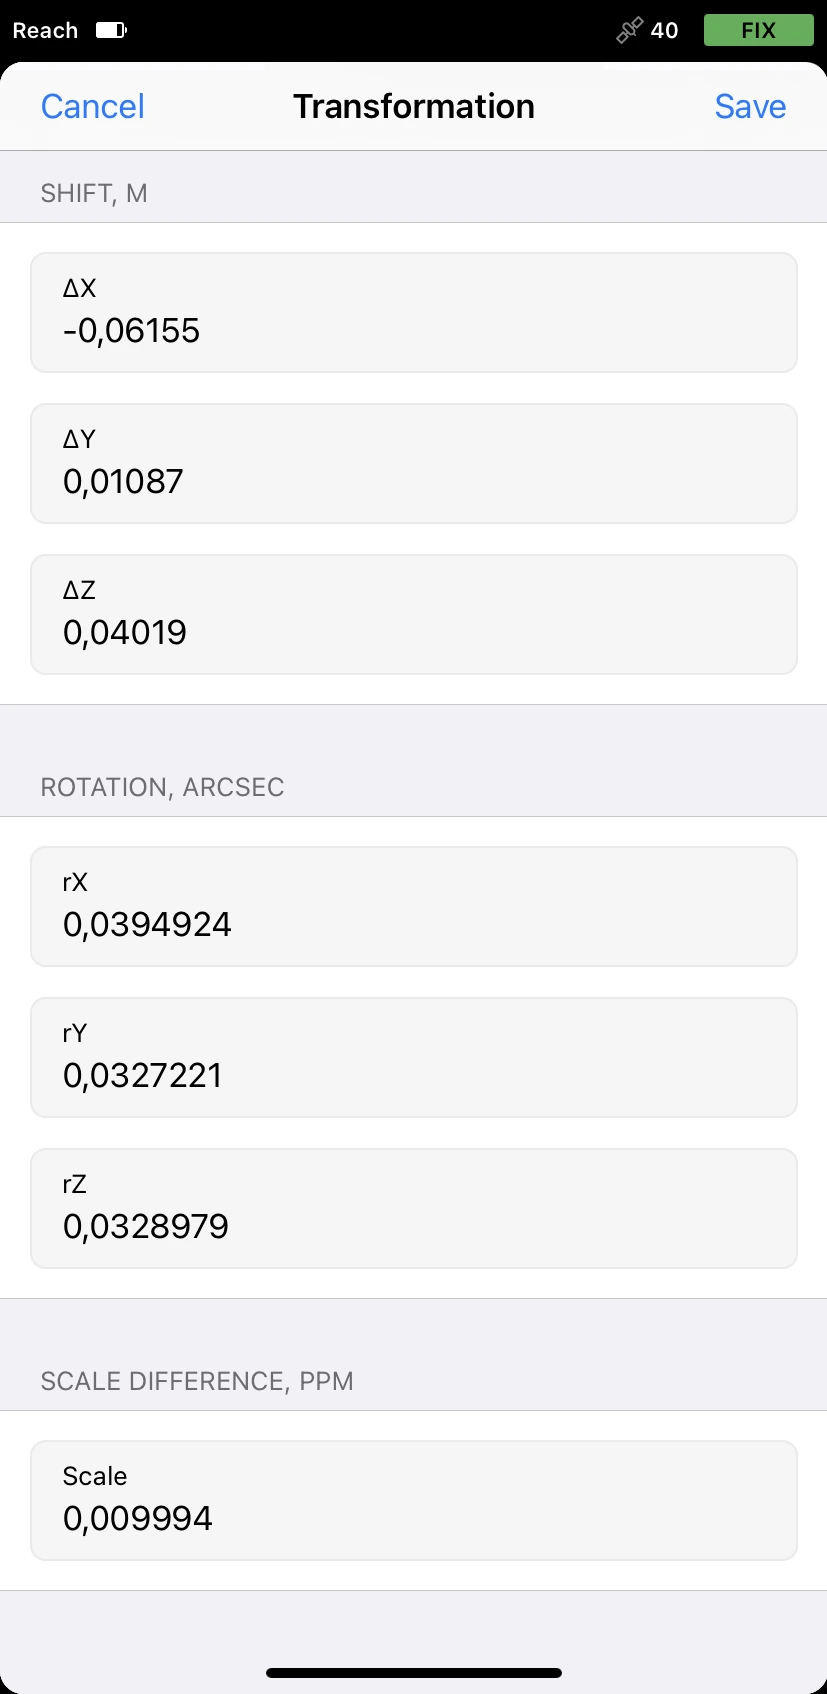
Choose the required transformation type: Helmert or Molodensky-Badekas.
We need the Helmert transformation to go from
GDA2020toGDA94datum. -
Fill in the transformation parameters: there are 7 of them for the Helmert transformation and 10 for Molodensky-Badekas.
tipThe app can also perform transformations with only 3, 4, and 6 parameters. You can type in the parameters you have and leave the others empty.
-
Save changes.
You need to configure this option only if your
Coordinate system is a coordinate-based local, regional or global system used to locate geographical entities. A spatial reference system defines a specific map projection, as well as transformations between different spatial reference systems.
-
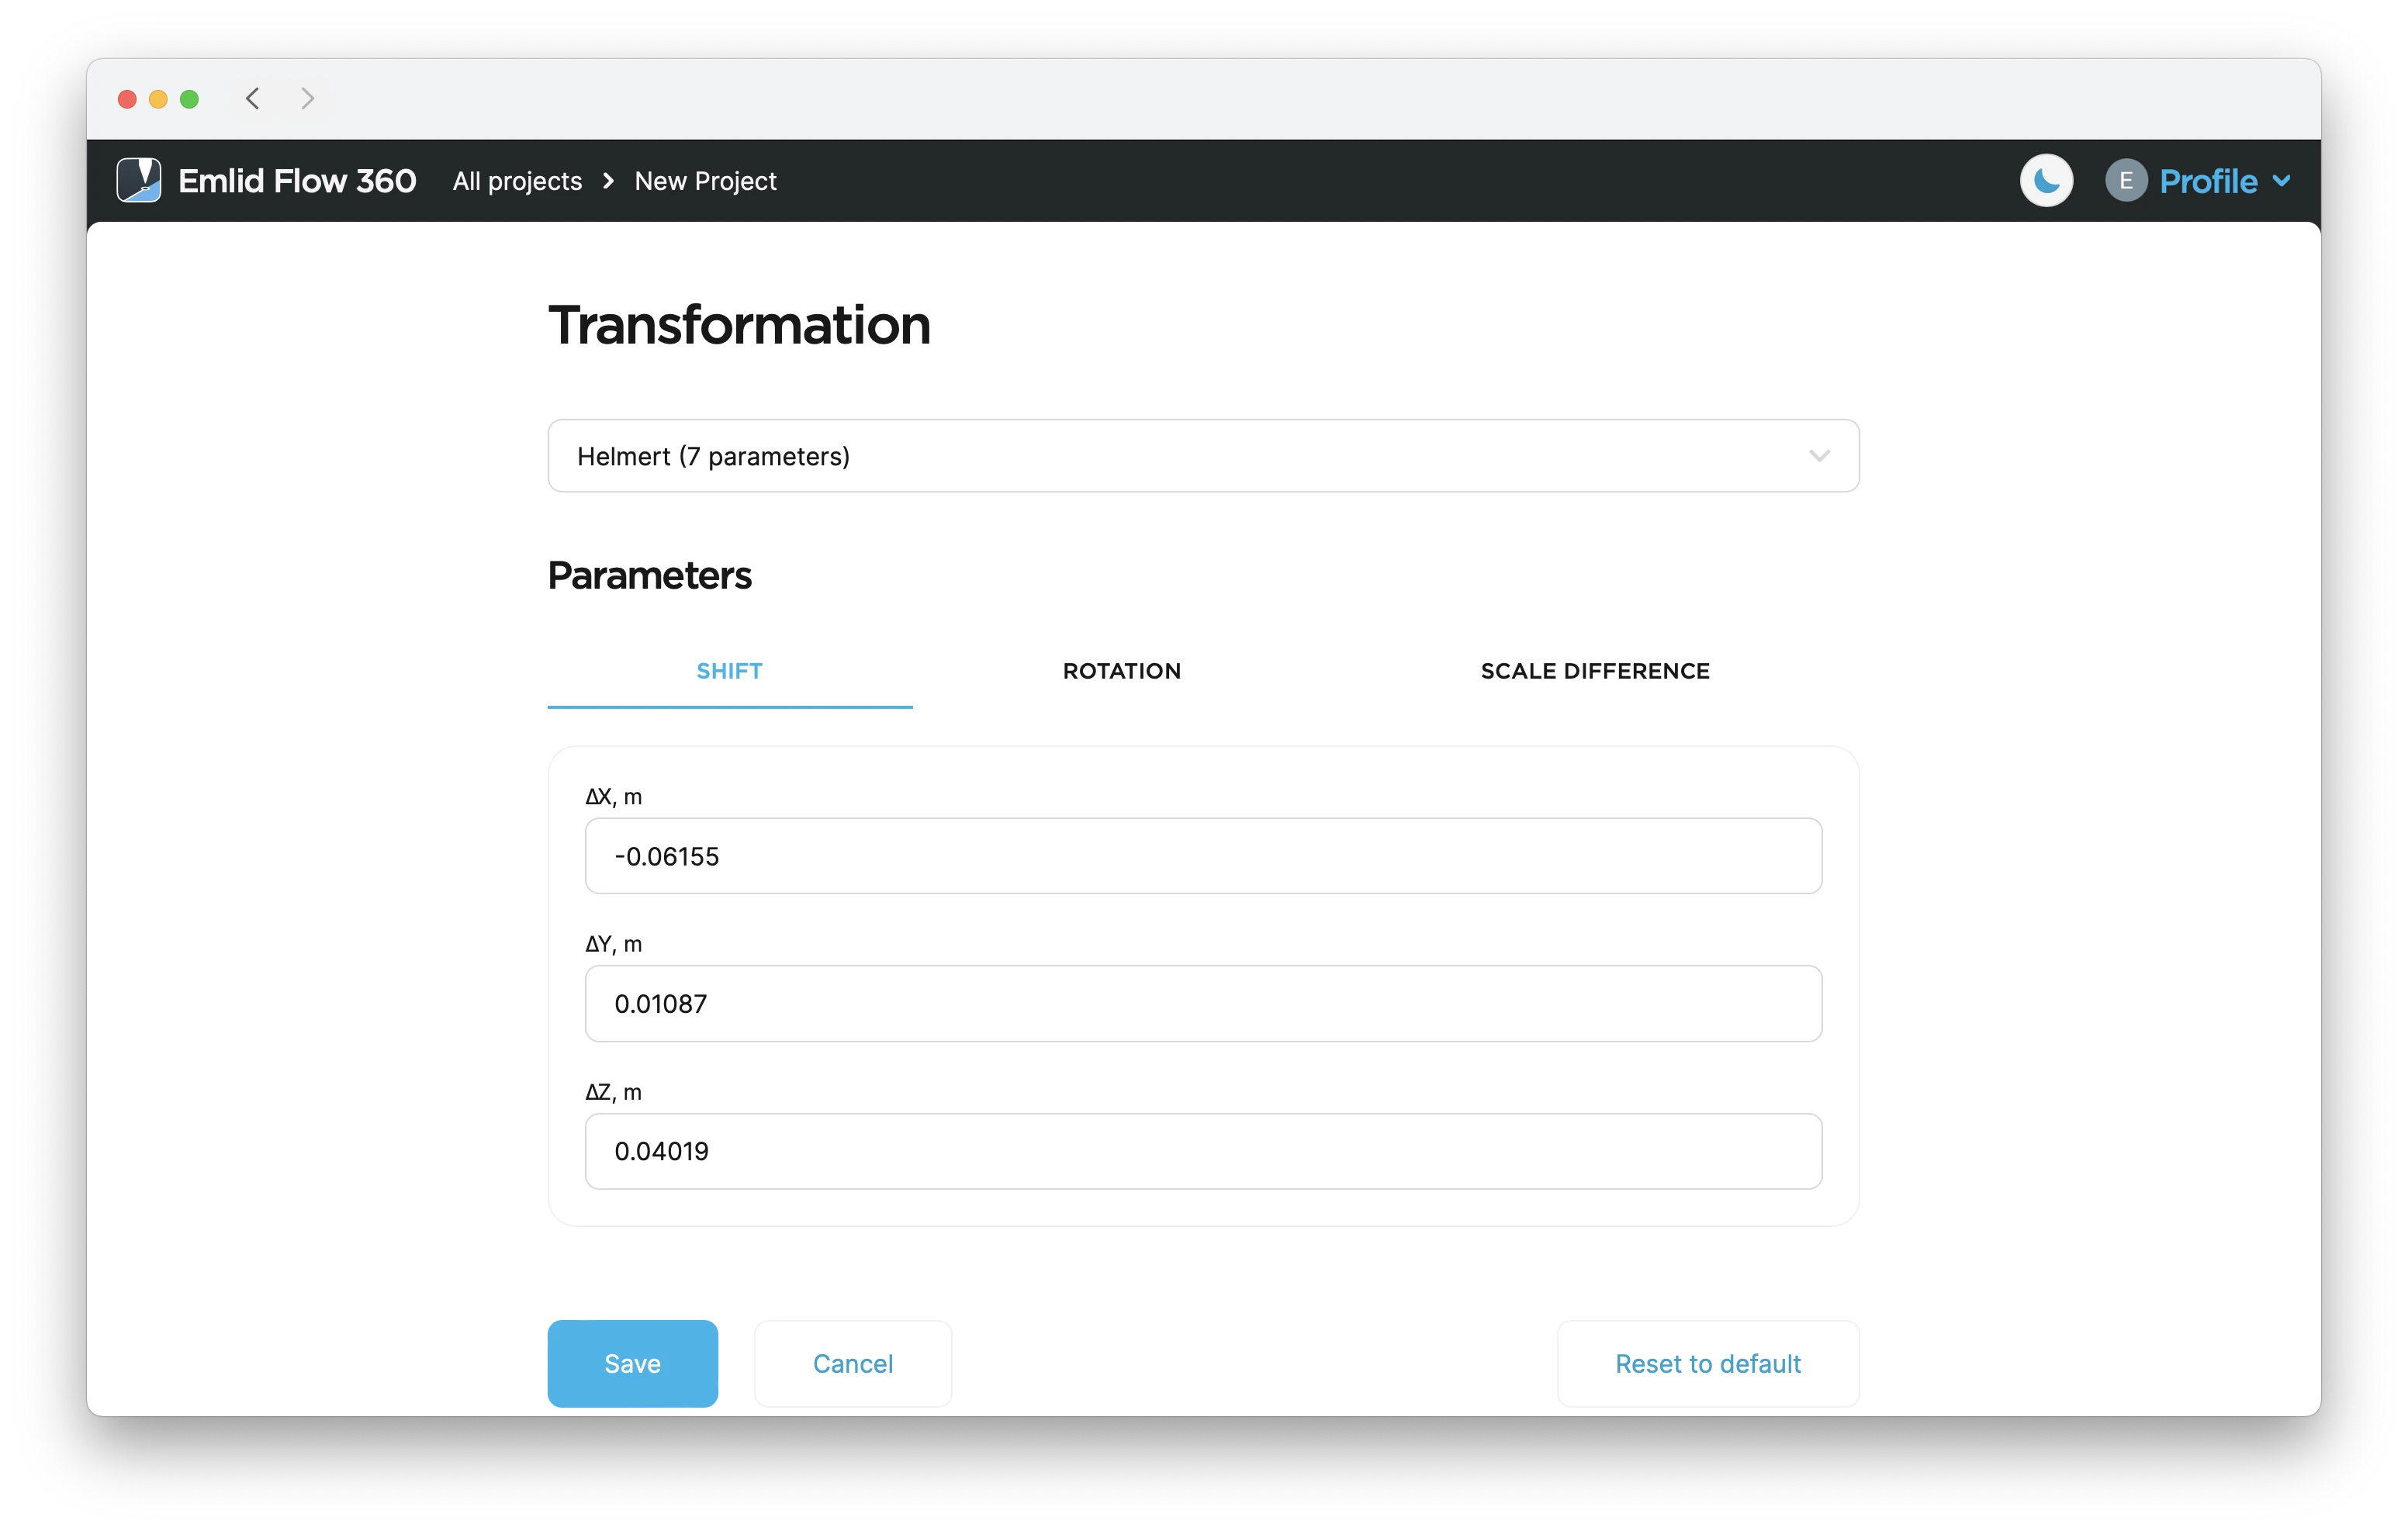
Click the Transformation cell.
-
Choose the required transformation type: Helmert or Molodensky-Badekas.
We need the Helmert transformation to go from
GDA2020toGDA94datum. -
Fill in the transformation parameters: there are 7 of them for the Helmert transformation and 10 for Molodensky-Badekas.
tipThe app can also perform transformations only with 3, 4, and 6 parameters. You can type in the parameters you have and leave the others empty.
-
Save changes.
Choosing geoid model
- Emlid Flow
- Emlid Flow 360
Apply the geoid model to your custom coordinate system only if you require orthometric height for your project. Emlid Flow applies geoid correction to the datum the base works with, so make sure to choose the appropriate one.
-
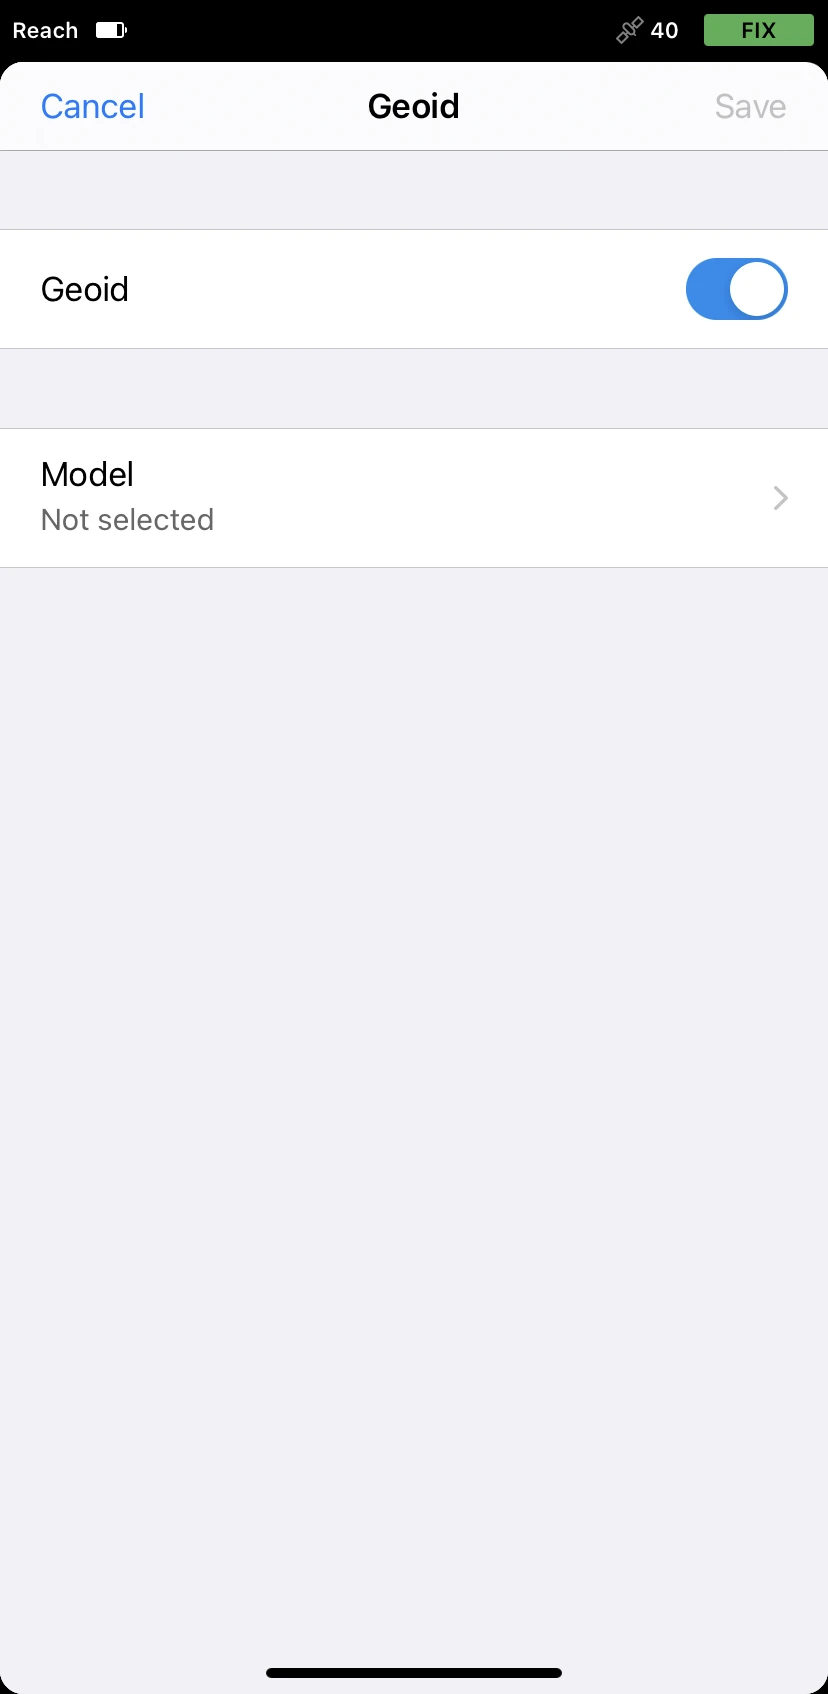
Go to the Geoid screen and turn it on.
-
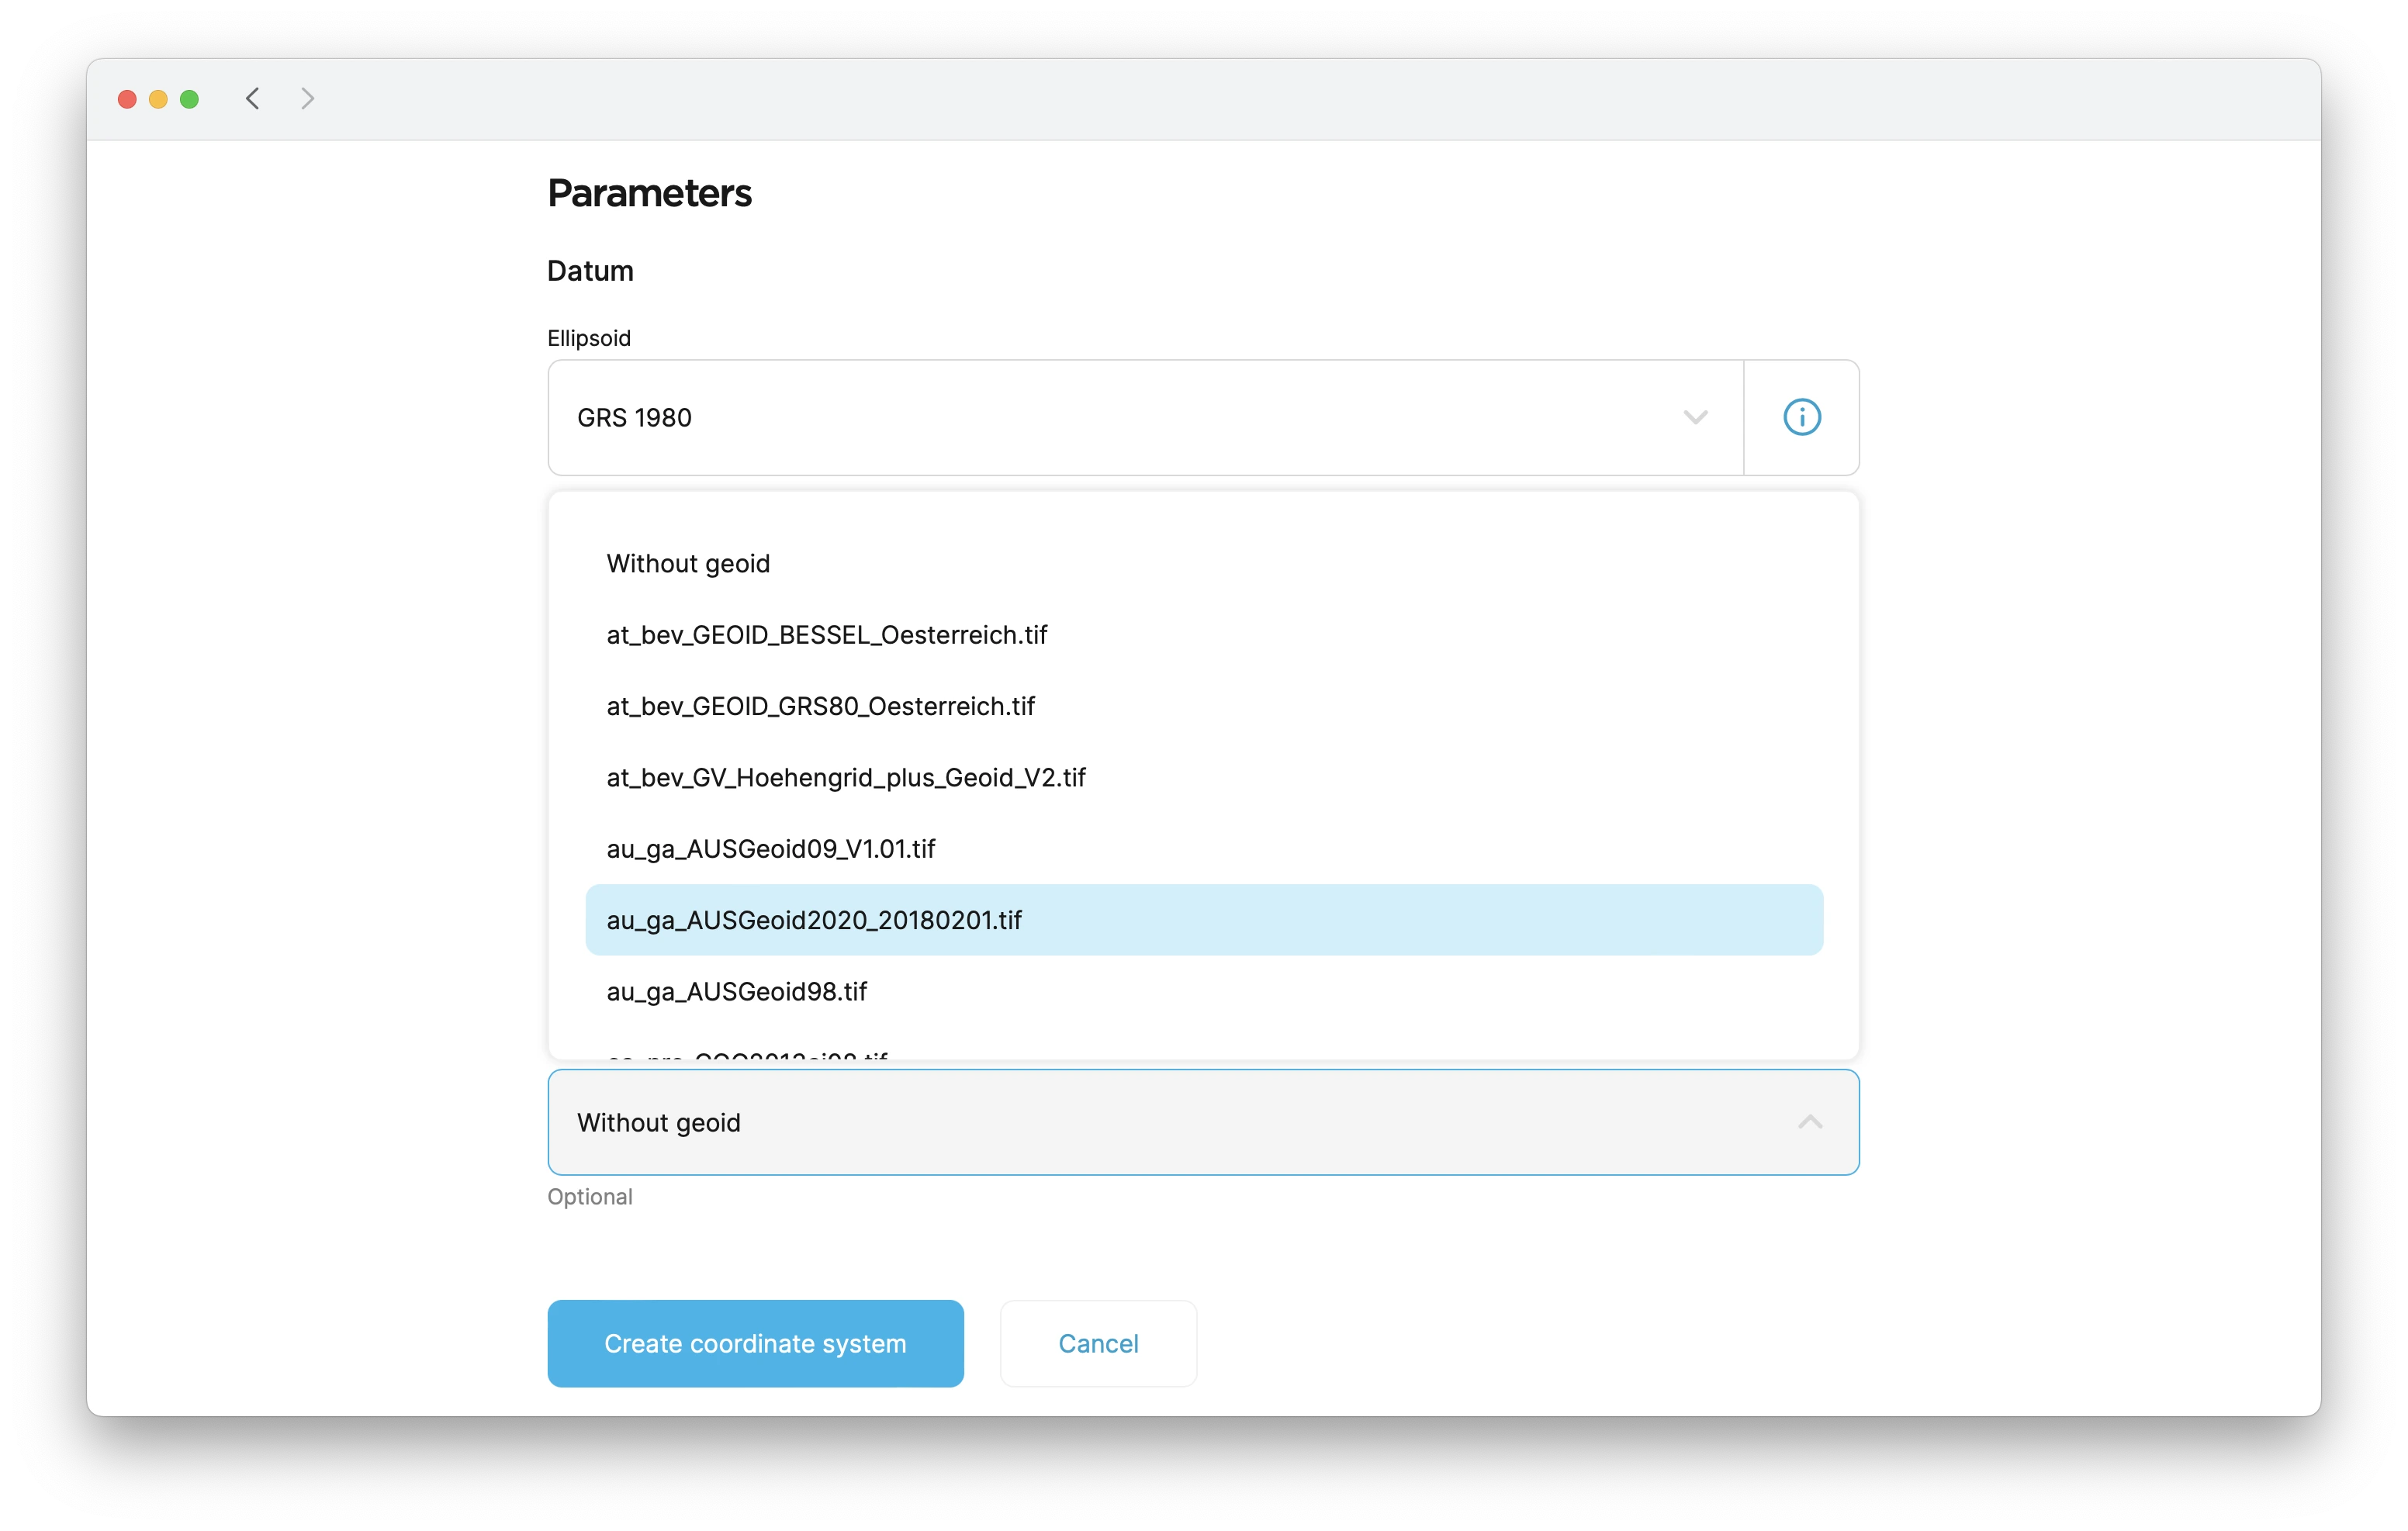
Click on the Model and select the appropriate geoid file. The app will suggest you download the geoid model if you have not done it earlier.
We select the
AUSgeoid2020that is meant to be used for coordinates inGDA2020.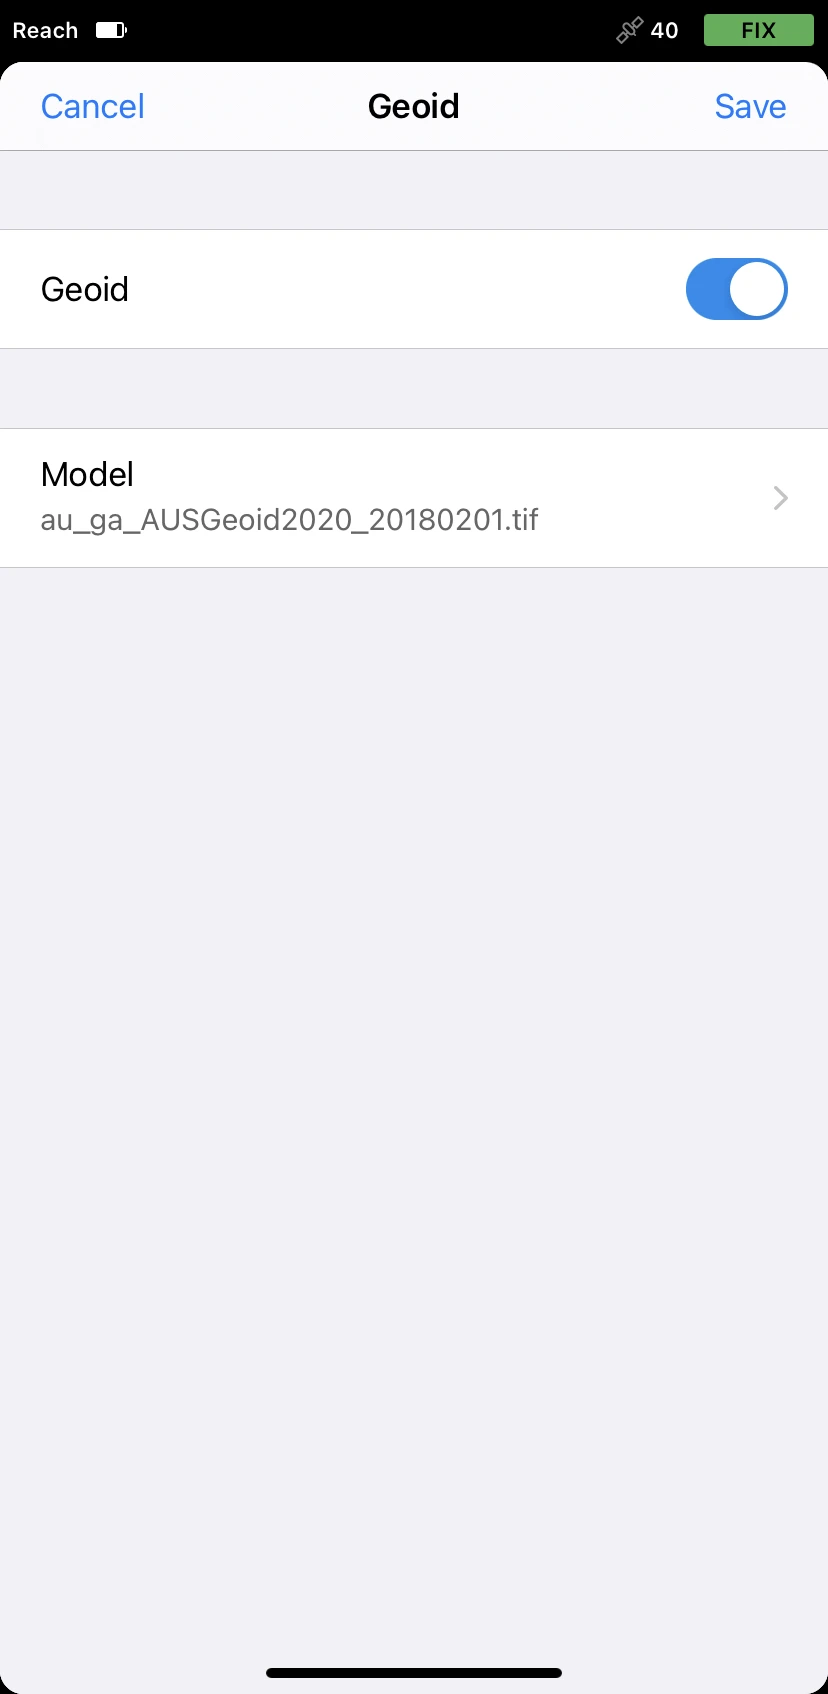
-
Once the geoid is downloaded, tap Save.
Apply the geoid model to your custom coordinate system only if you require orthometric height for your project. Emlid Flow 360 applies geoid correction to the datum the base works with, so make sure to choose the appropriate one.
Click the Geoid model cell and select the appropriate geoid file from the list.
We select the AUSgeoid2020 that is meant to be used for coordinates in GDA2020.
Saving custom CS
- Emlid Flow
- Emlid Flow 360
Once everything is configured, tap Save on the New CS screen to save the coordinate system. From now on, your custom coordinate system is saved to your Emlid account and synced among all your devices.
You can find your custom coordinate systems later while configuring new projects.
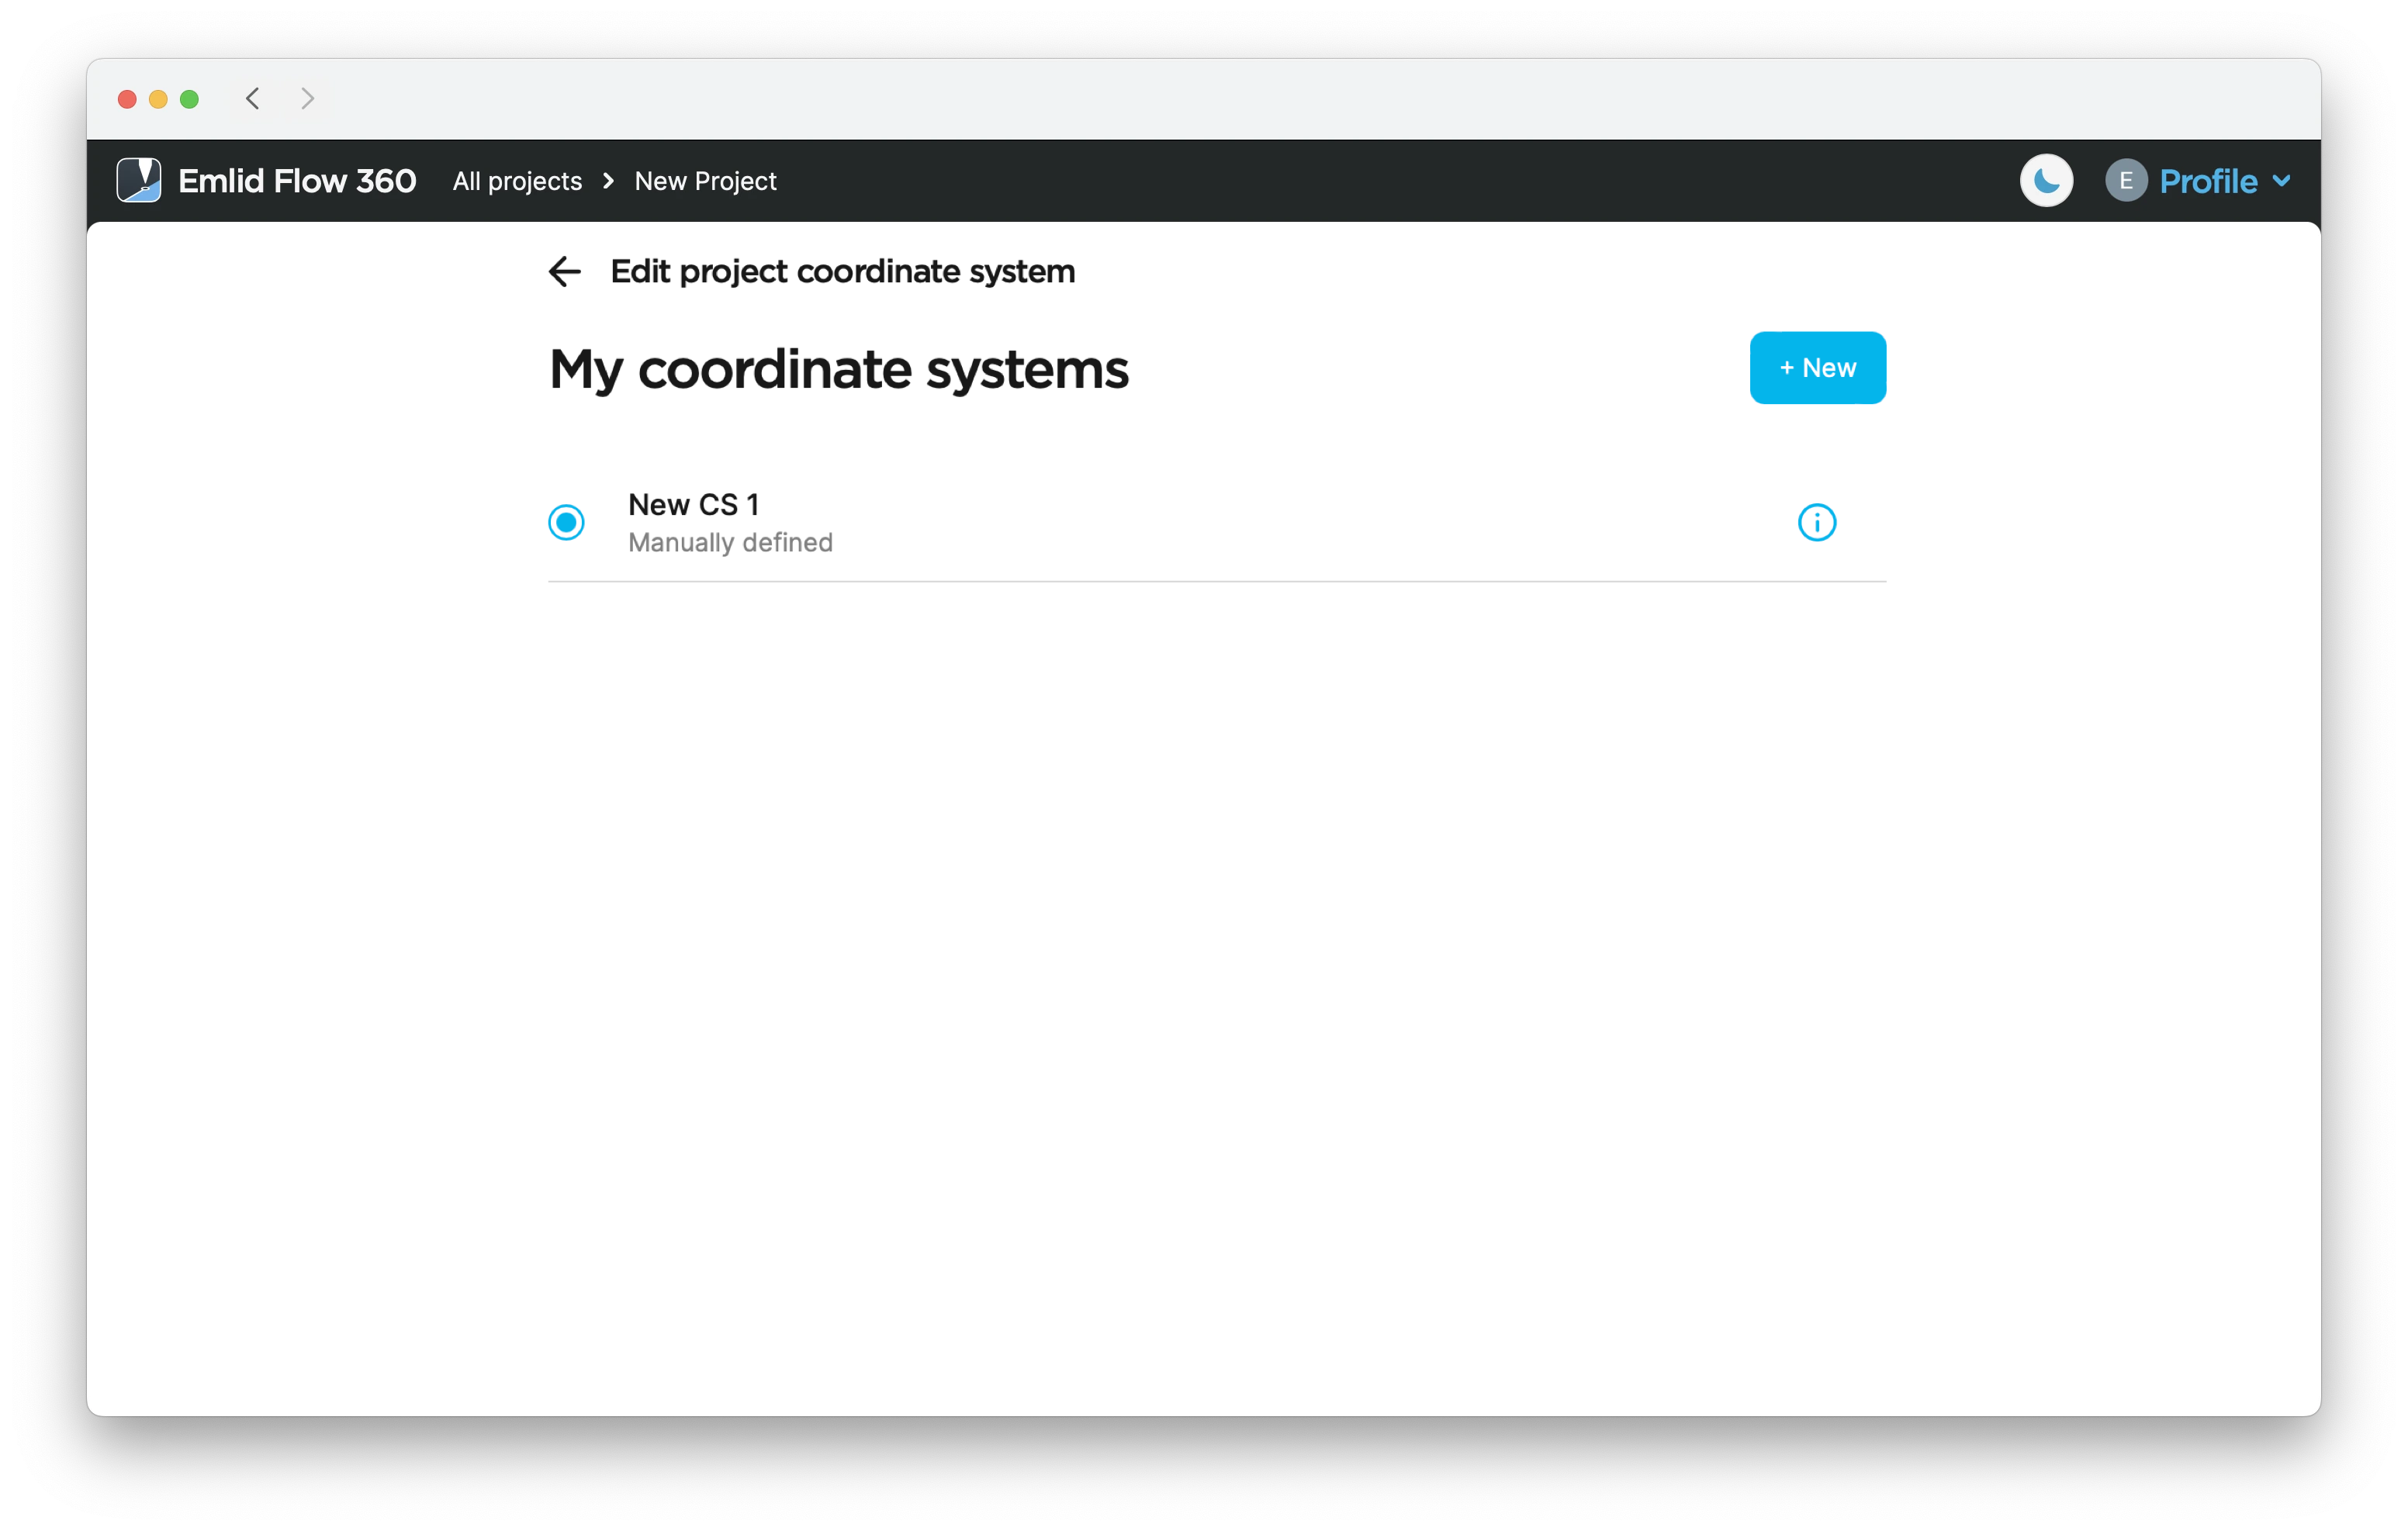
Once everything is configured, click Create coordinate system on the New coordinate system screen to save the coordinate system. From now on, your custom coordinate system is saved to your Emlid account and synced among all your devices.
You can find your custom coordinate systems on the My coordinate systems screen.
You can continue creating the project for survey.
Editing custom CS
- Emlid Flow 360
You can edit parameters of your custom CS in the Emlid Flow 360 app. To do so, follow these steps:
The editing option is not available for calibrated systems.
-
Tap Profile in the upper-left corner and select My coordinate systems from the drop-down menu. The list of your custom CSs will open.
-
Tap the three dots button to rename, duplicate, edit or delete your custom CS.
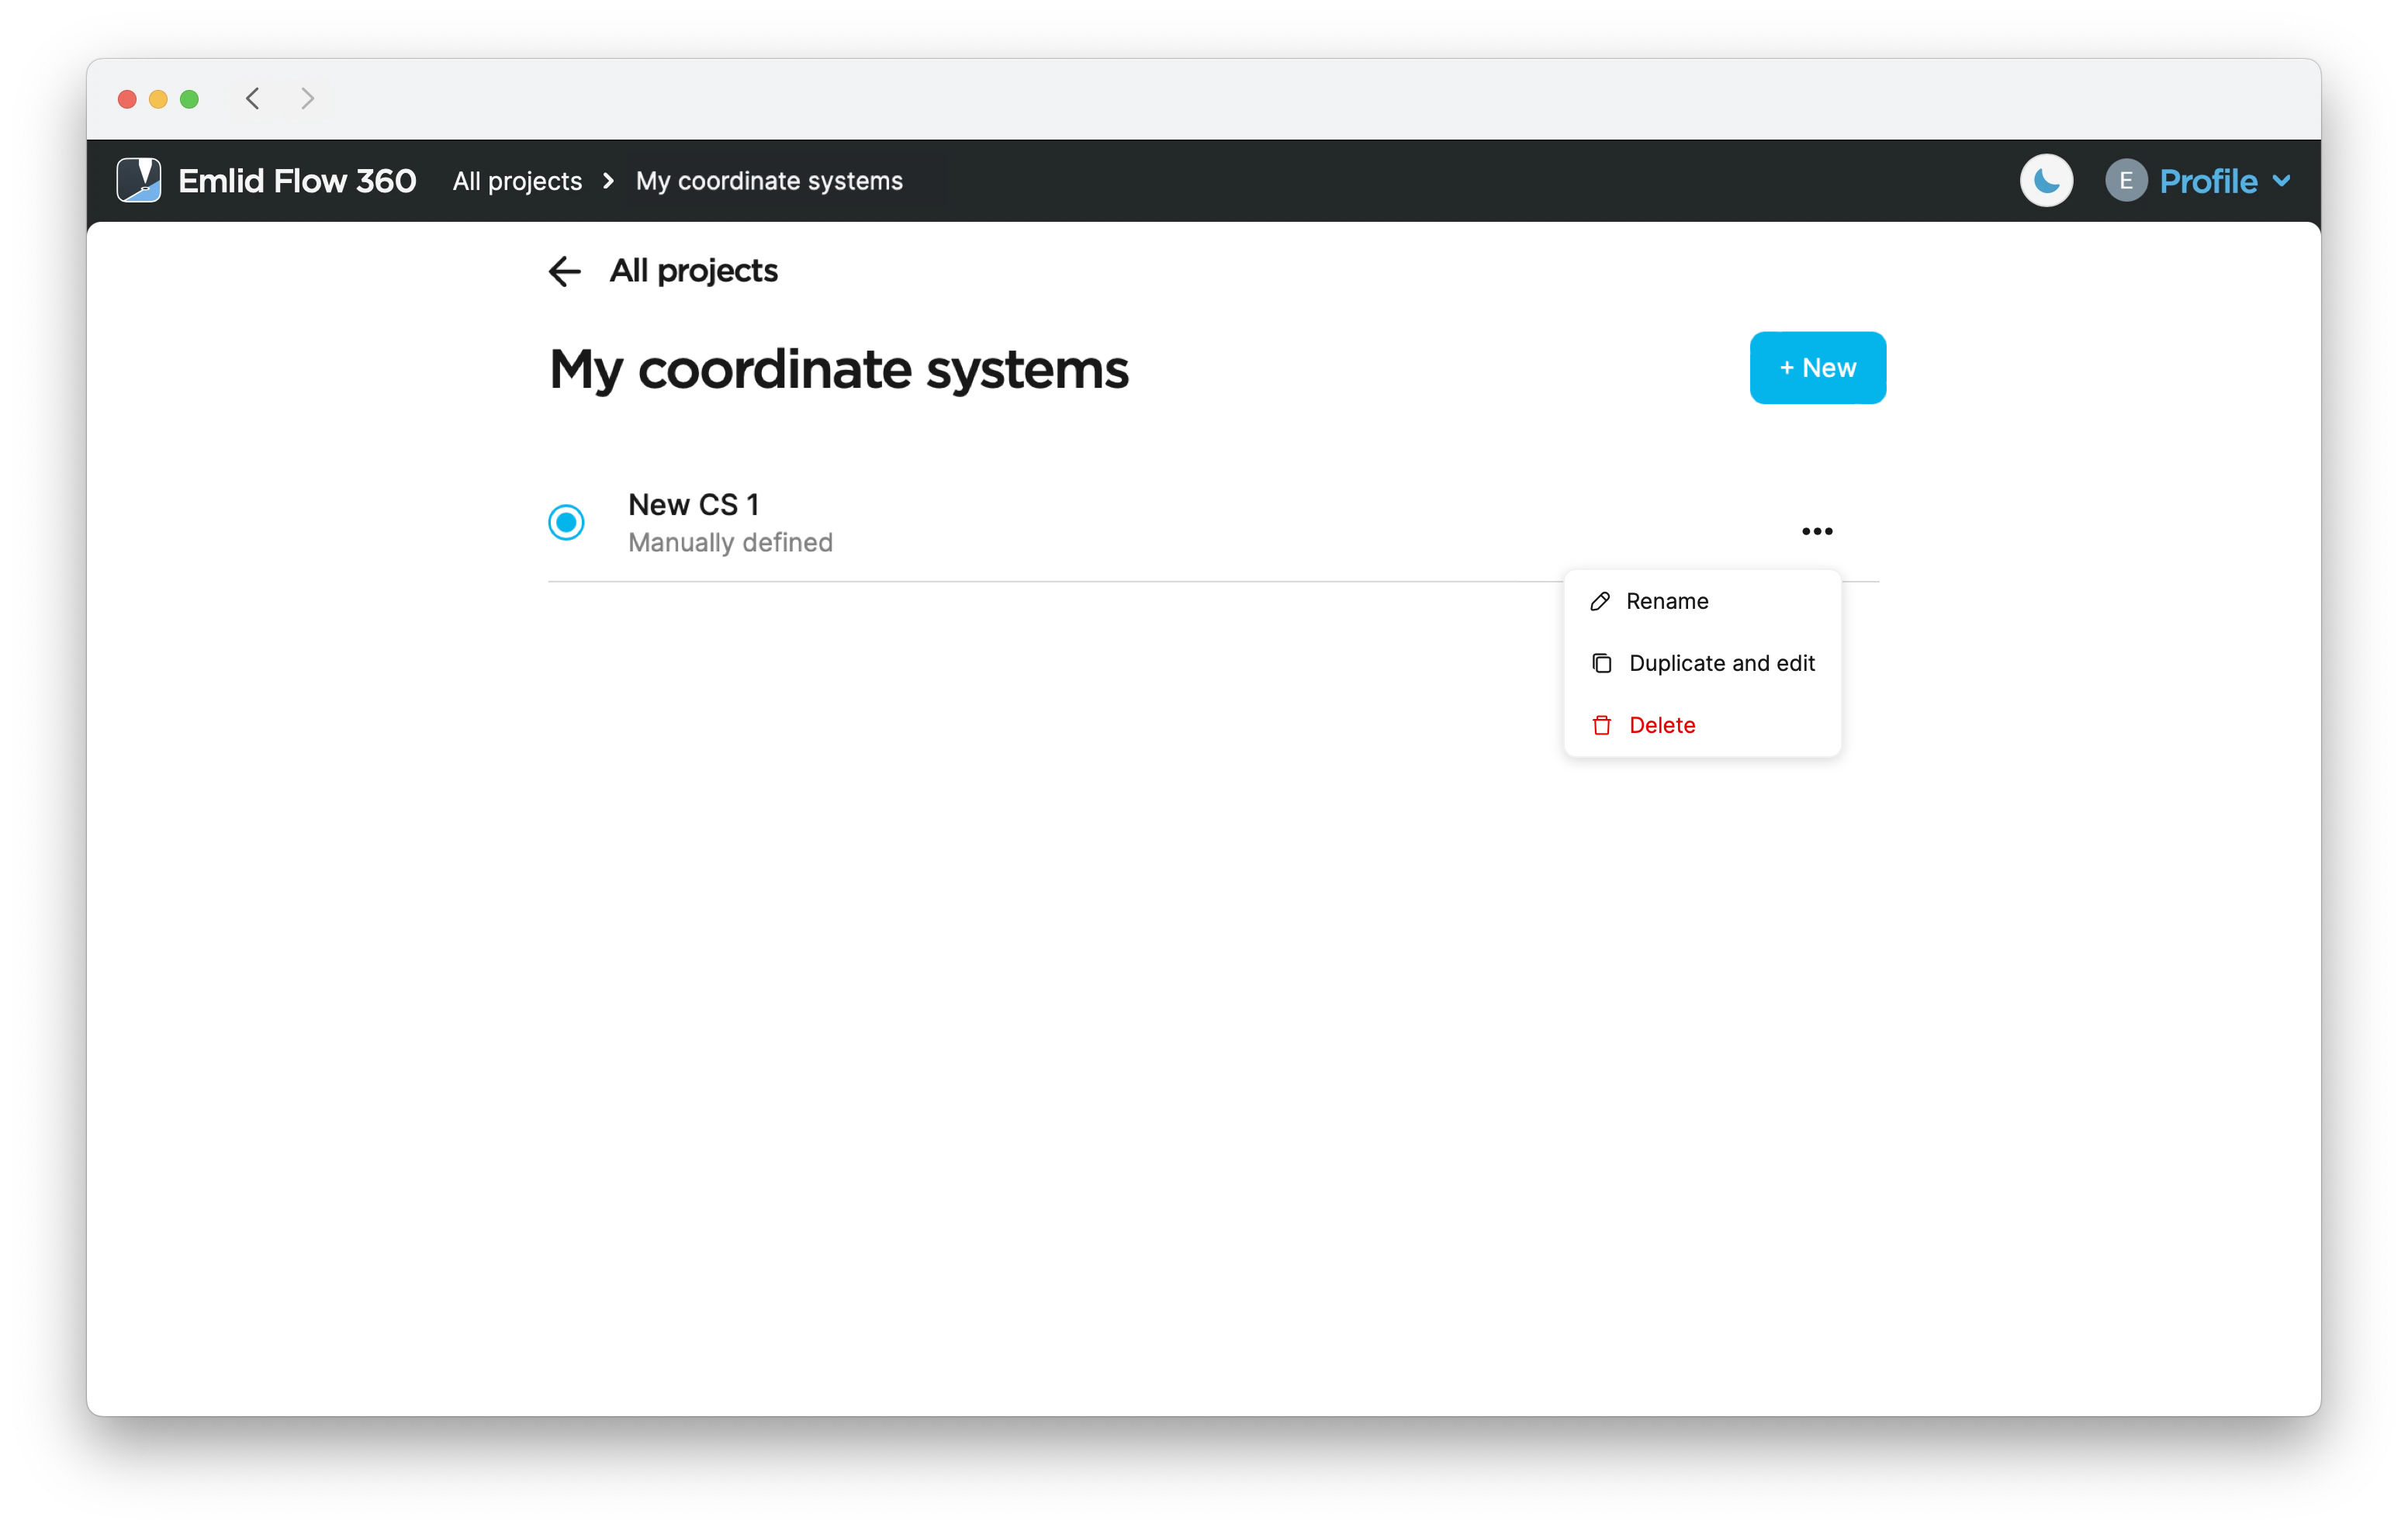
Duplicating your CS allows you to quickly edit parameters without having to enter them twice.
- Edit the parameters and tap Create coordinate system.