Working with Reach RS2+ base
This guide shows how to receive corrections on Reach RX from Reach RS2+ base using Emlid Caster.
Overview
Make sure that you can provide Internet access for both receivers.
With the help of Emlid NTRIP caster, you can combine Reach RS2+ as a base and Reach RX rover in one setup and pass corrections from Reach RS2+ to Reach RX over the Internet.
Learn more about Emlid Caster.
Workflow
Follow the steps below to receive corrections from Reach RS2+ base on your Reach RX.
Get access to NTRIP credentials
First, you need to get your NTRIP credentials for both Reach RS2+ base and Reach RX rover. Follow the steps below:
-
Go to caster.emlid.com.
-
Sign up or sign in using your Emlid account.
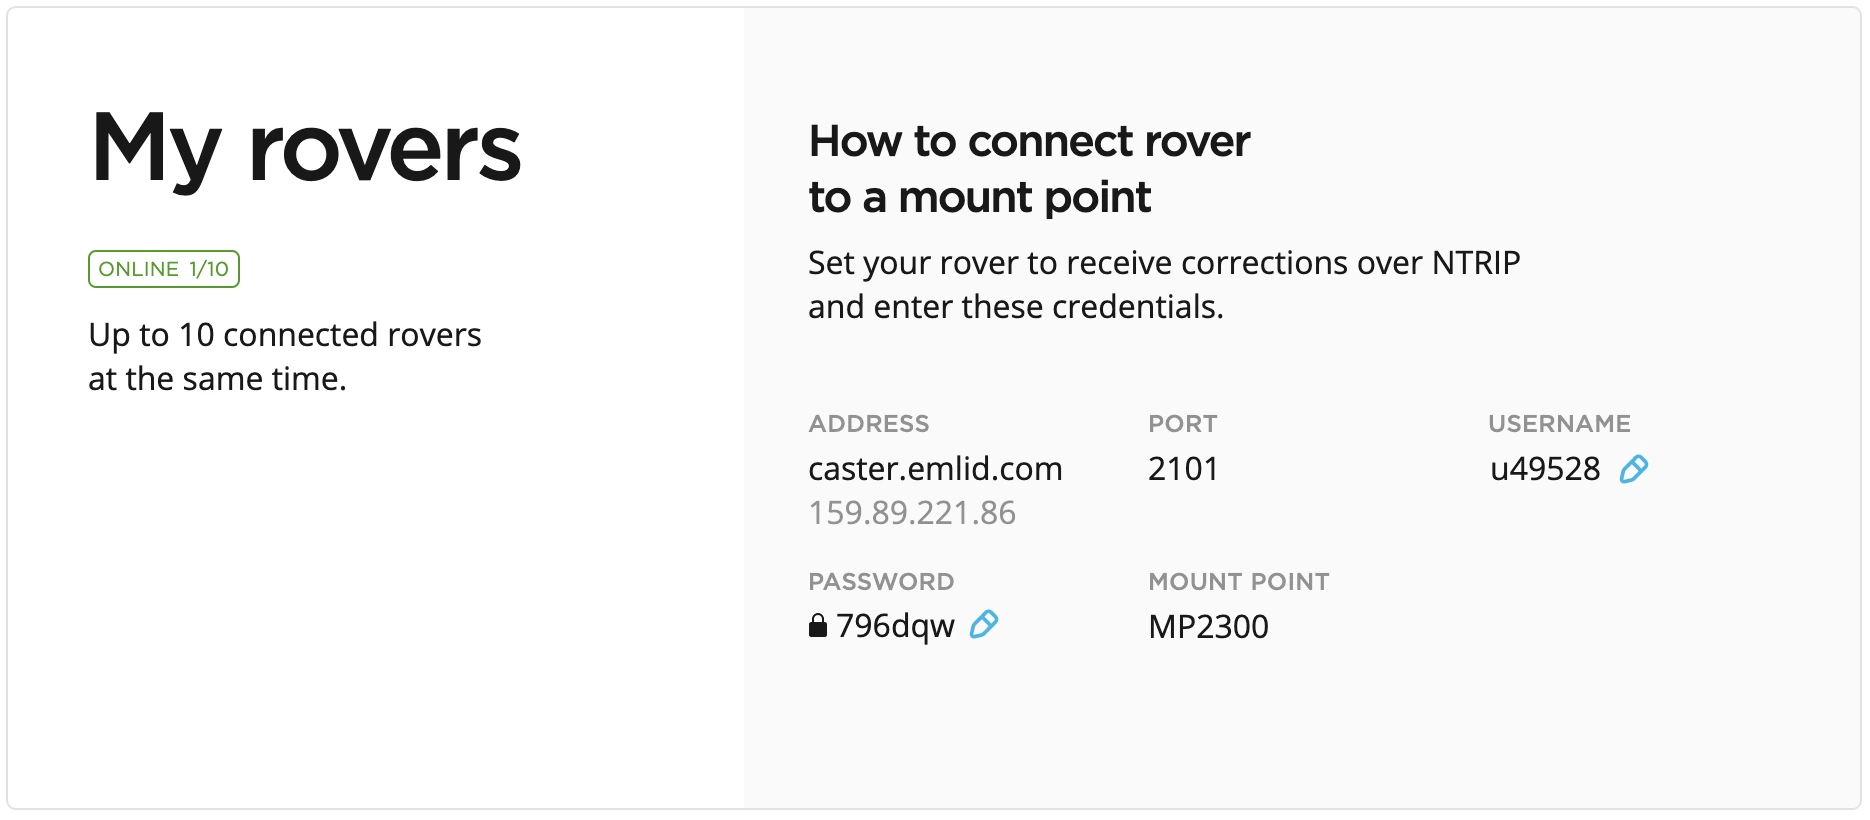
Once you sign up, you will access the page with NTRIP credentials for both base and rover, which are generated automatically. From this moment, you can use these credentials to connect your base and rover to a mount point.
Connect base to a mount point�
To connect your Reach RS2+ base to a mount point, follow the steps below:
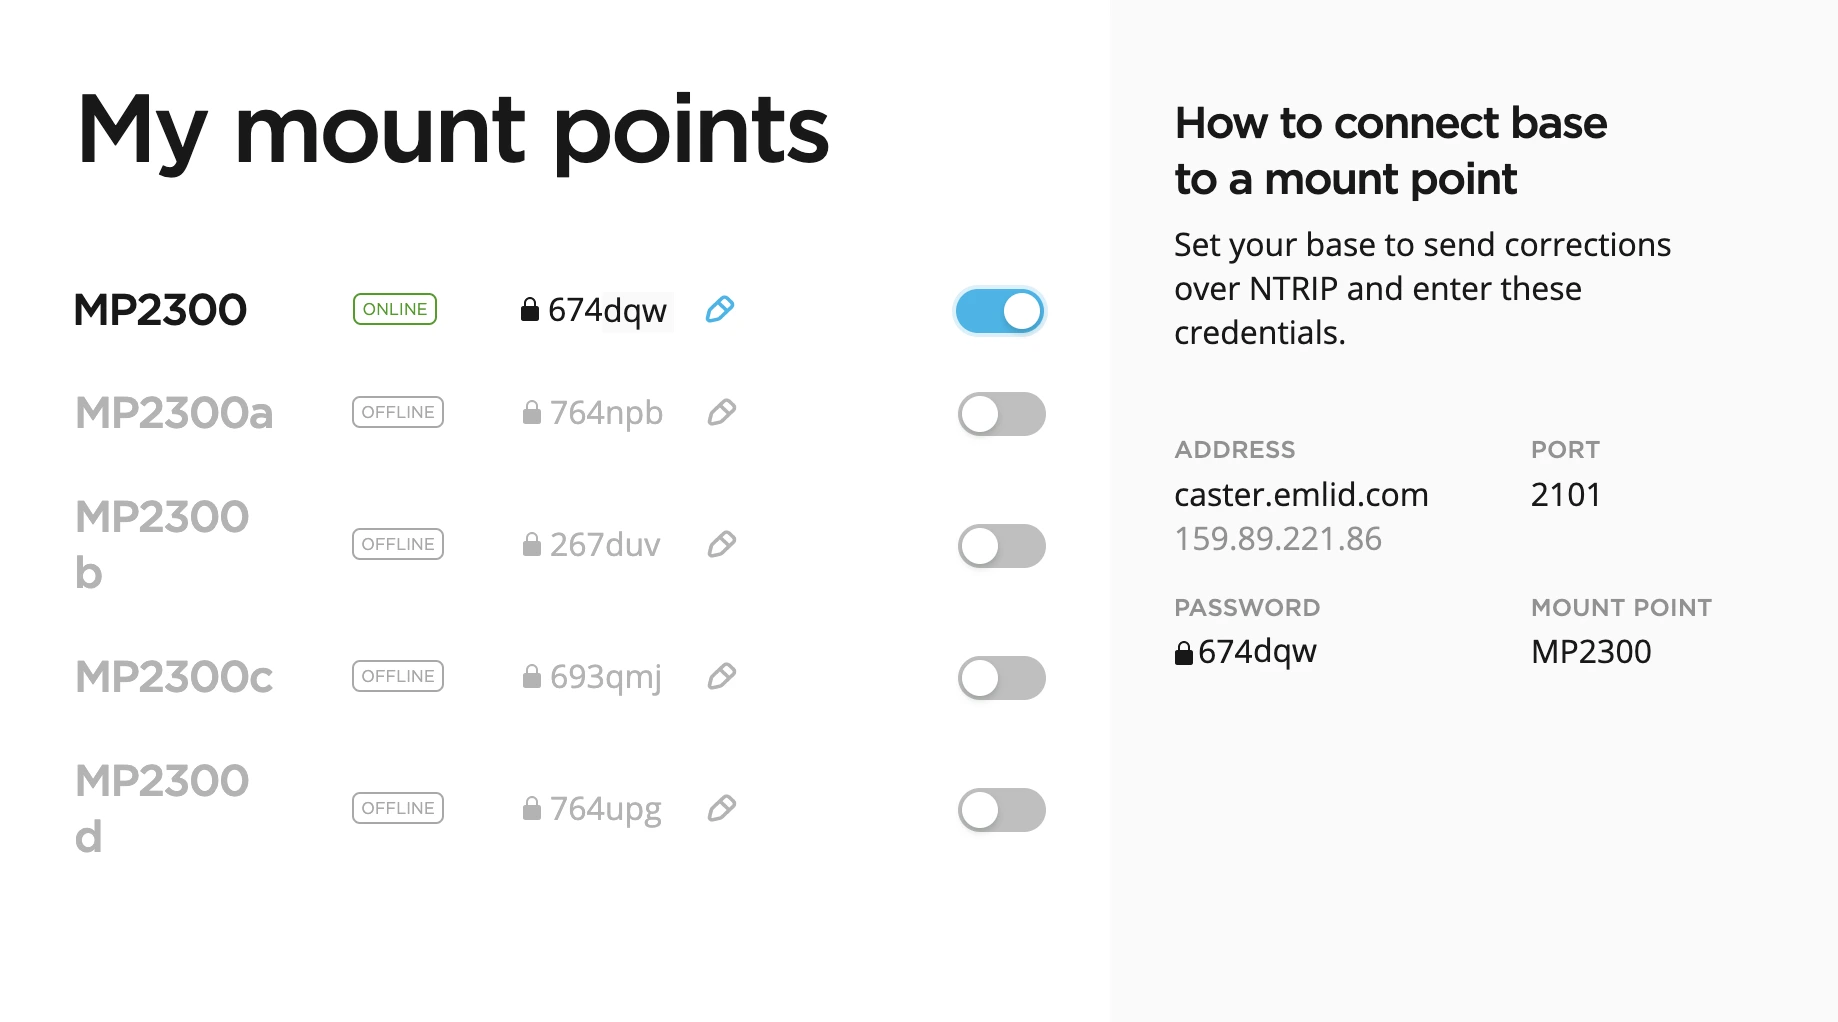
- Activate the mount point you want to use by switching on the toggle.

-
Connect to your base via Emlid Flow, go to Base output, and set it up to send corrections over NTRIP using the obtained credentials:
- Address
- Port
- Password
- Mount point
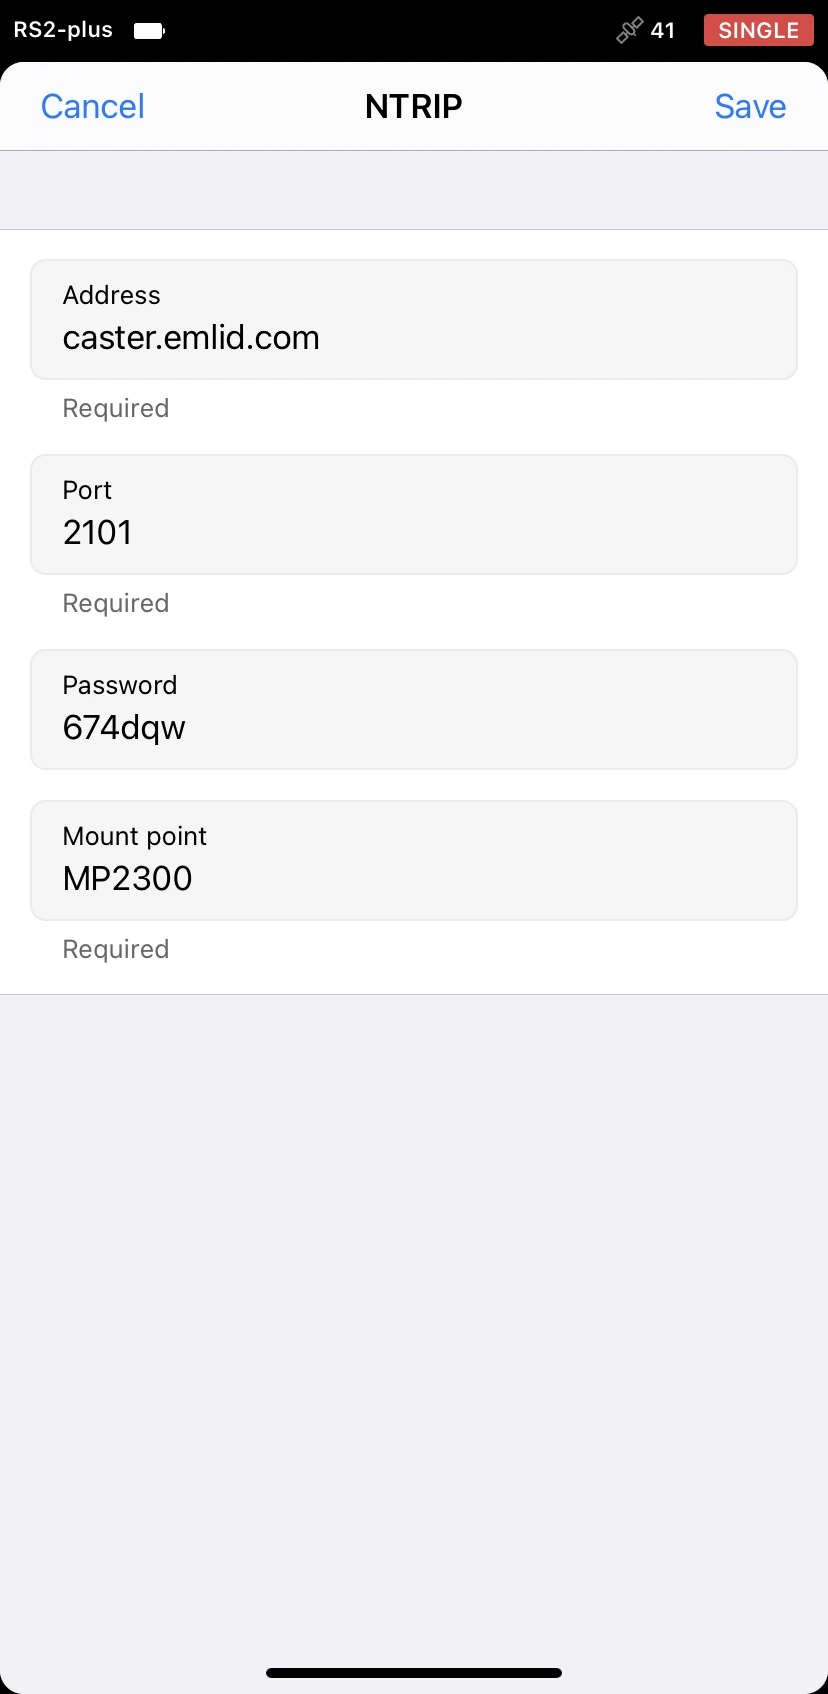
Make sure you configured your base to output corrections via NTRIP.
Once you successfully connect your base, you will see the ONLINE notification next to the mount point name.
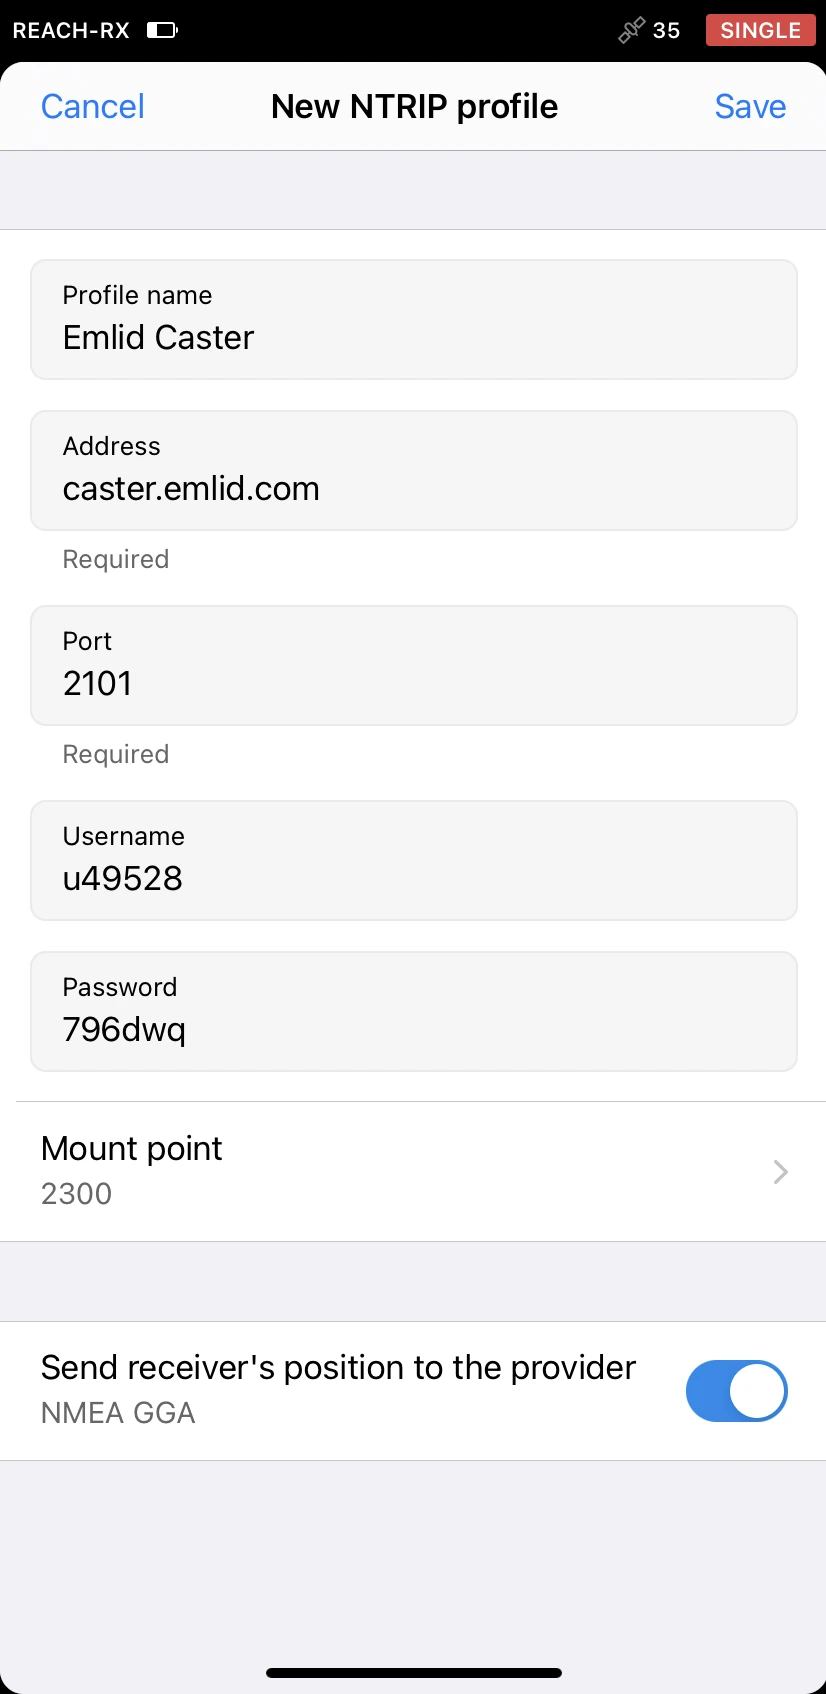
Connect your rover to a mount point
To connect your Reach RX rover to a mount point, follow the steps below:
- Access the rover's credentials.
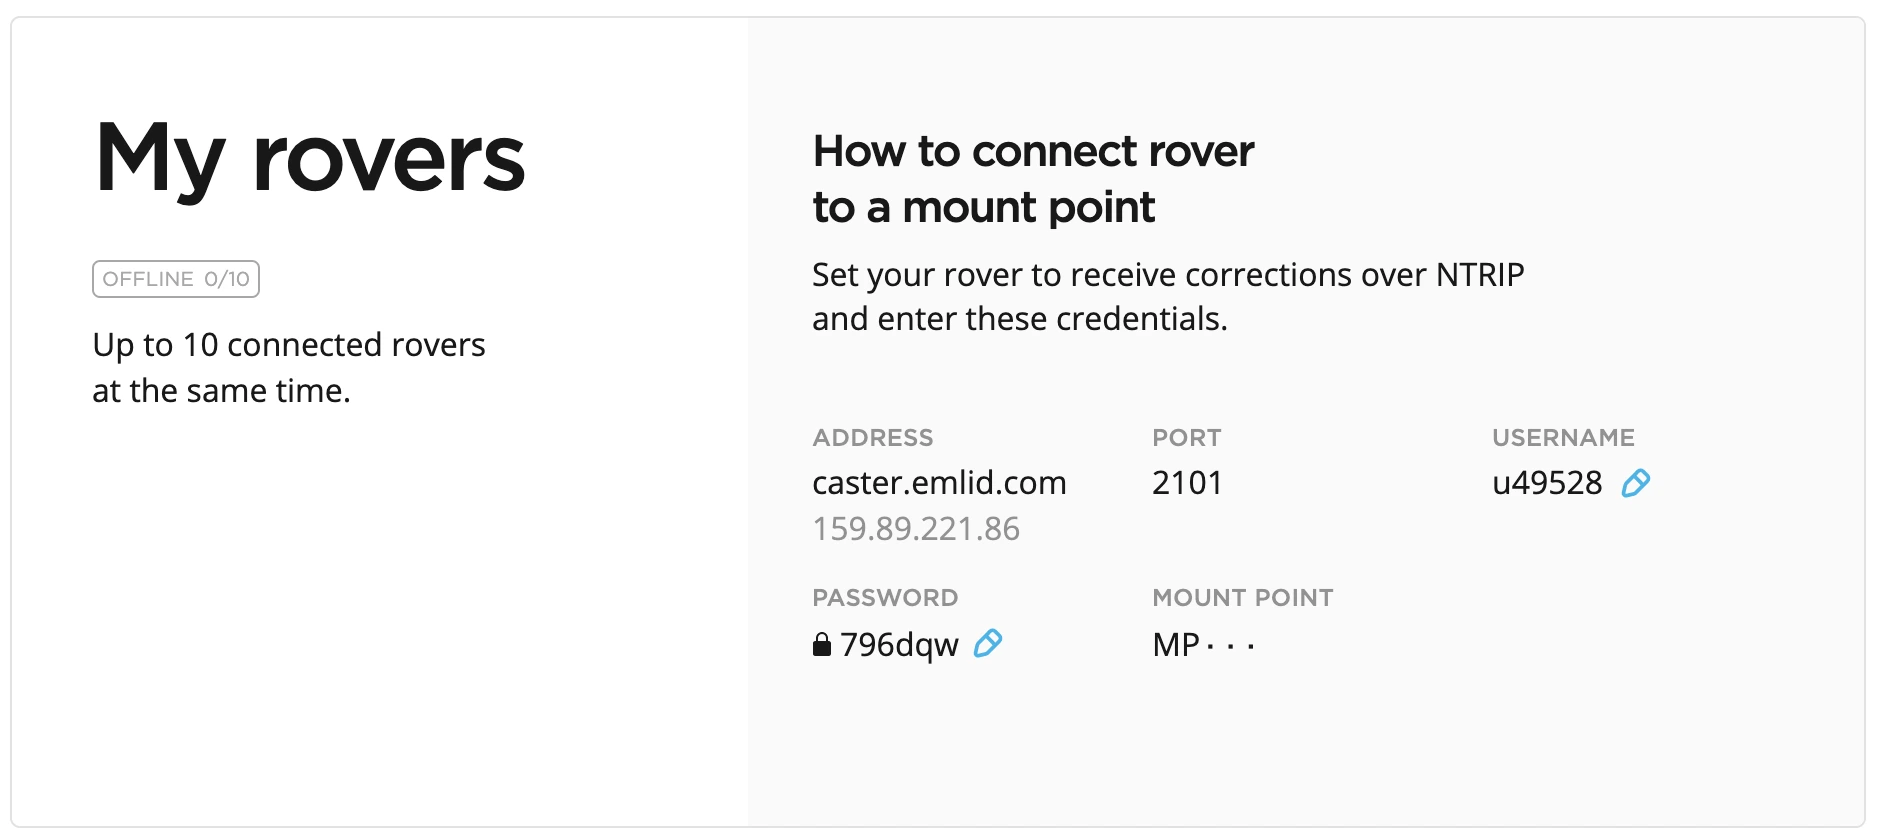
Once you activate the mount point for the base, you will see it in the rover's credentials.
-
Connect to your rover via Emlid Flow, go to Correction input, and set it up to get corrections over NTRIP using the obtained credentials for the rover:
- Address
- Port
- Username
- Password
- Mount point
Make sure you configured your rover to receive corrections from the base via NTRIP.
If you want to add more rovers, repeat the steps above.
Once you successfully connect your rover, you will see the ONLINE notification and the number of the connected rovers in the My rovers section.
To ensure successful corrections transmitting, double-check the credentials you entered on both base and rover.
When you set up and connected both base and rover to the mount point, you are all set for the survey.
Placement
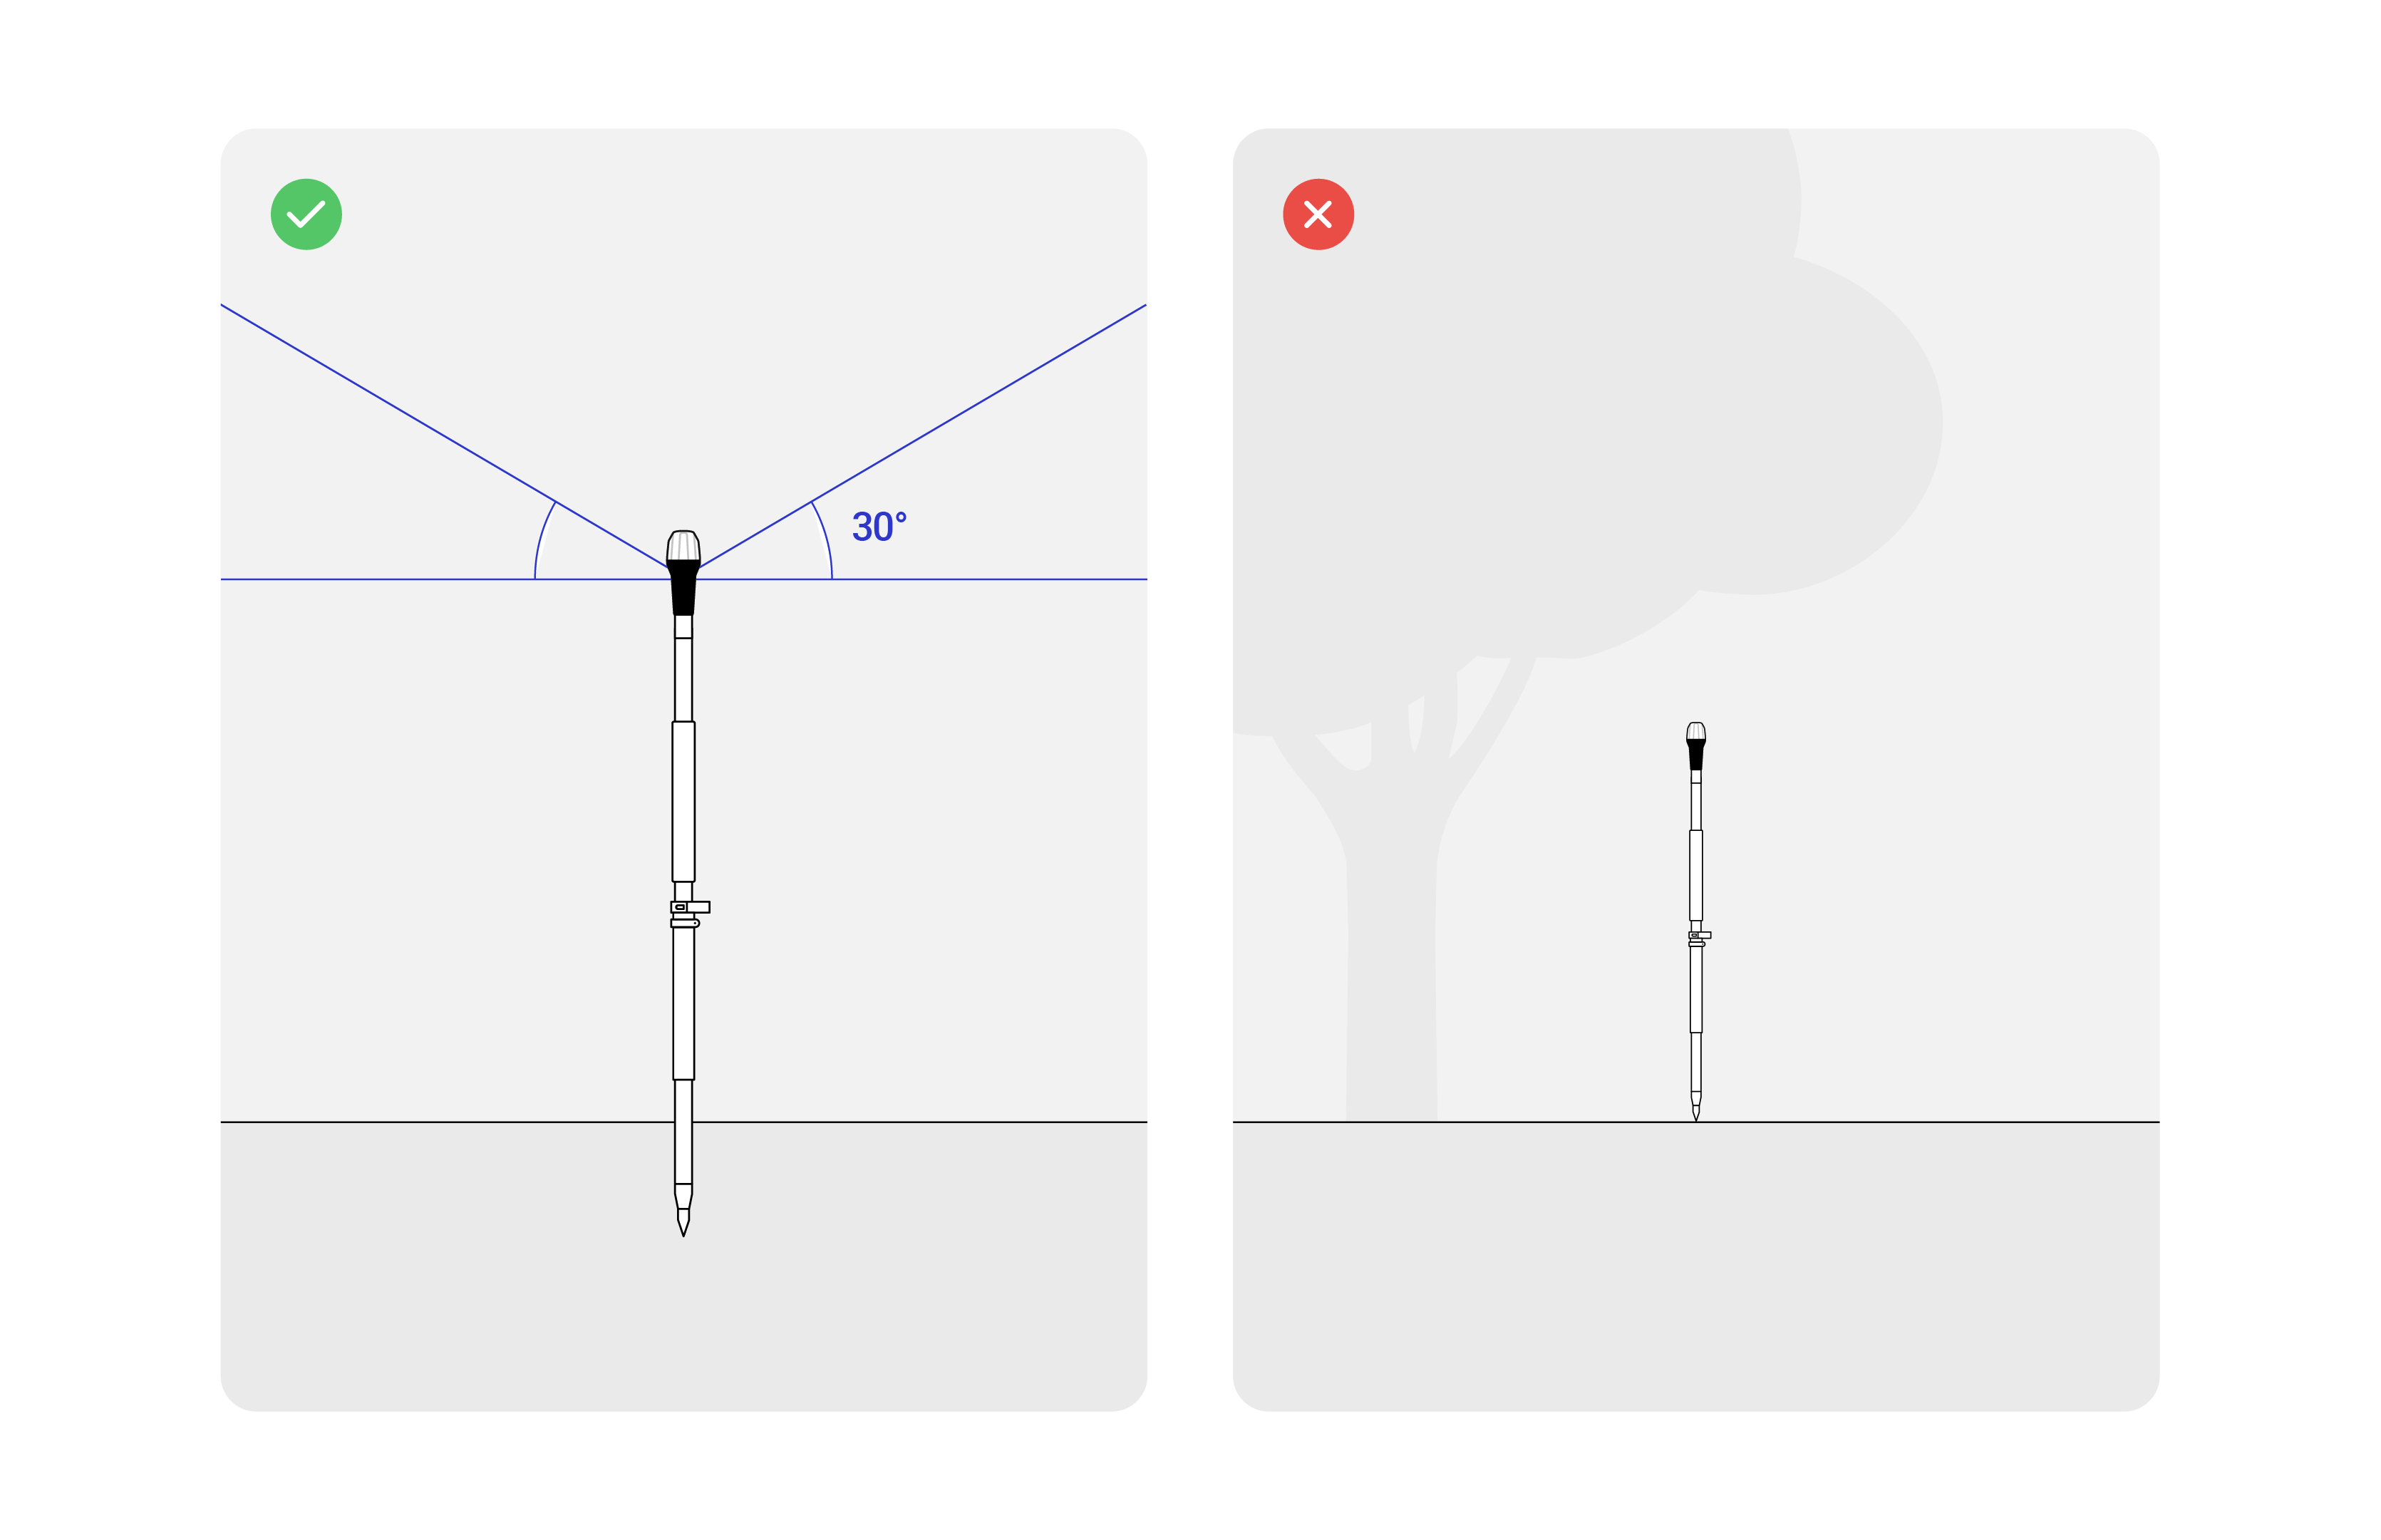
Placing Reach RX rover
Before surveying, make sure your Reach has a clear sky view of at least 30° above the horizon. There should be no obstacles that could block the view like buildings, trees, cars, humans, laptops, etc.
Placing Reach RS2+ base
To properly place your Reach RS2+ base, check these guides:
Viewing results
When you completed your RTK setup, you can watch the current solution status in the top right corner of the Emlid Flow app or watch the Status LED on your Reach RX:

SINGLE means that Reach has found a solution relying only on the satellite signals. In this case, the precision is usually at the meter level.

FLOAT means that Reach receives corrections from the base station but needs more time to calculate the solution. In this case, the precision is usually at the submeter level.

FIX means that Reach using the base corrections calculated a solution with a centimeter precision.
Reach RX gets a fixed solution withing a short period of time. In good environments, it will take a few seconds. In tough conditions, it may take a little longer. Once the rover gets FIX, you are all set for surveying.
You can also find the current solution status as well as your real-time position on the Status screen.