Power supply and operation
This guide provides you with information on the power supply and operation of your Reach RX.
Overview
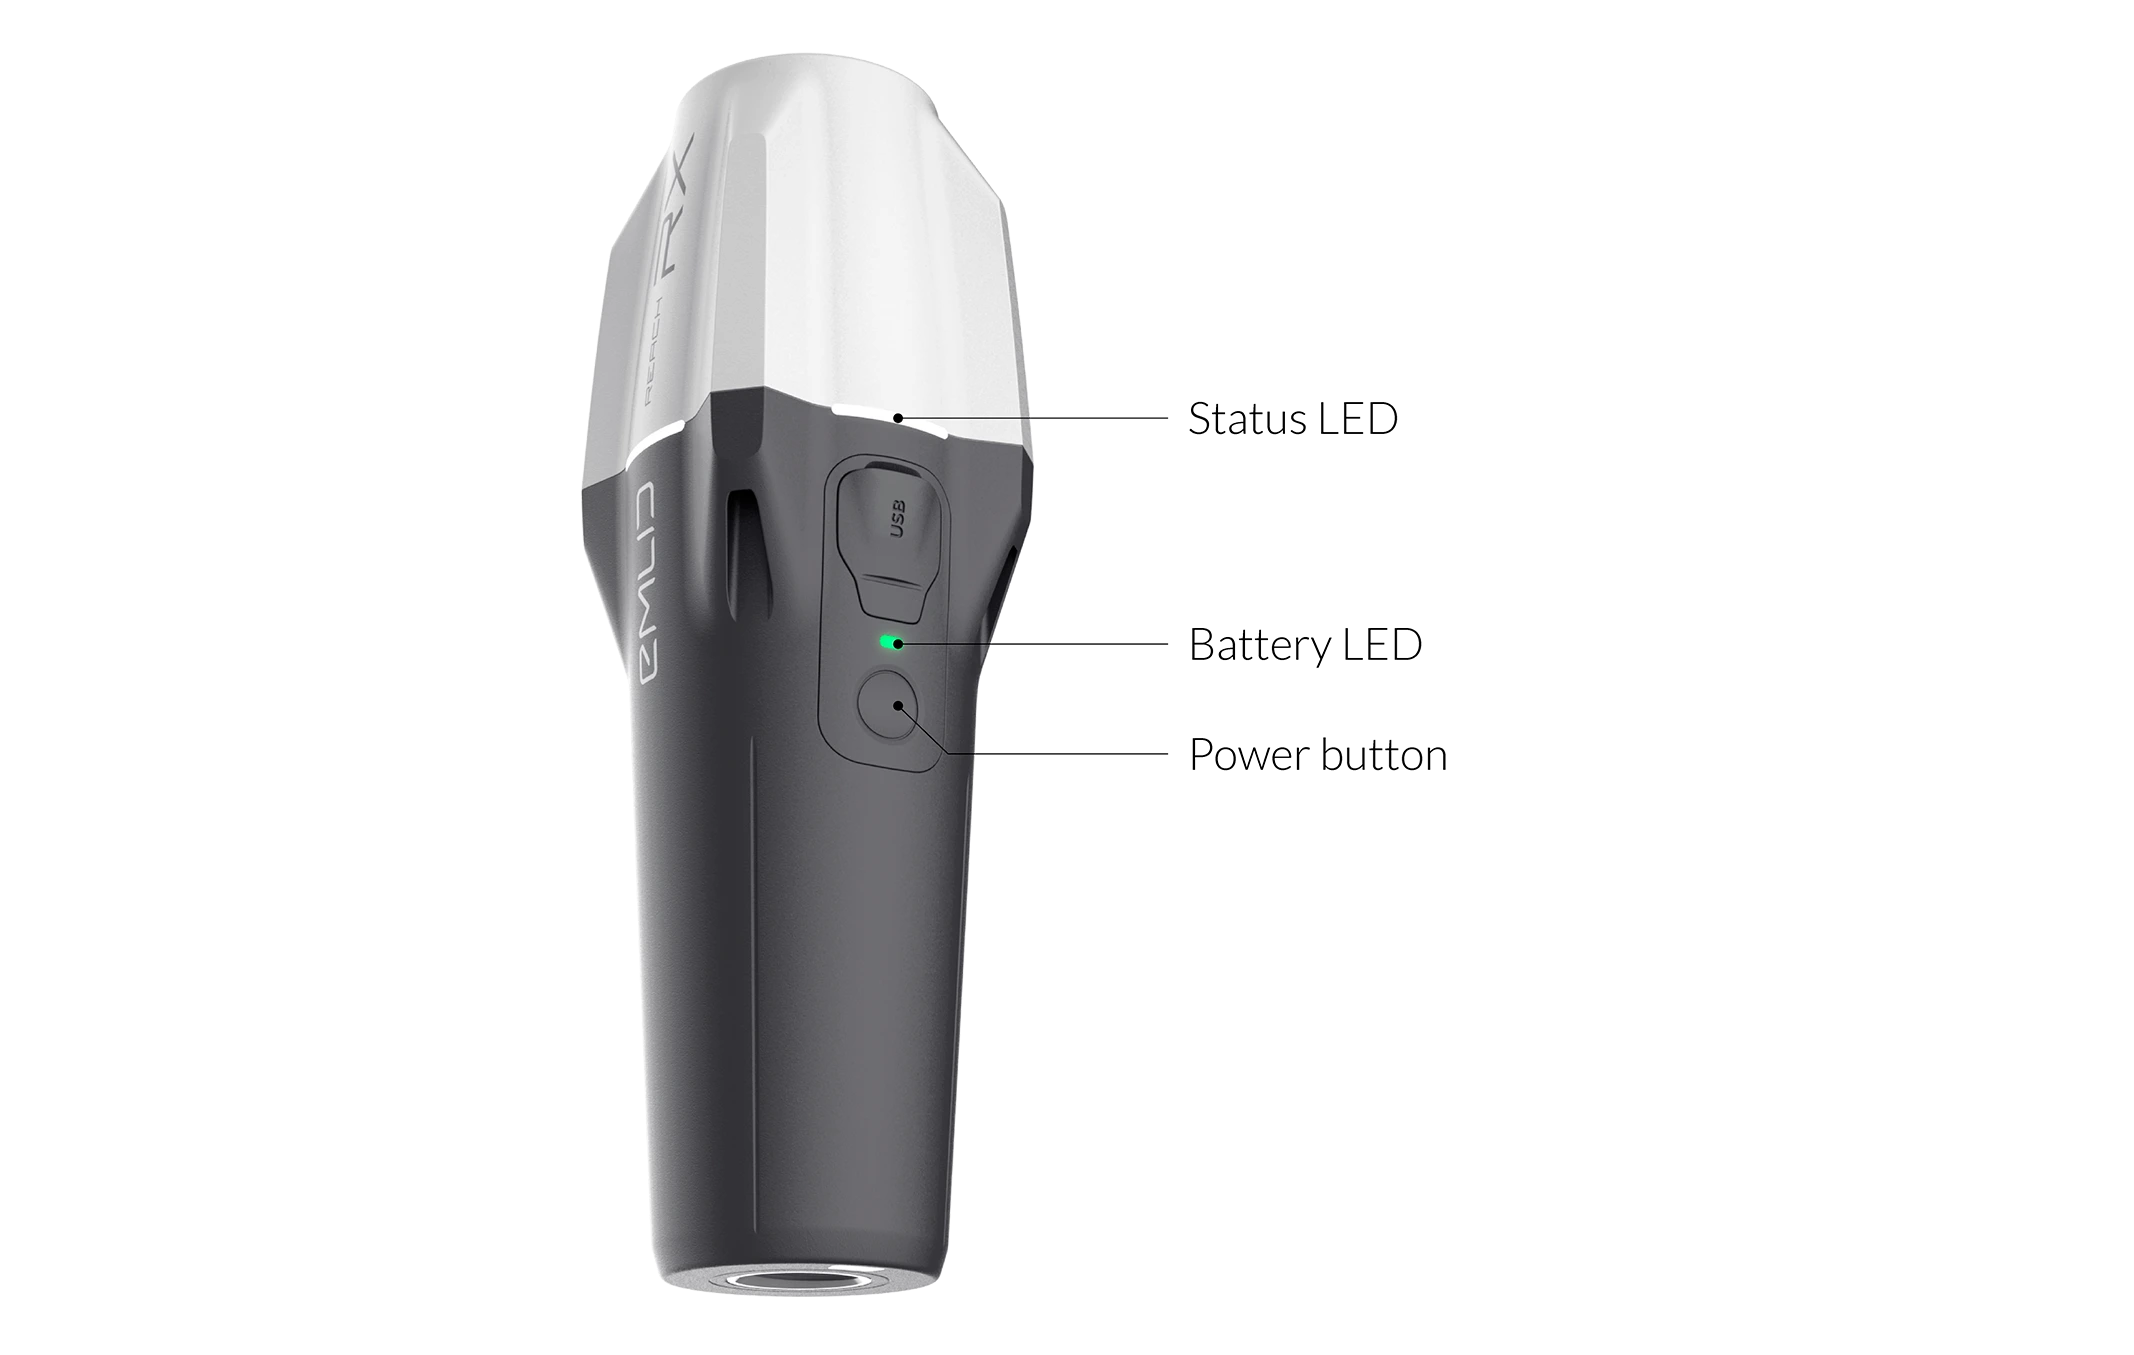
Reach RX has 2 LEDs—Battery LED and Status LED. The Battery LED indicates the battery charge level and is located above the power button. The Status LED indicates the operating states of the receiver. The power button is used to turn on and off the receiver and to check the battery charge level.
Checking battery charge level
You can check the battery charge level with a short press on the power button. Learn more about the Battery LED status below.
RX is turned off
 31–100%
 11–30%
 1–10%
1–10% 0%
0%RX is turned on
31–100%11–30% 0–10%
0–10%RX is charging
Fully charged 31–100%
 11–30%
 1–10%
1–10%Charging Reach RX
Reach RX has a built-in Li-Ion battery providing up to 16 hours of autonomous work when operating as an RTK network rover. You can power and charge Reach RX over the USB Type-C cable supplied with the receiver using power supplies like:
- Power bank
- USB wall adapter
Operating receiver
You can check the operating state of the receiver by watching its Status LED. Learn more about Status LED states below.

Reach RX is turned off.

Reach RX is loading.


Reach RX is operating.
This state can be represented by 3 different collors: white, yellow and green.