ArcGIS Survey123 integration
This tutorial provides step-by-step instructions on how to perform integration of Reach RS/RS+ with ArcGIS Survey123 via TCP using an iOS or Android device to create, share and analyse surveys.
What is ArcGIS Survey123?
ArcGIS Survey123 is an app for creating, sharing, and analyzing surveys. With this app, you can collect data via web or mobile devices, even when disconnected from the Internet.
Visit the site to learn more.
Getting started
To perform the integration, you will need the following:
- an iOS or Android device
- Emlid Flow
- Reach RS/RS+
To start, download the ArcGIS Survey123 app from the App Store or Google Play and connect your Reach RS/RS+ to the iOS or Android device using the Emlid Flow app. In this tutorial, we use an iOS device.
Establishing TCP connection
To establish a TCP connection between your Reach RS/RS+ and ArcGIS Survey123, configure settings both in Emlid Flow and ArcGIS Survey123.
Configuring settings in Emlid Flow
-
Open Emlid Flow and connect to your Reach.
-
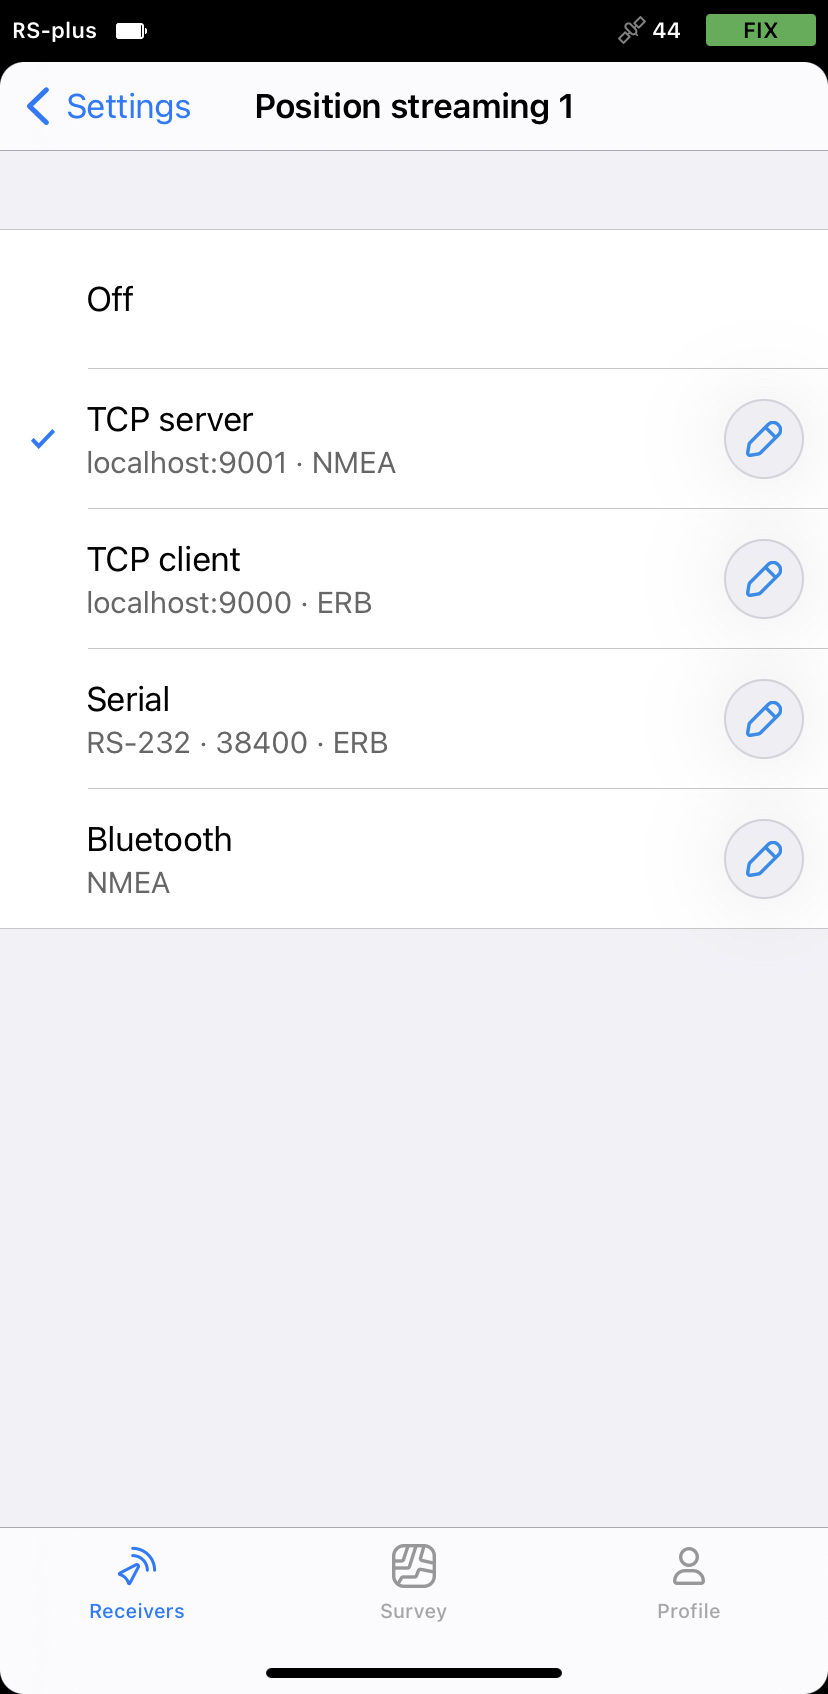
Go to Settings and tap Position Streaming 1.
-
Choose TCP server.
-
Tap the Edit button in the TCP server cell.
-
Tap Format and choose NMEA. Save changes.
noteBy default, the receiver will be configured on the TCP port 9001.
Configuring settings in ArcGIS Survey123
-
Open the ArcGIS Survey123 app.
-
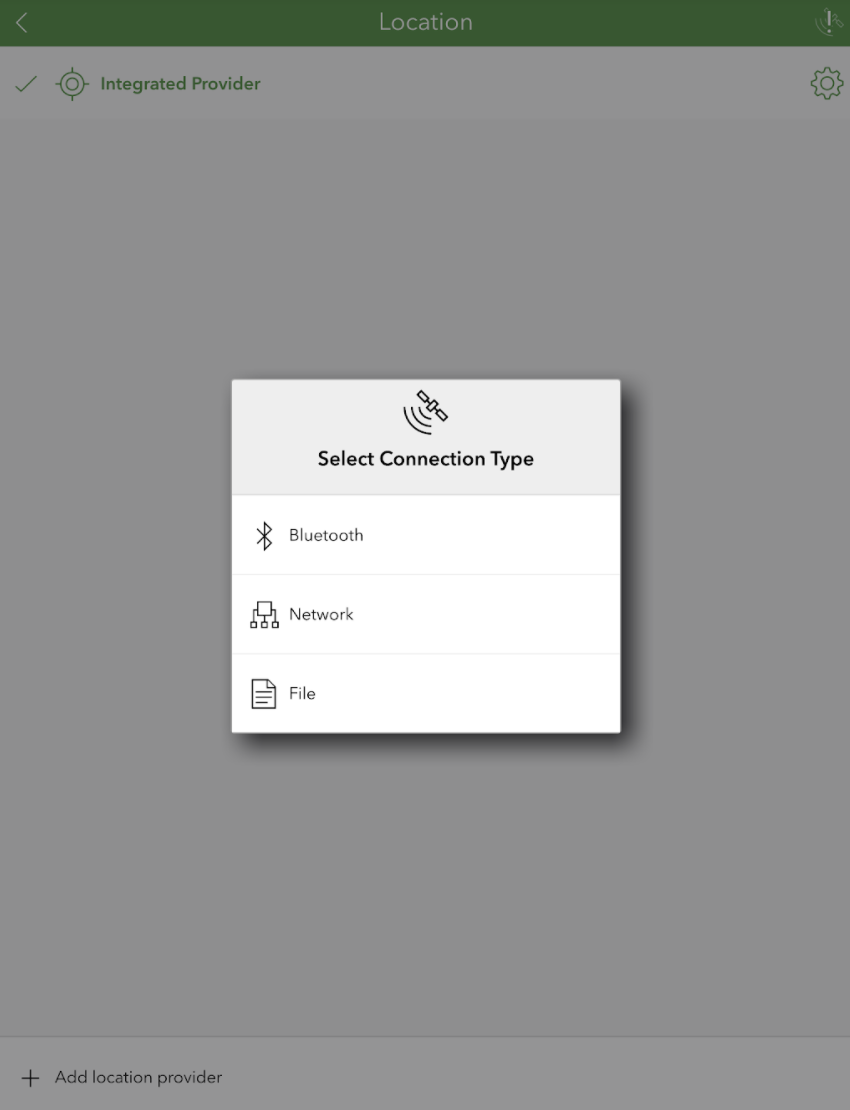
Tap the GNSS location icon.
-
Tap the Settings icon.
-
Tap Add location provider.

-
Choose the Network connection type.
-
Enter the Reach RS/RS+ IP address in the Hostname field and the port that was configured on the receiver in the Port field.
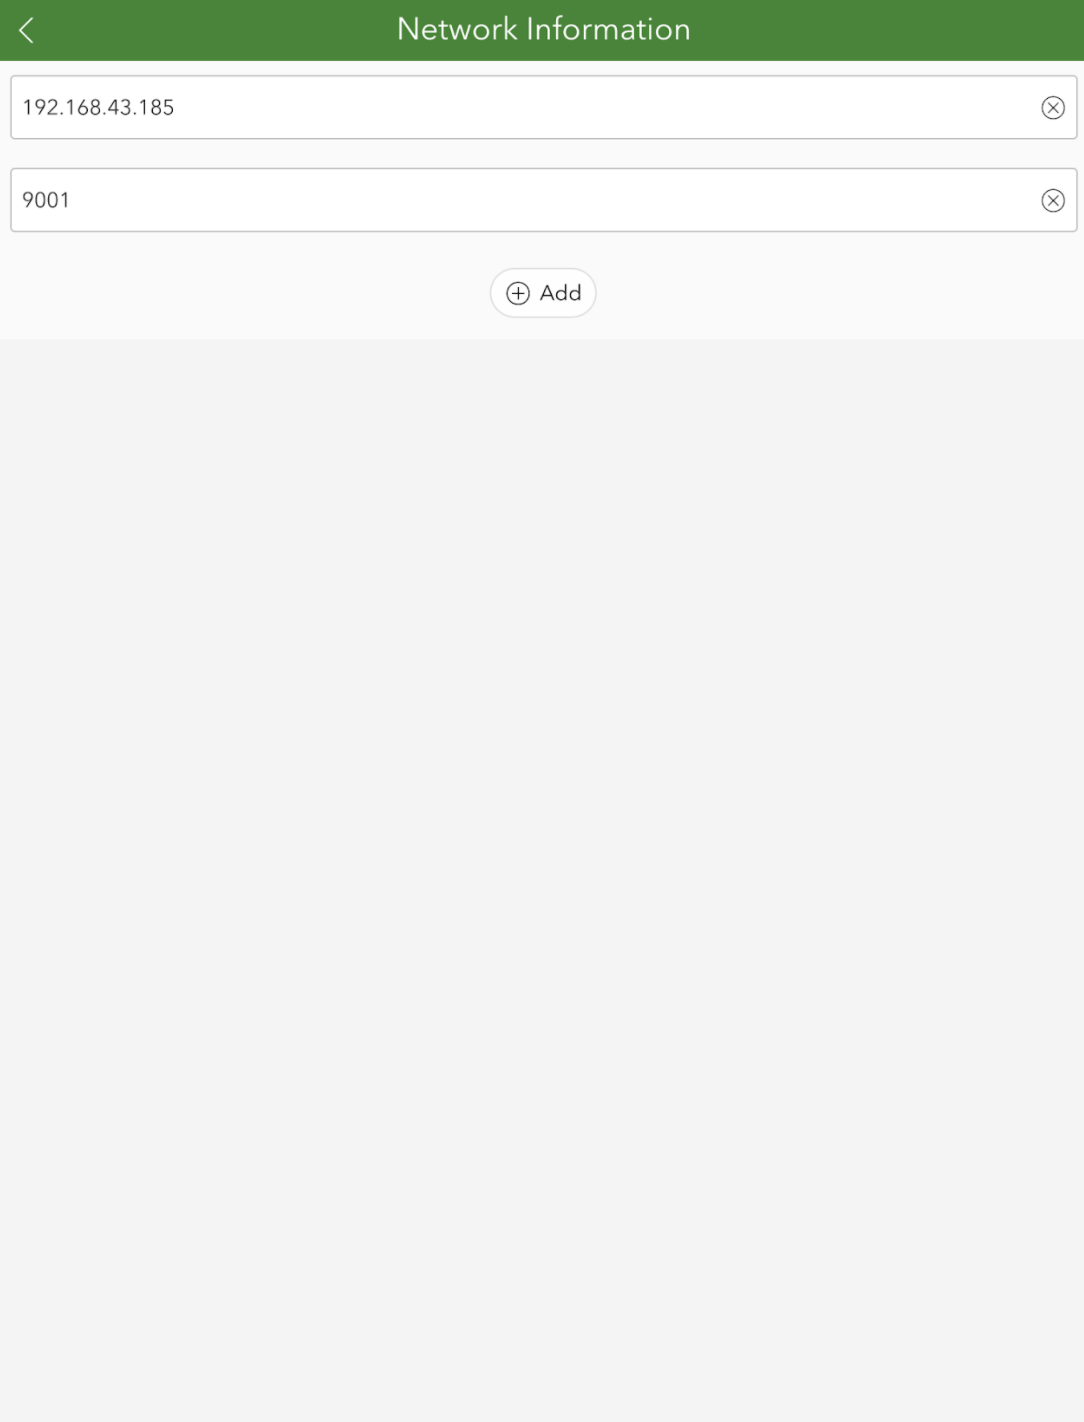
tipYou can check the IP address of your Reach RS/RS+ in the Emlid Flow app. Go to the Settings screen and find it under the name of your receiver.
noteMake sure that the port corresponds to the one configured on the receiver.
-
Tap the Add location provider button and press the back button to check the location providers list. Once the app is connected to your Reach RS/RS+, you will see a tick near the hostname.
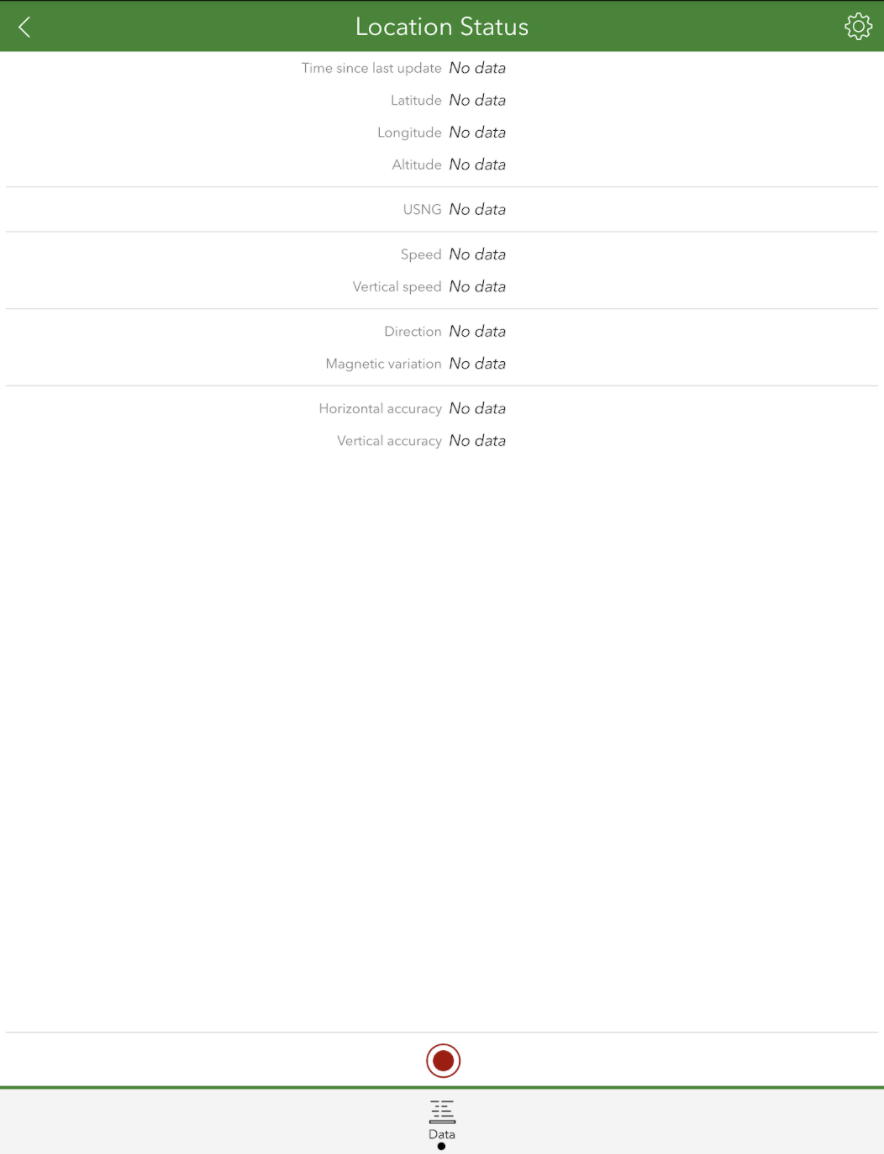
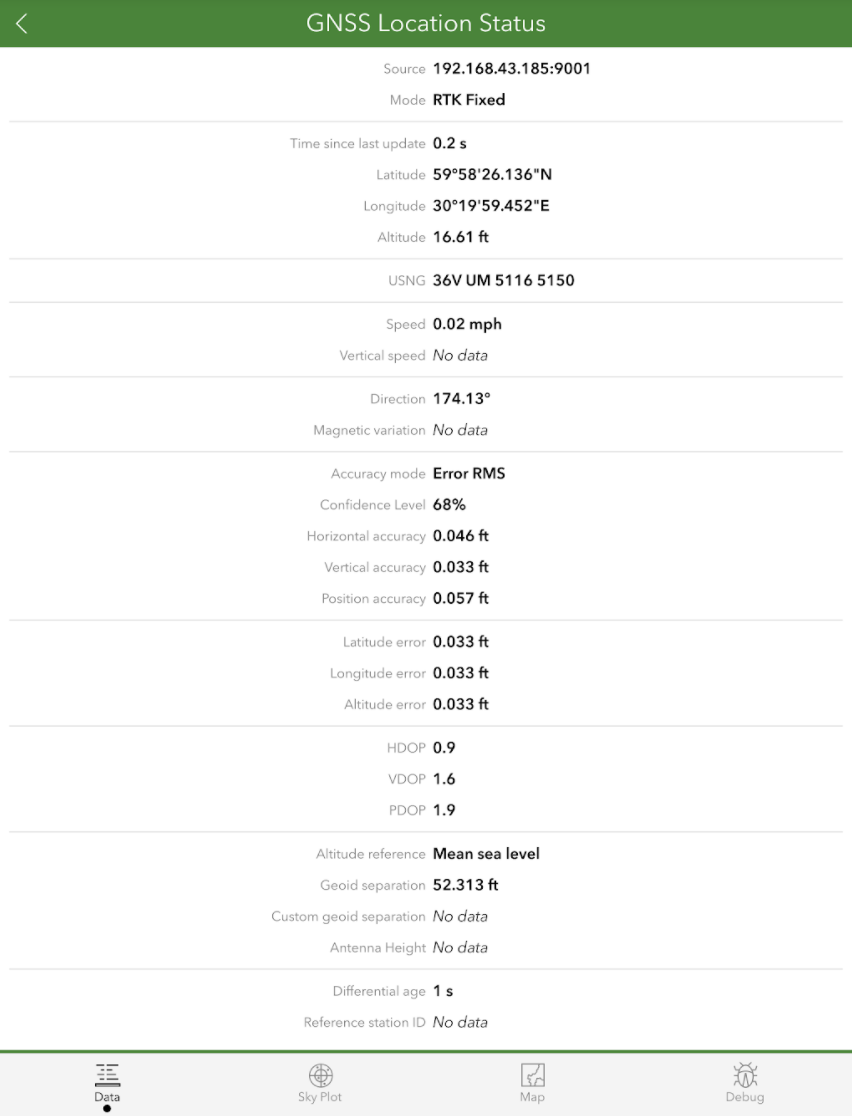
Once you successfully integrated your Reach RS/RS+ with ArcGIS Survey123, you are ready for the survey. Tap on the GNSS location icon to check the GNSS location status:
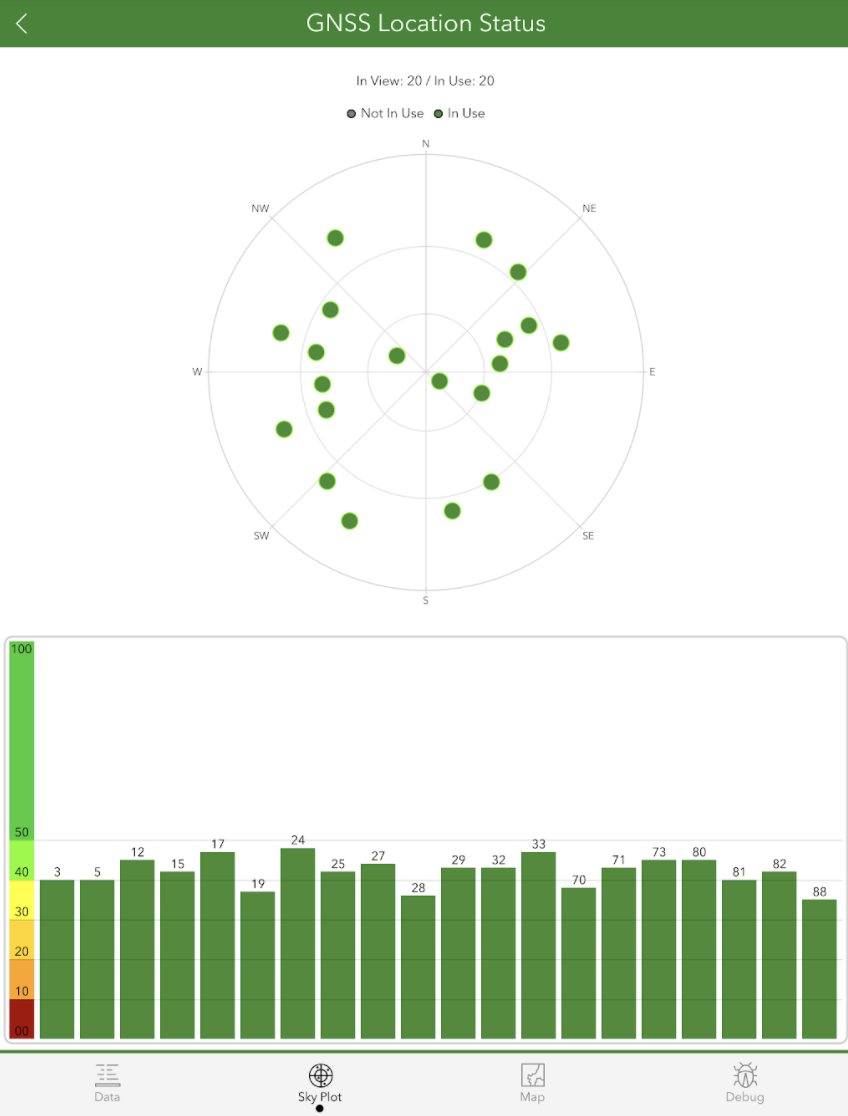
You can also check the SNR and sky plot in the Sky Plot tab:
To survey with ArcGIS Survey123, you will need to sign in with your ArcGIS account. After that, you can create a new survey following these instructions.