senseFly PPK guide
Overview
In this tutorial, you will find the information on how to perform PPK with senseFly drones and Reach RS2/RS2+ in eMotion software.
Step-by-step guide can be also found on senseFly Knowledge Base.
Preparing Reach RS2/RS2+ data
In this part, we will explain how to place Reach RS2/RS2+ to record logs for PPK.
Placing the Reach RS2/RS2+ receiver
The video below demonstrates how to place the Reach RS2/RS2+ base over a known point.
To find out other ways of placing the local base station, check the Placing the base guide.
The general steps for placing the base receiver are described below.
-
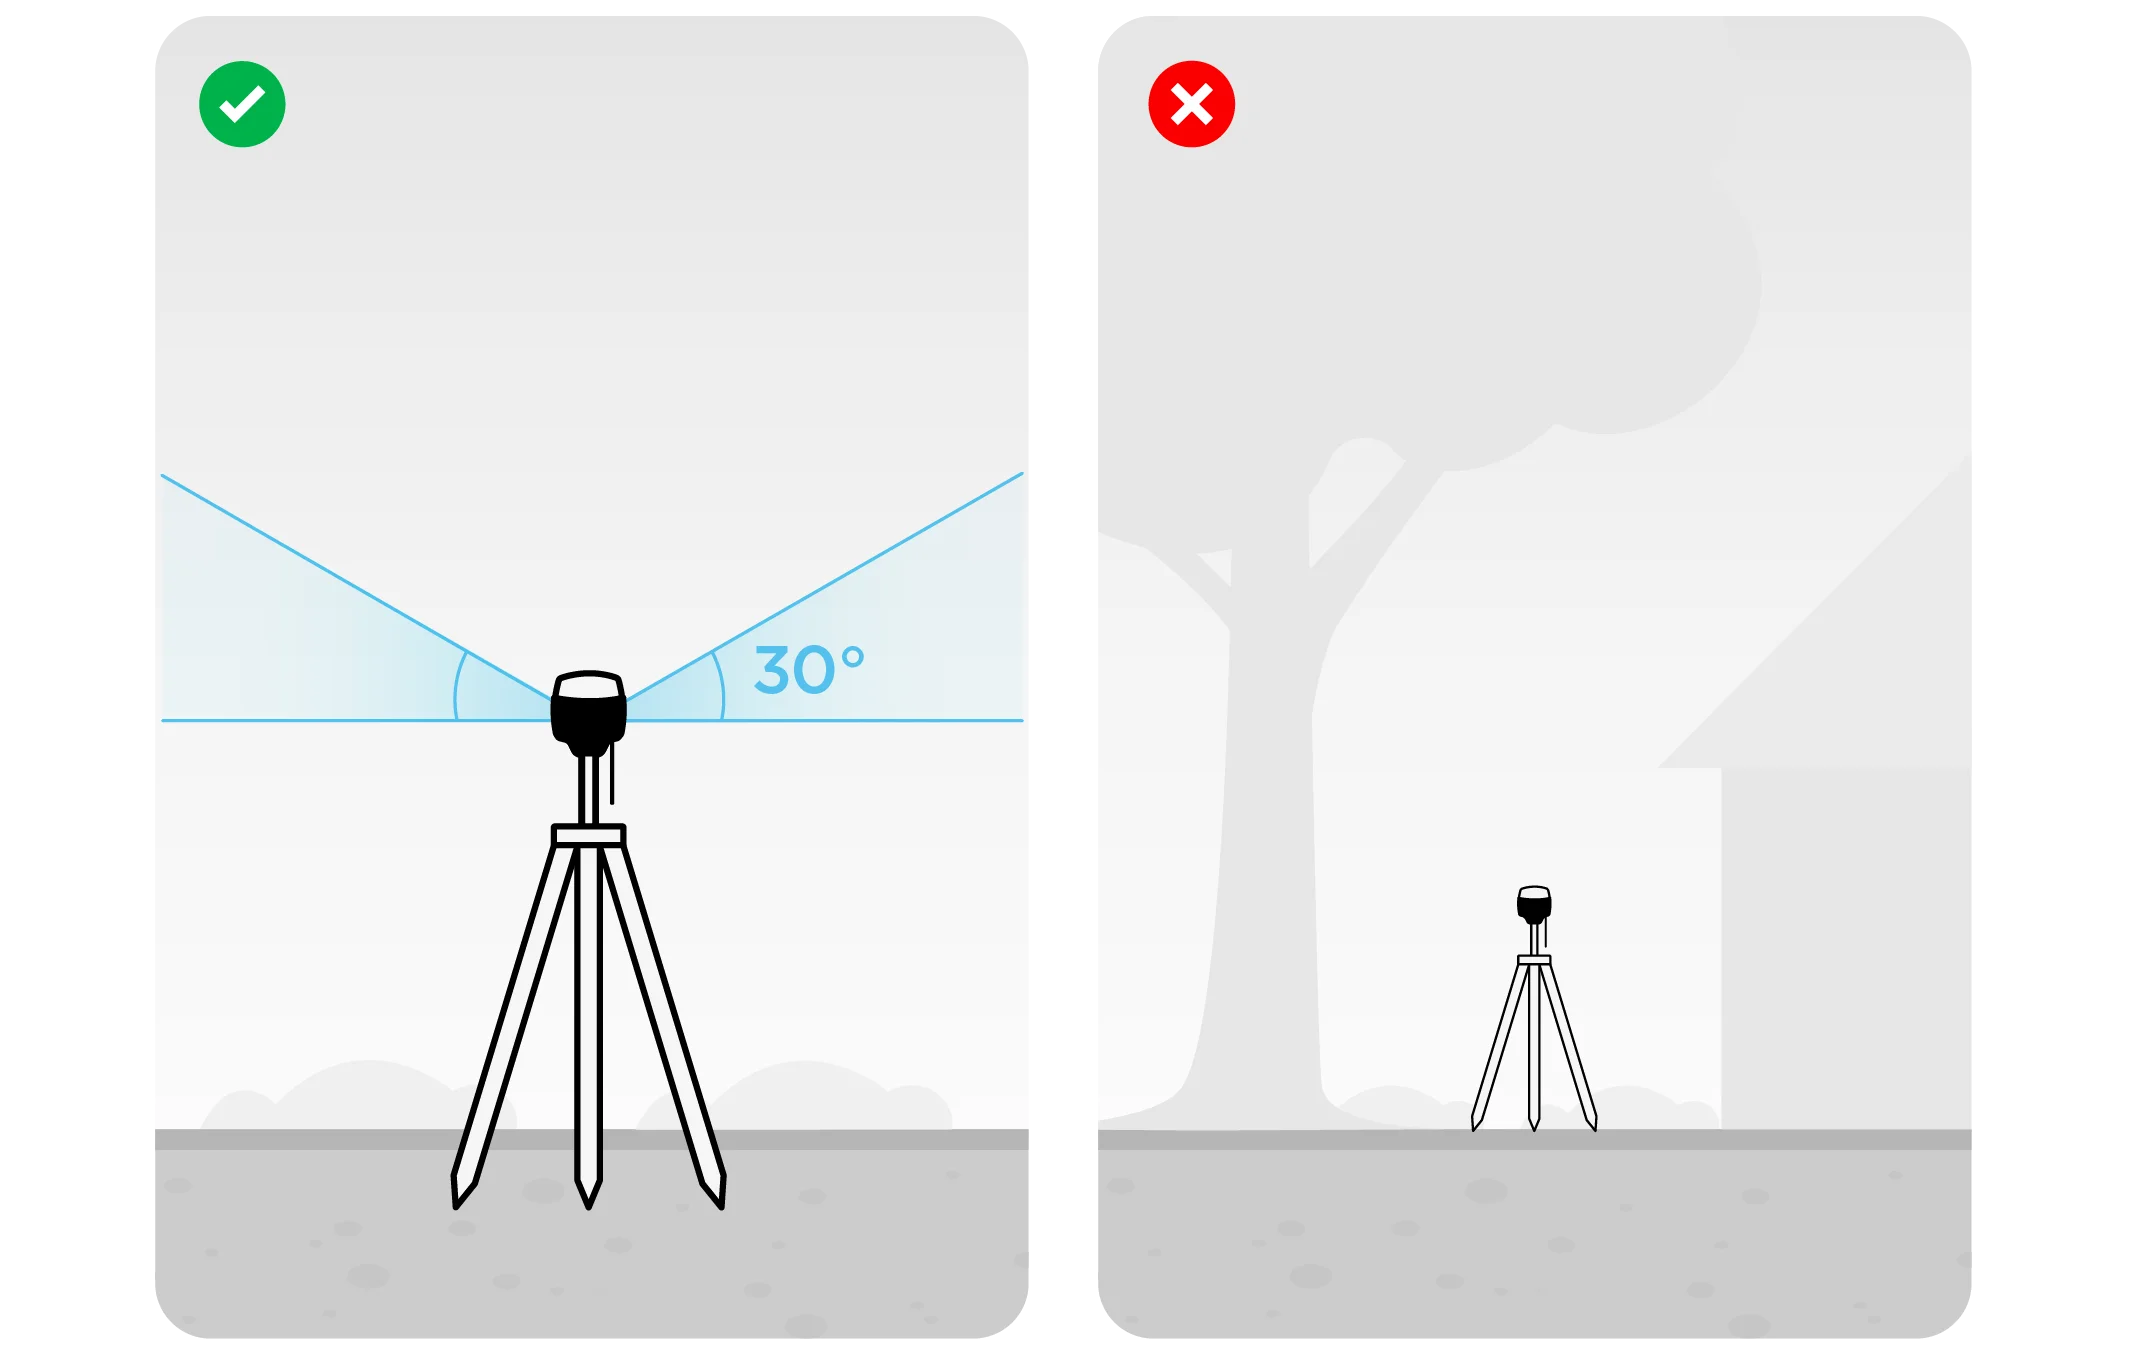
Make sure you choose an appropriate location to place Reach RS2/RS2+ base station. Take a look at 2 pictures below. The left picture demonstrates desirable conditions for the base location. The right one is an example of bad surrounding conditions such as the reduced view of the sky, possible obstructions or vegetation nearby.
-
Make sure your Reach RS2/RS2+ is placed precisely above the marked point on the tripod and leveled.
-
If you are setting up base coordinates manually, measure the antenna height offset.
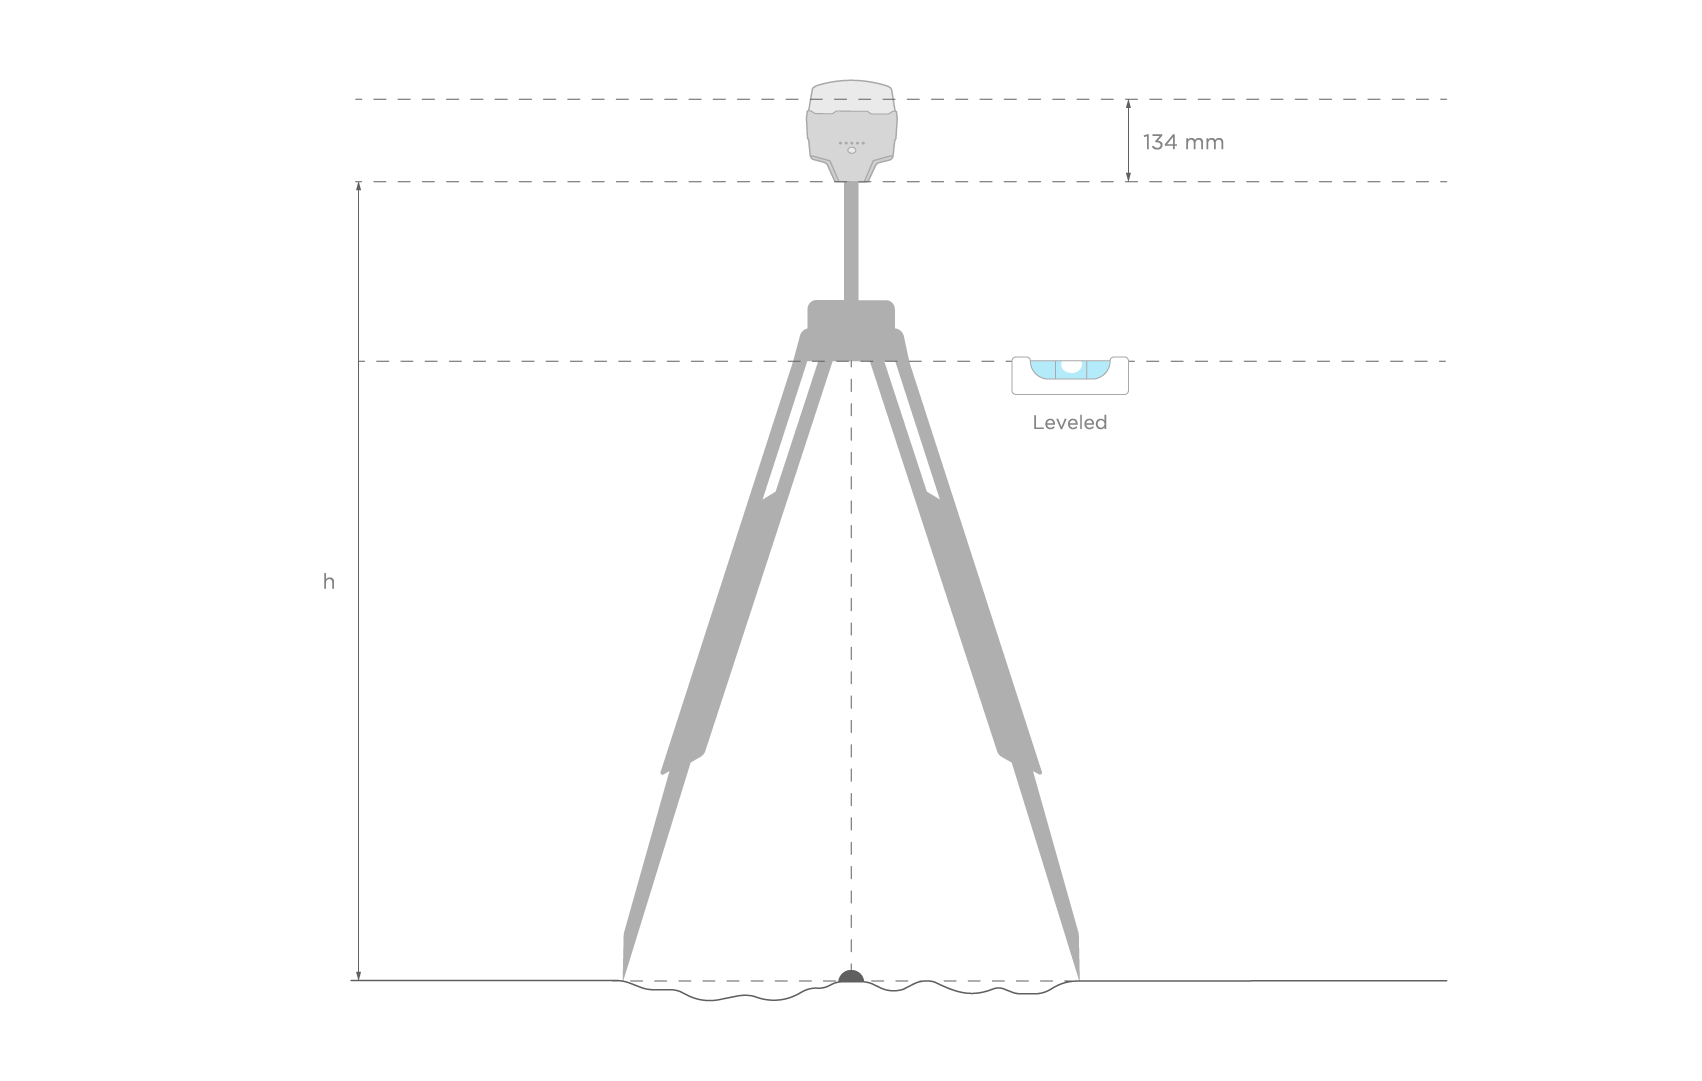
noteAntenna height is measured as the distance between the mark and the antenna reference point (ARP).
For Reach RS2/RS2+, consider the antenna height as the distance between the mark and the bottom of Reach RS2/RS2+ (h on the figure below) plus 134 mm.
notePrecise base coordinates will be needed for post-processing in eMotion.
Raw data logging
-
Open a list of Wi-Fi networks on your smartphone/tablet.
-
Connect to a network named reach:xx:xx.
-
Type network password: emlidreach.
-
Choose Reach RS2/RS2+ from the list of available devices in the Emlid Flow App.
-
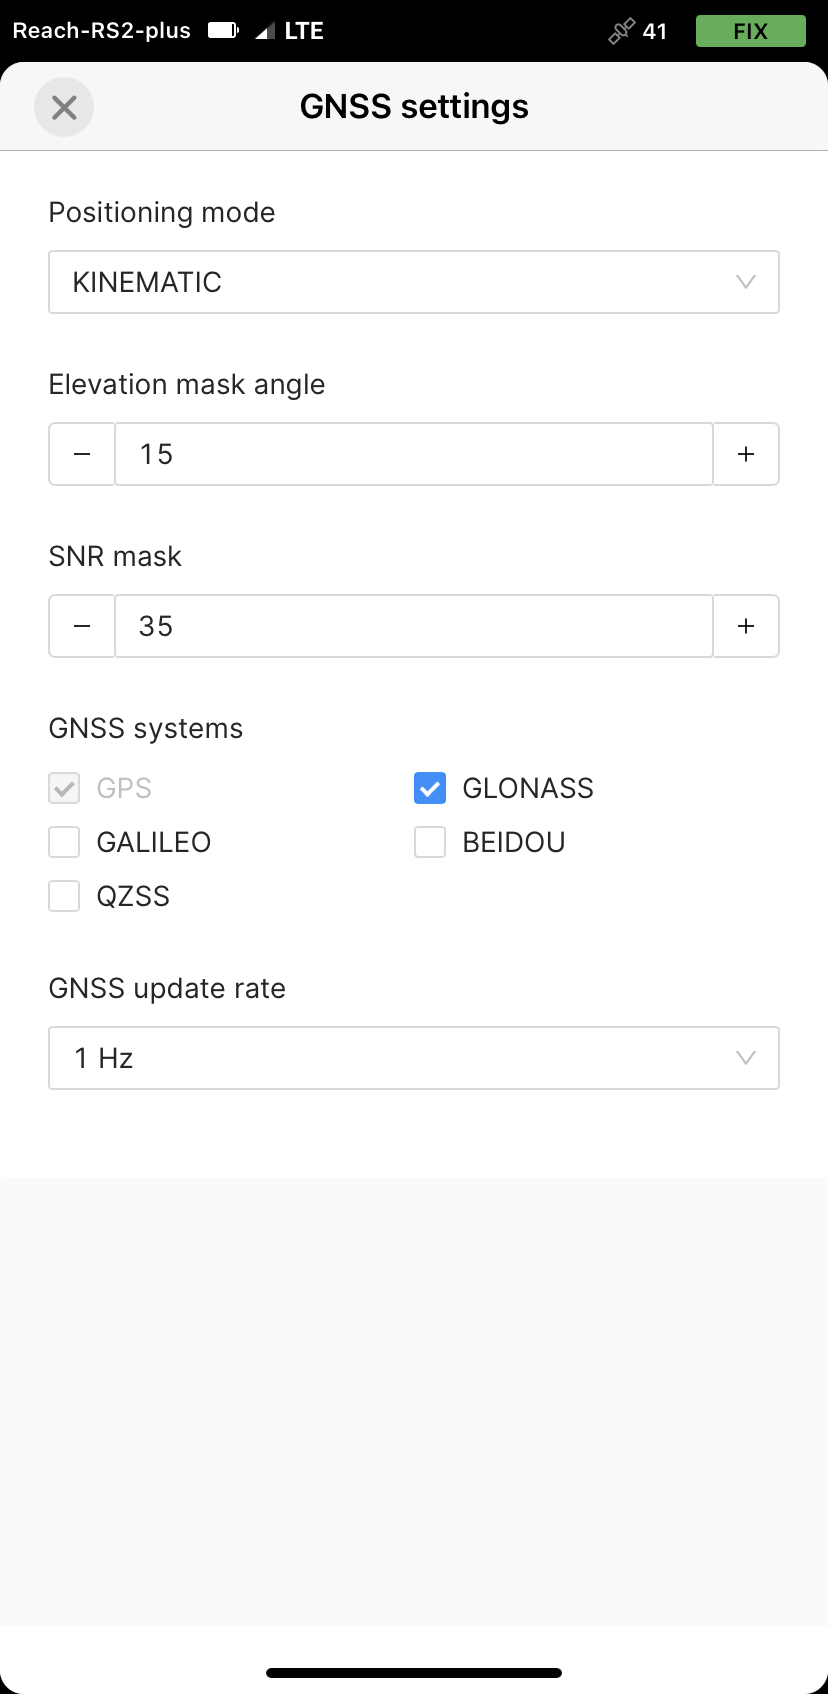
On the Settings screen, tap GNSS settings.
-
Select GNSS constellations as follows.
noteOur default recommendation is all GNSS enabled at 1 Hz.
-
Go back to the Receivers screen and tap Logging.

-
Tap the Recorded logs and settings button.
-
To configure logging, tap the blue gear button.
-
In the Format and presets dropdown menu, choose UBX. Apply changes.
Once Reach RS2/RS2+ base starts data logging, you can fly your eBee in a standalone mode.
Converting raw data log
-
Download RTKLIB QT apps.
-
Download raw files from Reach to your PC.
-
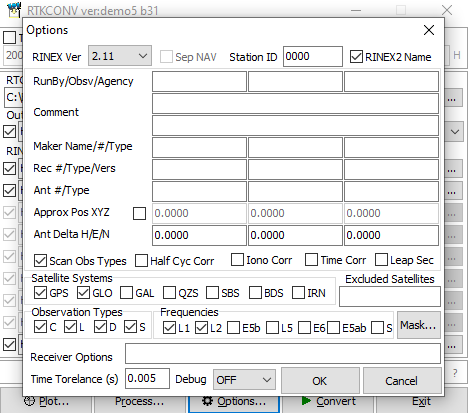
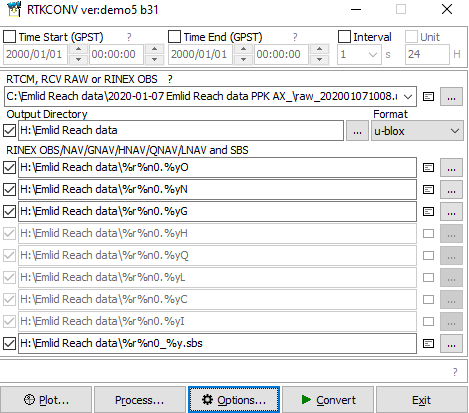
Start RTKLIB RTKConv.
-
Push Options button.
-
Choose RINEX Version 2.11.
-
Turn on Satellites Systems you need.
-
Press OK.
-
Add your rover raw log in the first field and choose output directory.
-
Choose format of your log in pop-down menu. Set format to u-blox.
-
Press Convert.
-
Now you can proceed to post-processing your logs in eMotion3.
Post-processing with eMotion
-
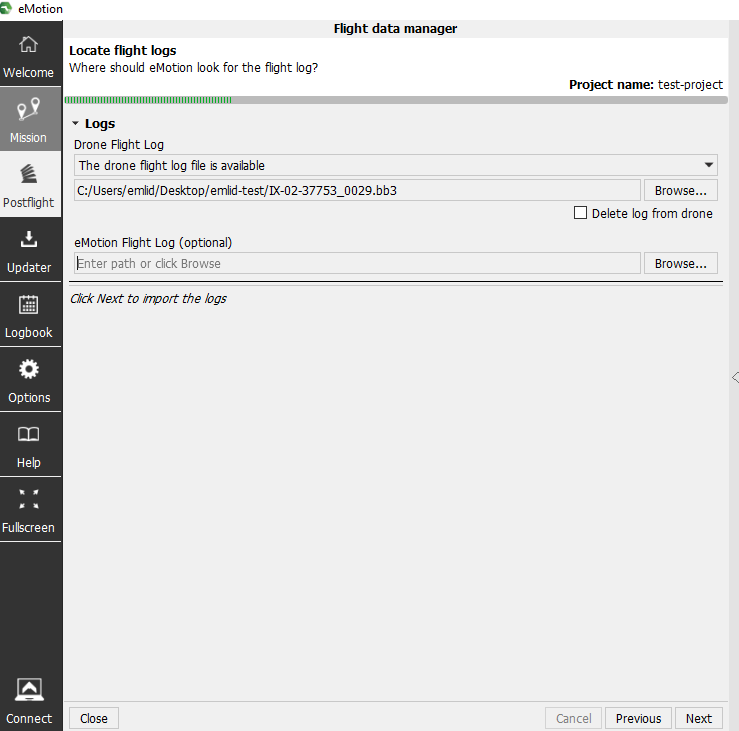
Launch eMotion3 and select post flight FDM (Flight Device Manager).
-
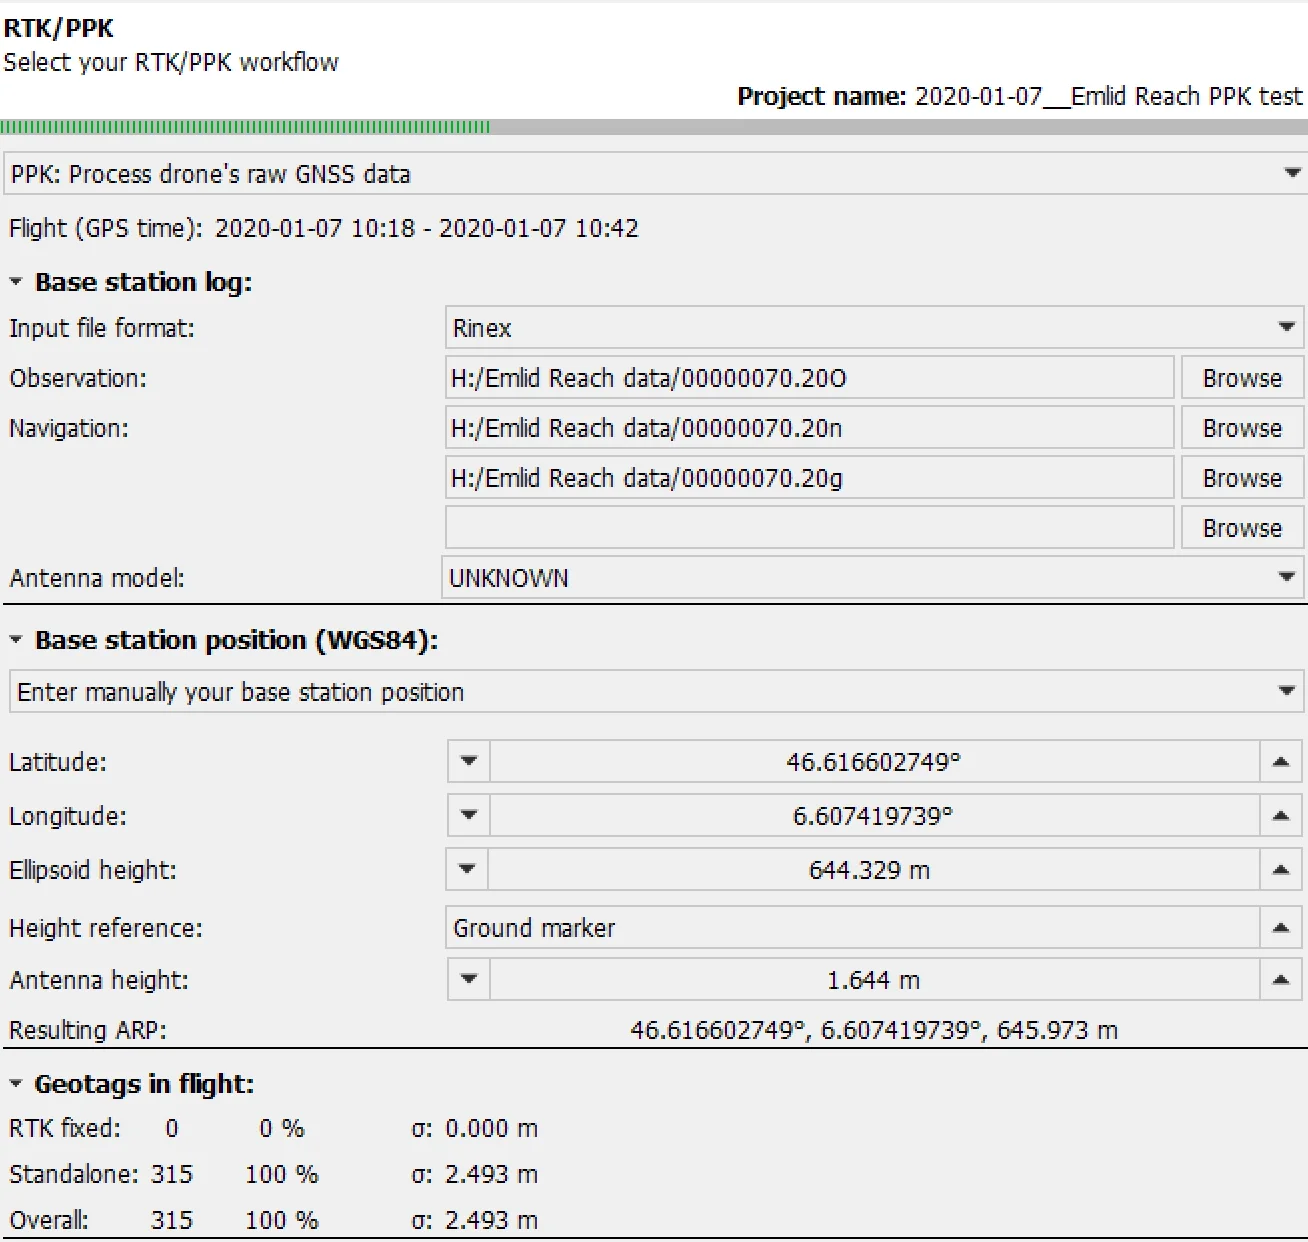
Create a project and import the flight logs. Proceed to the RTK/PPK workflow tab.
-
Set Input file format to RINEX.
-
Select newly converted RINEX O, N and G files from the Reach RS2/RS2+ base.
-
Set Antenna model to UNKNOWN.
-
Fill the base position field with the known coordinates of the marked ground point (ground marker).
-
Set the Height Reference to the Ground marker.
-
Enter the Antenna height calculated according to explanation in this step for the receiver.
-
Press Next to calculate solution.
-
Once Calculated solution is finished, the Geotags are post-processed based on the RINEX file with corrected base position.
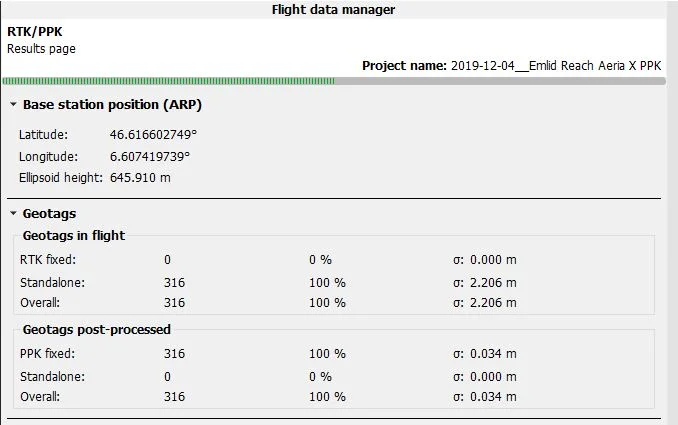
- Proceed to the remaining FDM steps to complete the Postflight process.
Now you have successfully post-processed logs from Reach RS2/RS2+ and eBee drone.