Quickstart
Intro
This quickstart tutorial will guide you through the initial setup of Edge drone controller and its accessories. In the end you’ll get a configured Edge drone controller that streams video from a camera to your laptop. After that you can proceed to the hardware installation guide and install your Edge in a frame.
note
Please update Edge to the latest firmware before continuing.
tip
If you encounter any issues performing these steps, we are happy to help you out on our community forum.
Connect Edge GNSS module
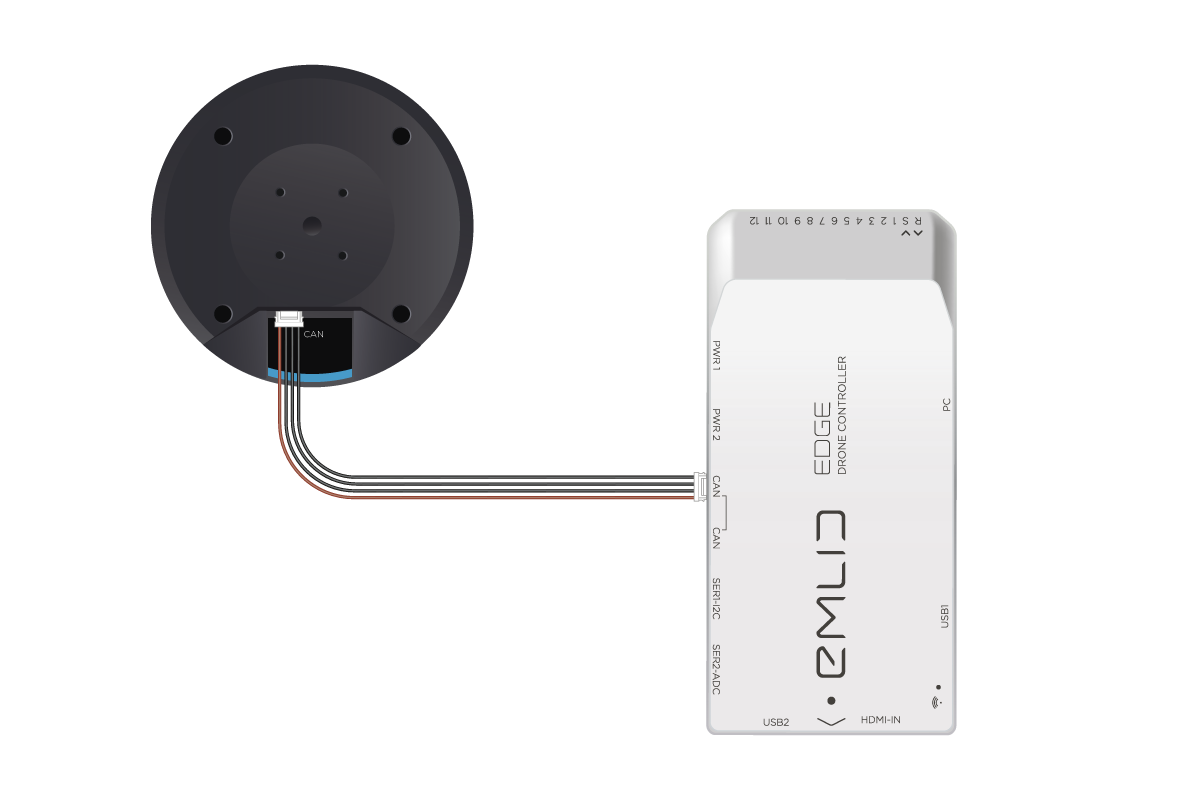
Edge GNSS module is a positioning device that contains a GNSS receiver, a high-precision barometer and two 3-axis compasses.
To connect Edge GNSS module to Edge use a JST-GH-4P to JST-GH-4P cable.
- Connect one end of the cable to any of the CAN ports on Edge GNSS module
- Connect another end of the cable to any of the CAN ports of Edge drone controller
Connect video camera
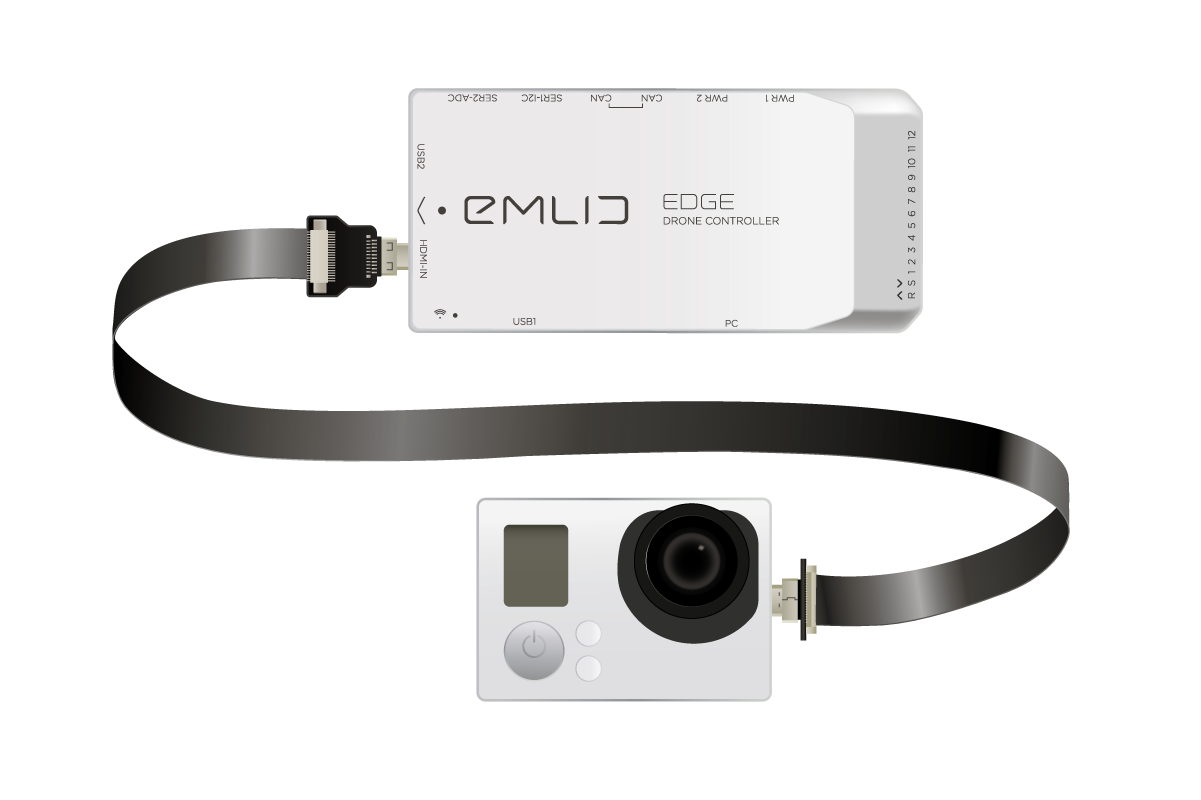
Camera should be connected to the HDMI-IN port on Edge. In case you are connecting an action camera then most likely it will have Micro-HDMI connector as well. In that case you would need Micro-HDMI to Micro-HDMI cable to connect the camera to the Edge.
Attention
Turn off the camera’s internal WiFi, otherwise it may interfere with RC equipment or Wi-Fi modules
danger
Turn the camera on after Edge is booted
tip
Resolution and frame per second value of the input stream may vary. Maximum supported video format is 1080p 30fps
Connect Wi-Fi modules
Edge kit comes with two identical long-range Wi-Fi modules in separate boxes. Use one to connect to the Edge drone controller and another one to connect to a computer (assuming a laptop for rest of the guide).
Connect Wi-Fi module to Edge
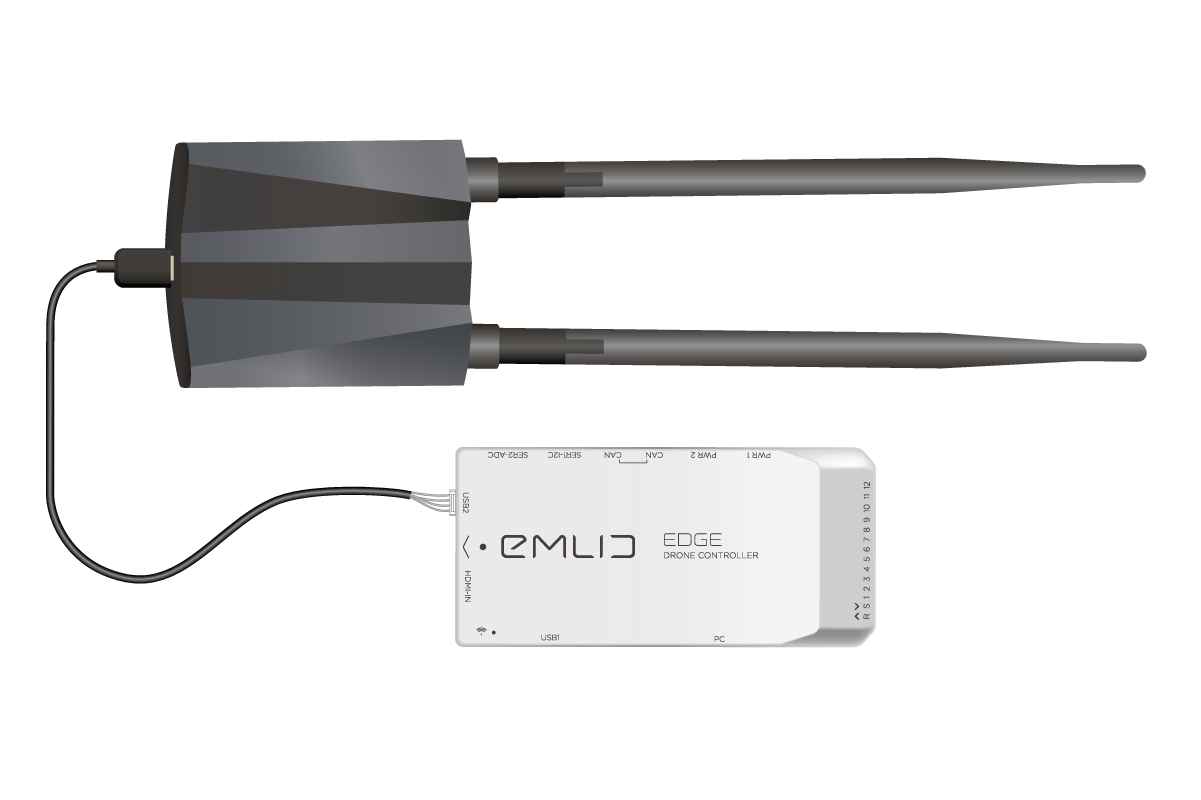
To connect Wi-Fi module to the Edge use a Micro-USB to JSH-GH-4P cable from the kit.
- Plug JST-GH-4P connector into Edge port labeled USB2
- Plug Micro-USB connector into Micro-USB port of the Wi-Fi module
Connect Wi-Fi module to a computer
We need to connect another Wi-Fi module to the laptop. In order to do that you need to perform two simple steps
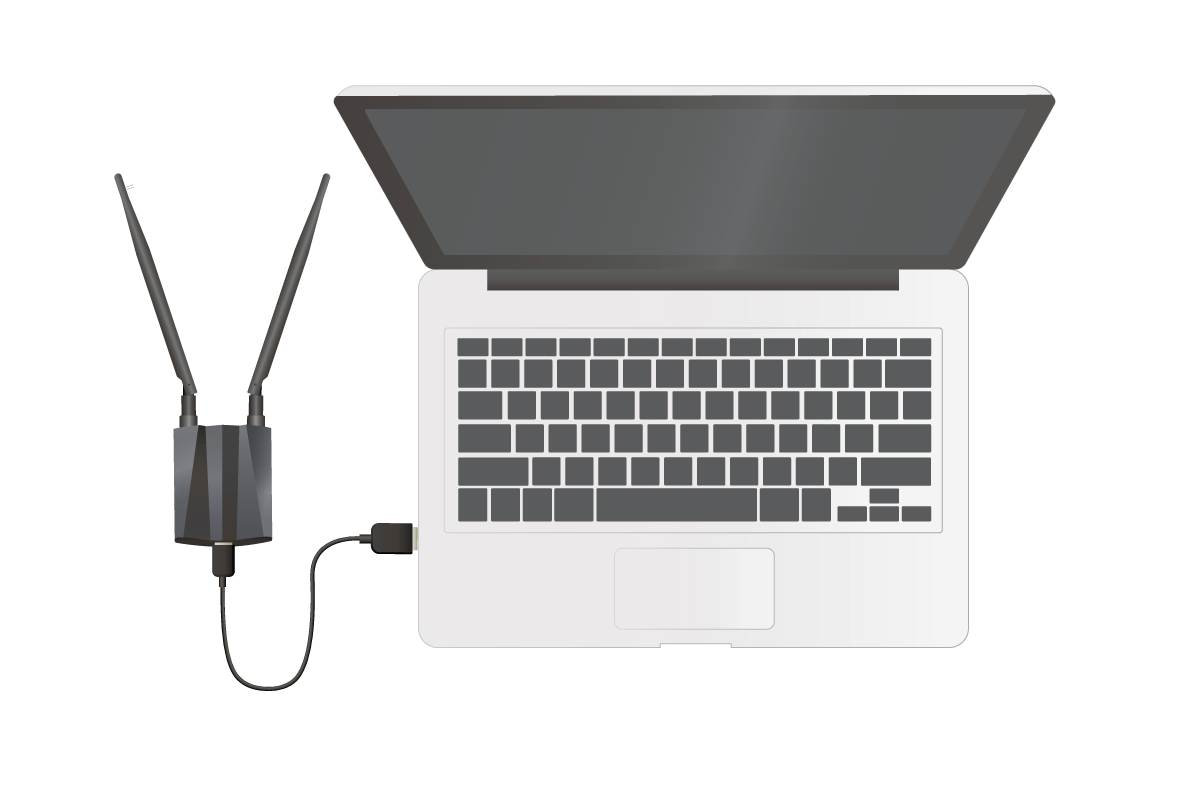
Use Alfa’s Micro-USB-3.0 to USB-3.0 cable from the Wi-Fi module box
- Connect Micro-USB-3.0 one end of the cable to the Wi-Fi module
- Connect the other end to the USB port of your laptop/desktop computer
Software installation
Wi-Fi module driver
Now we need to install the driver for the Wi-Fi module. The instructions depend on your OS.
Windows
- Download driver for Windows
| Windows 10 | Windows 8 | Windows 7 | Windows Vista | Windows XP |
|---|---|---|---|---|
| win10_x86 | win8_x86 | win7_x86 | winVista_x86 | winXP_x86 |
| win10_x64 | win8_x64 | win7_x64 | winVista_x64 | winXP_x64 |
- Connect Wi-Fi module to the laptop.
- Start device manager:
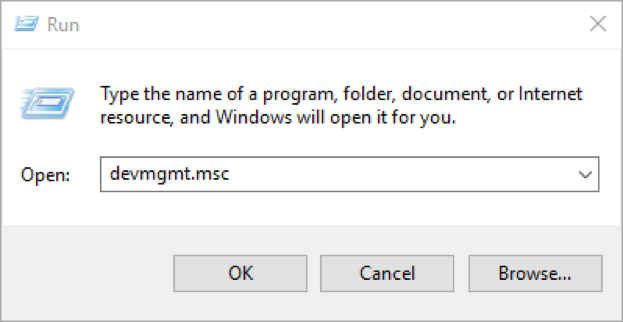
- Open the "Run" dialog box by pressing and holding the Windows key, then press the R key
- Type
devmgmt.msc
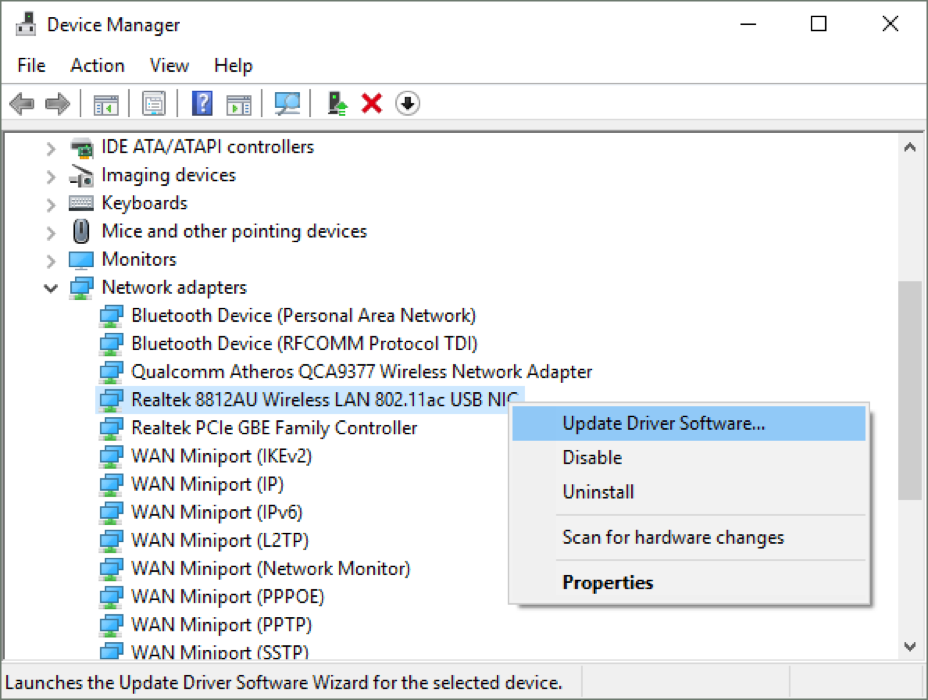
- Expand Network adapters category
note
Wi-Fi module might appear in Other devices category
- Right click on “Realtek 8812AU Wireless LAN 802.11ac USB NIC” and select Update Driver Software
- Select Browse my computer for driver software
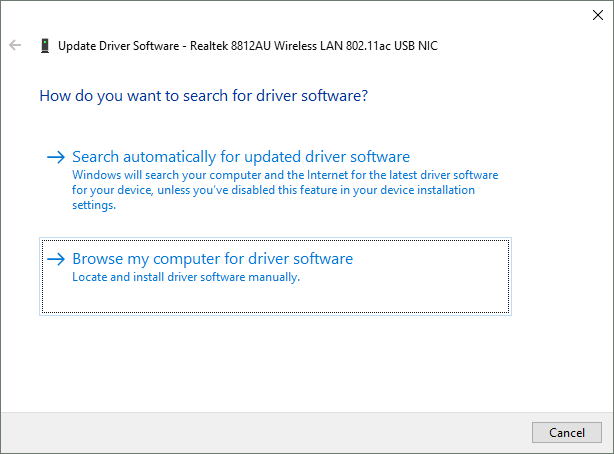
Click Browse to find the location of driver's directory
Click Next to install the driver
danger
It is necessary to off location services on Windows in order to make the driver work smoother. This setting has a direct impact on the stability of the videostream.
Steps for disabling location services in Windows 10
- First, open up the Settings, click on the Privacy group and navigate to Location section.
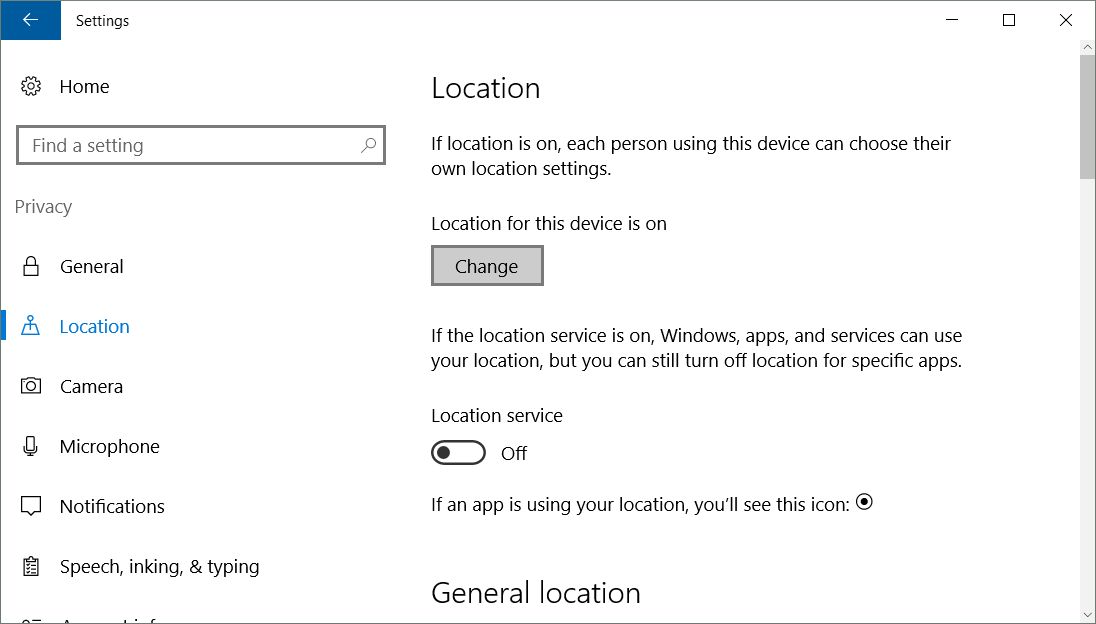
- Click the “Change” button, which will then open a new window so you can turn off the “Location for this device”.

Linux
The Wi-Fi module uses RTL8812AU chipset under the hood which requires drivers that have not been merged with the linux kernel and do not come with most linux distros (yet). That’s why you need to build it by yourself for now. In the future this step will be automated.
Make sure you have the required build packages
sudo apt-get install linux-headers-generic build-essential git mokutilDownload the source code
git clone https://github.com/aircrack-ng/rtl8812au.gitcd 8812auRun
install-rtl8812auscript to compile, install and sign (if security boot is enabled) the modulesudo ./install-rtl8812au
You will be prompted for a password that will be used for the second part of the MOK enrollment.
Reboot your machine, the shim UEFI Key Manager will appear
- Press a key to start the process
- select "Enroll MOK"
- select "Continue"
- select "Yes"
- enter the password
And the key has been inserted. This is a persistent operation, so you’ll only need to do this once. When you have finished booting you can easily check that EFI loaded the key:
dmesg | grep 'EFI: Loaded cert' | grep 8812
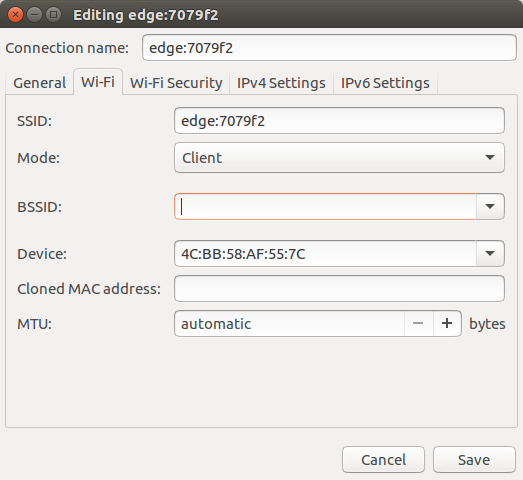
If you're using NetworkManager, it may periodically scan for networks to maintain optimal connectivity.
WiFi device must change from its current radio channel to other channels and wait for a short amount of
time listening for beacons from access points. This happens every two minutes and leads to latancy problems.
You can disable this behaviour by locking your WiFi connection profile to the BSSID of Edge's access point.
When you do this, NetworkManager understands that you do not want to roam and will disable the periodic scanning behavior.
Firstly, you need to determine Edge's MAC address. You can obtain it from ifconfig or use arp command as follows:
$ arp -aThen open your WiFi settings from top bar, click 'Edit connections' and find Edge's connection profile. Modify the BSSID field with the MAC address of your Edge and save.
Mac OS X
- Download the driver
- Unzip the downloaded archive and install it from the pkg file
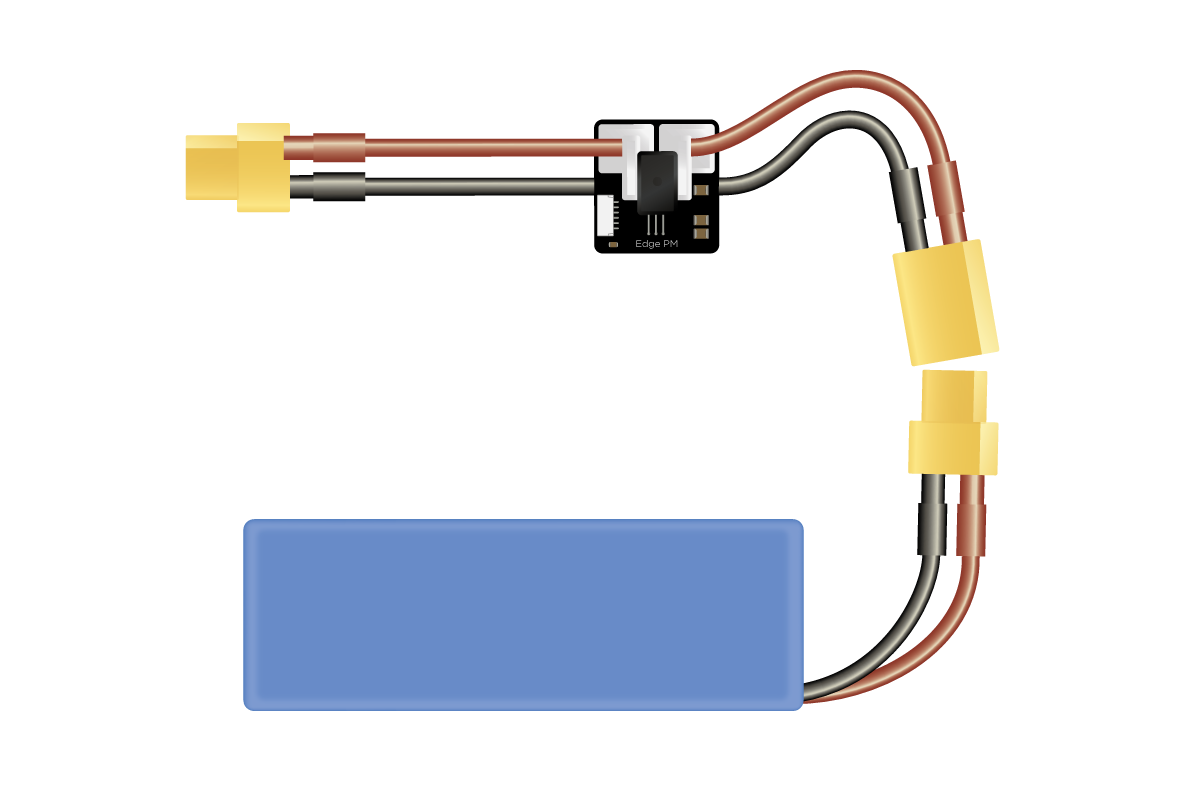
Power from a battery
Now you can turn on your Edge using the Edge Power Module (PM).
Connect JST-GH-6P connector to any power port on Edge (PWR1 or PWR2).

And after that connect a battery to your PM.
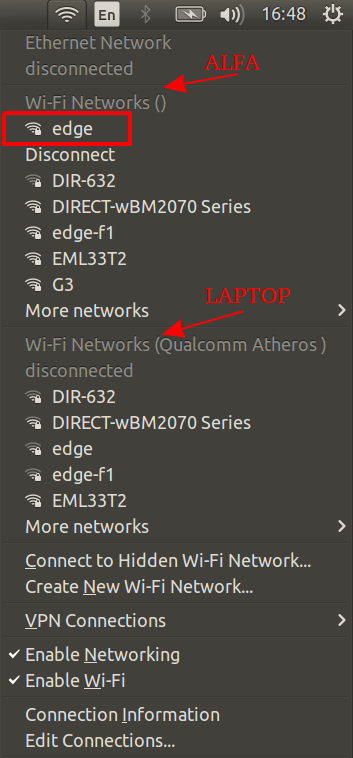
Connect to Edge’s access point
After powering up Edge needs some time to create an access point (AP). Connect to Edge’s AP (edge) with password: EmlidEdge (since 1.2 the password will be emlidedge).
danger
Most laptops have a built-in Wi-Fi module. You need to connect to Edge using specifically the external Wi-Fi module provided with Edge
tip
To avoid interference from the internal Wi-Fi we recommend disabling it
Attention
Be sure you connect to AP using the external Wi-Fi module, not the built-in Wi-Fi module of your laptop
After the connection succeeded you can install and run the QGC.
Configuring QGroundControl for Edge
danger
Install GCS specifically tailored for Edge.
On the top window choose QGC settings
In the opened settings tab click on Comm Link tab.
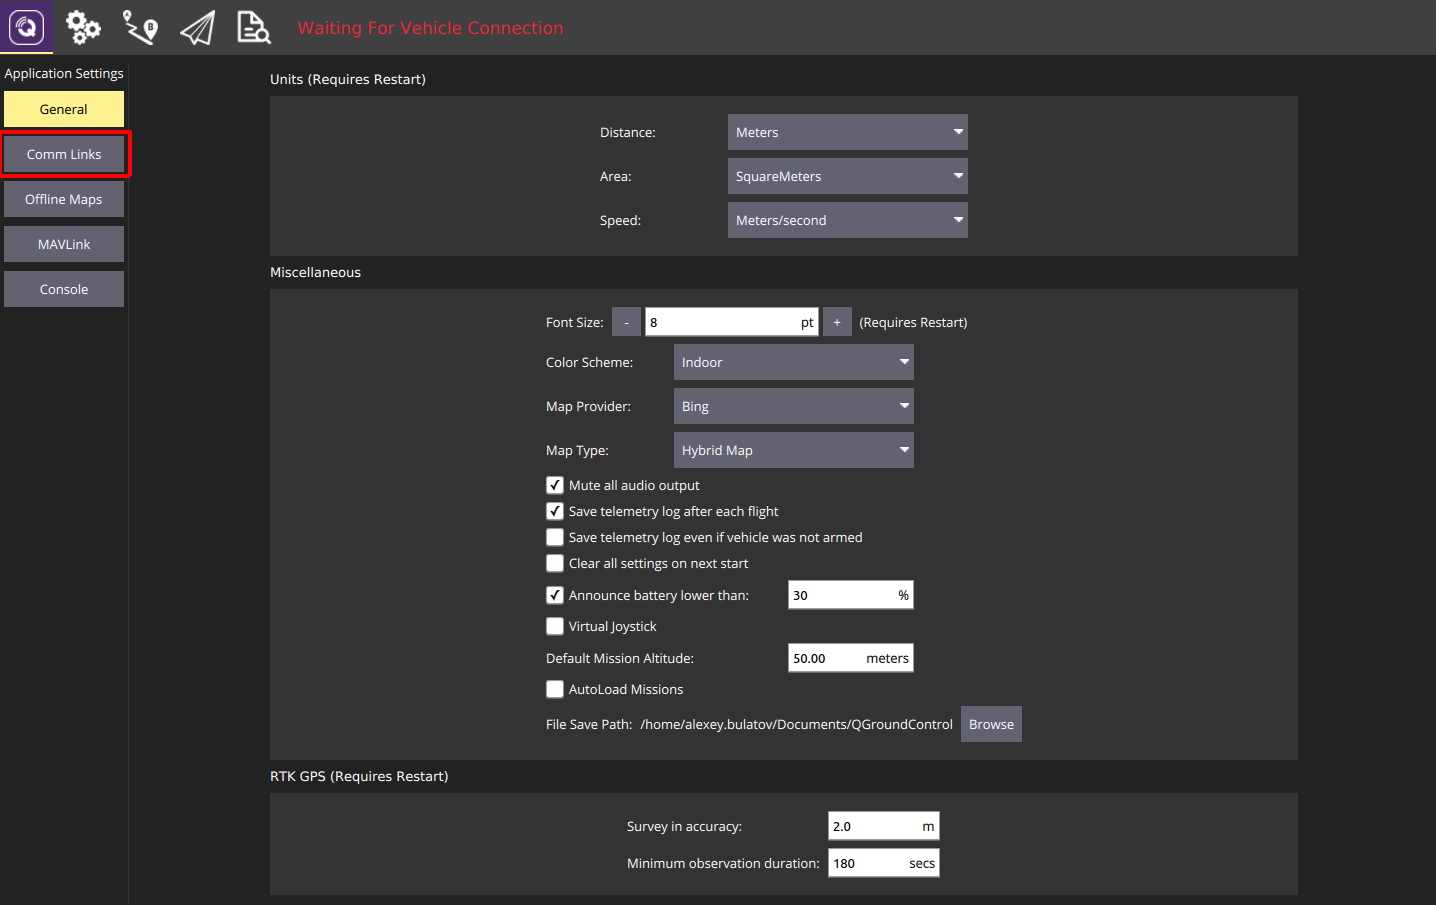
You will see the window for creating connection. Click Add to create new connection to Edge. After that you’ll see a tab with network settings.
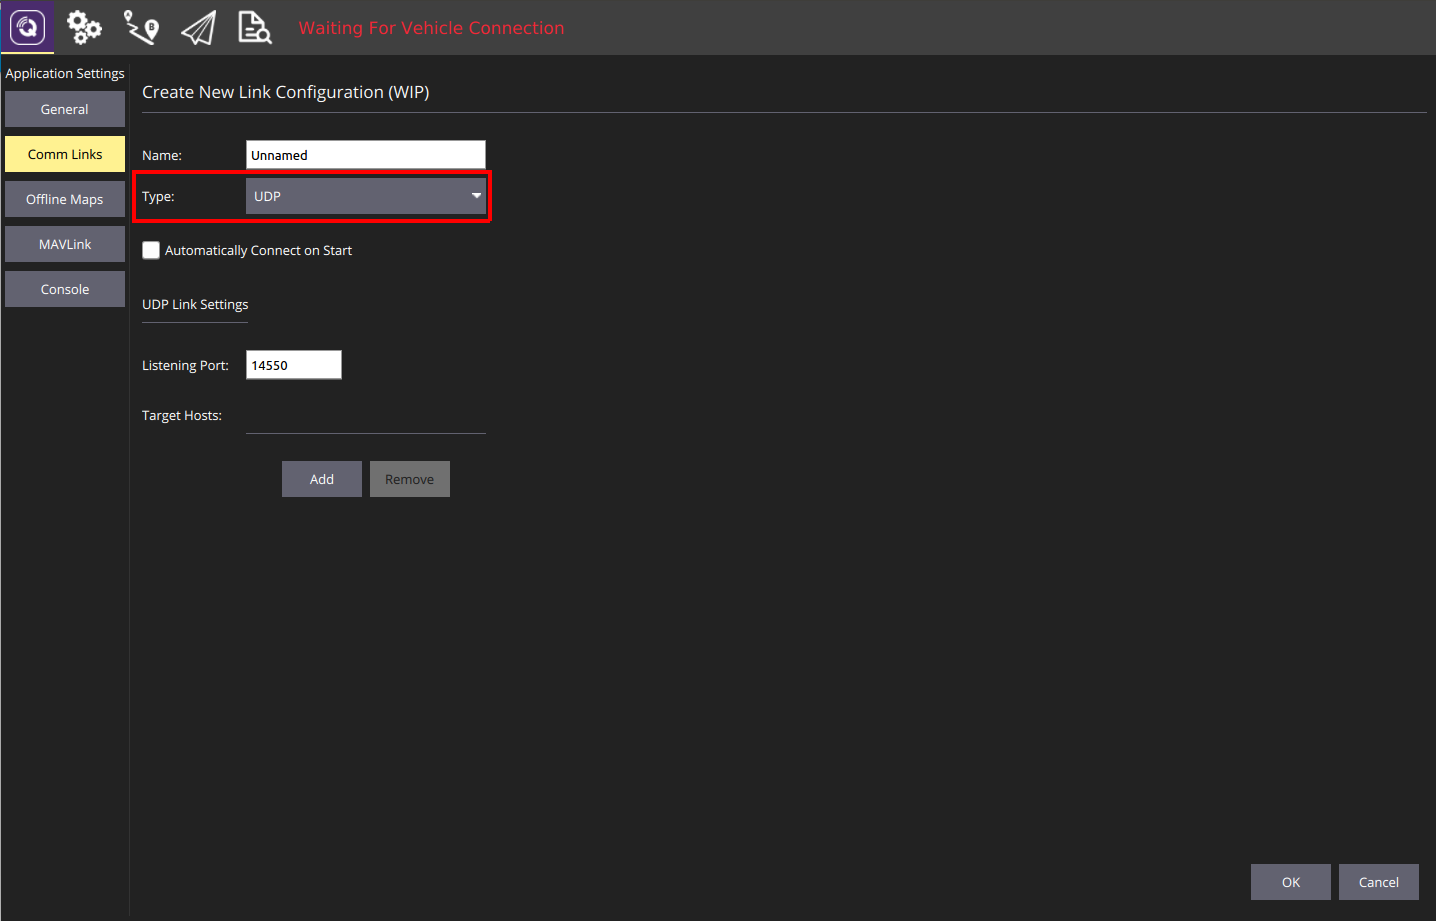
Now we need to configure the connection to your Edge. Just a couple more simple steps
- Select UDP as a connection type
- Give a name to this connection and make it automatically connect on start
- Add a target host
- Click
Addand type in the IP of Edge (192.168.0.1) or just Edge’s hostname (edge) - Press Enter
- Leave the default port (14550) as is
- Click
OKbutton
- Click
After these steps you’ll see the new link added with the name you specified
- Now you can connect to Edge, press connect for the created link

danger
You will need to ensure there is no firewall on PC stopping the incoming stream to your GCS.
- QGC will connect to Edge and will start receiving its parameters
note
By default QGC will set Video Source to UDP. If you had had another setup (i.e. another QGroundControl version installed) you’ll need to change it in the General tab of QGC settings
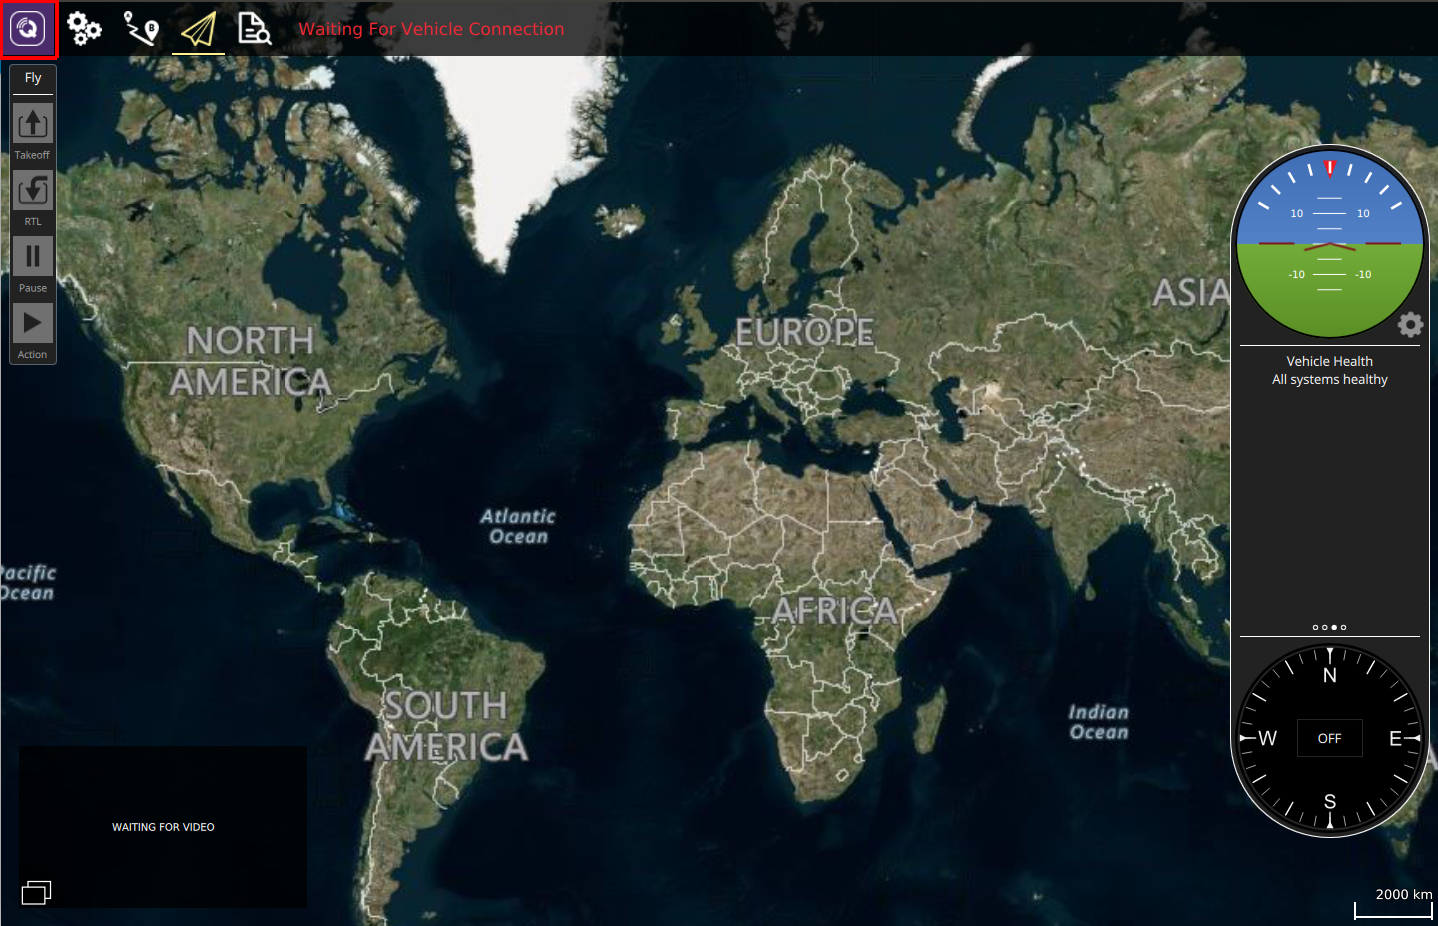
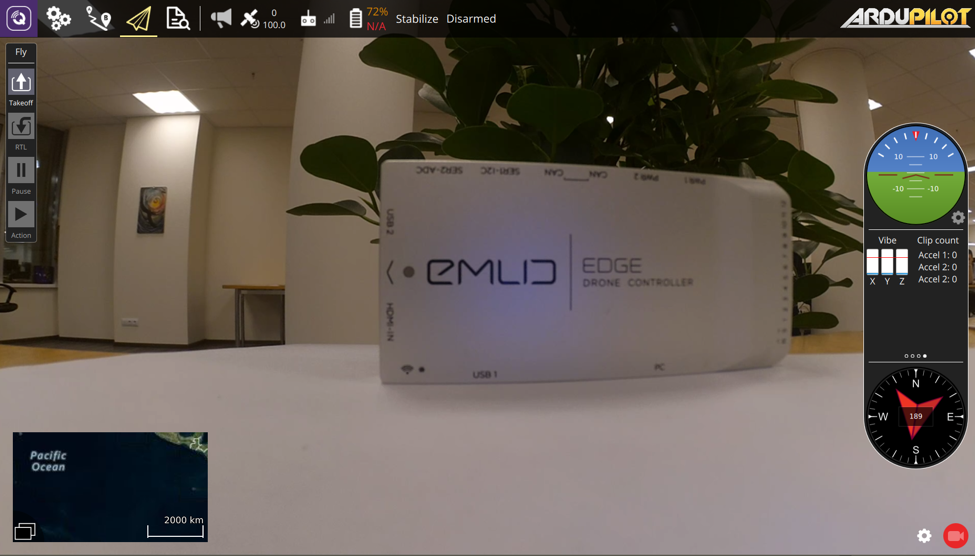
Launching a videostream
We’re almost there! Just a couple more steps to get the video stream on your screen.
Go to the Fly menu  and click on a black rectangle in the bottom left corner
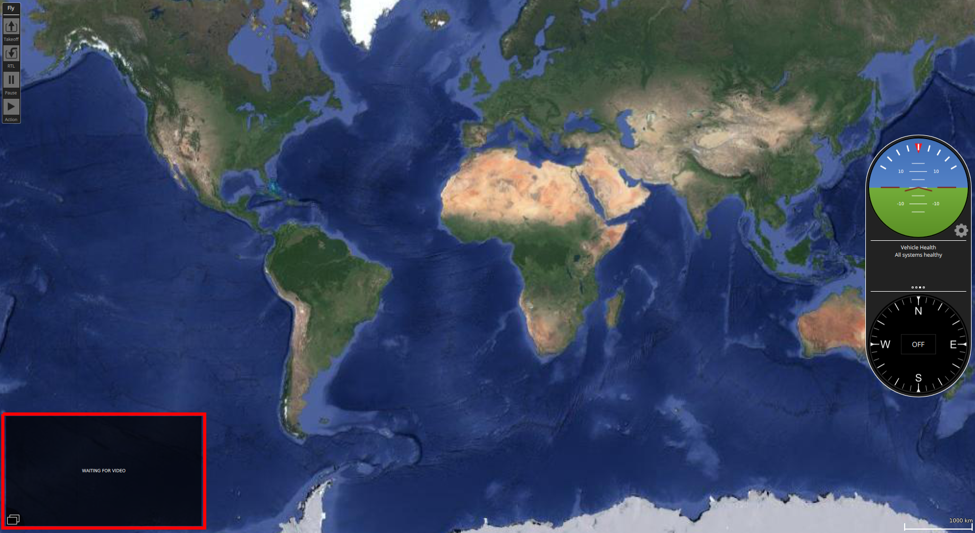
In the lower right corner will appear an icon  for settings of the video stream:
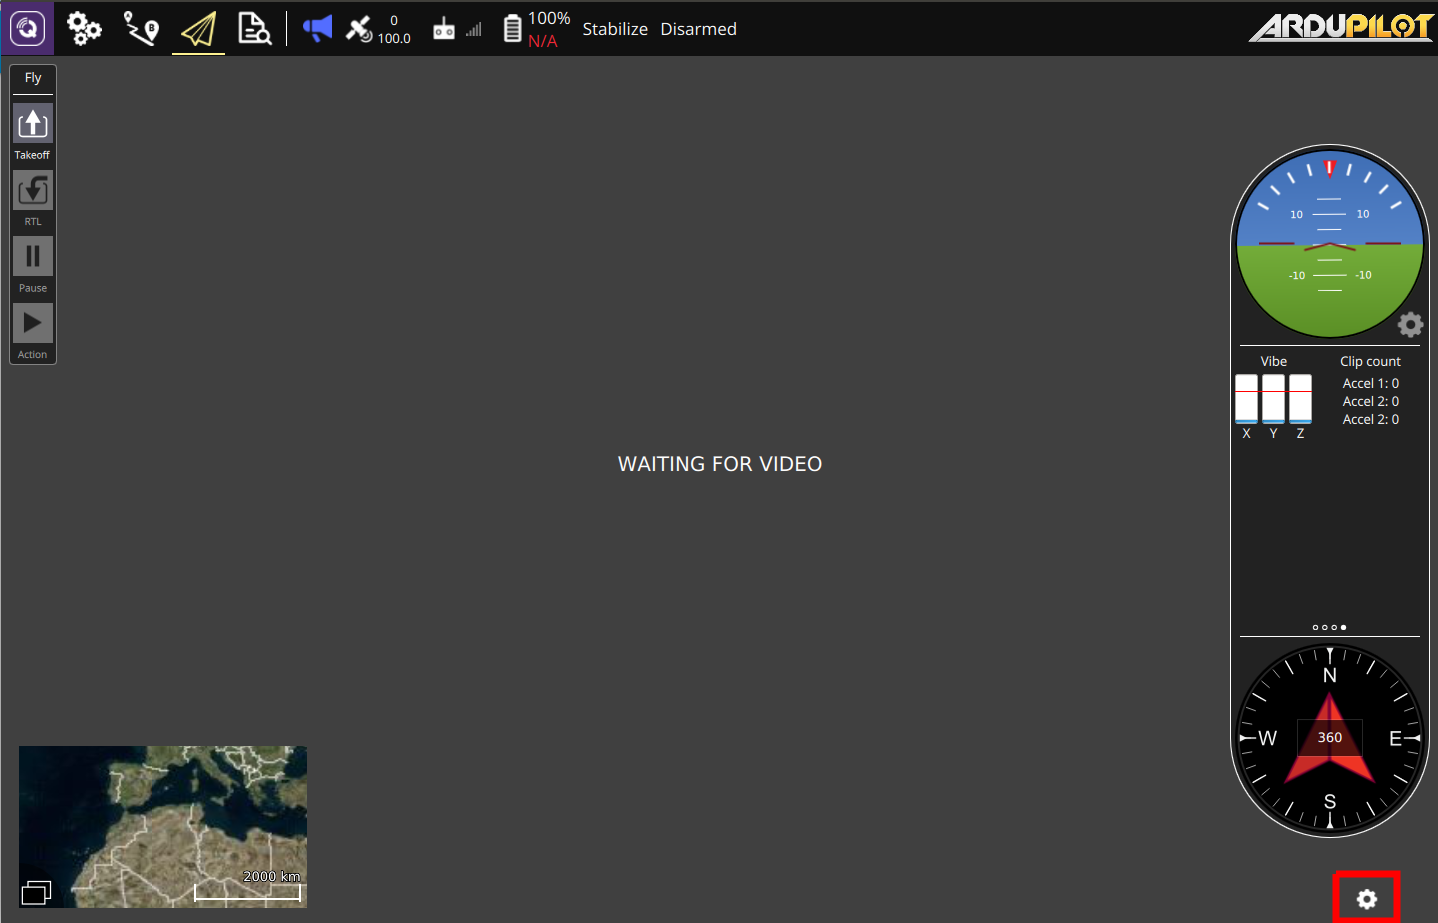
After pressing this button a menu will pop up
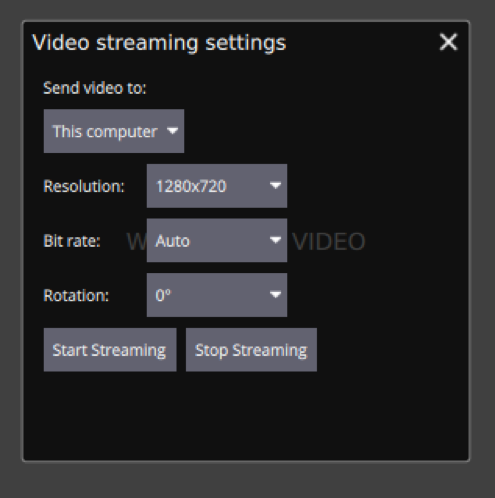
Here you can set video resolution, bitrate and rotation
note
By default QGC will set the IP of your PC and the default port from Video settings in the General menu
After this step click Start streaming and you will get the video stream from your camera.
Attention
Please don’t unplug or turn off camera before clicking on “Stop streaming”
Conclusion
That’s it, folks! If you have any questions, feel free to ask them on our community forum.
Now you can continue to installation on a frame.