senseFly RTK guide
Overview
In this tutorial, you will find the information on how to survey in RTK with senseFly drones and Reach RS2/RS2+.
Step-by-step guide can be also found on senseFly Knowledge Base.
Setting up Reach RS2/RS2+
In this part, we will explain how to configure Reach RS2/RS2+ to transmit corrections to the PC via Bluetooth.
Placing the Reach RS2/RS2+ receiver
The video below demonstrates how to place the Reach RS2/RS2+ base over a known point.
To find out other ways of placing the local base station, check the Placing the base guide.
The general steps for placing the base receiver are described below.
-
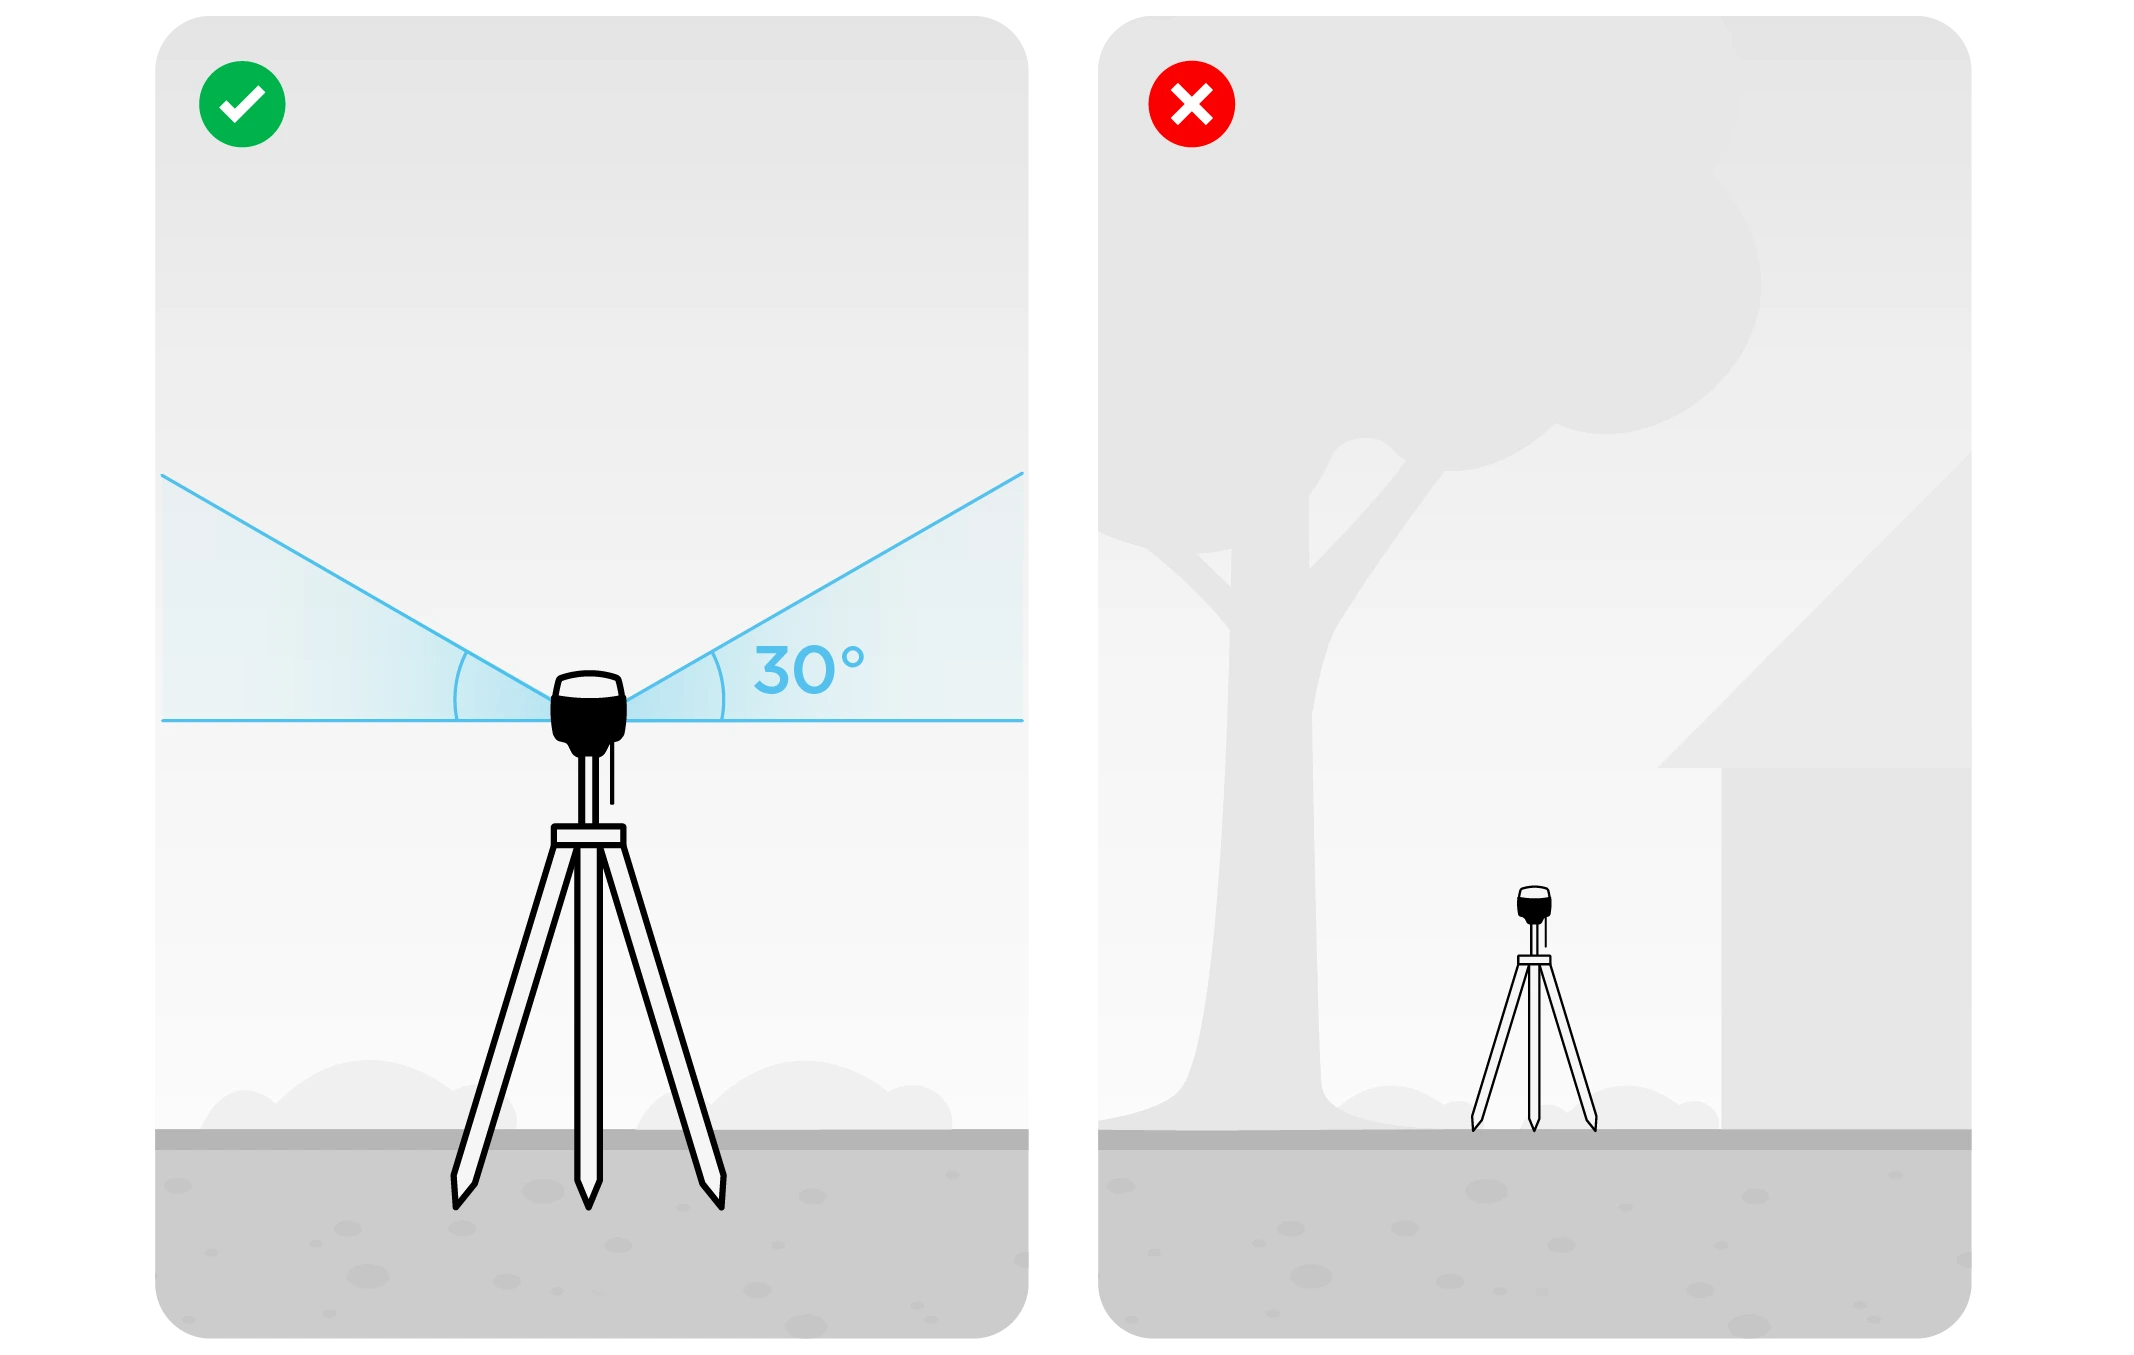
Make sure you choose an appropriate location to place Reach RS2/RS2+ base station. Take a look at 2 pictures below. The left picture demonstrates desirable conditions for the base location. The right one is an example of bad surrounding conditions such as the reduced view of the sky, possible obstructions or vegetation nearby.
-
Make sure your Reach RS2/RS2+ is placed precisely above the marked point on the tripod and leveled.
-
If you are setting up base coordinates manually, measure the antenna height offset.
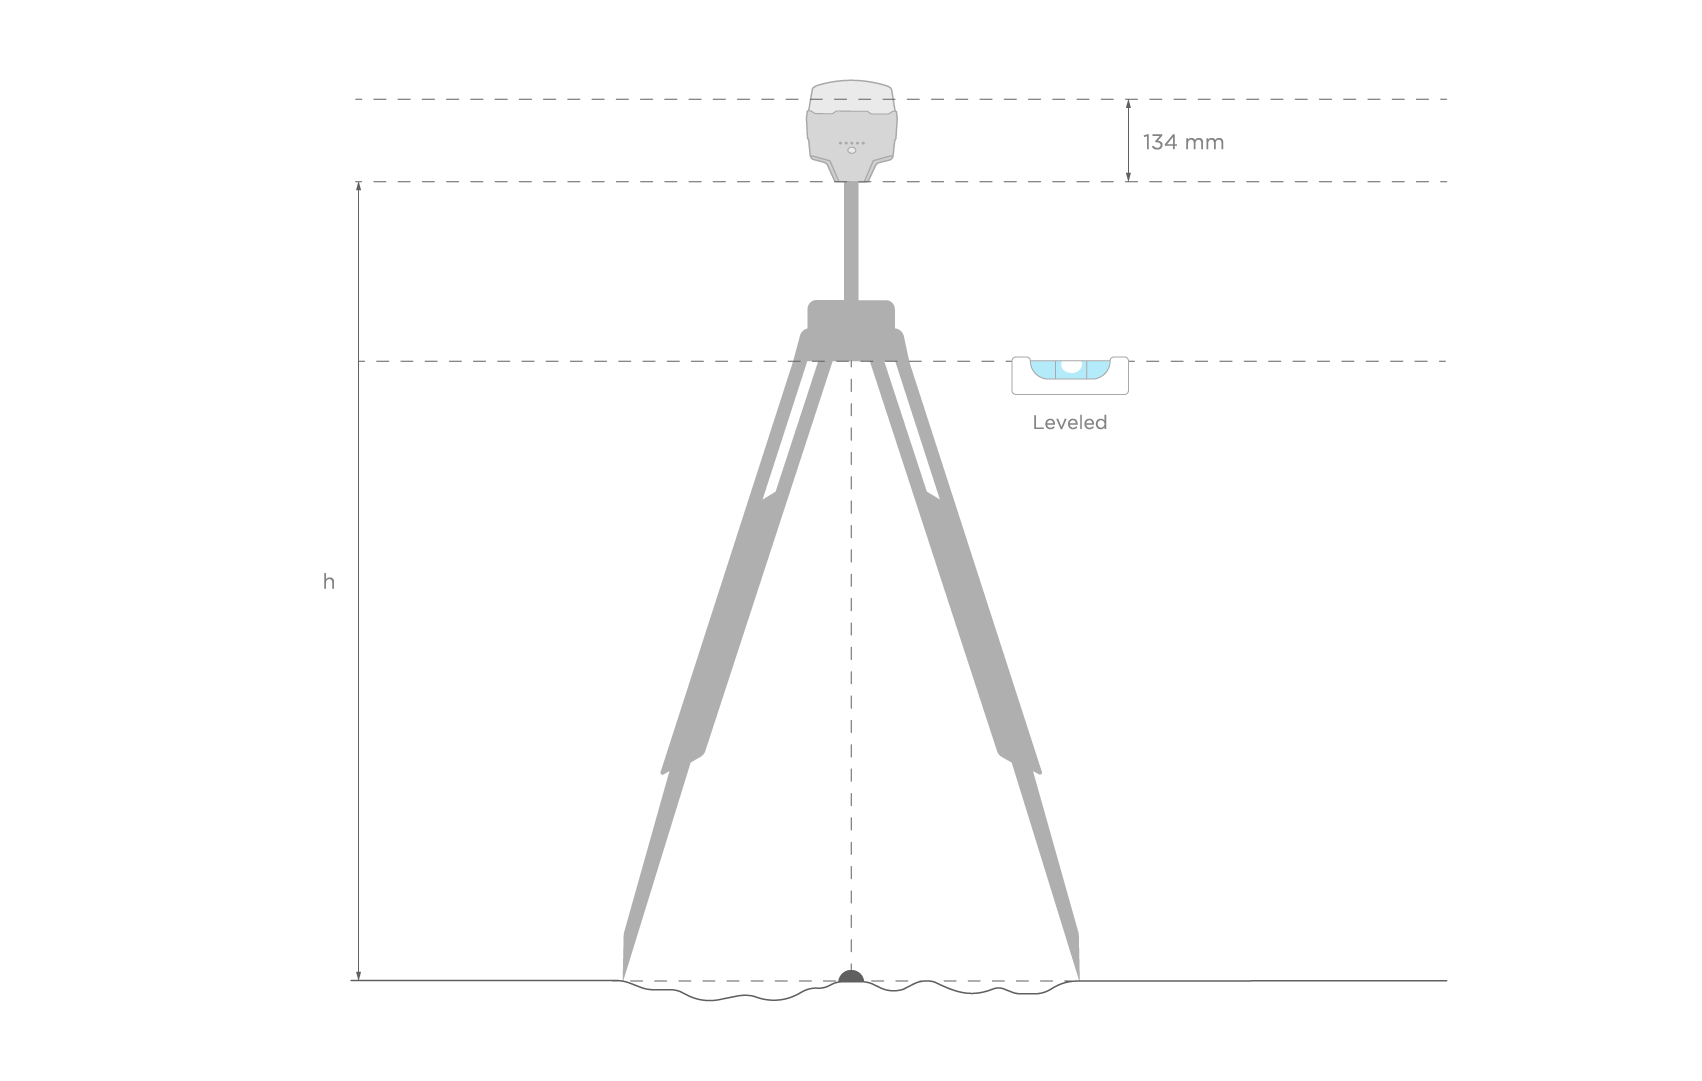
noteAntenna height is measured as the distance between the mark and the antenna reference point (ARP).
For Reach RS2/RS2+, consider the antenna height as the distance between the mark and the bottom of Reach RS2/RS2+ (h on the figure below) plus 134 mm.
noteIf you require absolute centimeter-level accuracy, you need to calculate an absolute base coordinate.
If you require relative centimeter-level accuracy, you can average base position.
Pairing with PC
-
Open Emlid Flow and connect to your Reach.
Steps for connecting via hotspotTo learn more, check the Connecting to Reach guide.
-
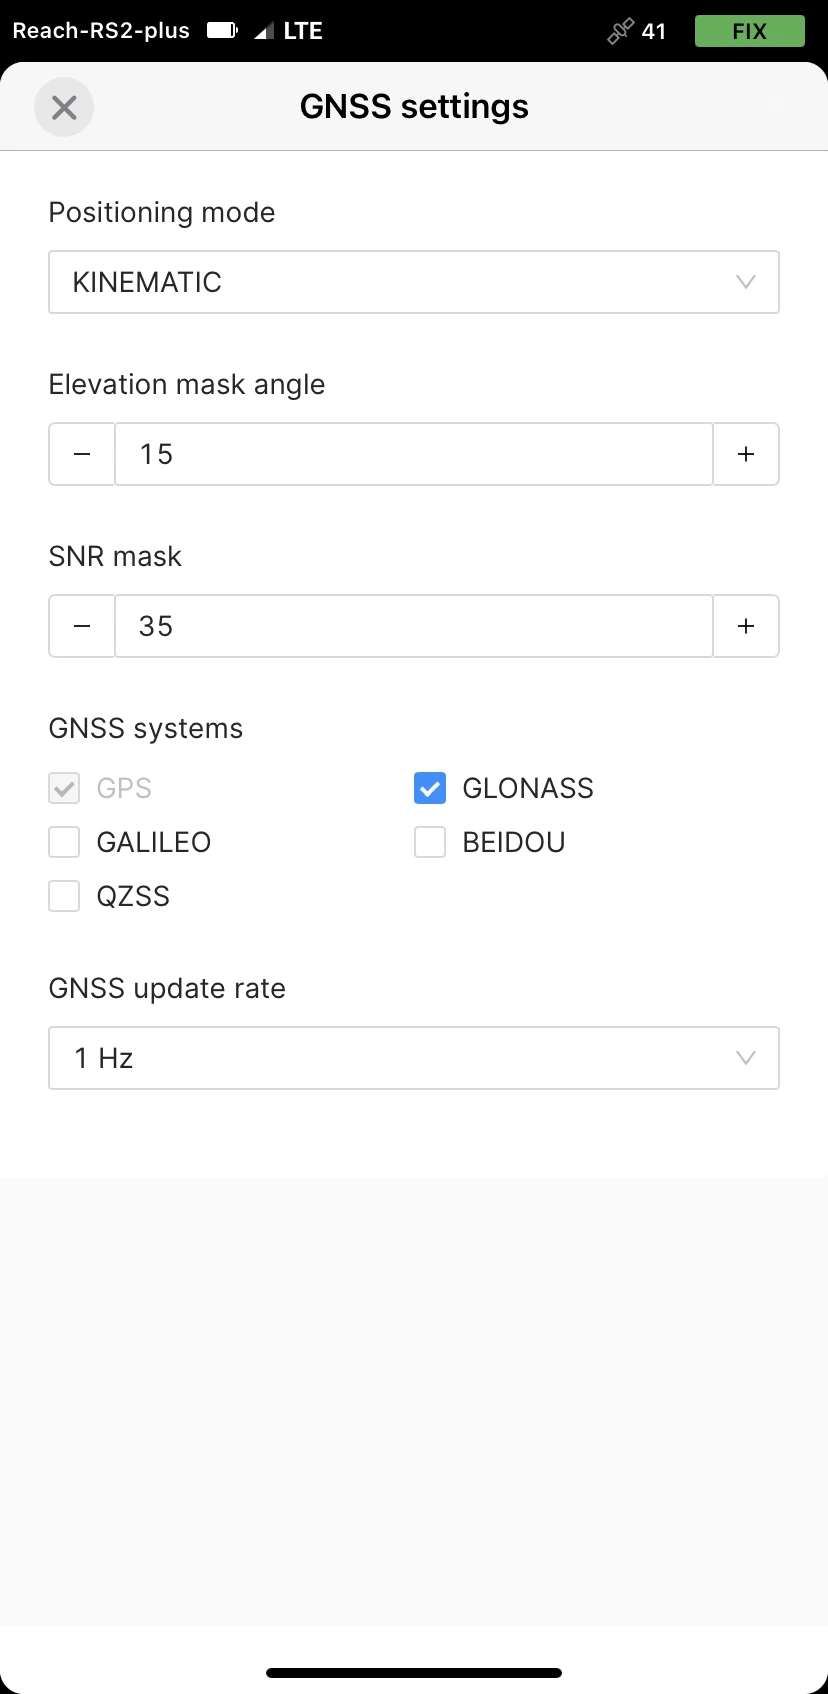
On the Settings screen, tap GNSS settings.
-
Select GNSS constellations as follows.
noteFor working with eBee drones, enable GPS and GLONASS at 1 Hz.
-
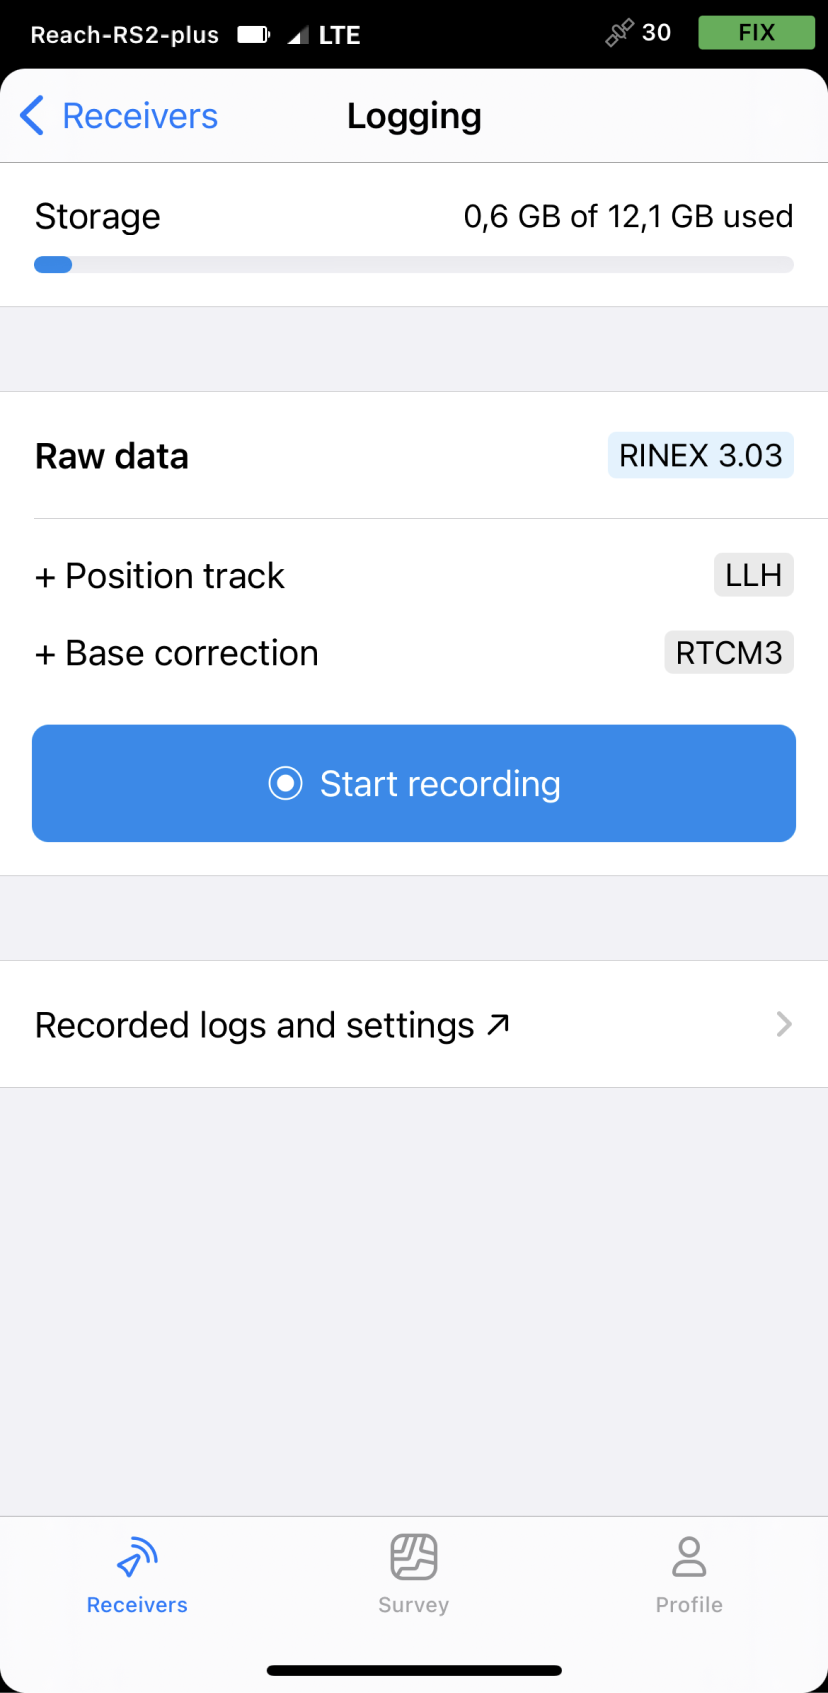
Go back to the Receivers screen and tap Logging.
-
Tap the Recorded logs and settings button.
-
To configure logging, tap the blue gear button.
-
In the Format and presets dropdown menu, choose UBX. Apply changes and close the Logging screen.
-
Go to Settings and tap Bluetooth.
-
Enable Bluetooth by tapping the Turn on Bluetooth button.
-
Tap Discoverability and turn on the Discoverability option. Tap Save to apply changes.
-
Enable Bluetooth on your PC.
-
Open Bluetooth settings.
-
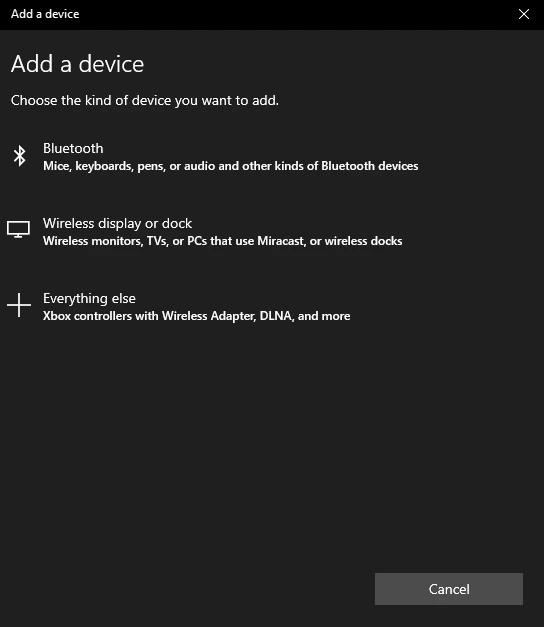
Click on Add Bluetooth or other device.
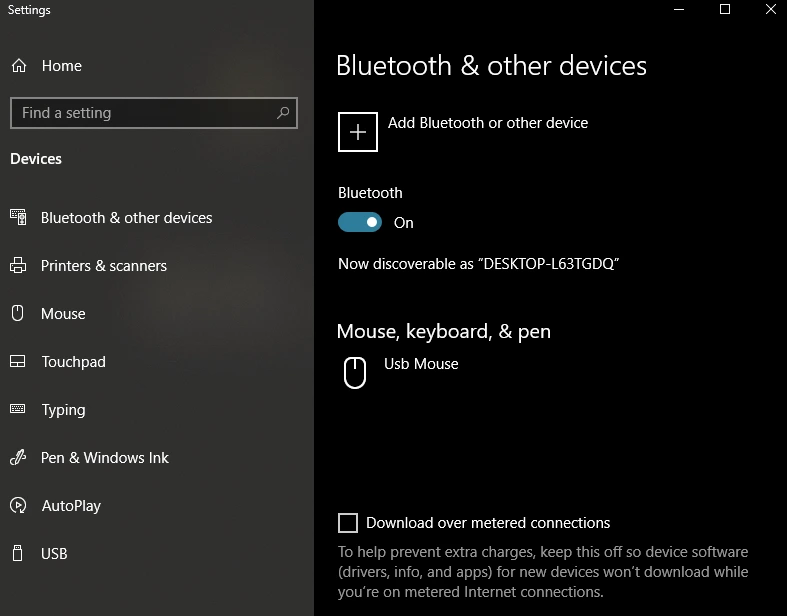
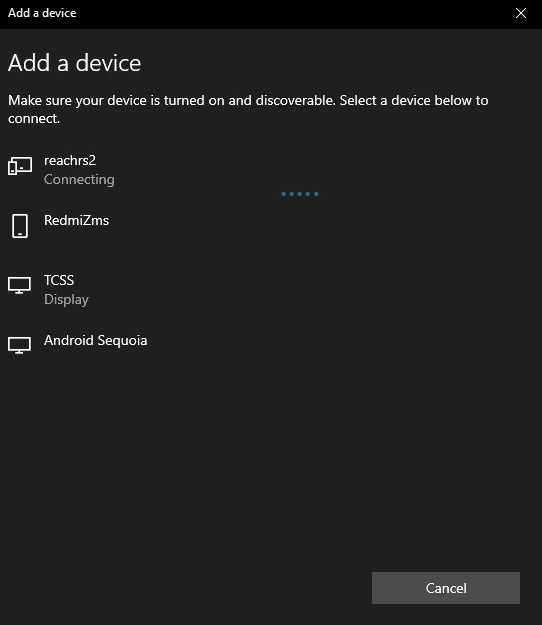
- Choose the Bluetooth option in the Add a device window.
- Make sure your Reach RS2/RS2+ is discoverable and can be seen in the list of devices.
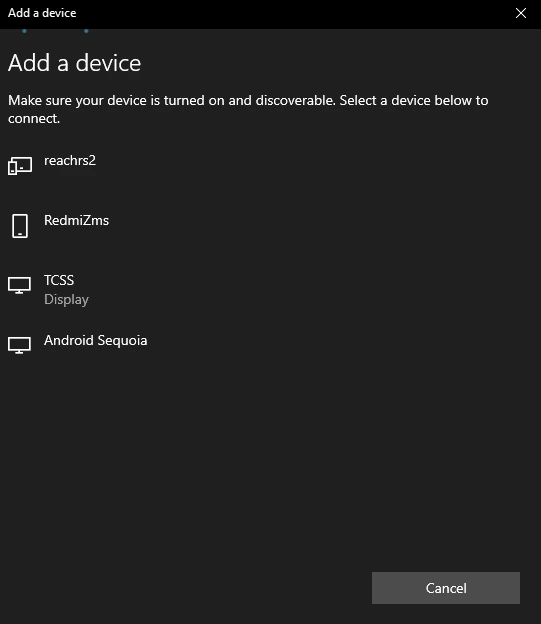
- Once you can see Reach RS2/RS2+ in the list, connect to it.
If the connection is successful, you will get a message "Your device is ready to go!"
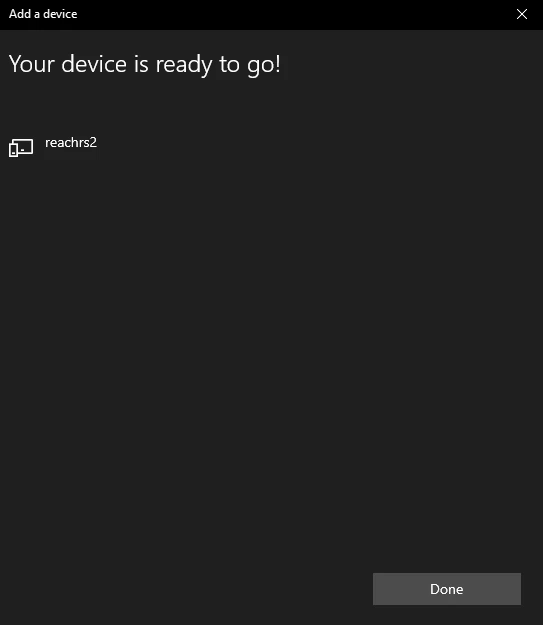
Now you can proceed to the next step.
Configuring base output
-
On the Receivers screen in Emlid Flow, tap Base output.
-
Choose Bluetooth.
-
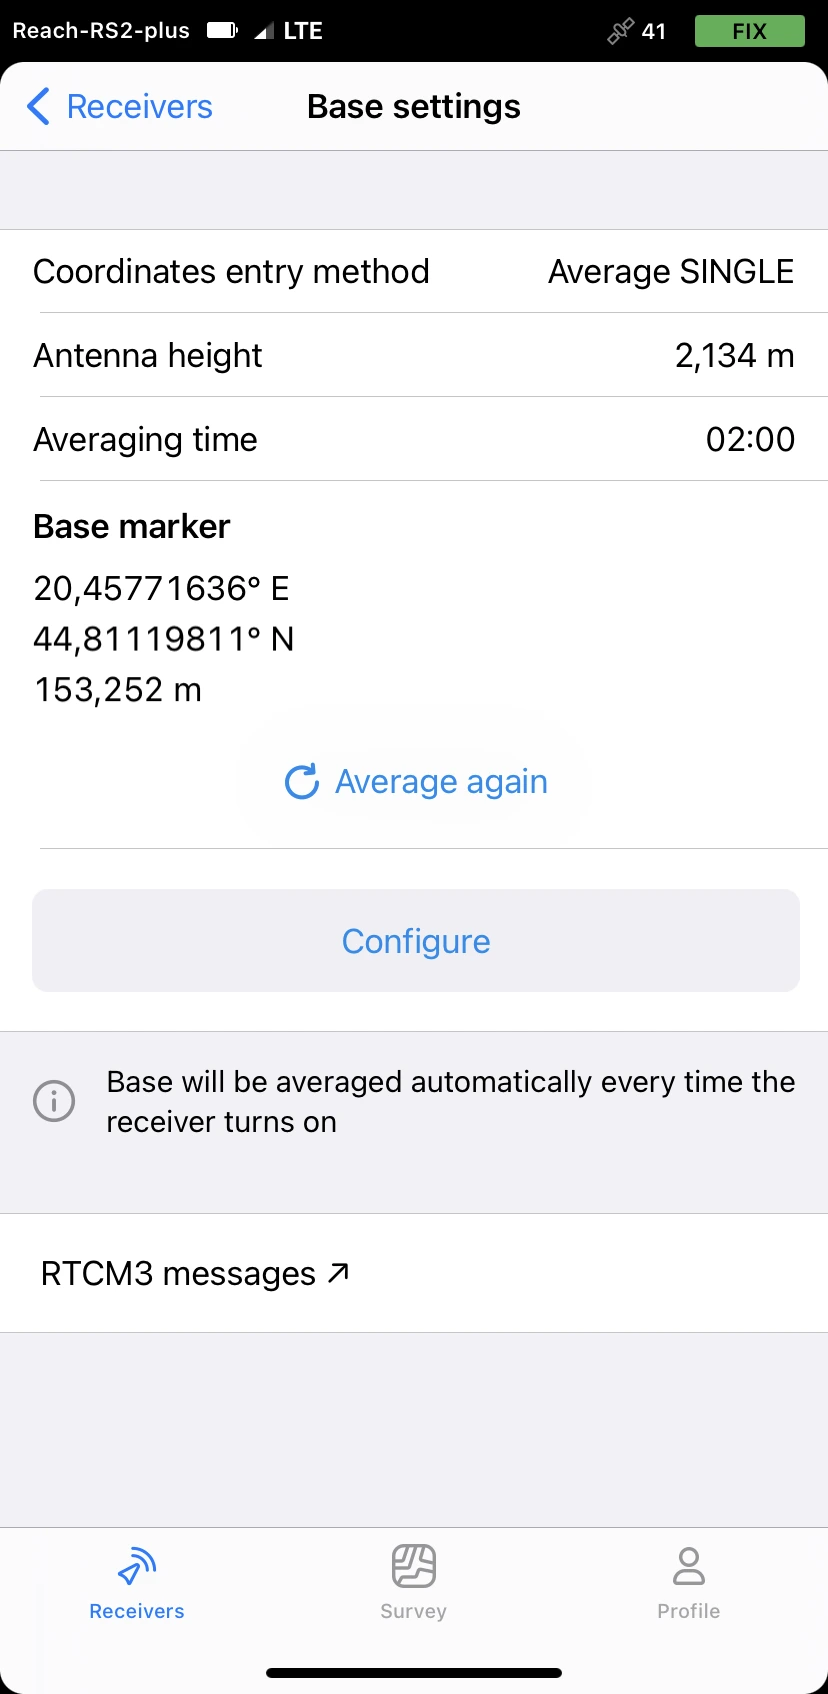
Go back to the Receivers screen and tap Base settings.
-
Choose Coordinate entry method. In this guide, we use Average Single.
tipTo learn more, check the Placing the base guide.
-
Fill-in Antenna height and then specify Averaging time.
-
Tap RTCM3 messages and Specify transmitted RTCM3 messages.
RTCM3 messages Message type Minimal required messages 1006 ARP station coordinate 1074 GPS MSM4 **Optional messages for other GNSS ** 1084 GLONASS MSM4 1094 Galileo MSM4 1124 BeiDou MSM4 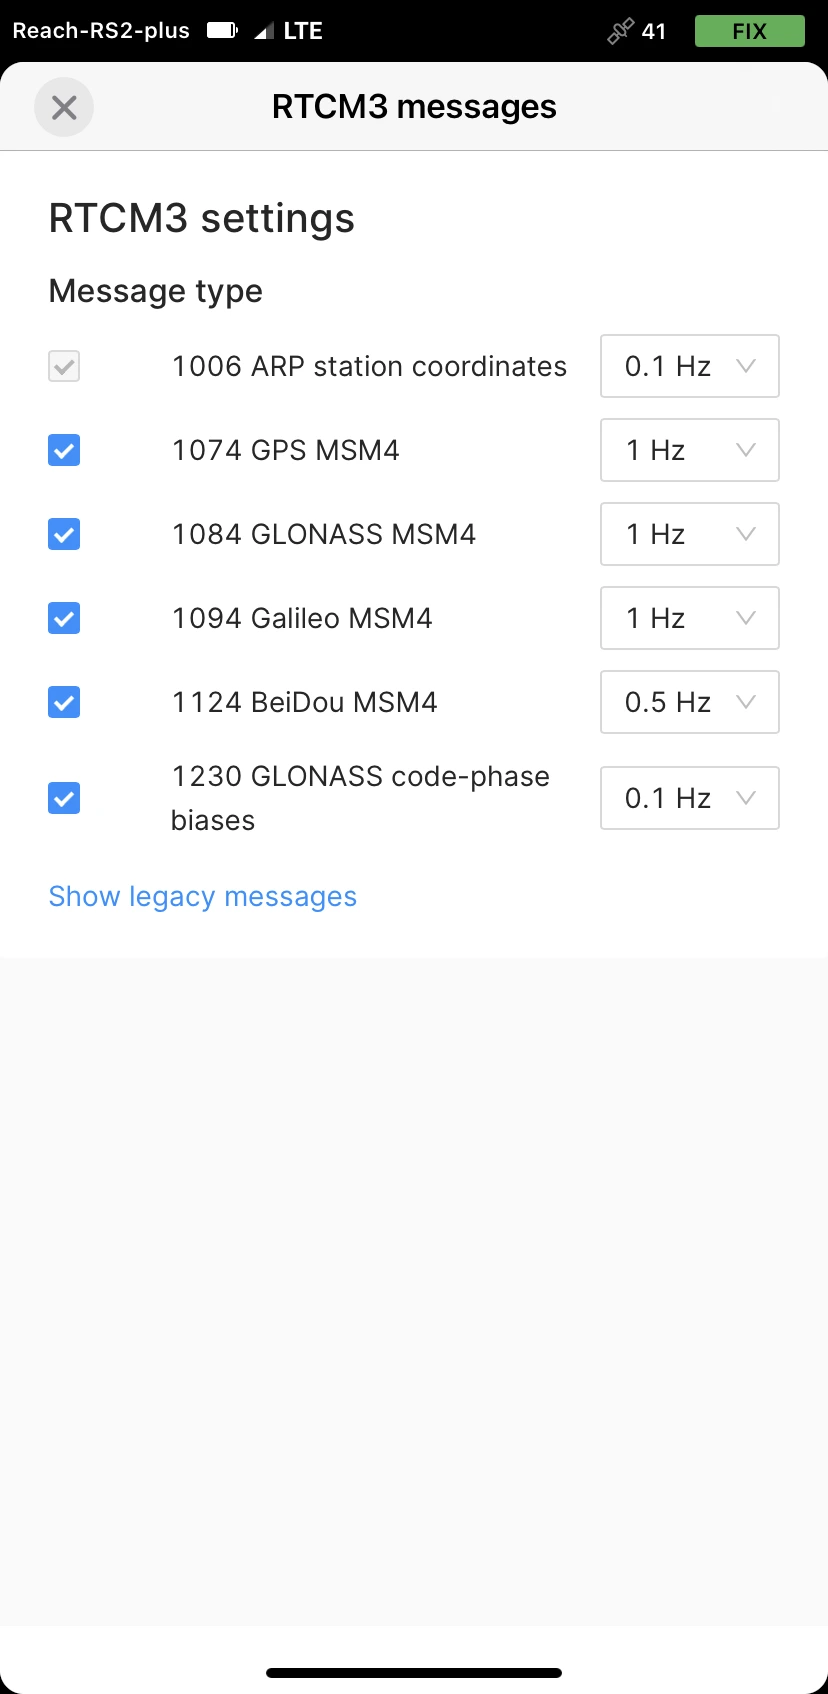
Checking the connection
You will need to find out what COM port on your PC is used by Reach RS2/RS2+. For that, we recommend using the PuTTY client for Windows.
-
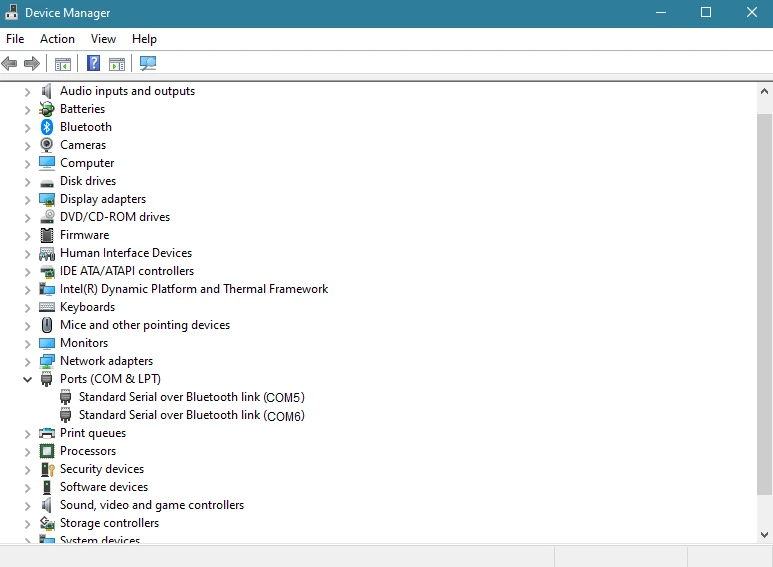
Open Device Manager on your computer.
-
Check available Standard Serial over Bluetooth link ports.
-
Open PuTTY.
-
Go to the Session tab.
-
Specify the COM port in the Serial line.
-
Choose speed at 9600.
-
Choose the connection type Serial.

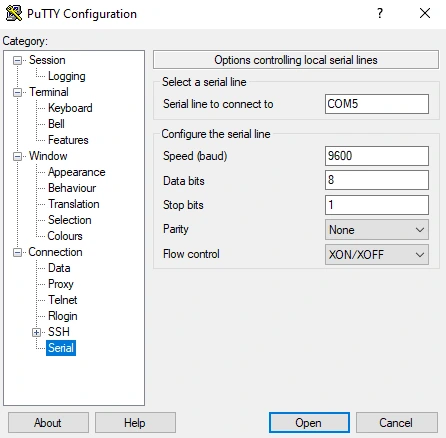
You can do the same in the Serial tab:
-
Go to the Serial tab.
-
Specify the COM port in the Serial line to connect to.
-
Choose speed at 9600.
-
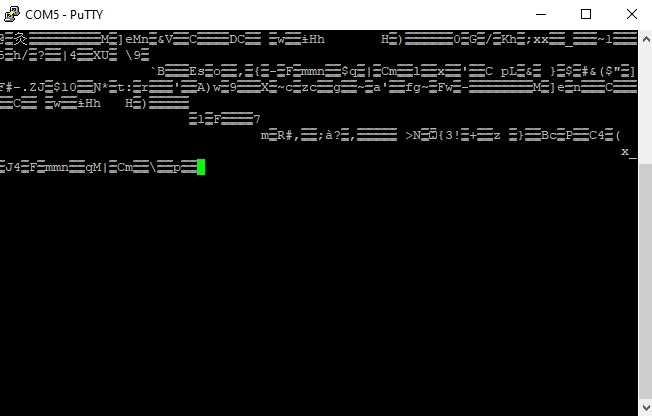
Press Open
If you have chosen the correct port, you will see the corrections from Reach RS2/RS2+ in the RTCM3 format on the screen. If you cannot see the data coming, choose another COM port in Serial line.
Now you are ready to configure the RTK link in eMotion3
Connecting to eMotion3
Now we will show you how to establish an RTK link with Reach RS2/RS2+ base on your eBee drone.
-
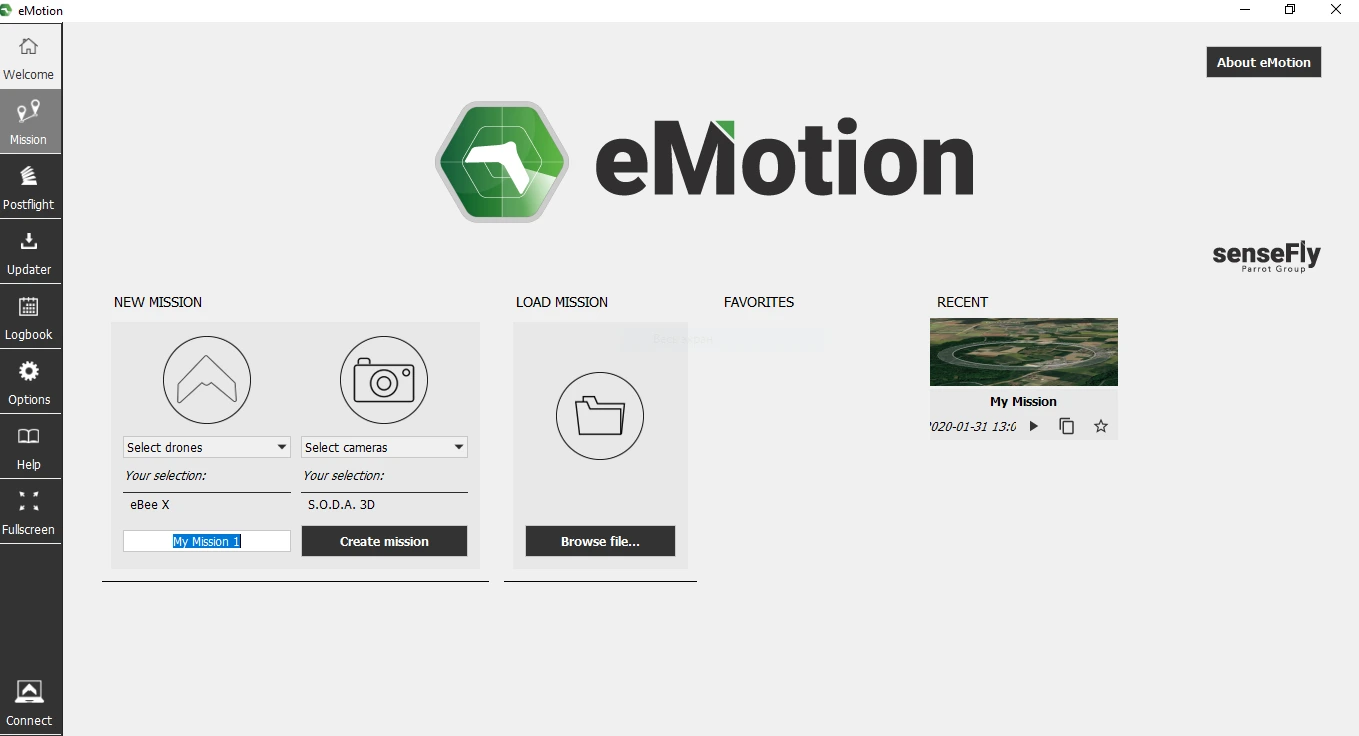
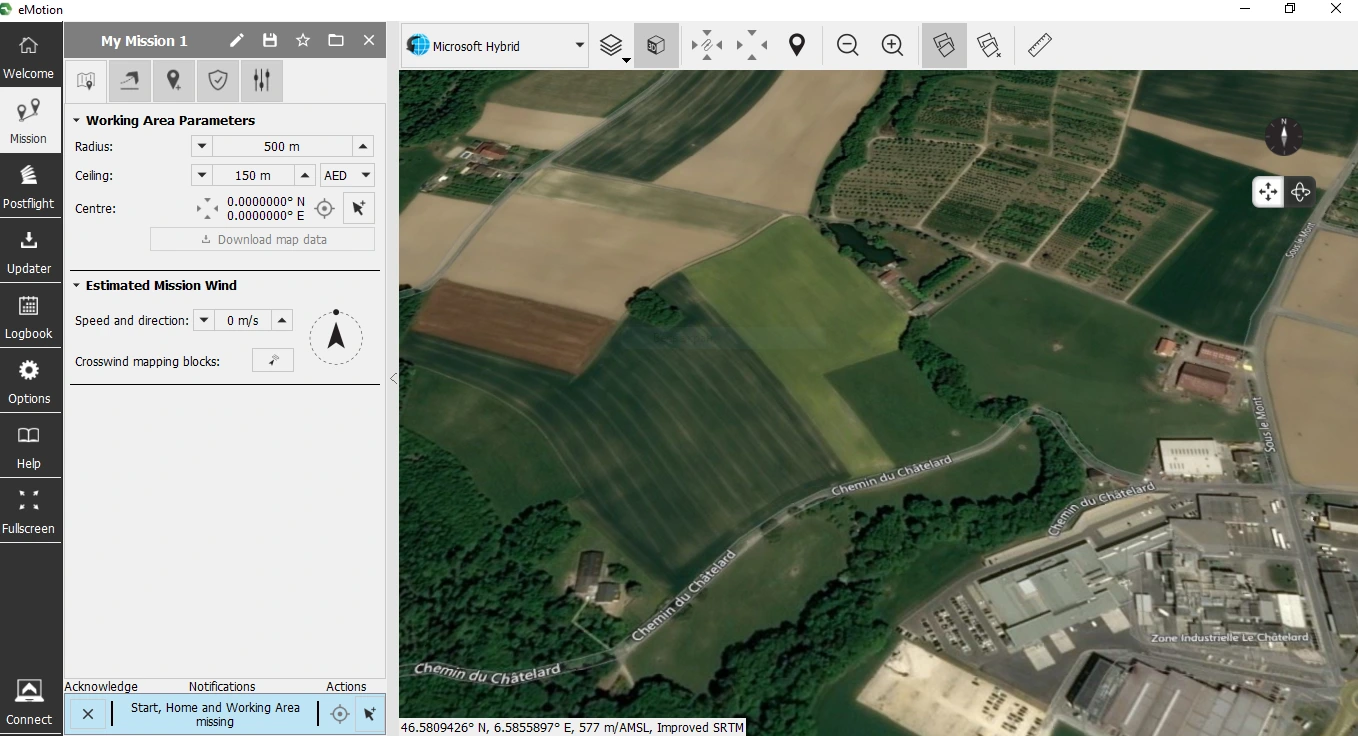
Launch eMotion3.
-
Create mission and go to the Mission tab.
-
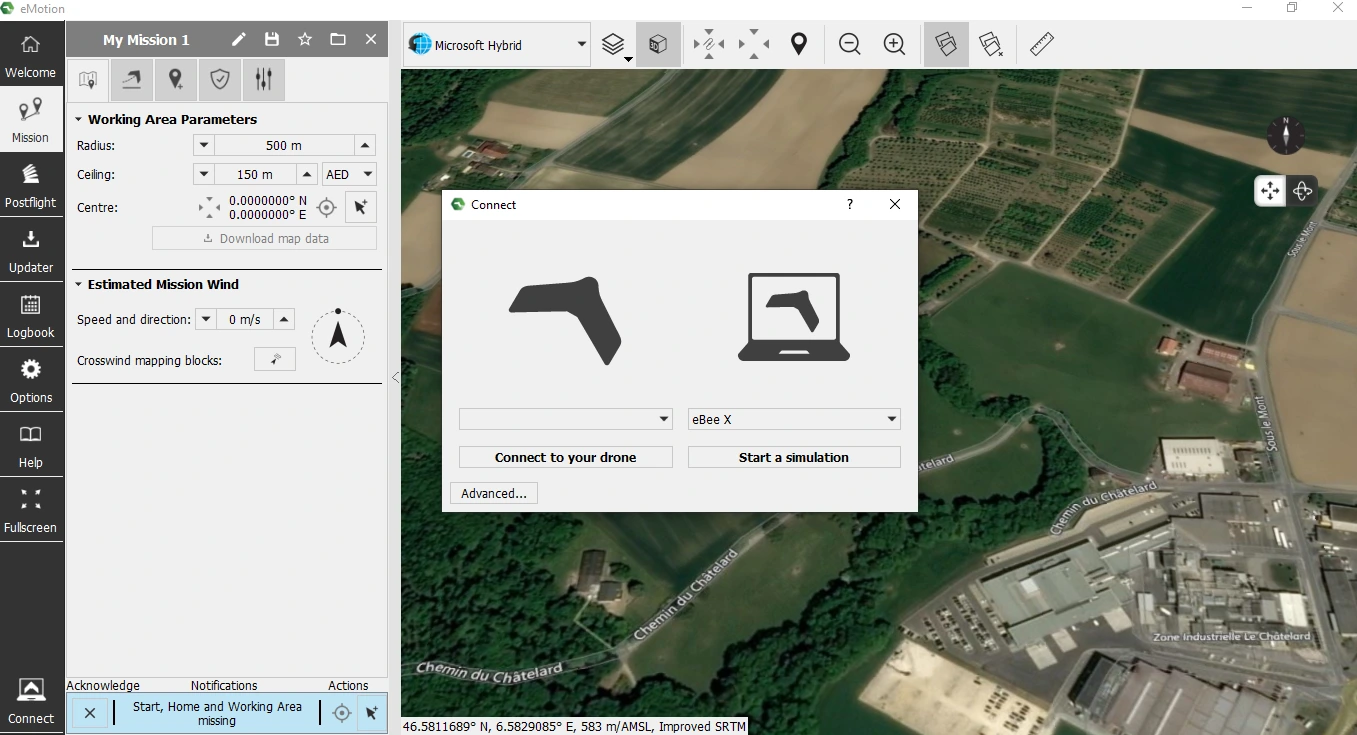
Press the Connect button. Connect to the drone by pressing Connect to your drone or simulate your flight by pressing Start a simulation.
-
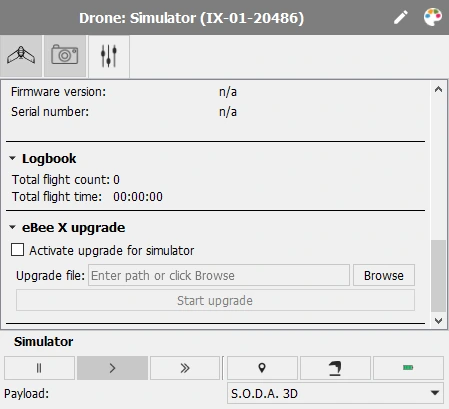
Activate your RTK/PPK license in the eBee plus upgrade tab of the Drone's panel. To activate a license for simulation, tick an Activate update for simulator box.
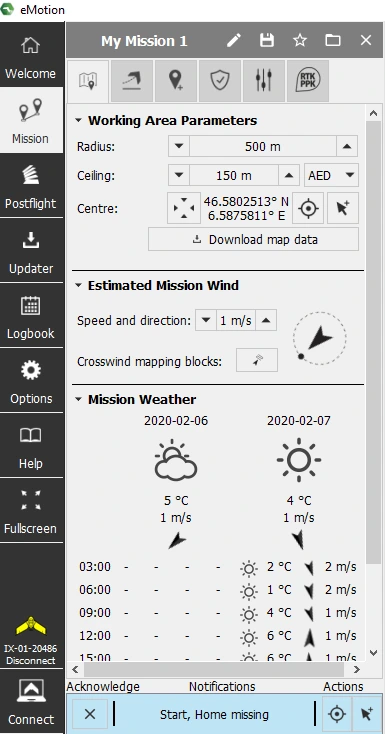
Now you can see the RTK tab enabled on your Mission panel on your left.
-
Go to the RTK tab in the Mission panel.

-
Press Set-up RTK/PPK to configure your base.
-
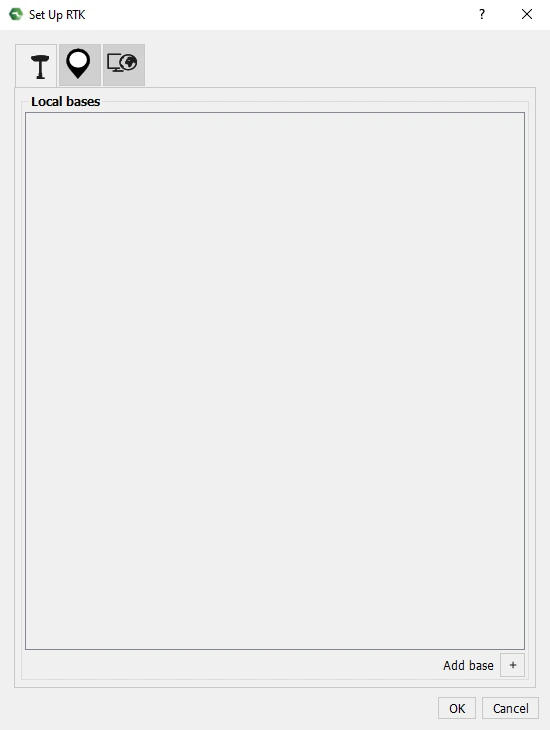
In the opened window, you can specify either a base station, reference points or a VRS. To configure the base station, press Add base + in the Base tab.
-
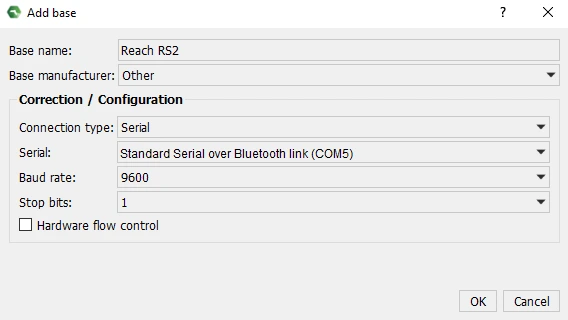
Set Reach RS2/RS2+ to a Base name.
-
Set Other to a Base manifacturer.
-
Set Connection type to Serial.
-
Choose the COM port that you checked on the previous step.
-
Set the same baudrate for all connected devices.
-
Press OK.
- Once you configured the connection, you can choose the base station in the RTK tab.
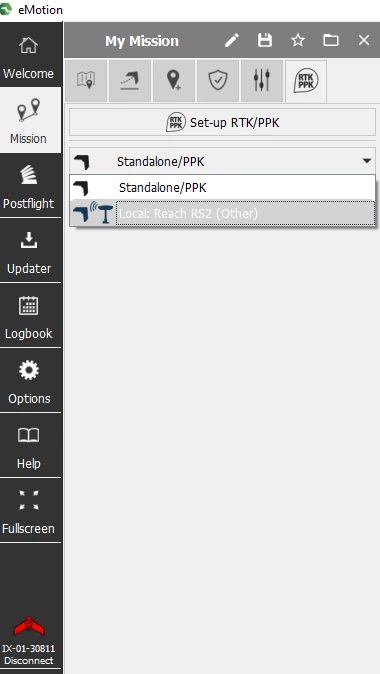
-
Press on the chosen base station to see the Set up Local Base window.
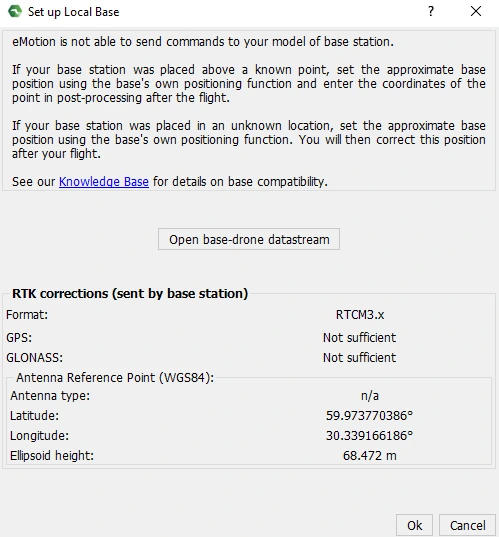
-
Press Open base-drone datastream.
If you are testing the setup inside, the GPS and GLONASS fields will show Not sufficient message.
- Check the base position the drone receives.
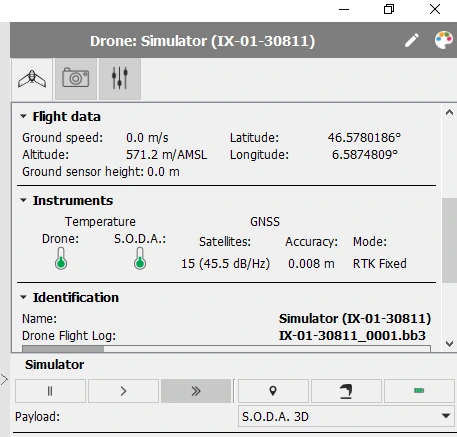
- Go to the Drone's panel. In the Instruments tab, you can see that the drone provides centimeter-level accuracy and the mode is RTK-fixed.
Now you have successfully configured RTK corrections on your drone from Reach RS2/RS2+.