Static processing
This tutorial shows how to post-process static data in Emlid Studio to get the precise position of a single point.
Overview
The Static processing workflow allows you to obtain an accurate position of a single point. Usually, it is used to get coordinates of a local base station when you cannot access an NTRIP service for RTK. For example, when the Internet coverage is too poor, or the baseline to the nearest station is too long.
In this case, you need to log the raw data on your base and get logs from the nearest continuously operating reference station (CORS) for further post-processing.
Getting started
To get coordinates of your local base station using the Static processing workflow, you will need the following files:
- a RINEX observation file from a CORS
- a RINEX observation file from a local base
- a RINEX navigation file from a CORS or a local base
If you recorded raw data in the UBX format or got corrections from the NTRIP service in the RTCM3 format, Emlid Studio will automatically convert them to RINEX using the background conversion feature.
Workflow
To post-process the collected data, follow the steps below:
Emlid Studio selects the One best solution by default. To double-check it, click the blue gear and you will access the settings. There, find the Output solution field and make sure that One best is chosen.
To add a file, simply drag and drop it from your desktop.
-
Select the workflow from the drop-down list in the upper-left corner.
-
Add the RINEX observation file from the local base to the Static receiver field.
-
Set the antenna height by clicking Edit.
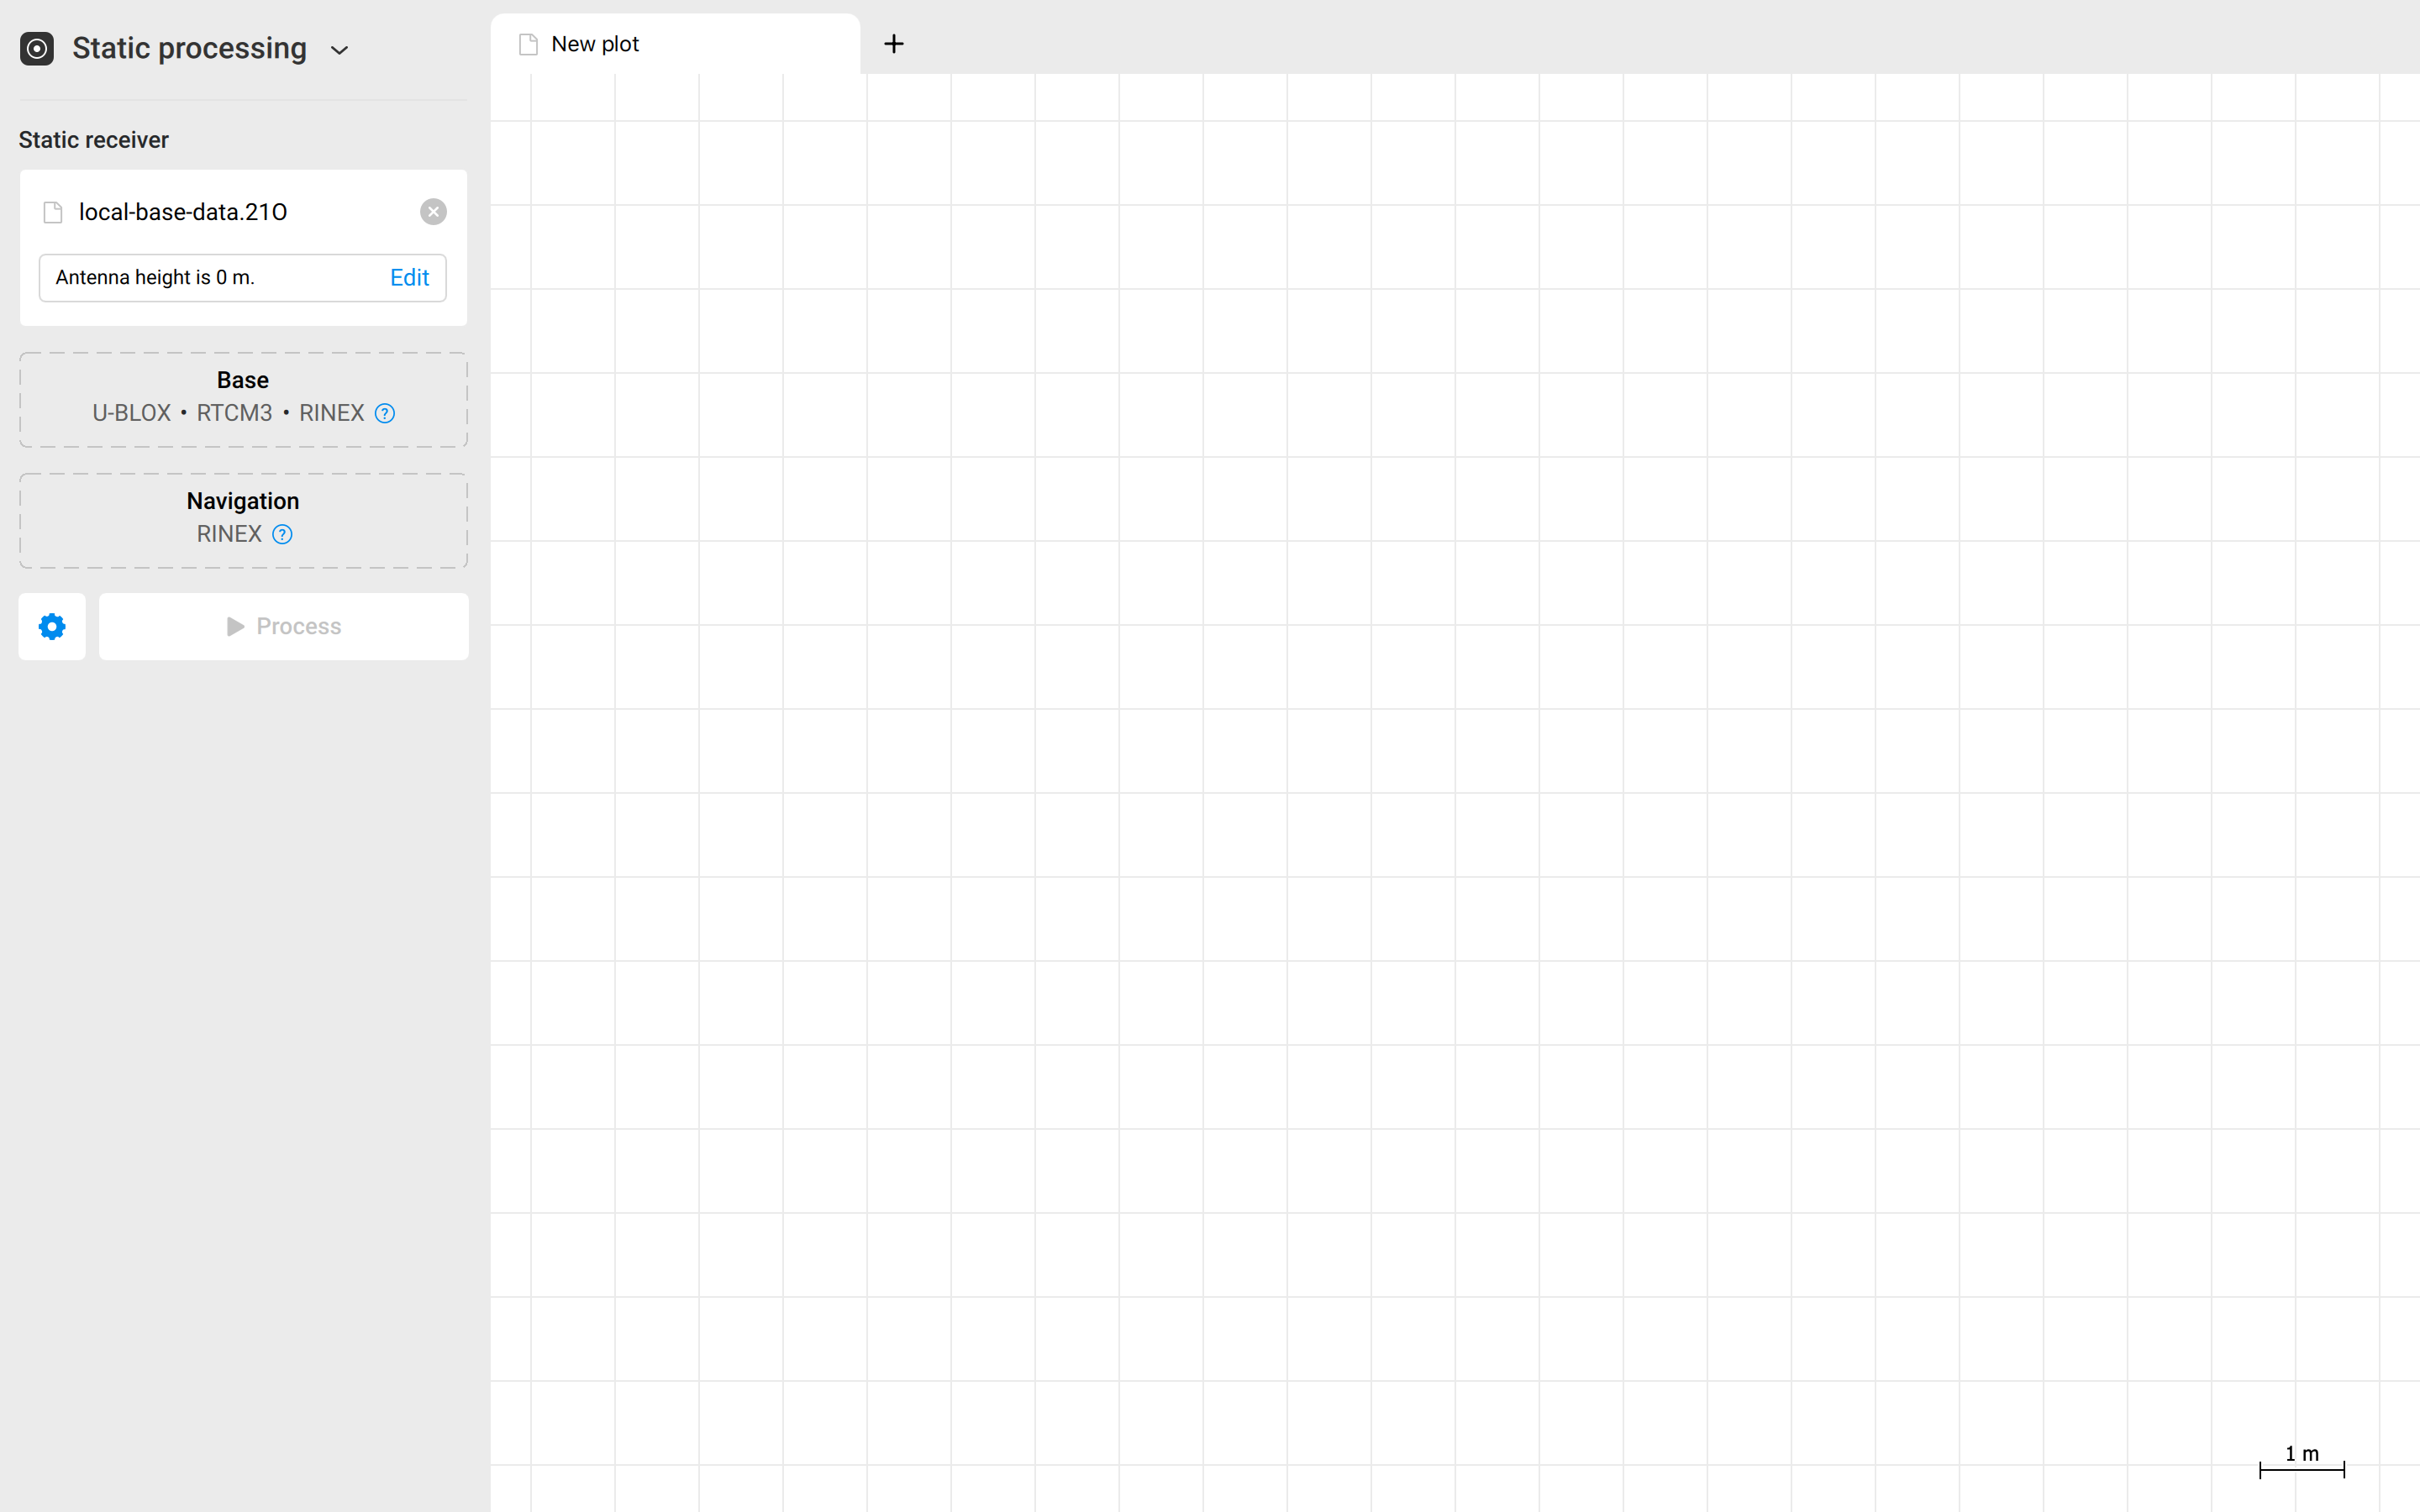
noteIf you use antenna height for your static receiver, you need to fill in the same antenna height in the base field when continuing post-processing your survey data using the Kinematic processing, Drone Data PPK, Stop & Go with Emlid Flow workflows. This will ensure data consistency.
-
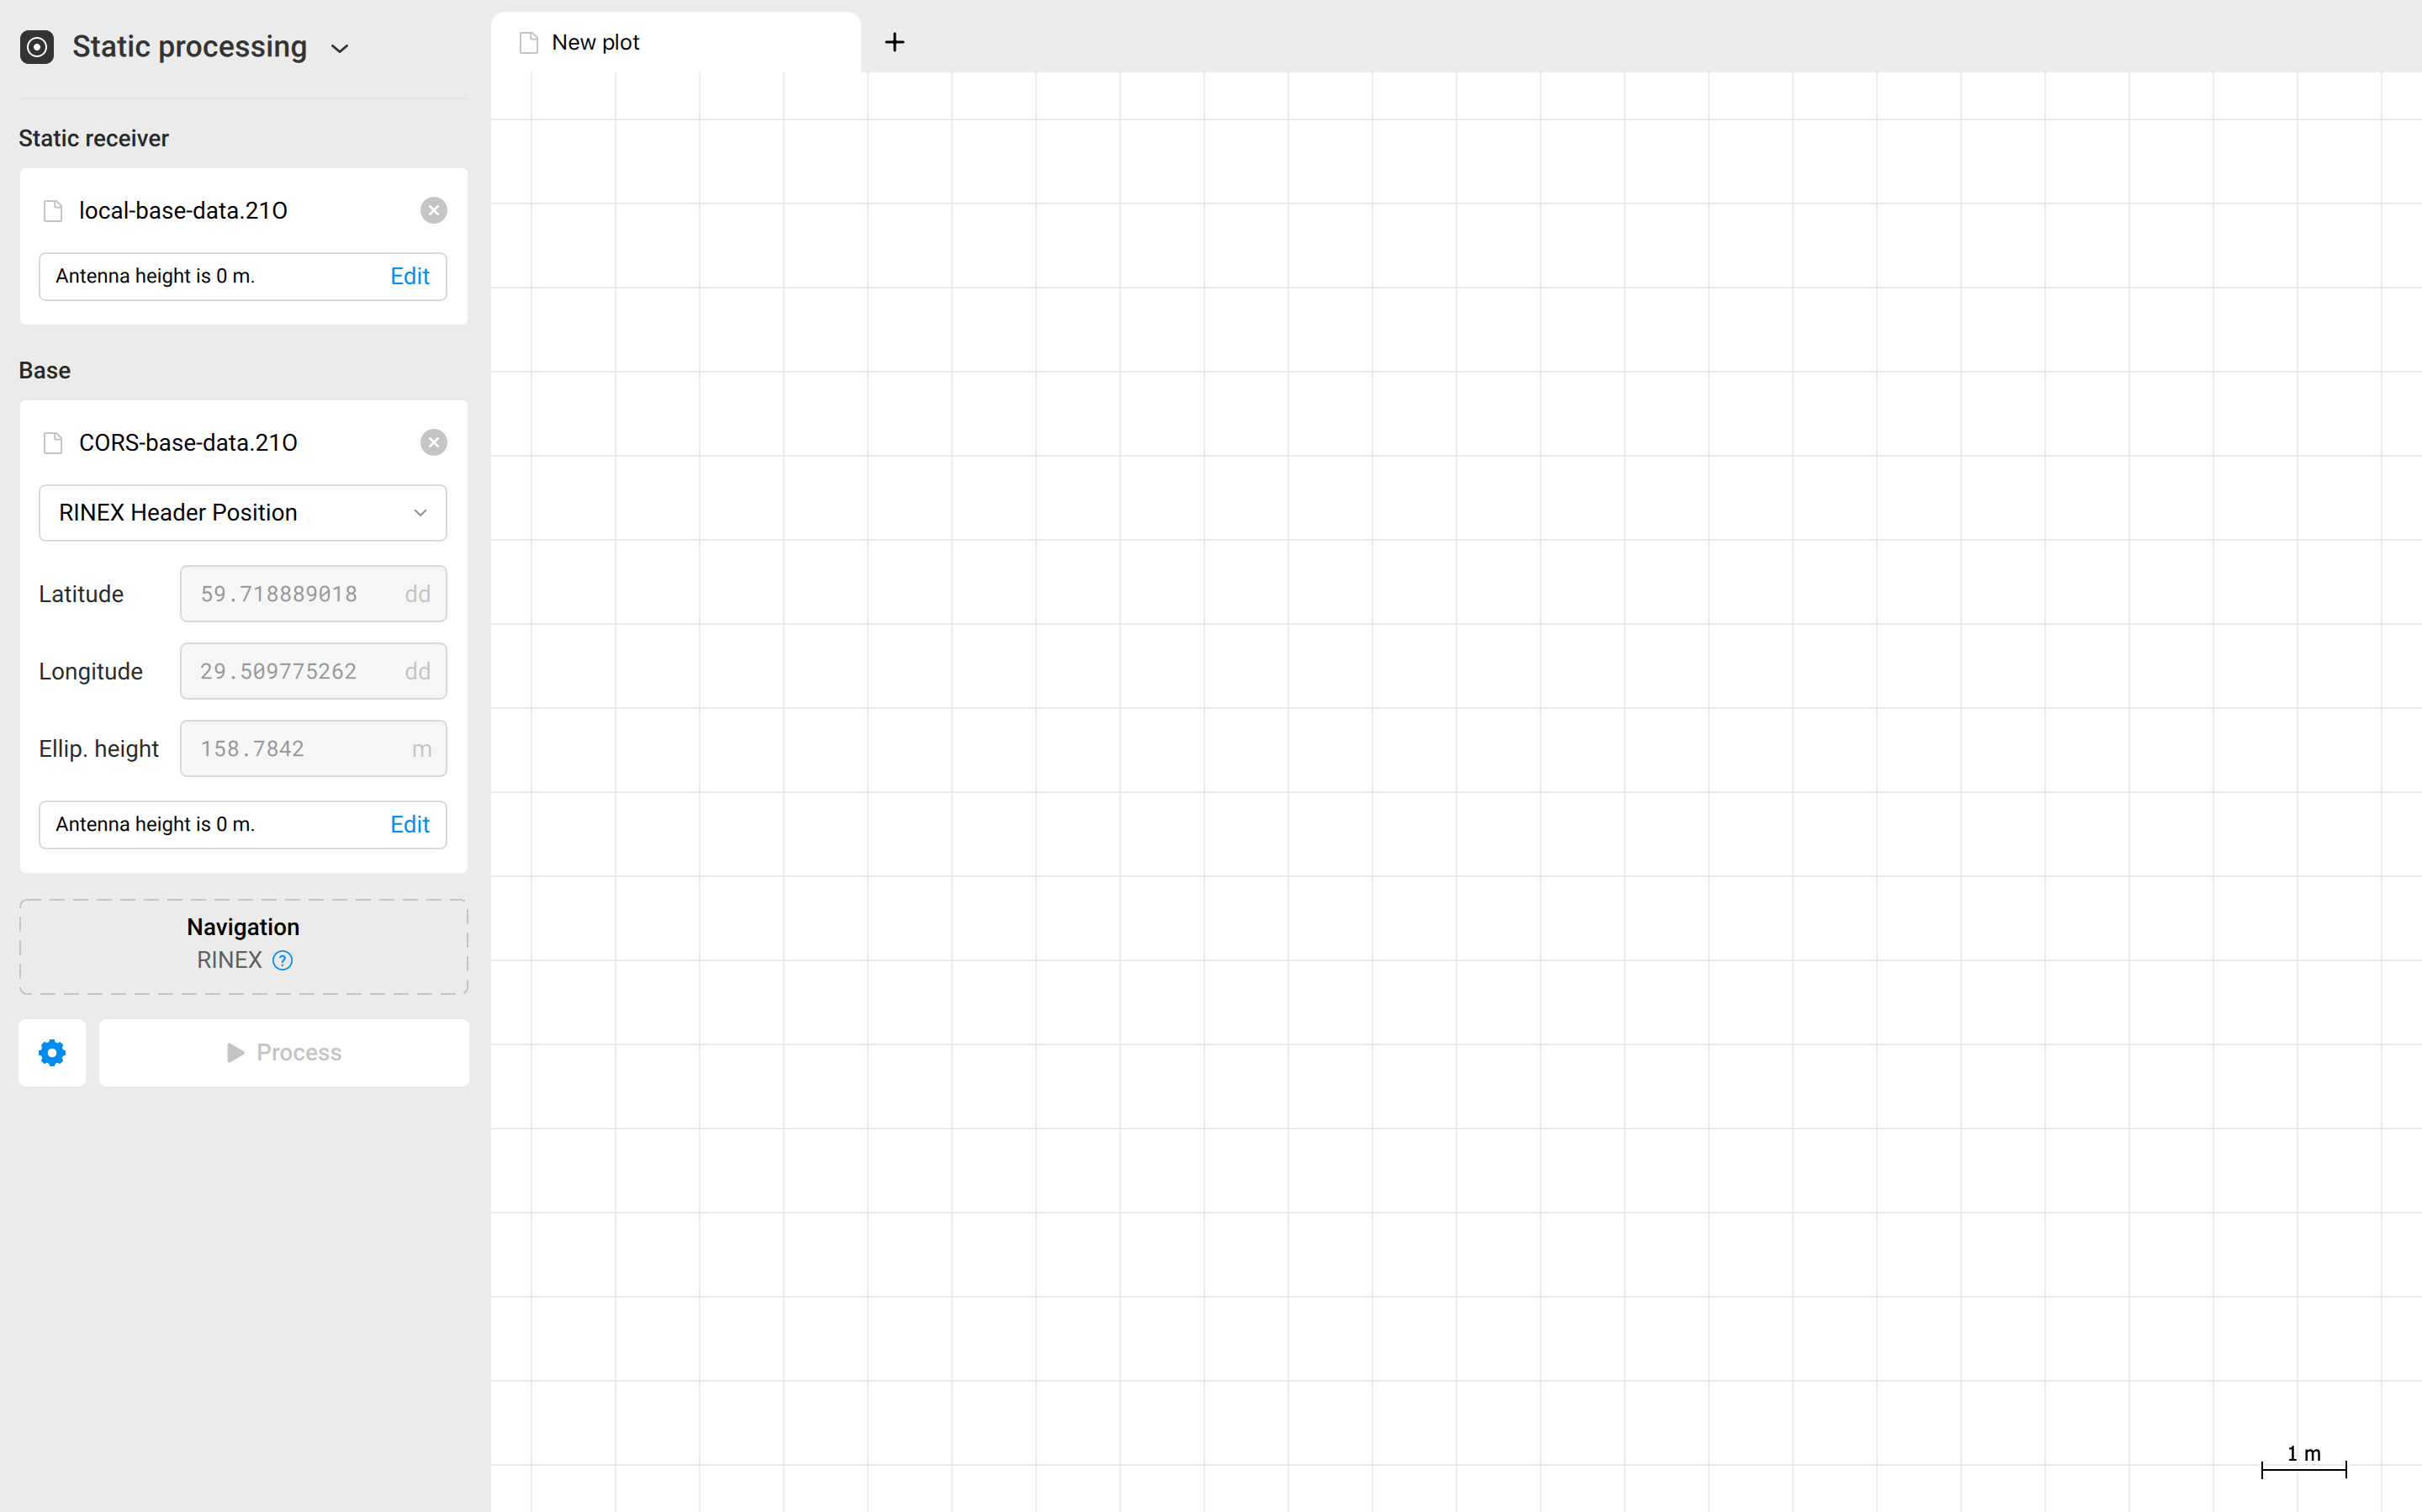
Add the RINEX observation file from the CORS to the Base field. You will see the CORS coordinates.
noteBy default, the RINEX Header Position is used.
-
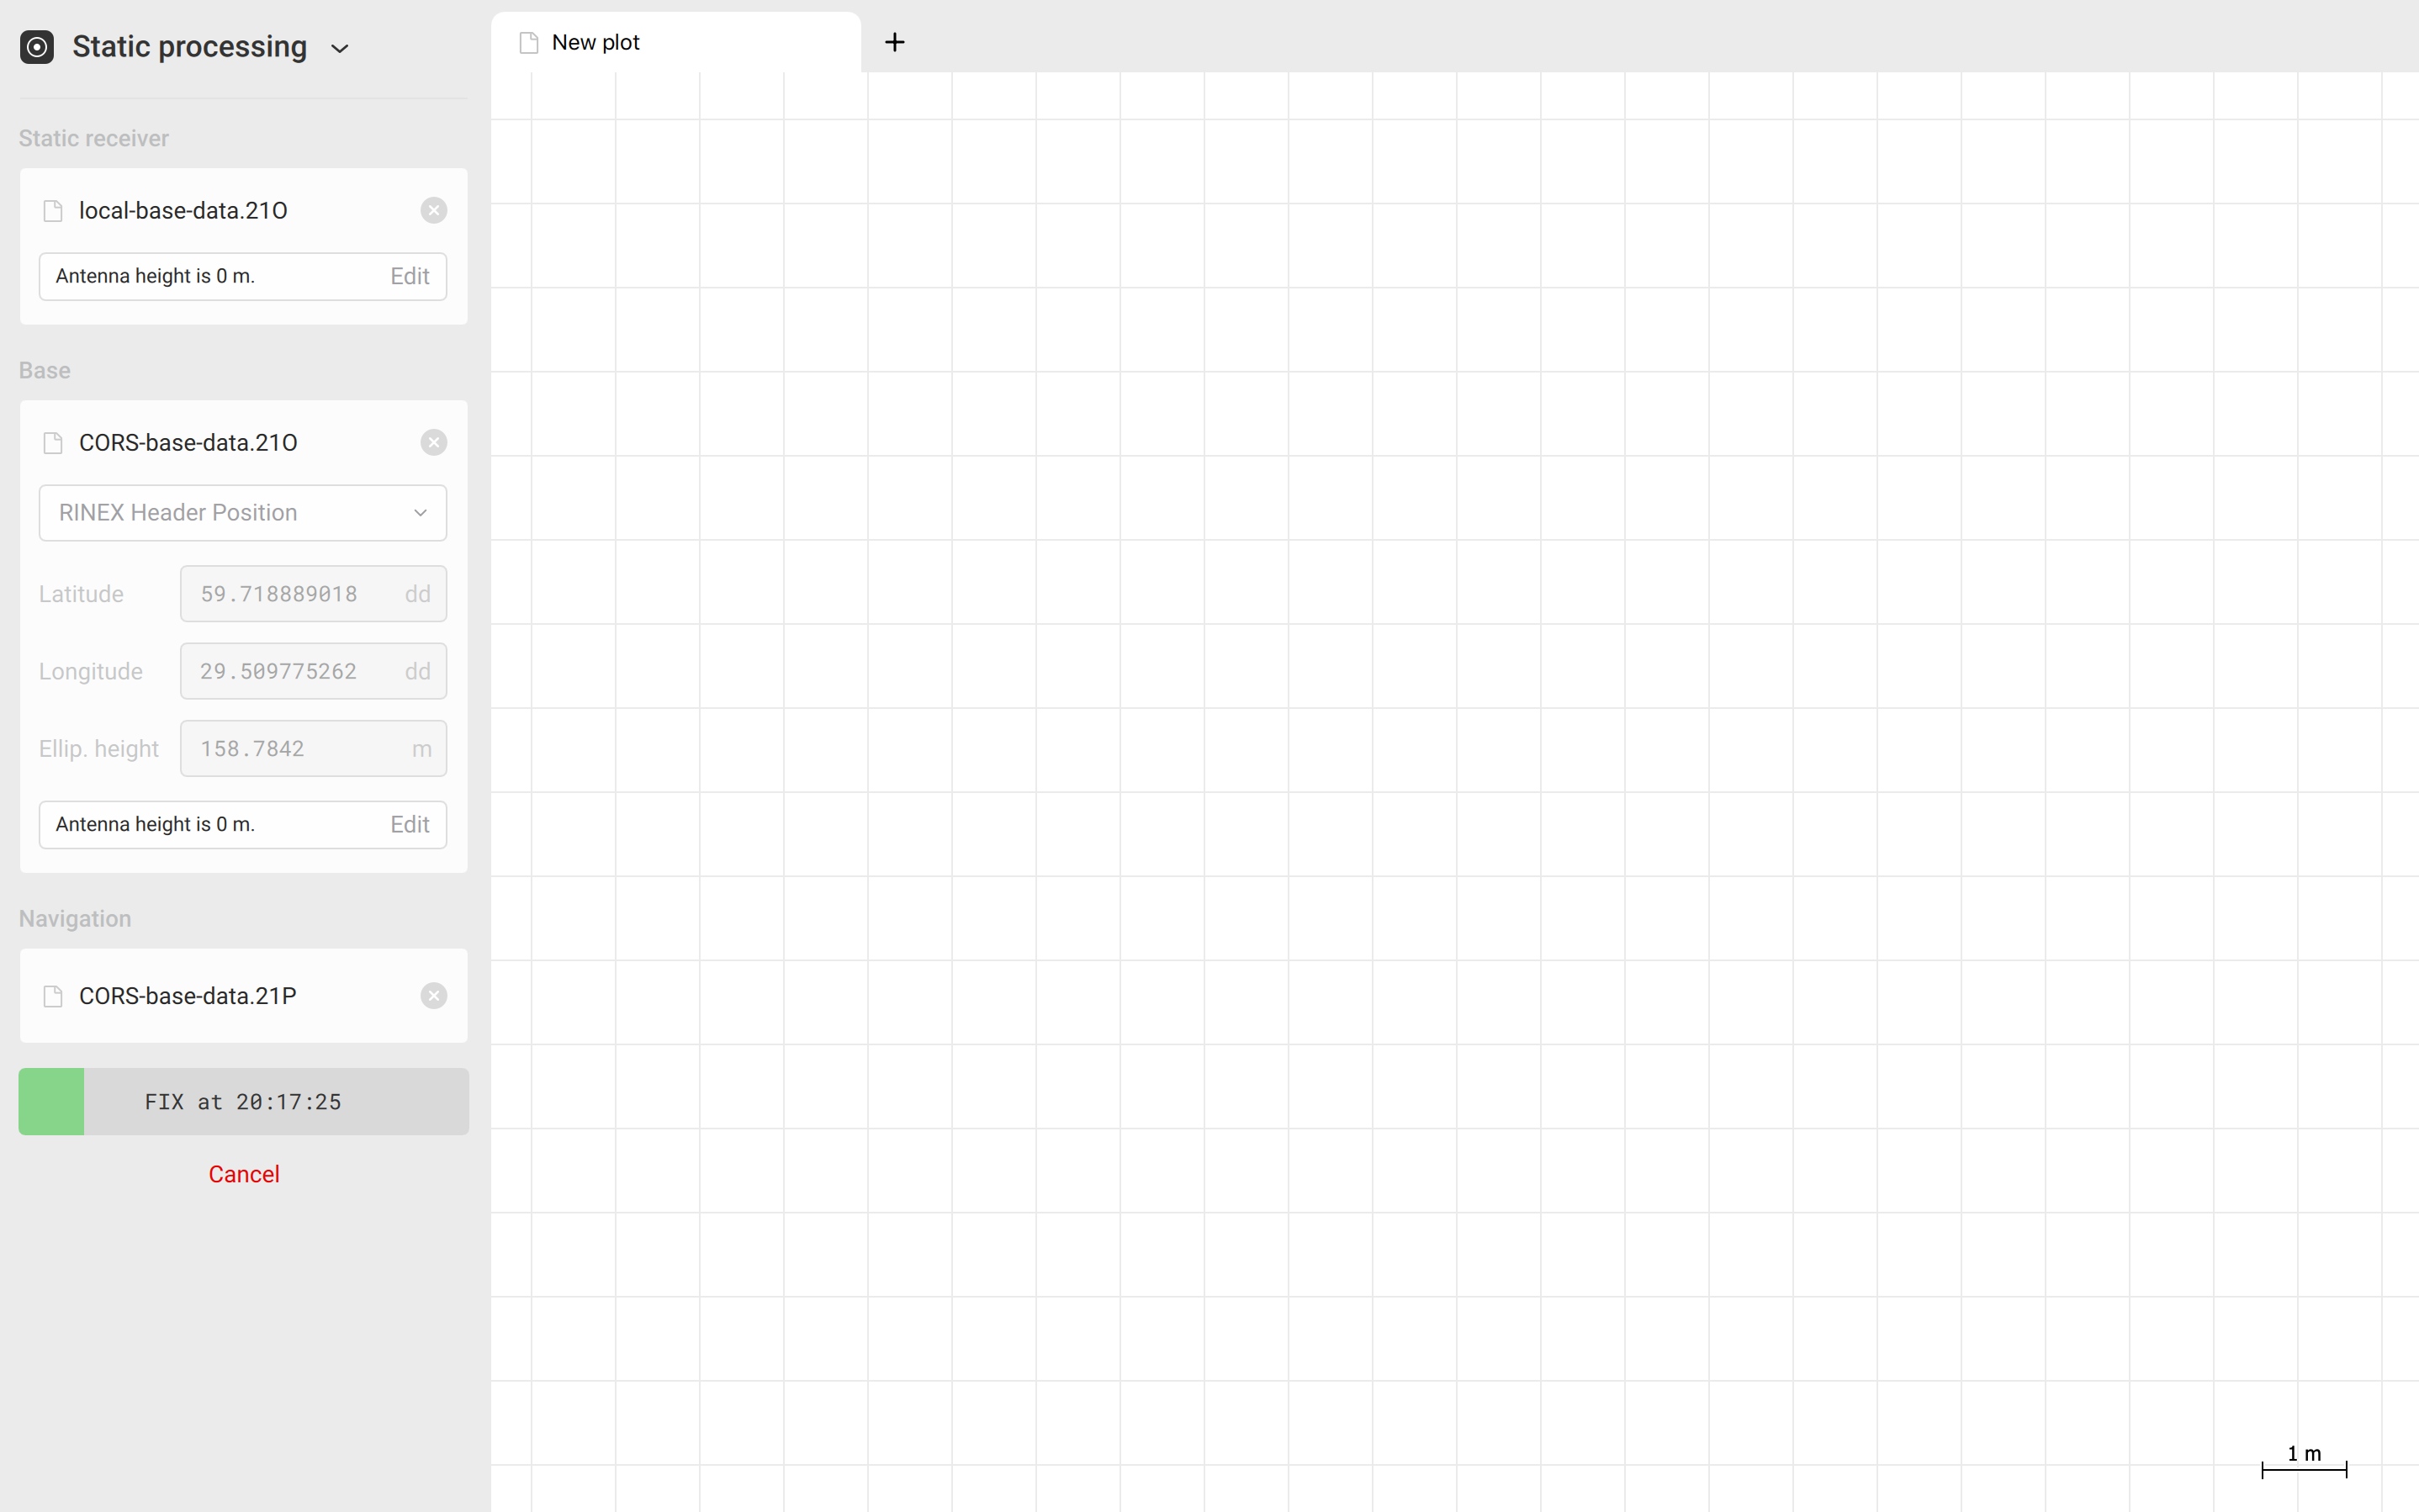
Add the RINEX navigation file from the local base or from the CORS.
-
Click Process. You will see the progress bar in the bottom left corner.
-
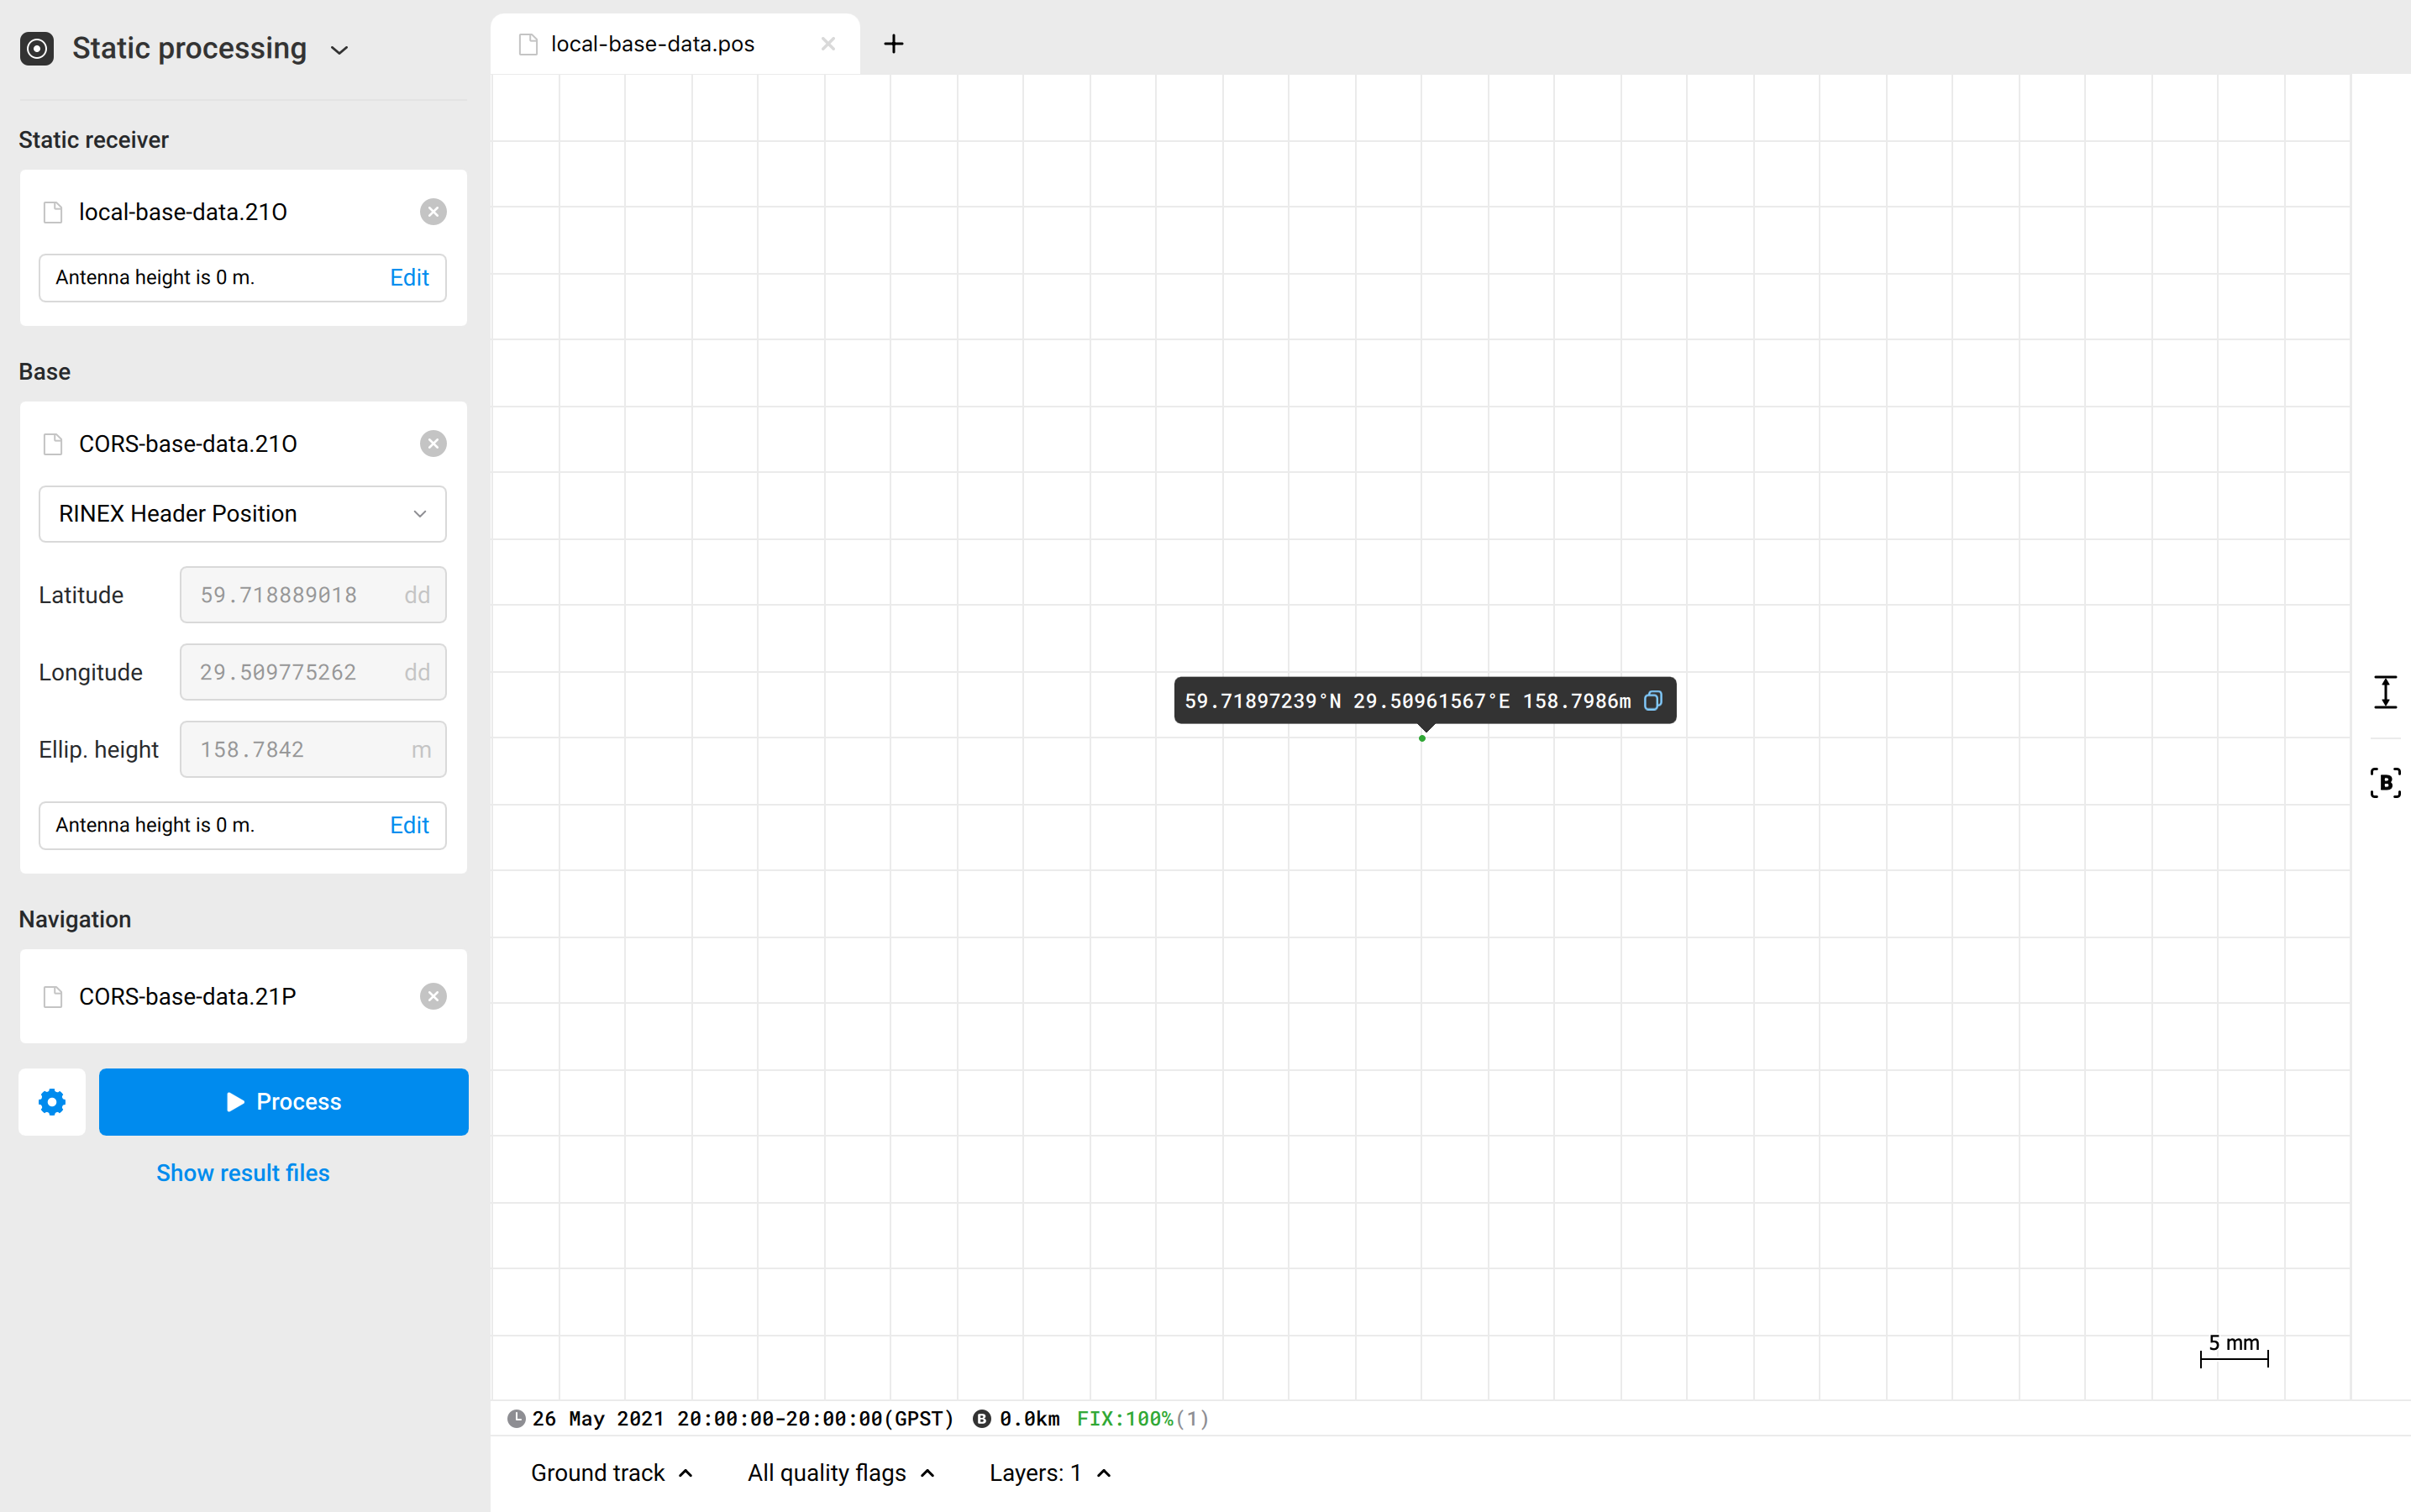
Once the processing is finished, Emlid Studio will show you the processed point on the plot.
tipTo check the local point's coordinates, just click on it on the plot.
noteYou can also find the coordinates of your local base in the generated .pos file. Click the Show result files button to move to the resulting folder.
tipIf you want to continue post-processing using the obtained .pos file, you can simply drag and drop the obtained position of your local base from the plot to the base’s field in the required workflow.
Now that you have obtained the coordinates of your local base station, you can continue surveying or post-process your local survey.
Video guide
Check out the workflow in the video below:
Further reading
To learn more about post-processing workflows in Emlid Studio, check the following tutorials: