Aplicar la localización
Mejora tu experiencia topográfica con codificación, trazado de líneas, mapas de fondo y localización
Esta guía describe cómo aplicar la localización en Emlid Flow para calcular los parámetros del sistema de coordenadas local o ajustar el existente.
Resumen
La función de localización de la aplicación Emlid Flow permite calcular los parámetros del sistema de coordenadas local o ajustar el existente para adaptarlo a los puntos de control de la zona topográfica.
Al aplicar la localización, Emlid Flow compara pares de coordenadas de puntos medidos y de control, y aplica la traslación, rotación y escalado para calcular los parámetros del sistema de coordenadas local. La aplicación selecciona automáticamente el mejor algoritmo en función del número de puntos y la proyección especificada, y permite llevar a cabo ajustes horizontales y verticales juntos o por separado.
Para aplicar la localización, tendrá que hacer lo siguiente:
- Añada puntos de control.
- Mida los mismos puntos de control con el roveren
El rover es uno de los dos receptores GNSS que se utiliza para la recolección de datos en escenarios RTK o PPK. El rover es una unidad móvil: el topógrafo utiliza el rover para registrar los puntos, mientras que el rover recibe las correcciones de la base estática.
RTK.La cinemática en tiempo real o RTK es una de las técnicas utilizadas para mejorar la exactitud de los datos recogidos desde los satélites por el receptor. Para el RTK se necesitan dos receptores: una base y un rover. La base envía correcciones al rover en movimiento durante la recogida de datos.
- Empareje las coordenadas de los puntos de control con las medidas.
Preparación
Para garantizar una alta precisión de localización, le recomendamos que se asegure de que los datos de entrada son suficientes.
Número de puntos
El número de puntos de control tiene un impacto directo en la precisión resultante de la localización realizada. En general, recomendamos utilizar entre 5 y 10 puntos de control.
Puede interactuar con el gráfico para ver datos específicos con más detalle.
RMSE dentro del rango desde el centro de un área de localización de 200 × 200 m según el número de puntos de control. Los ejes X e Y están en escala de registro.
Según el gráfico, podemos ver lo siguiente:
- Se debe evitar utilizar 1 punto para la localización.
- Utilizar al menos 3 puntos mejora mucho la precisión.
- Utilizar más de 10 puntos no supone una gran diferencia.
Distribución de puntos
La distribuci�ón de los puntos de control también afecta a la precisión. En general, se recomienda repartir los puntos de control de manera uniforme por toda la zona de interés.
Puede interactuar con el gráfico para ver datos específicos con más detalle.
RMSE a distancias del centro del área de localización según la dispersión de 5 puntos de control. Los ejes X e Y están en escala de registro.
Según el gráfico, para lograr la máxima precisión, le recomendamos realizar la localización en obras más pequeñas y recoger las mediciones solo dentro de la zona en la que se hayan situado los puntos de control.
Uso de la proyección
Proporcionar información sobre la proyección puede tener efectos tanto positivos como negativos en la precisión de la localización. Le recomendamos que pruebe ambas opciones para ver cuál le funciona mejor.
Flujo de trabajo
- Emlid Flow
Para aplicar la localización, siga los pasos que se indican a continuación:
-
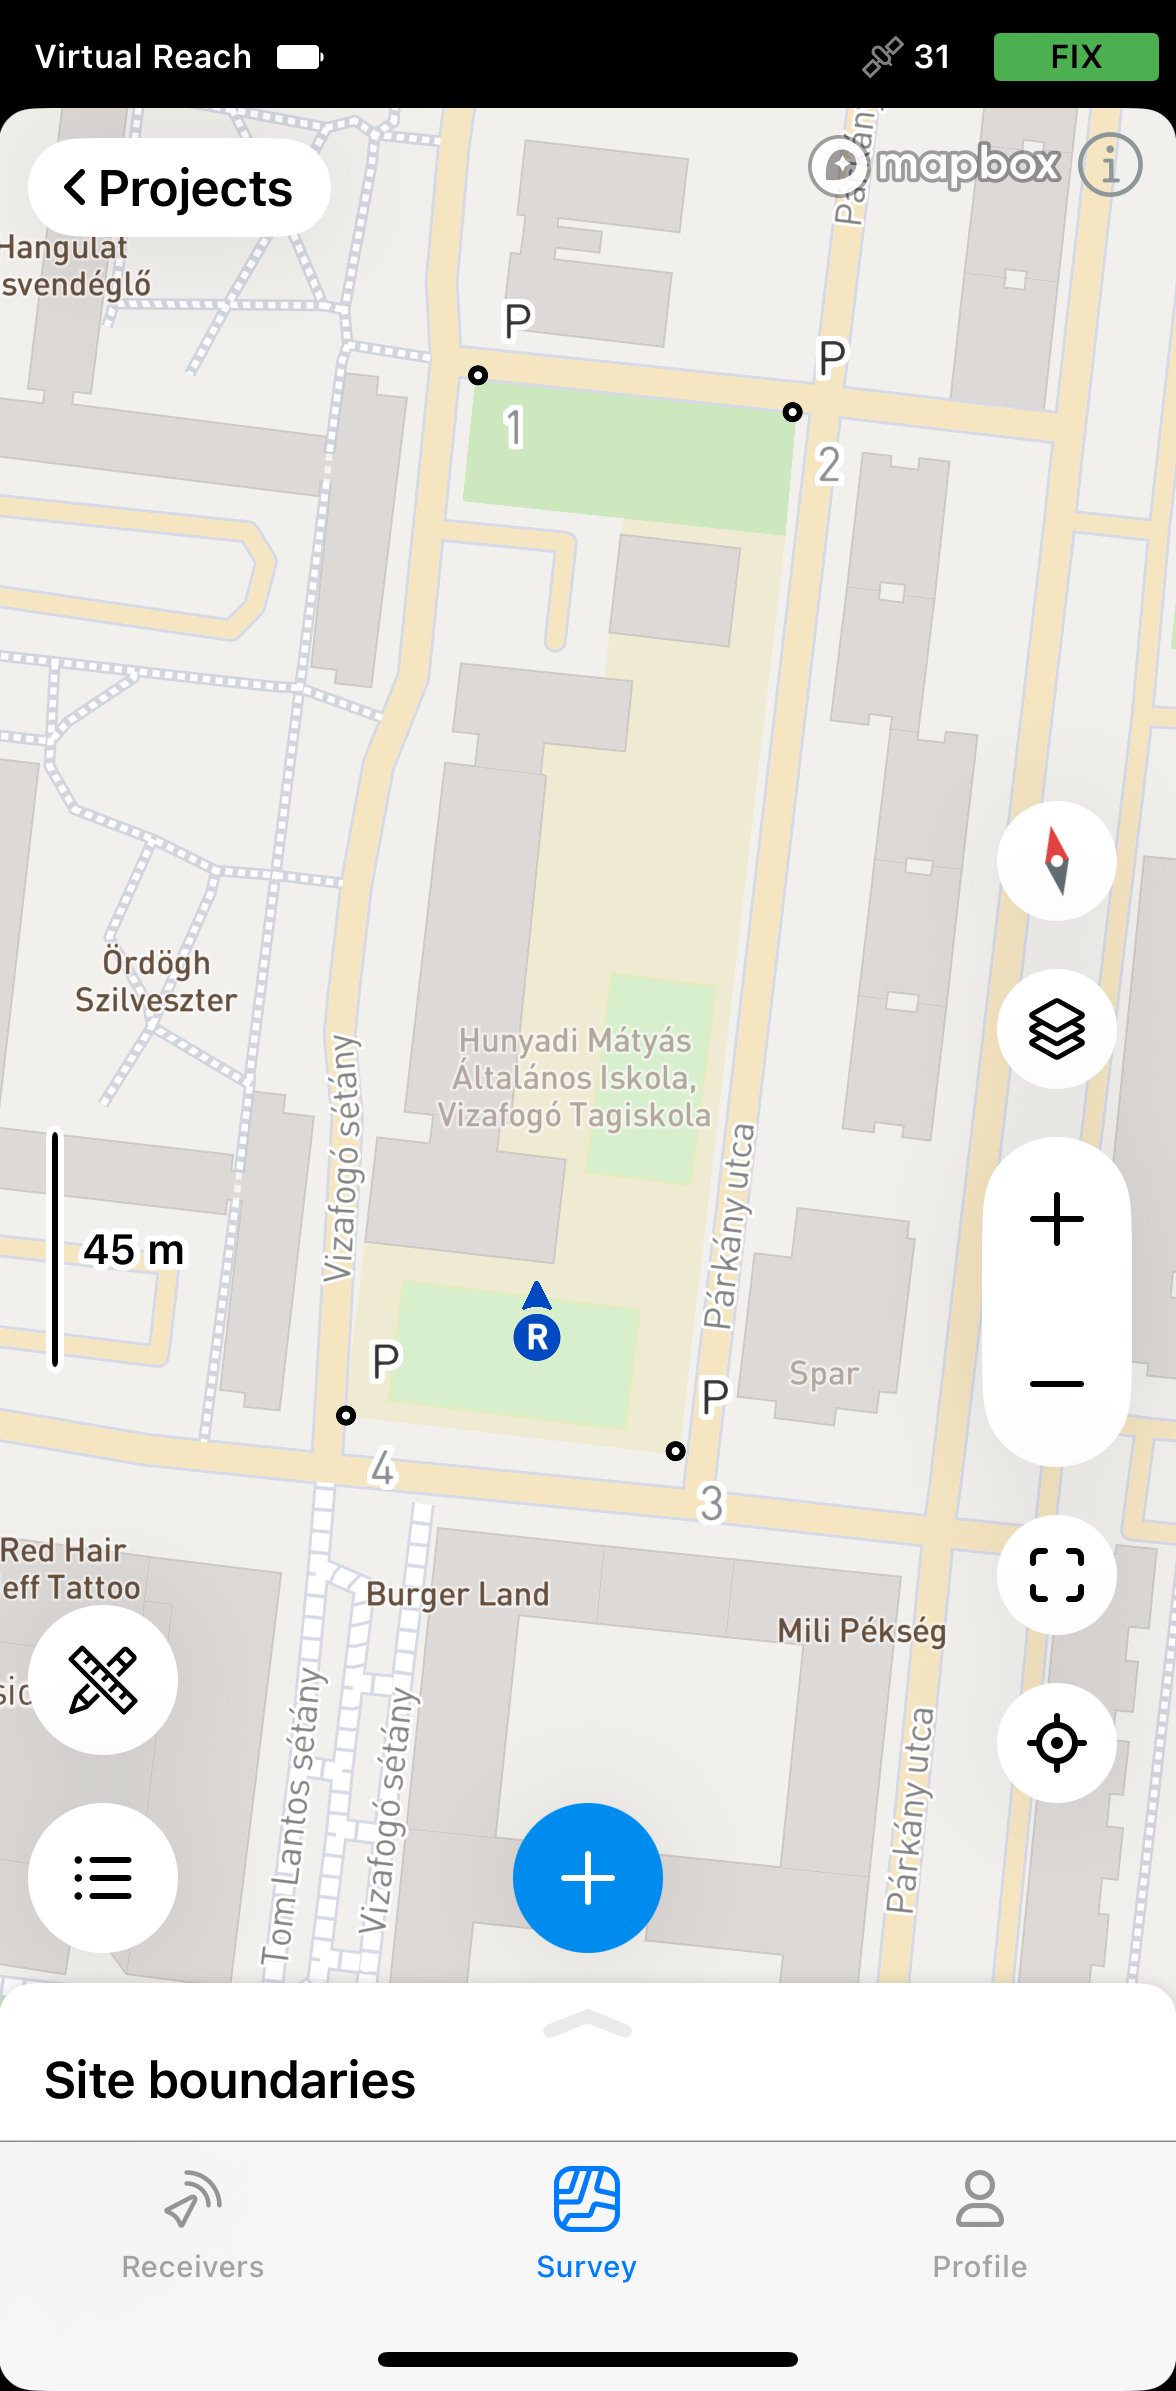
Dependiendo de su caso de uso, abra un proyecto existente o cree uno nuevo en Emlid Flow.
noteSu proyecto puede estar en CS global si no tiene los parámetros o en un CS local concreto si necesitas ajustarlo.
-
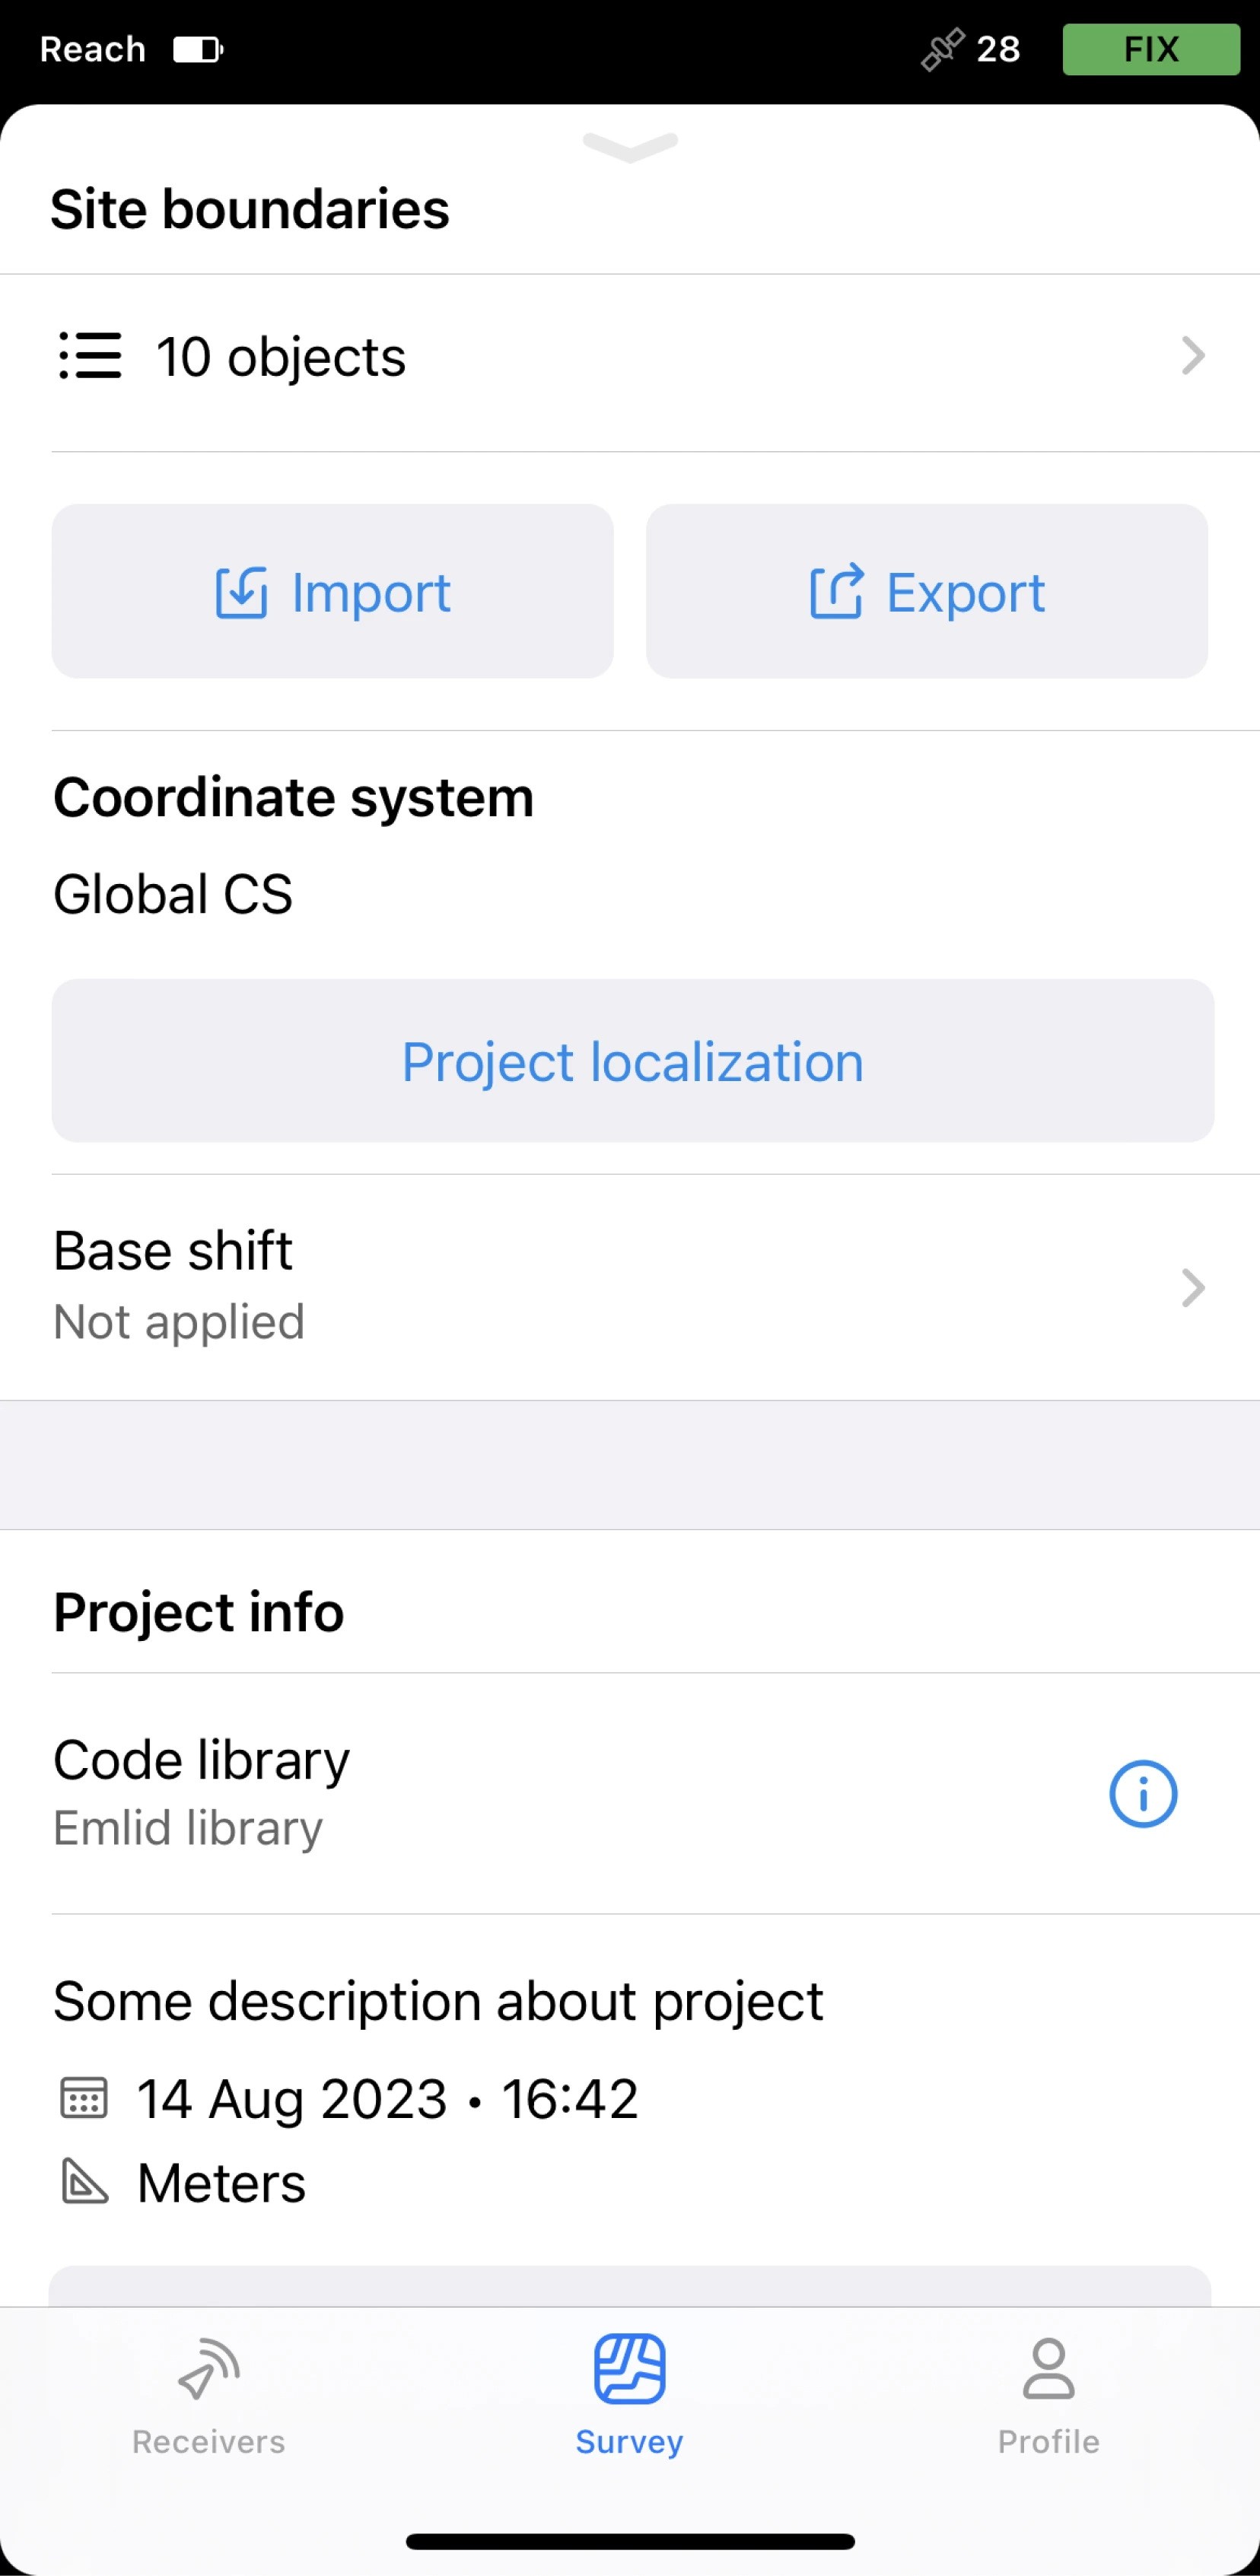
Pulse Project localization (Localización del proyecto).
-
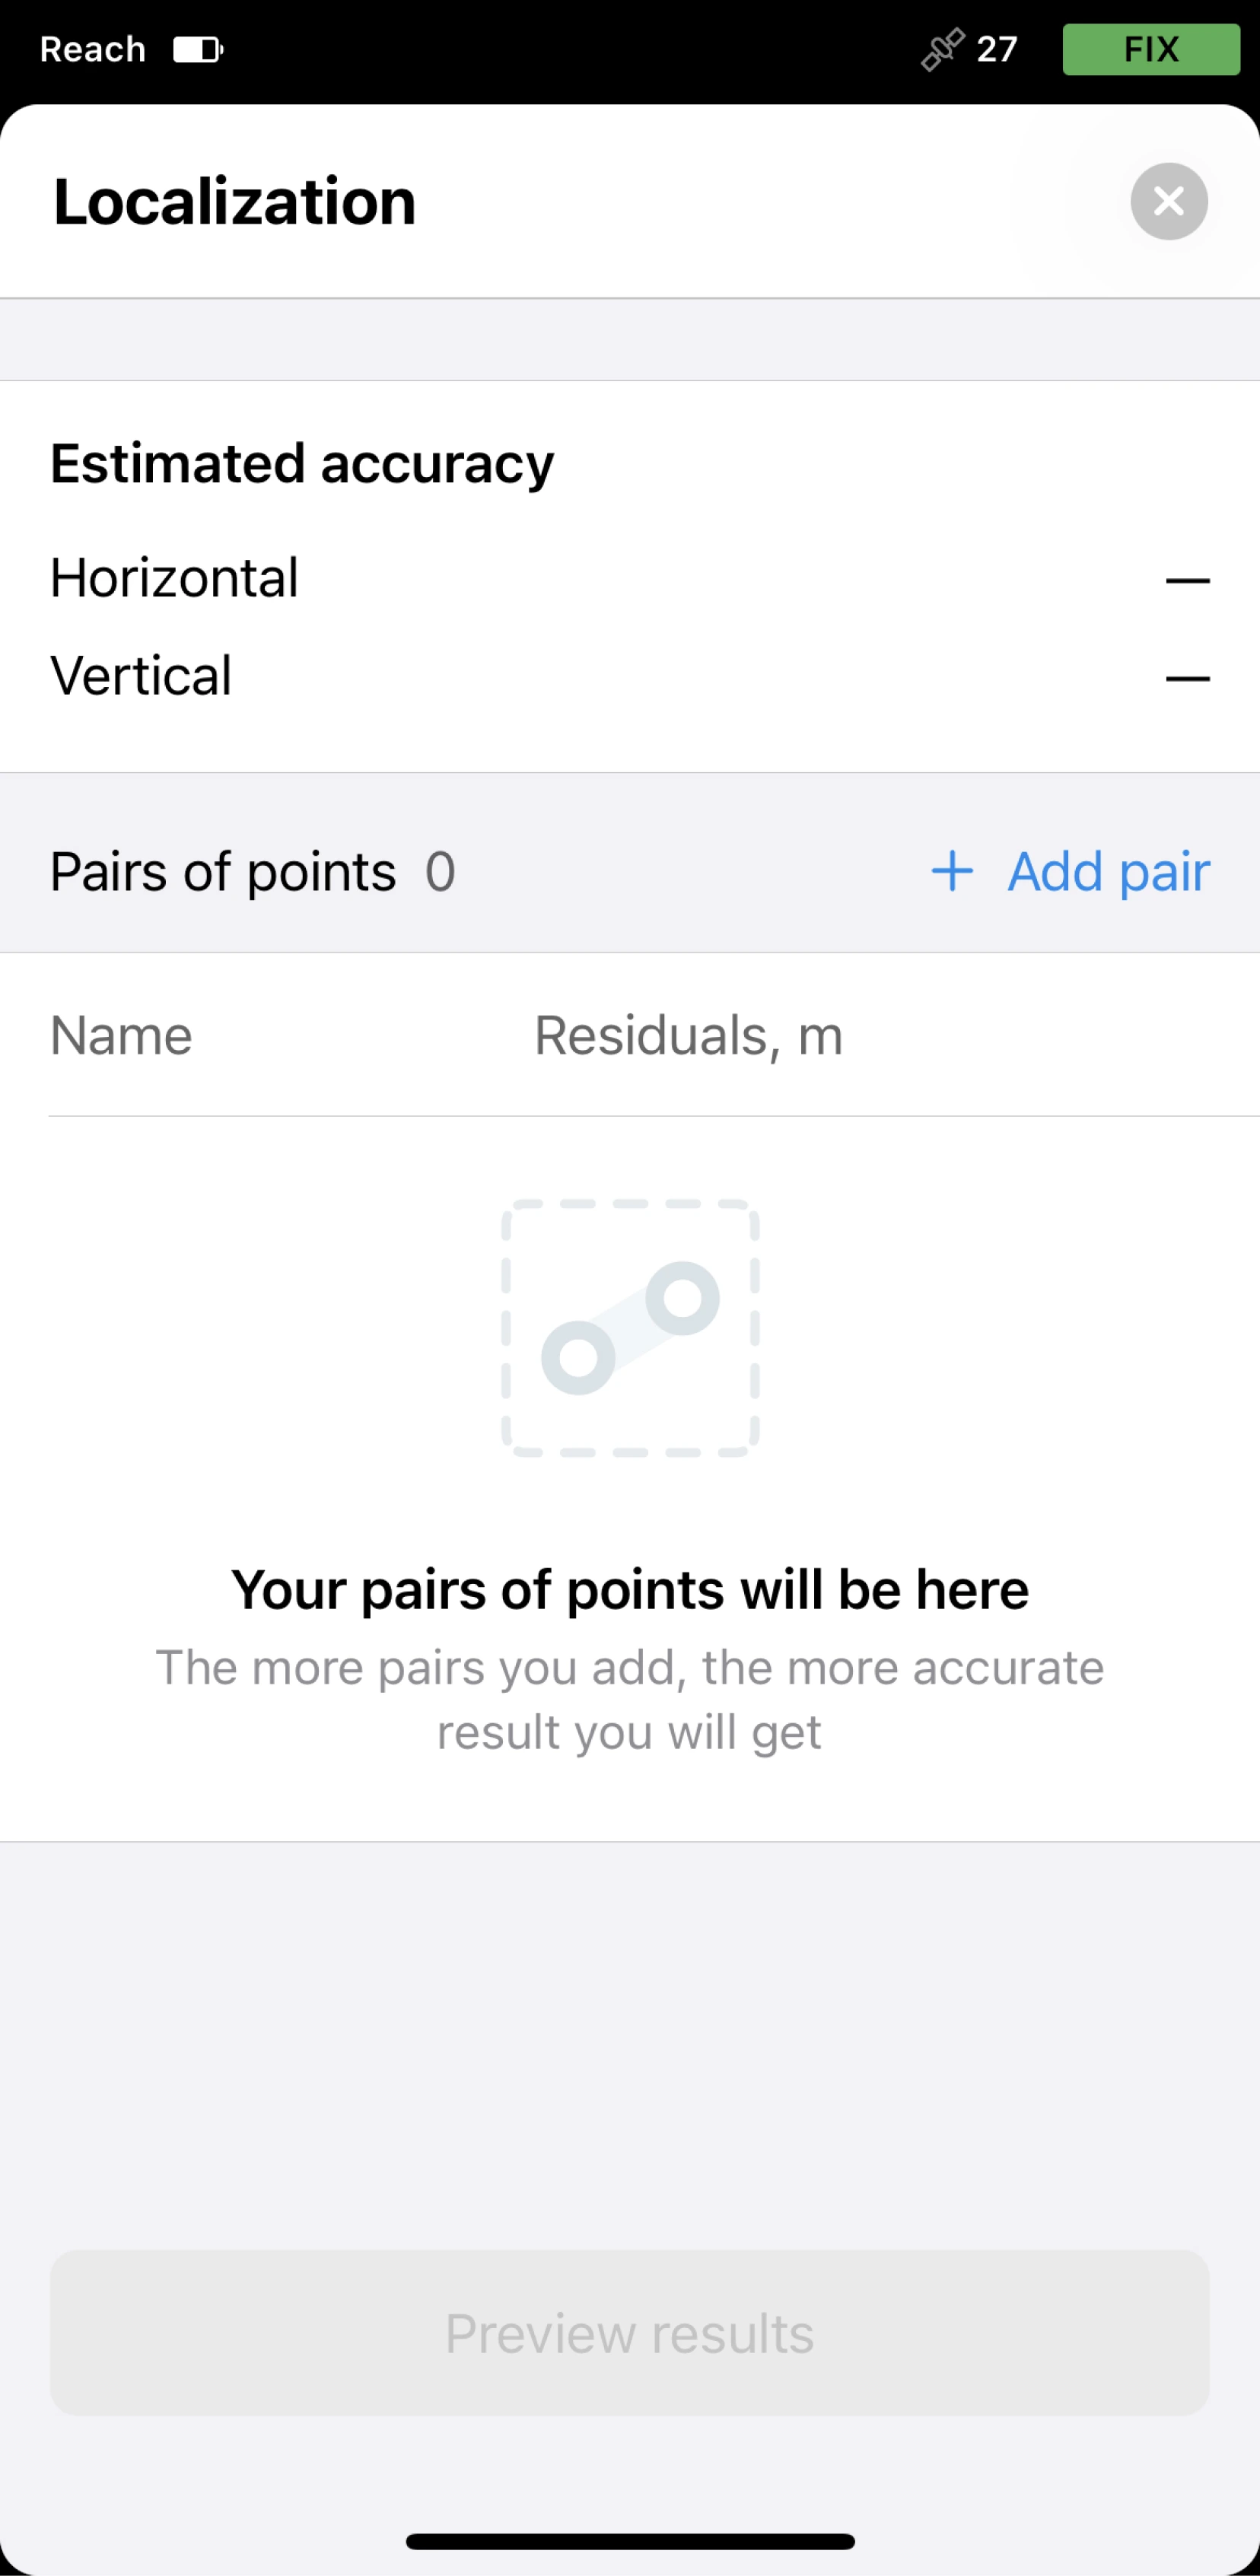
Pulse Add pair (Añadir par).
-
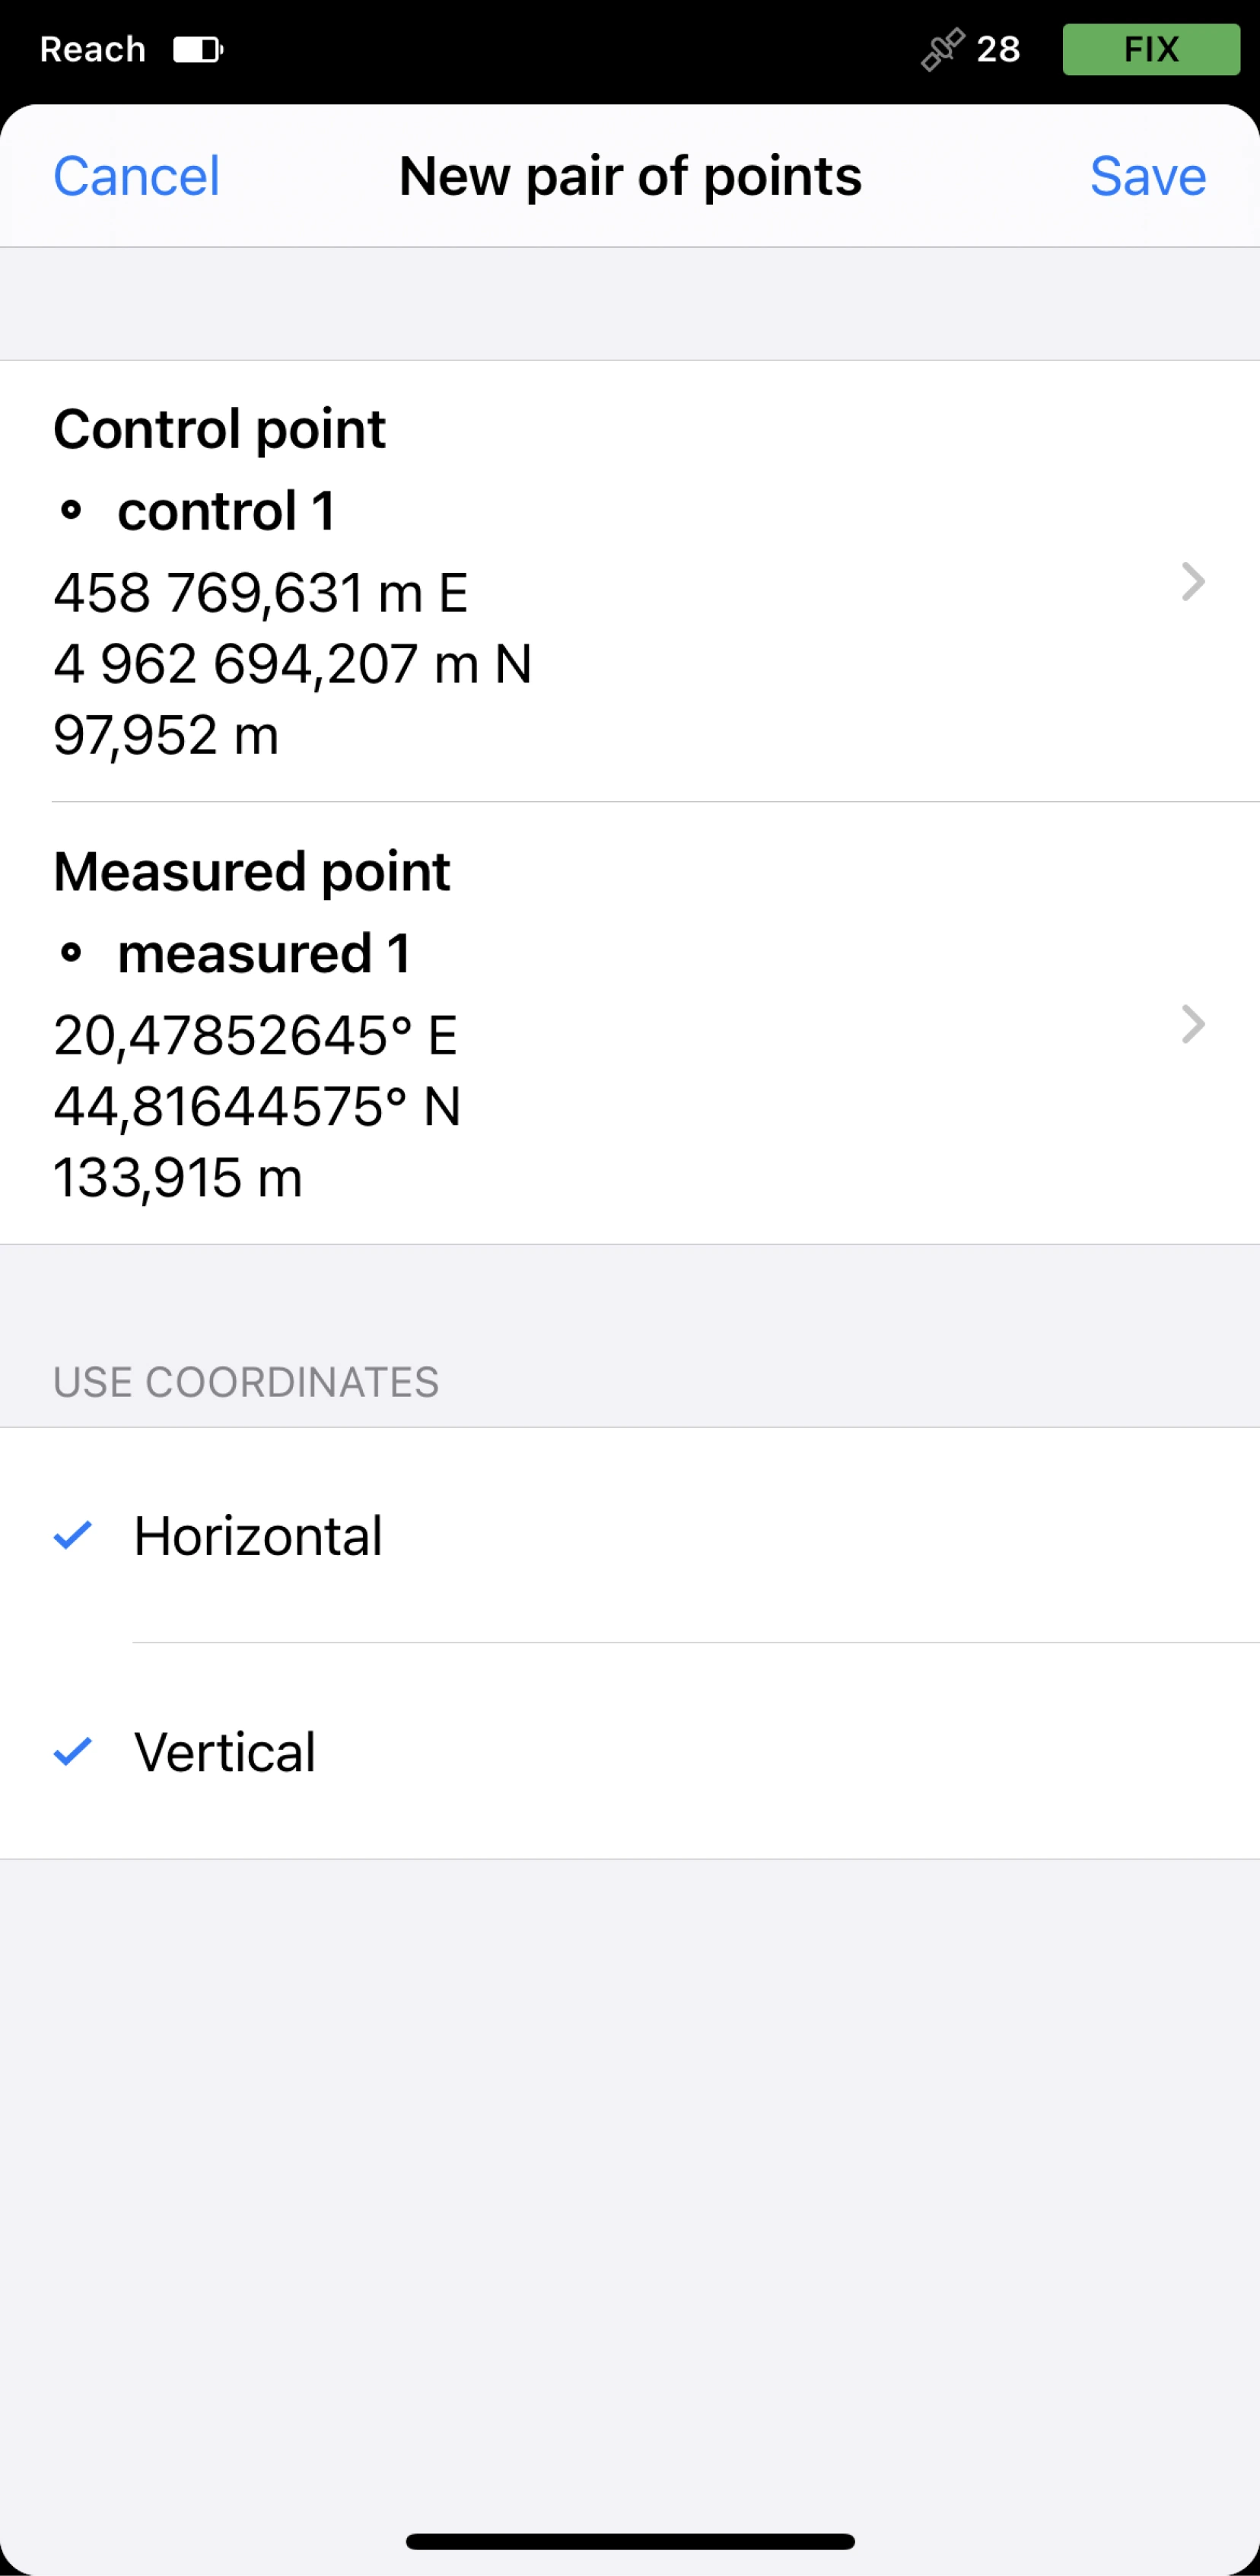
Seleccione los pares de puntos medidos y de control del proyecto de la siguiente manera:
tipEmlid Flow te permite introducir coordenadas de puntos de control o seleccionar puntos existentes en el proyecto. También puedes editar las coordenadas de un punto duplicándolo.
- Decida si utilizar las coordenadas horizontales (H) y verticales (V), o solo una de ellas en cada punto.
- Asegúrese de que los puntos de control tienen coordenadas locales en pies/metros y los puntos medidos tienen coordenadas globales en grados.
- Añada el número necesario de pares de puntos. El número máximo es 50.
-
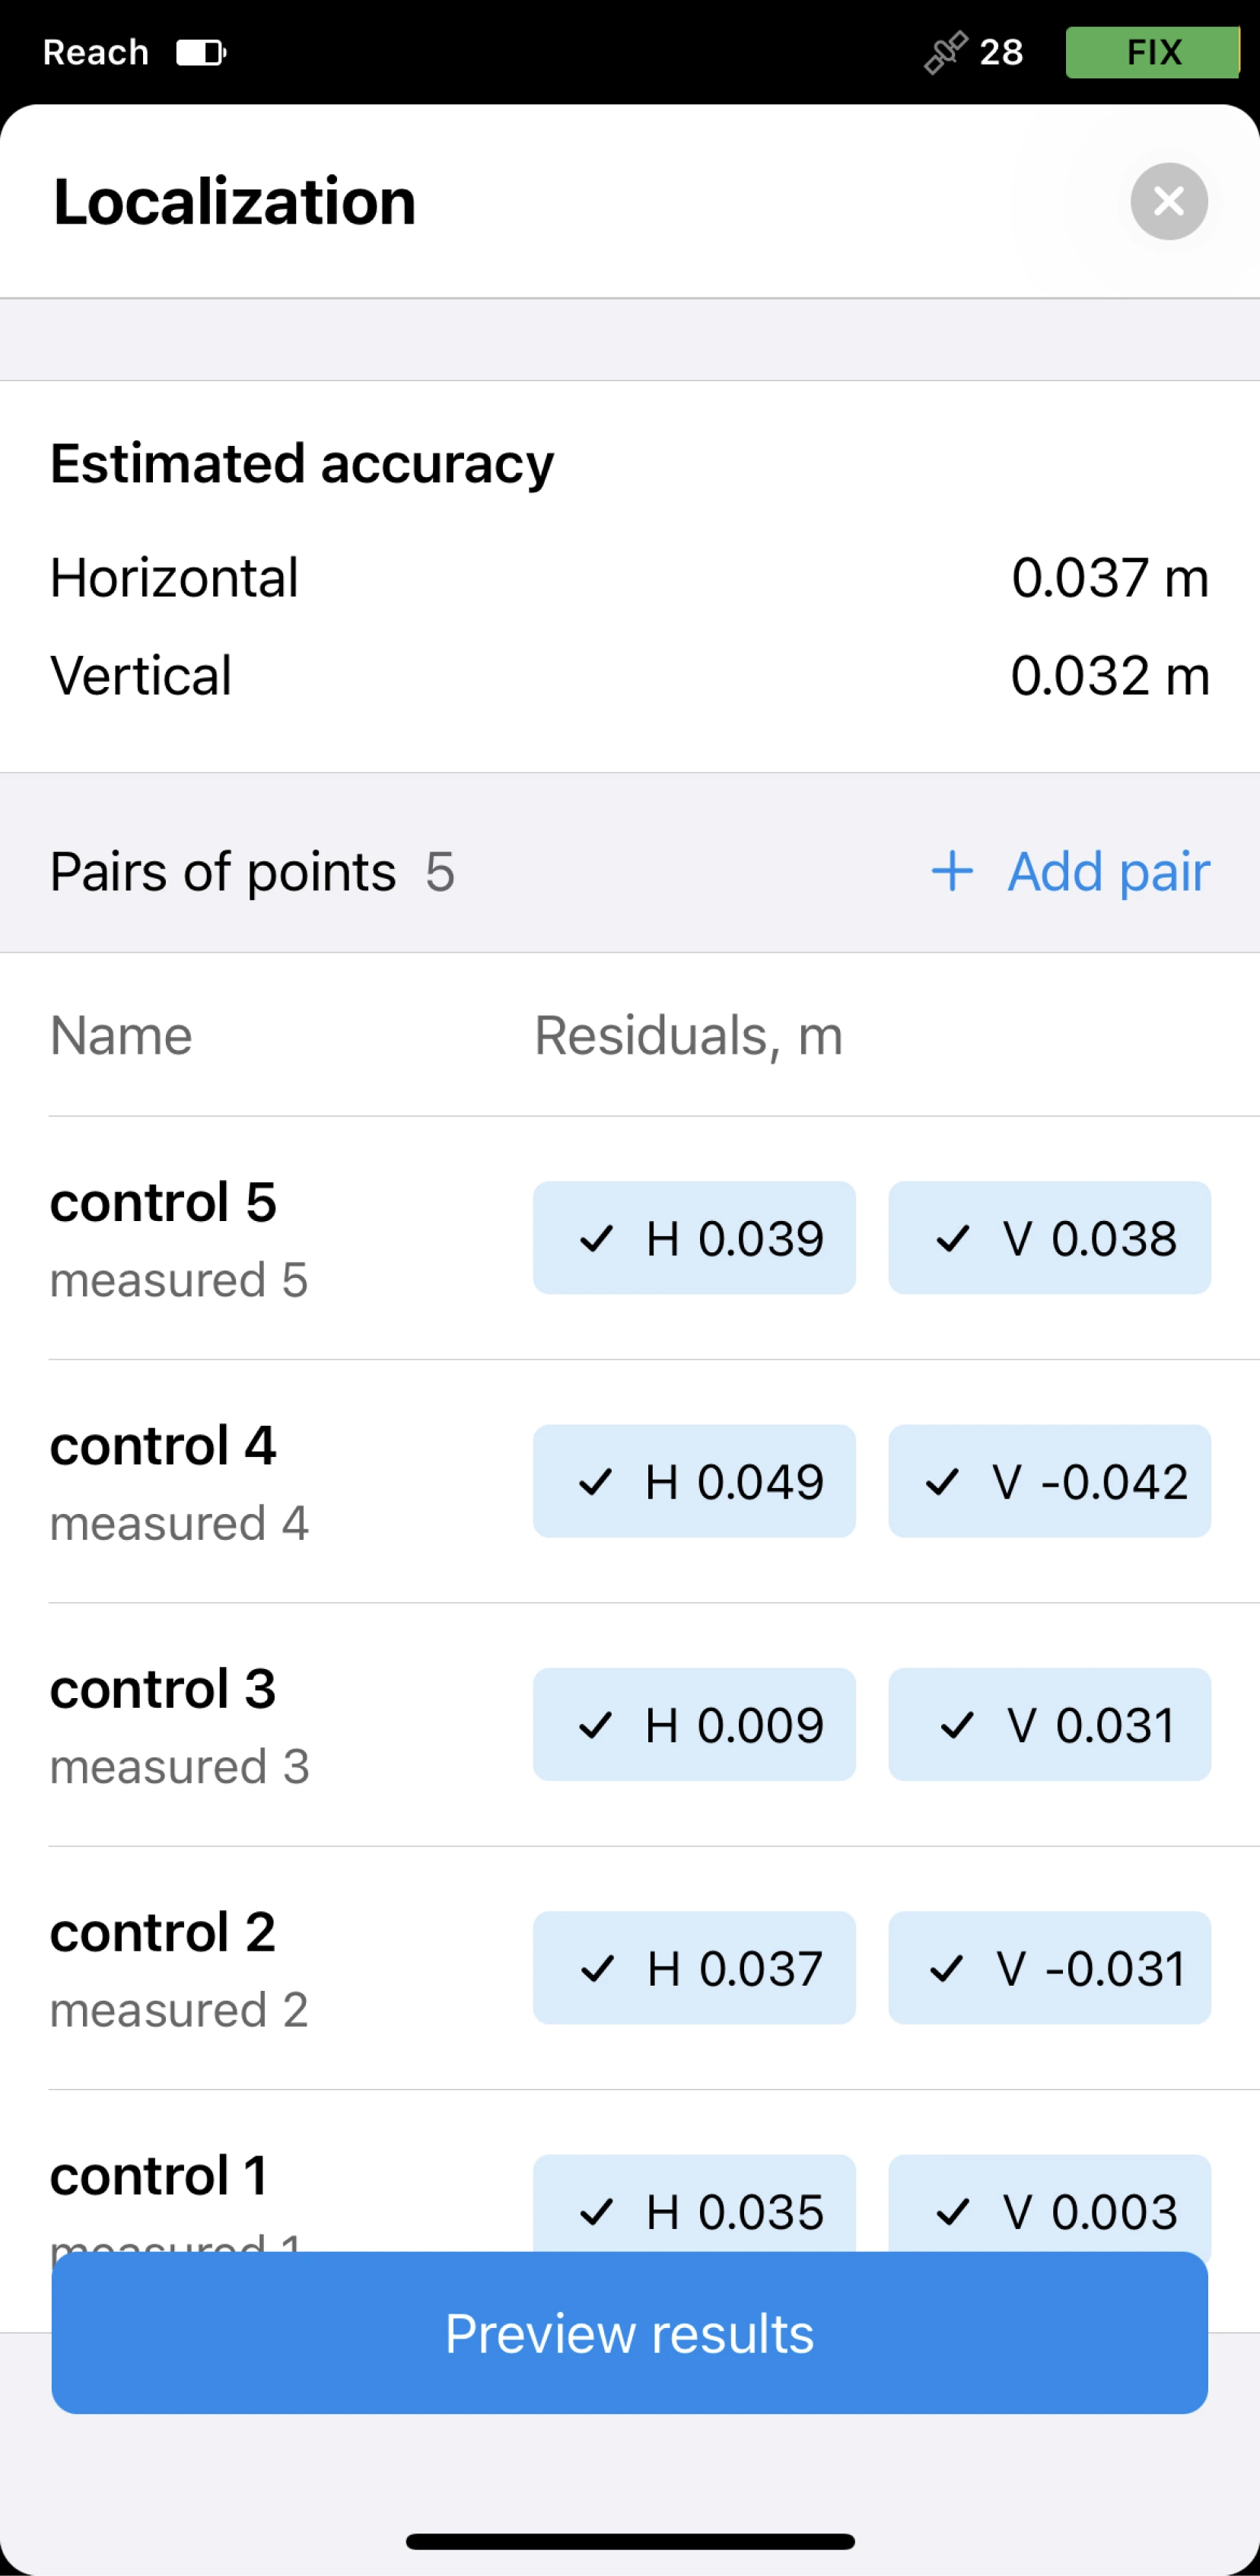
Pulse Save (Guardar). La aplicación calculará los residuos.
-
Analice los residuos. Si es necesario, puede editarlos de la siguiente manera:
- Excluya las coordenadas horizontales y verticales tocando la ficha.
- Quite el par pulsando en el nombre del par y el botón Remove pair (Quitar par).
-
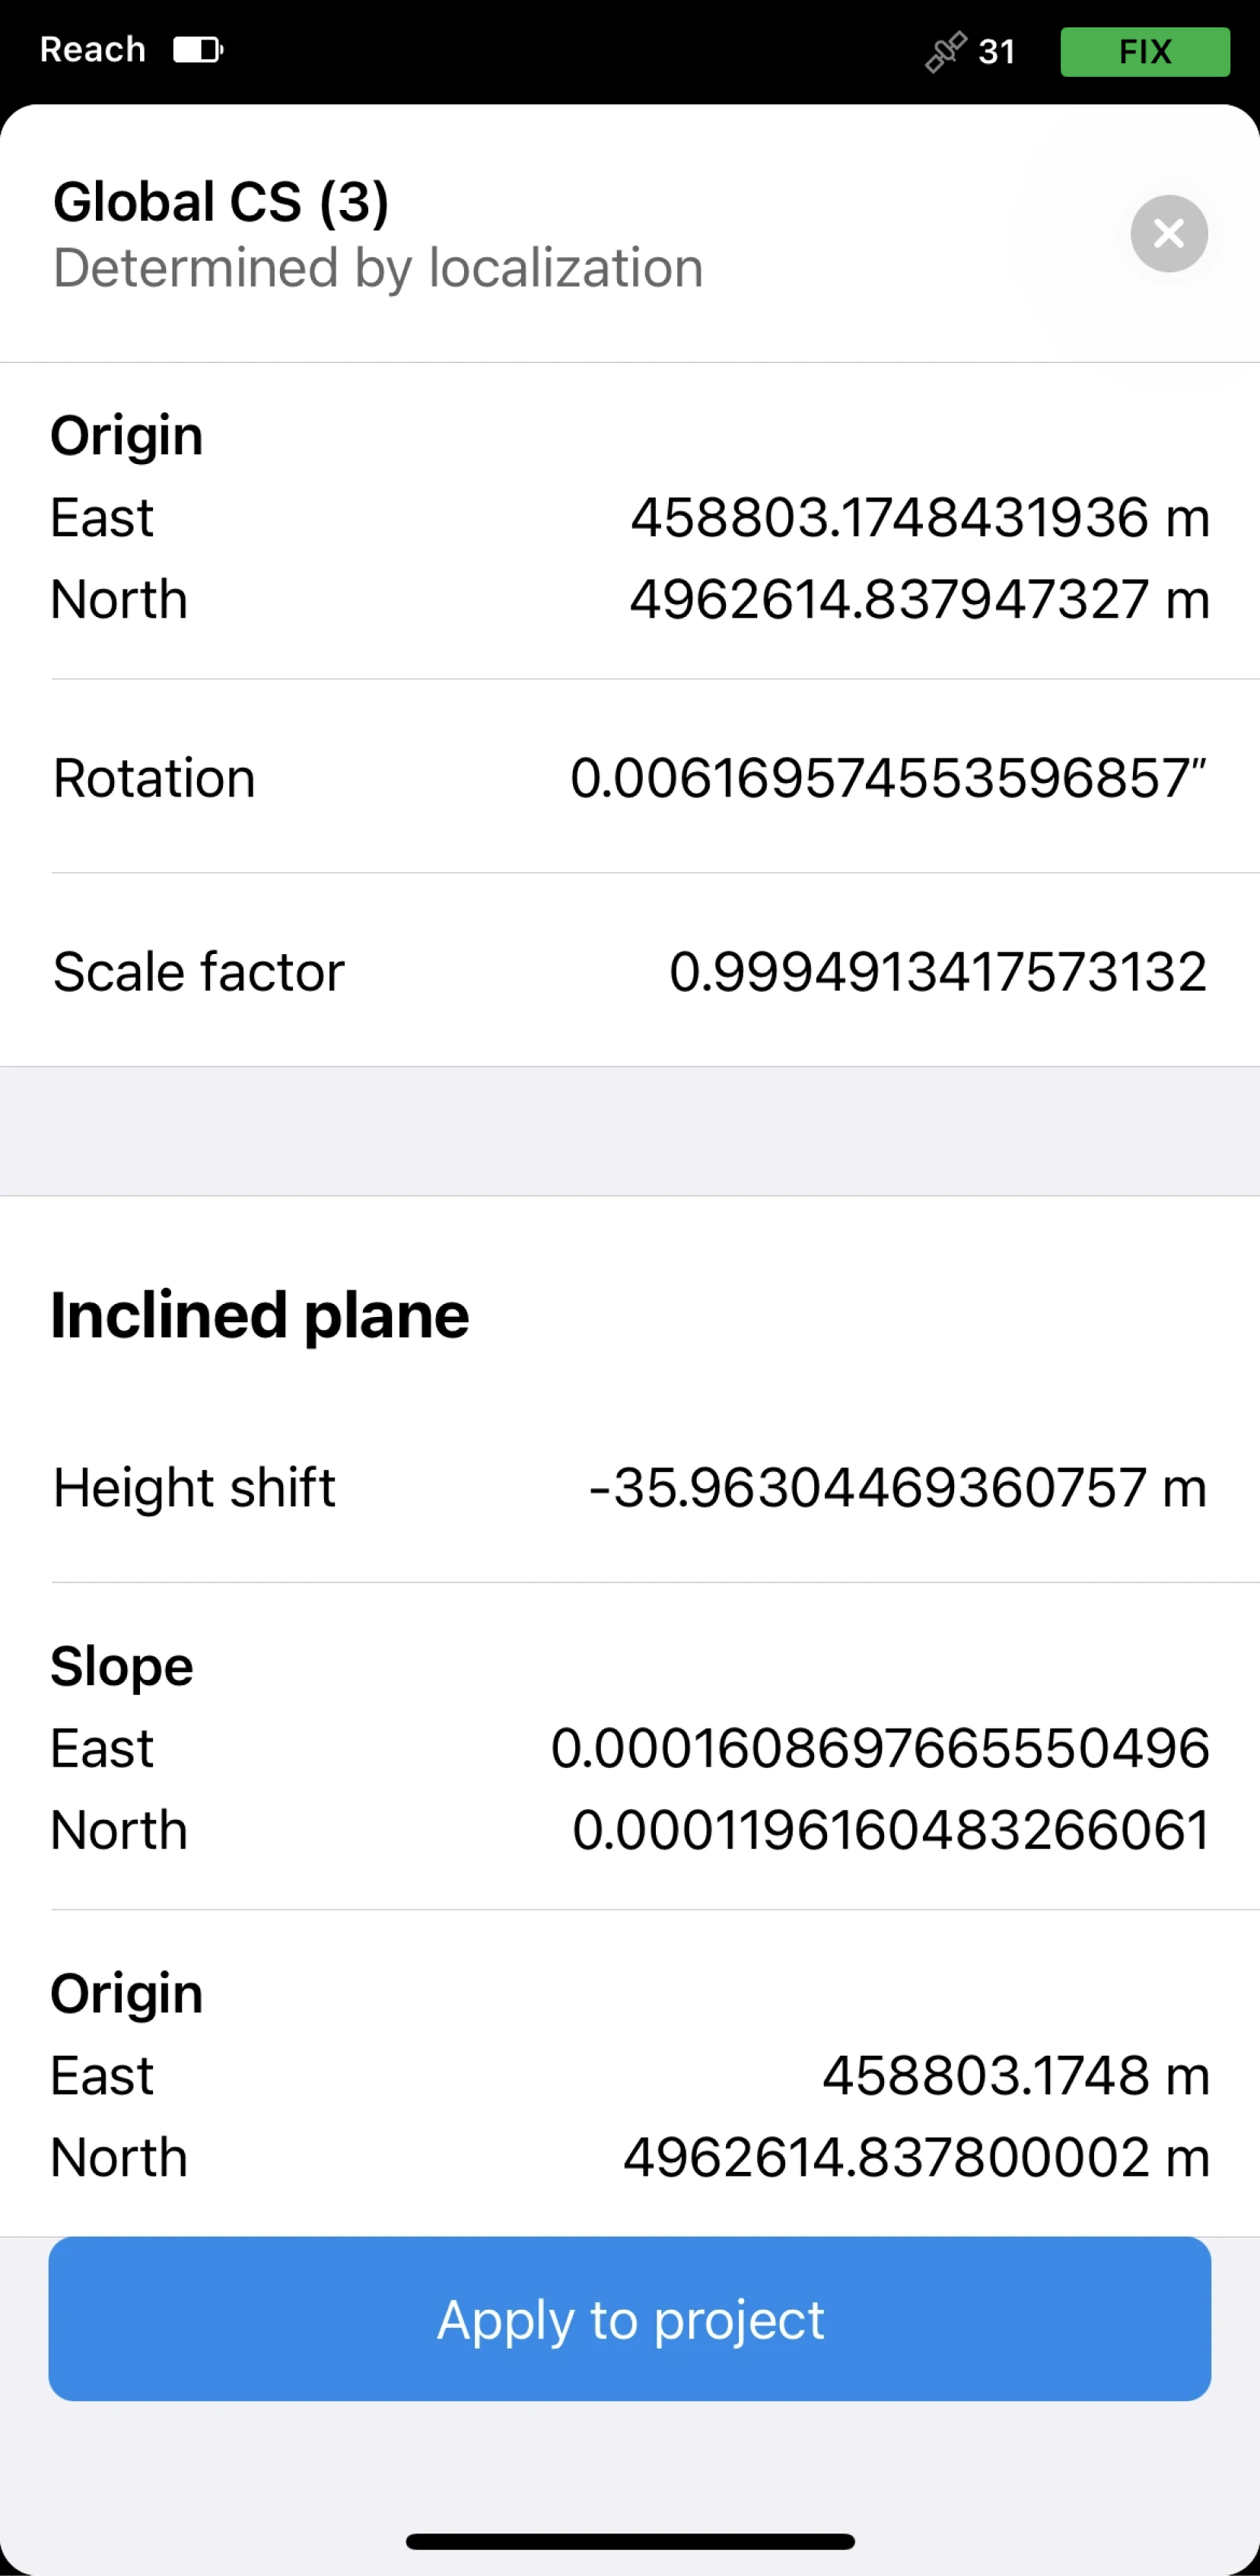
Pulse Preview the results (Previsualizar resultados). Verá los parámetros de transformación.
noteLa sección Horizontal adjustment (Ajuste horizontal) solo se muestra si ha introducido coordenadas horizontales.
La sección Inclined plane (Plano inclinado) solo se muestra si ha introducido coordenadas verticales.
-
Si los resultados son satisfactorios, pulse Apply to project (Aplicar al proyecto).
Si es necesario, puede volver a calibrar el mismo proyecto más adelante.
Una vez aplicada la localización, todos los puntos existentes y los que se recojan en el futuro se recalcularán de acuerdo con el sistema de coordenadas calculado.
Guardar un sistema de coordenadas
Puede guardar los sistemas de coordenadas determinados por la localización y utilizarlos en nuevos proyectos.
- Emlid Flow
- Emlid Flow 360
Para guardar el sistema de coordenadas determinado por la localización en Emlid Flow, siga estos pasos:
-
Abra el proyecto con el sistema de coordenadas determinado por la localización que desea guardar.
-
Deslice hacia arriba el icono de la flecha situado junto al nombre del proyecto.
-
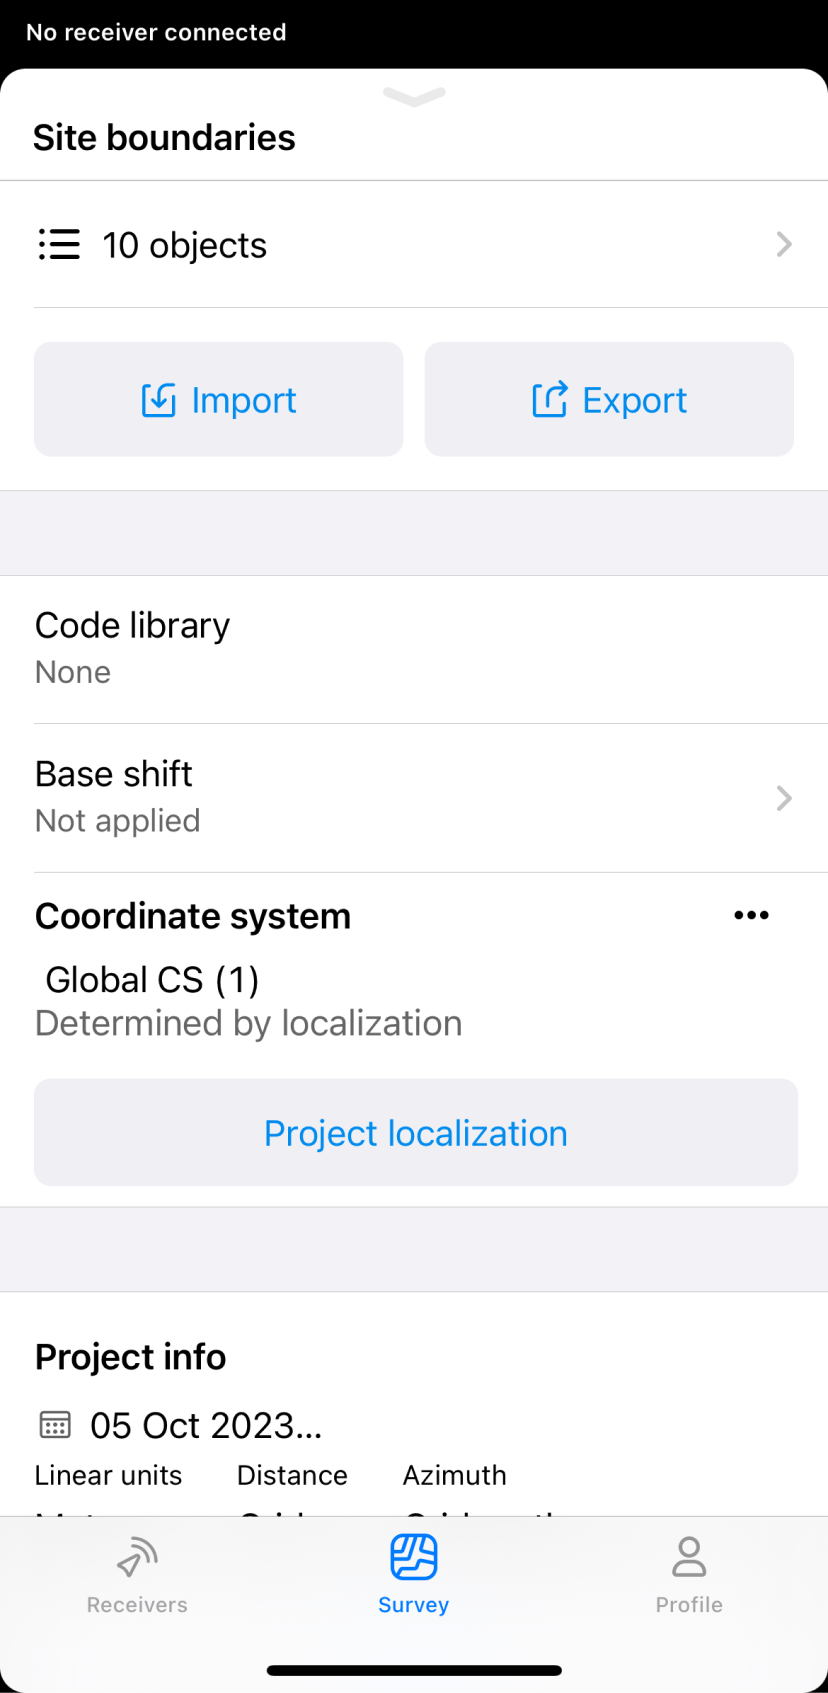
Vaya a la sección Coordinate system (Sistema de coordenadas).
-
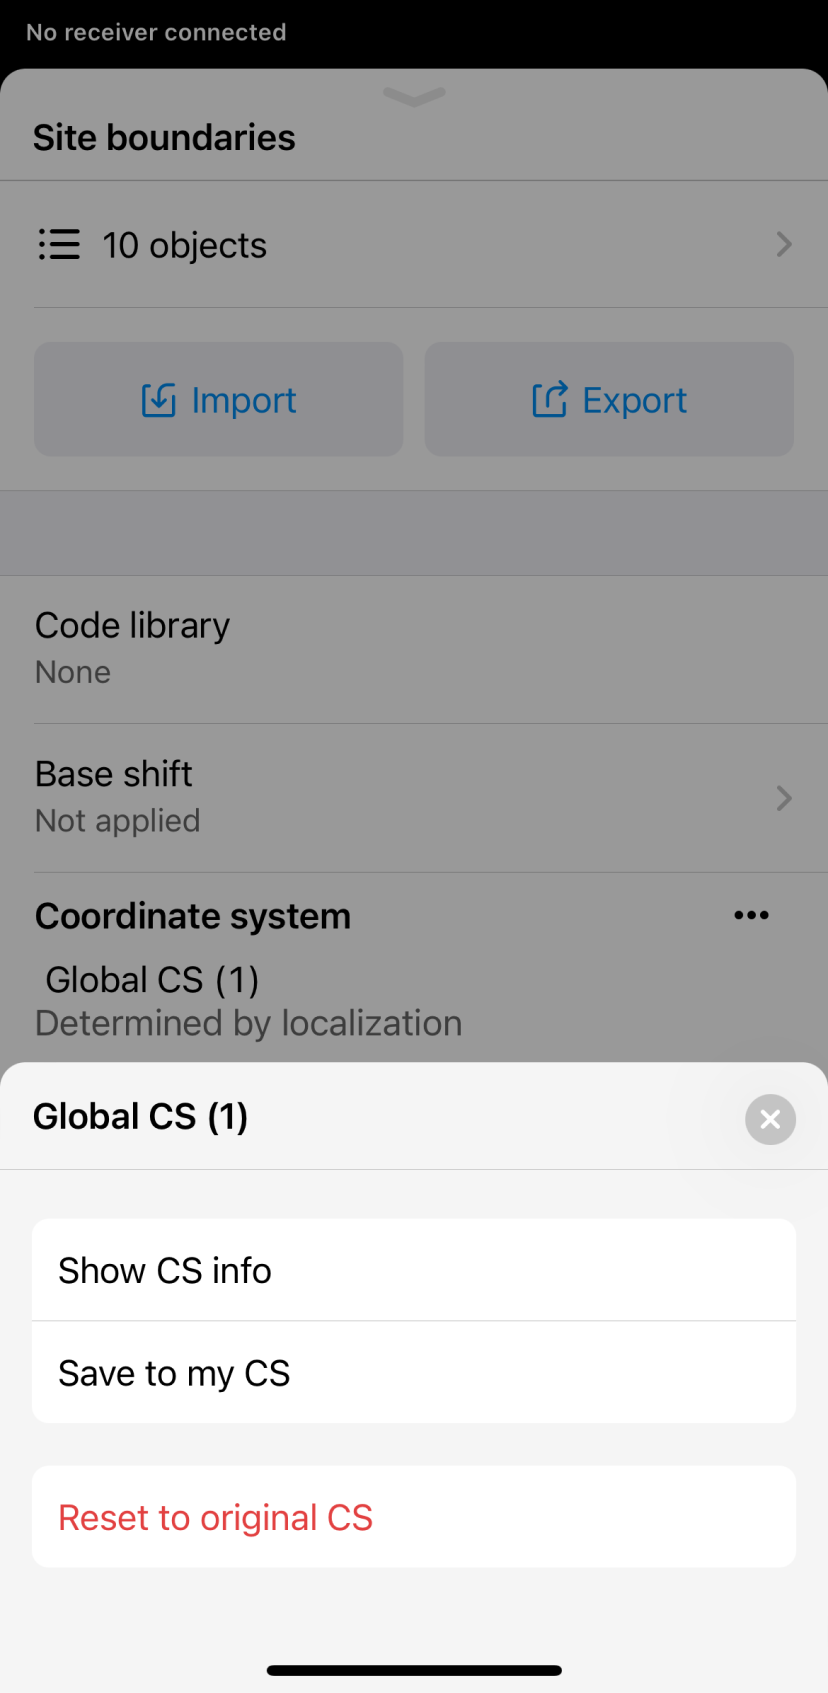
Pulse el botón de los tres puntos y seleccione Save to my CS (Guardar en mi CS) en el menú.
-
Introduzca el nombre y pulse Save (Guardar).
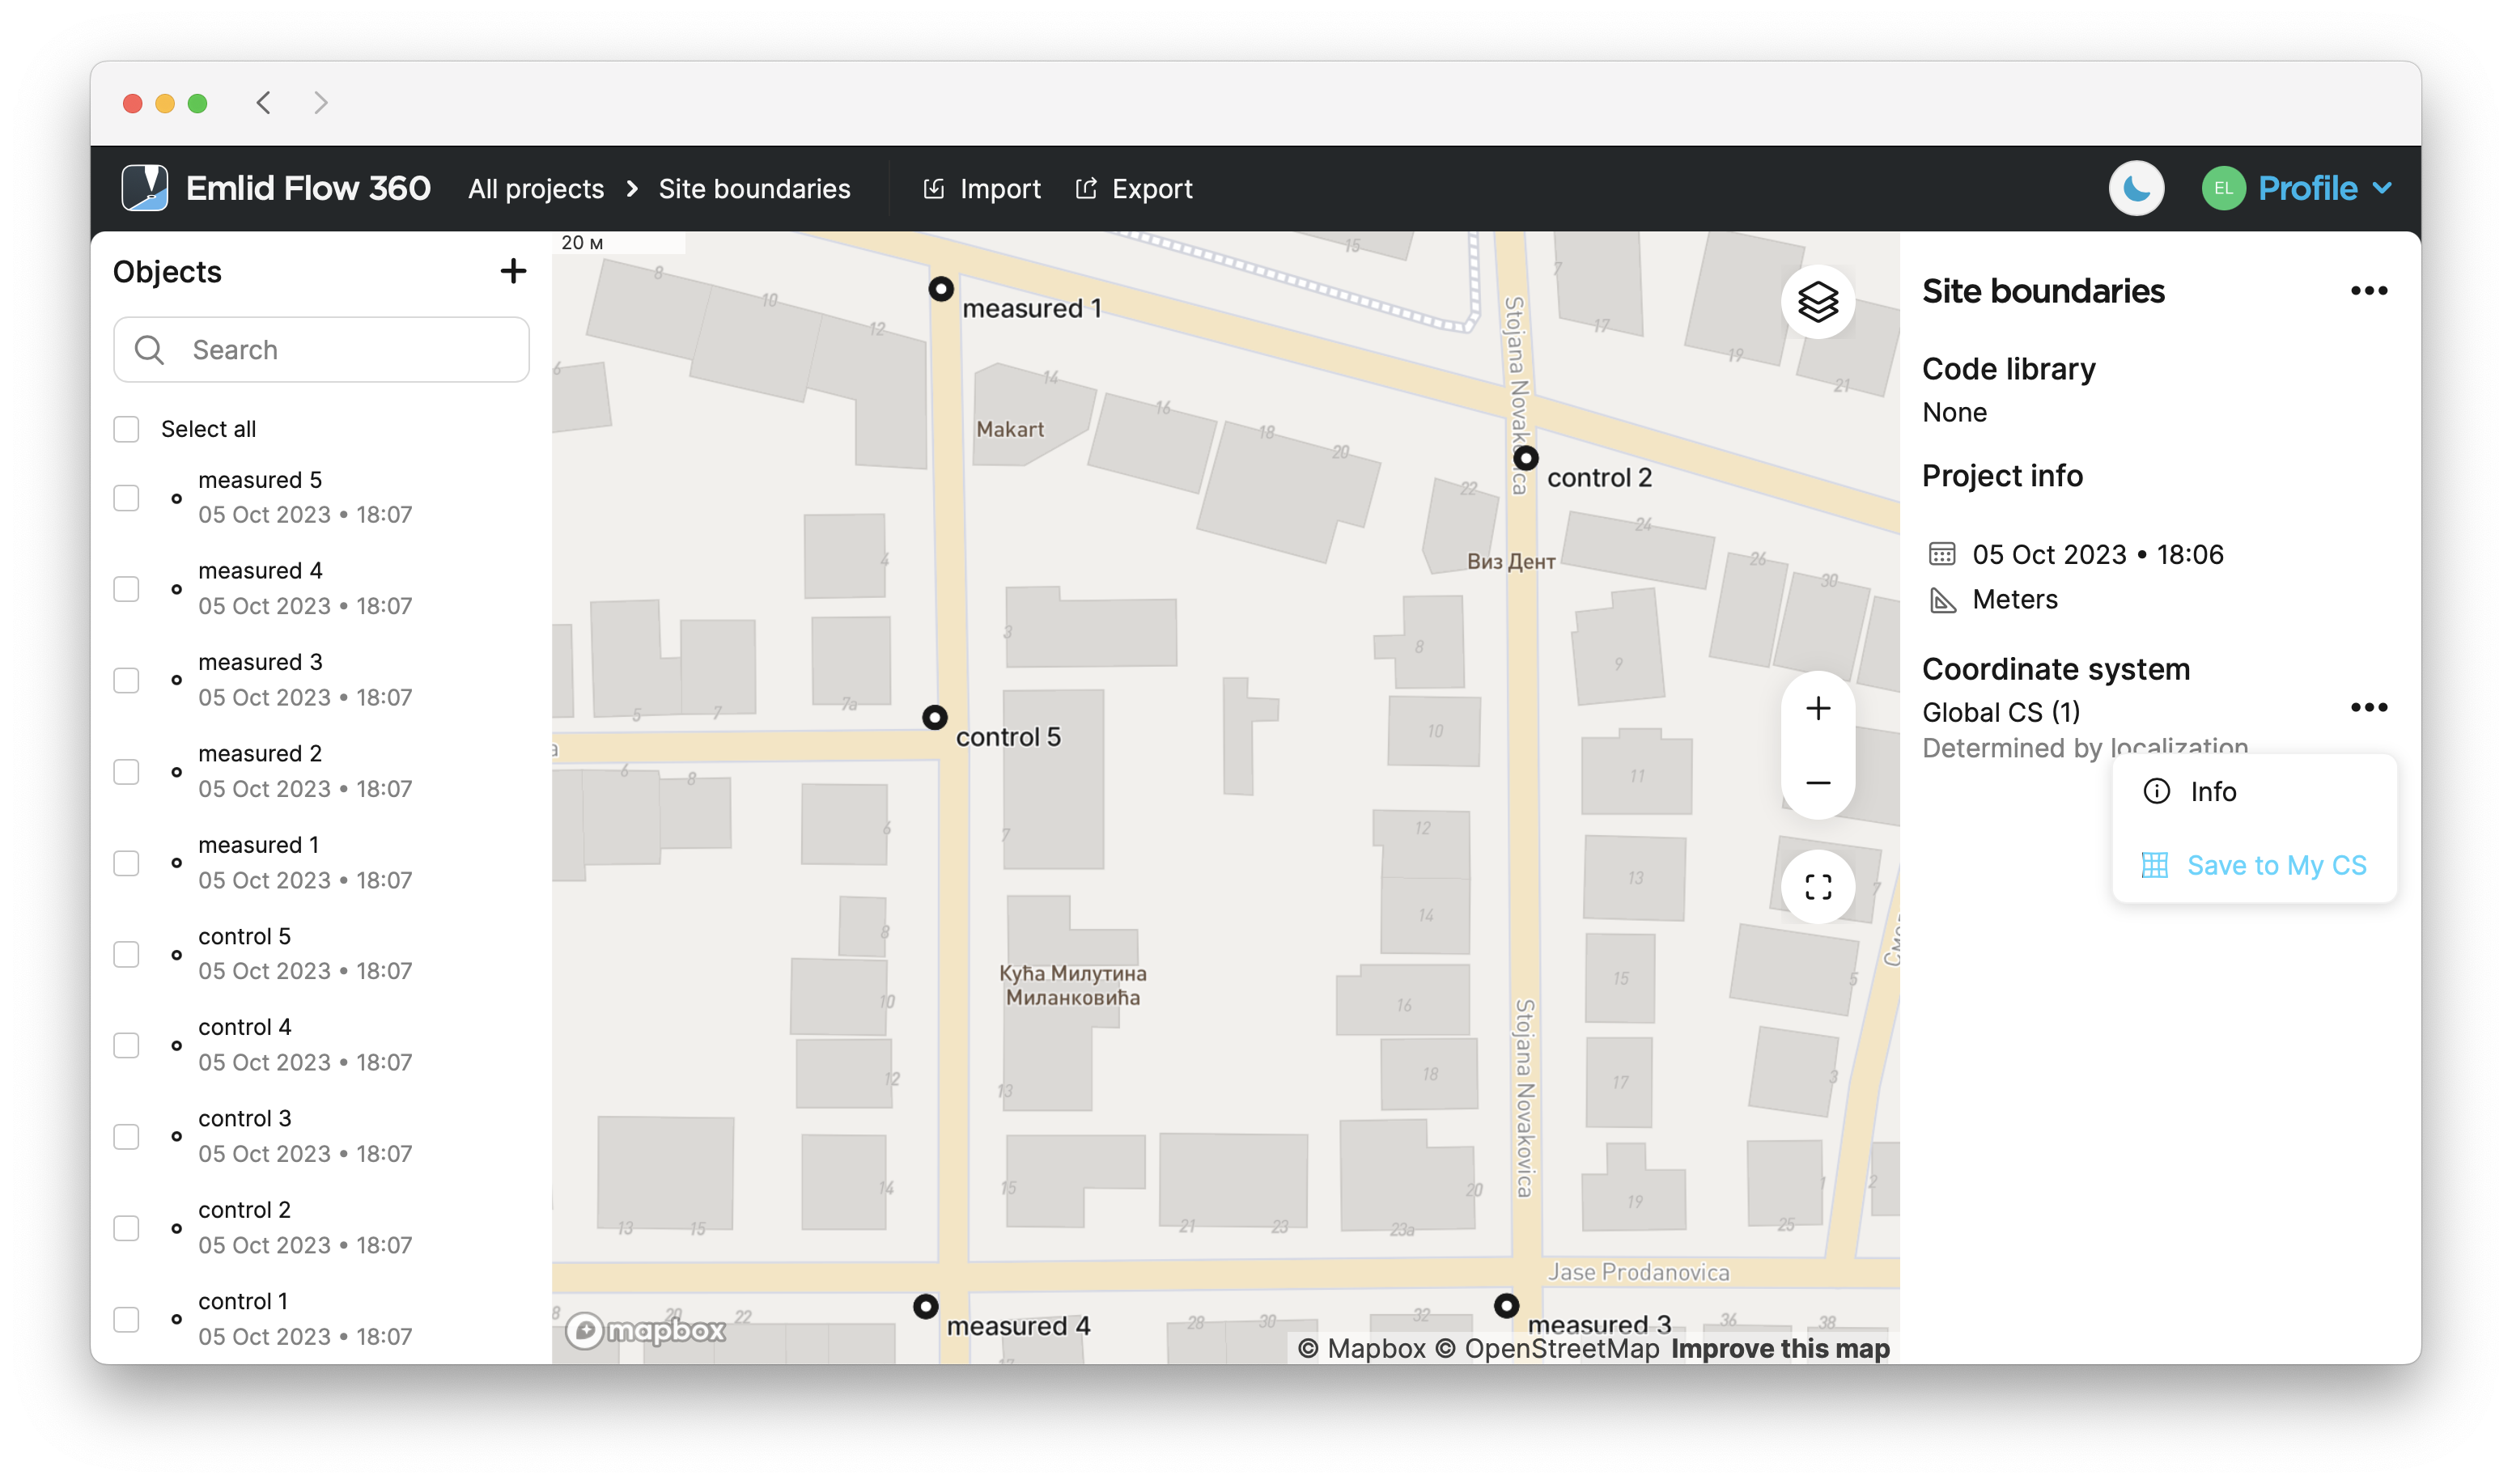
Para guardar el sistema de coordenadas determinado por la localización en Emlid Flow 360, sigue estos pasos:
-
Abra el proyecto con el sistema de coordenadas determinado por la localización que desea guardar.
-
Vaya a la sección Coordinate system (Sistema de coordenadas).
-
Pulsa el botón de los tres puntos y selecciona Save to my CS (Guardar en mi CS) en el menú desplegable.
-
Introduzca el nombre y pulse Save (Guardar).
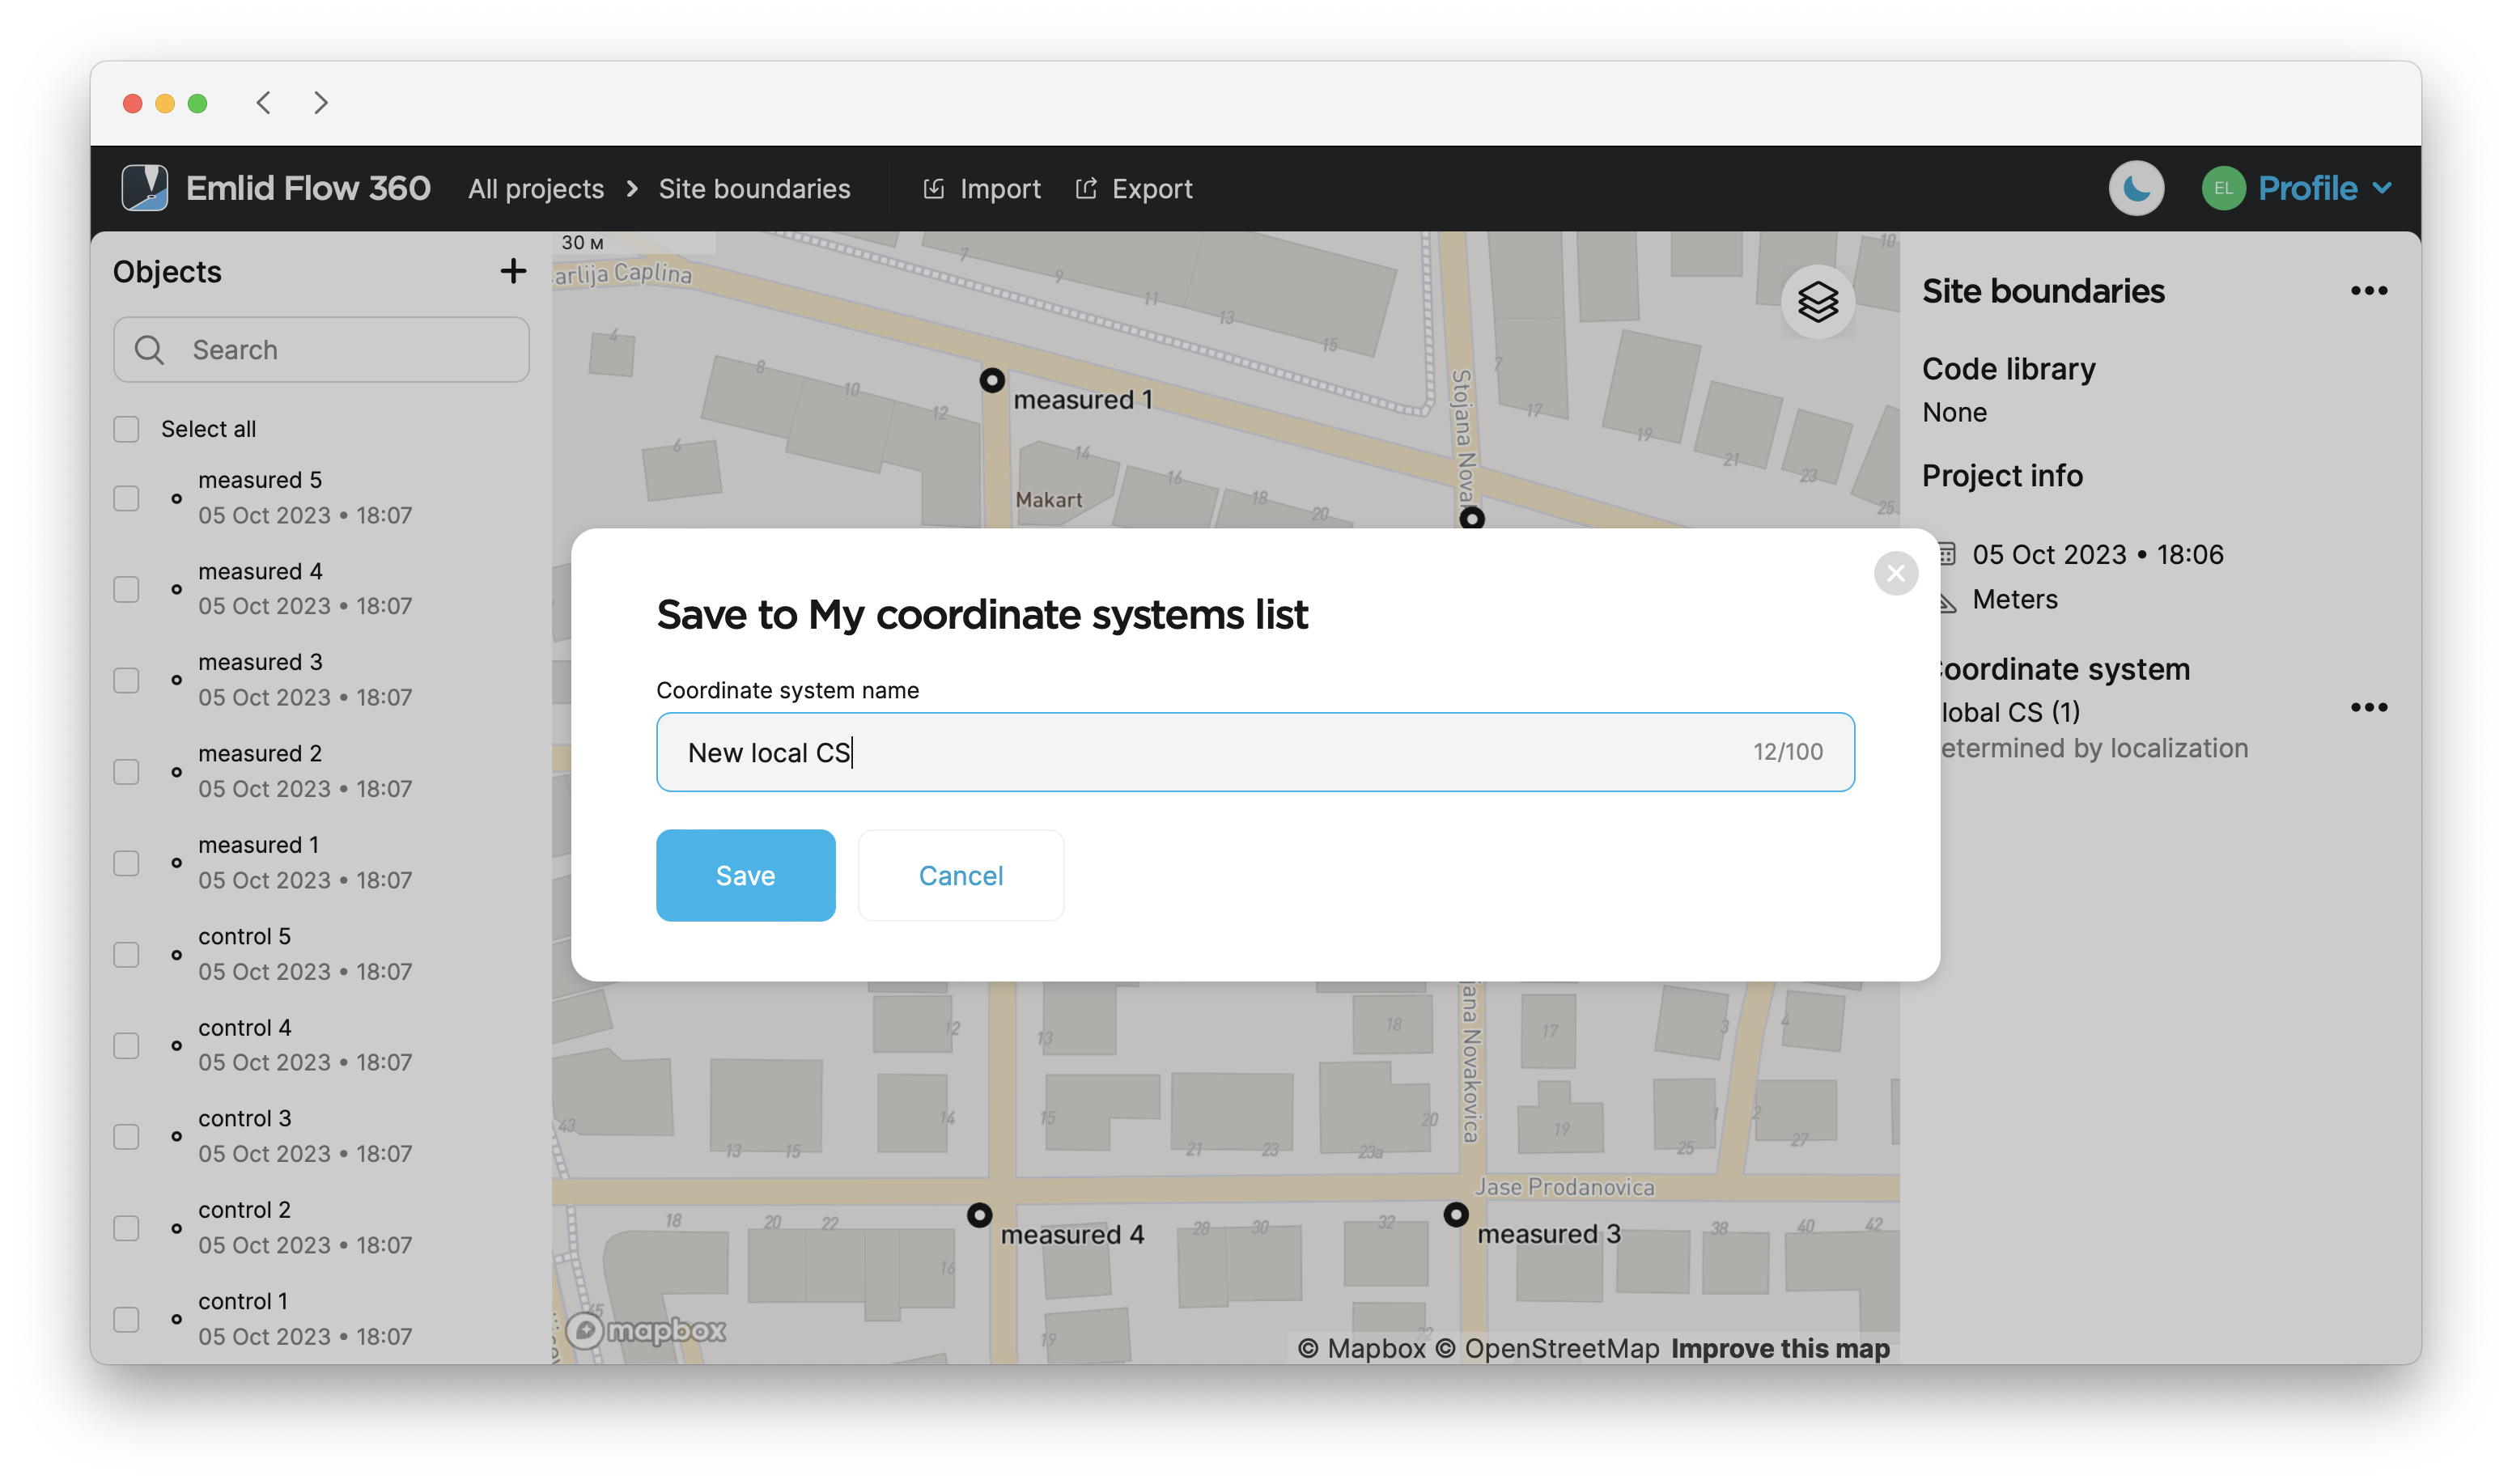
Ahora el sistema de coordenadas se guarda en la lista My coordinate systems (Mis sistemas de coordenadas).
Videoguía
La aplicación Emlid Flow se actualiza de forma periódica, por lo que la interfaz del vídeo puede parecer un poco diferente de la versión actual.
Echa un vistazo al flujo de trabajo en el siguiente vídeo: