Integration of Reach RX with PIX4Dcatch for smartphones with LiDAR
This guide explains how to integrate your Reach RX with the PIX4Dcatch mobile app for smartphones with LIDAR via Bluetooth to build 3D models of objects and process them in PIX4Dcloud or PIX4Dmatic.
Overview
Reach RX receiver allows integration with the PIX4Dcatch mobile app for smartphones with LiDAR to create 3D models with survey-grade centimeter accuracy and process them in the PIX4Dcloud or PIX4Dmatic photogrammetry software.
The process starts by creating 3D scans of an object by capturing images. Then, you get an automatically geotagged dataset with centimeter-level accurate positions. After that, you build a 3D model by processing the dataset. You can do this in two ways. You can get the results right in the PIX4Dcatch app with the help of PIX4D cloud. Alternatively, you can upload them to PIX4Dmatic desktop app and process them there.
Using the PIX4Dmatic software, you can also merge the resulting geotagged terrestrial dataset with drone data.
To integrate your Reach RX with PIX4Dcatch, you will need the following:
- Emlid Scanning Kit
- A smartphone equipped with LiDAR technology
- PIX4Dcatch mobile app installed on your smartphone
- NTRIP provider details
Workflow
To integrate your Reach RX with PIX4Dcatch, make 3D scans, and upload them for processing in PIX4Dcloud or PIX4Dmatic follow the steps below.
Configuring communication between Reach RX and PIX4Dcatch
Make sure Bluetooth is enabled on your smartphone.
The Standard and Cloud Advanced Emlid PIX4D Scanning kits contain GCP tags, which you can use in areas where RTK corrections are not available to cover all the objects. Refer to the How to use Automatic Tag Detection and Manual GCP Marking - PIX4Dcatch RTK guide.
-
Install your Reach RX and smartphone onto the Emlid scanning handle.
-
Turn on your Reach RX.
-
Open the PIX4Dcatch app.
-
Tap the menu in the upper right corner and log in using your PIX4D account with a valid subscirption.
-
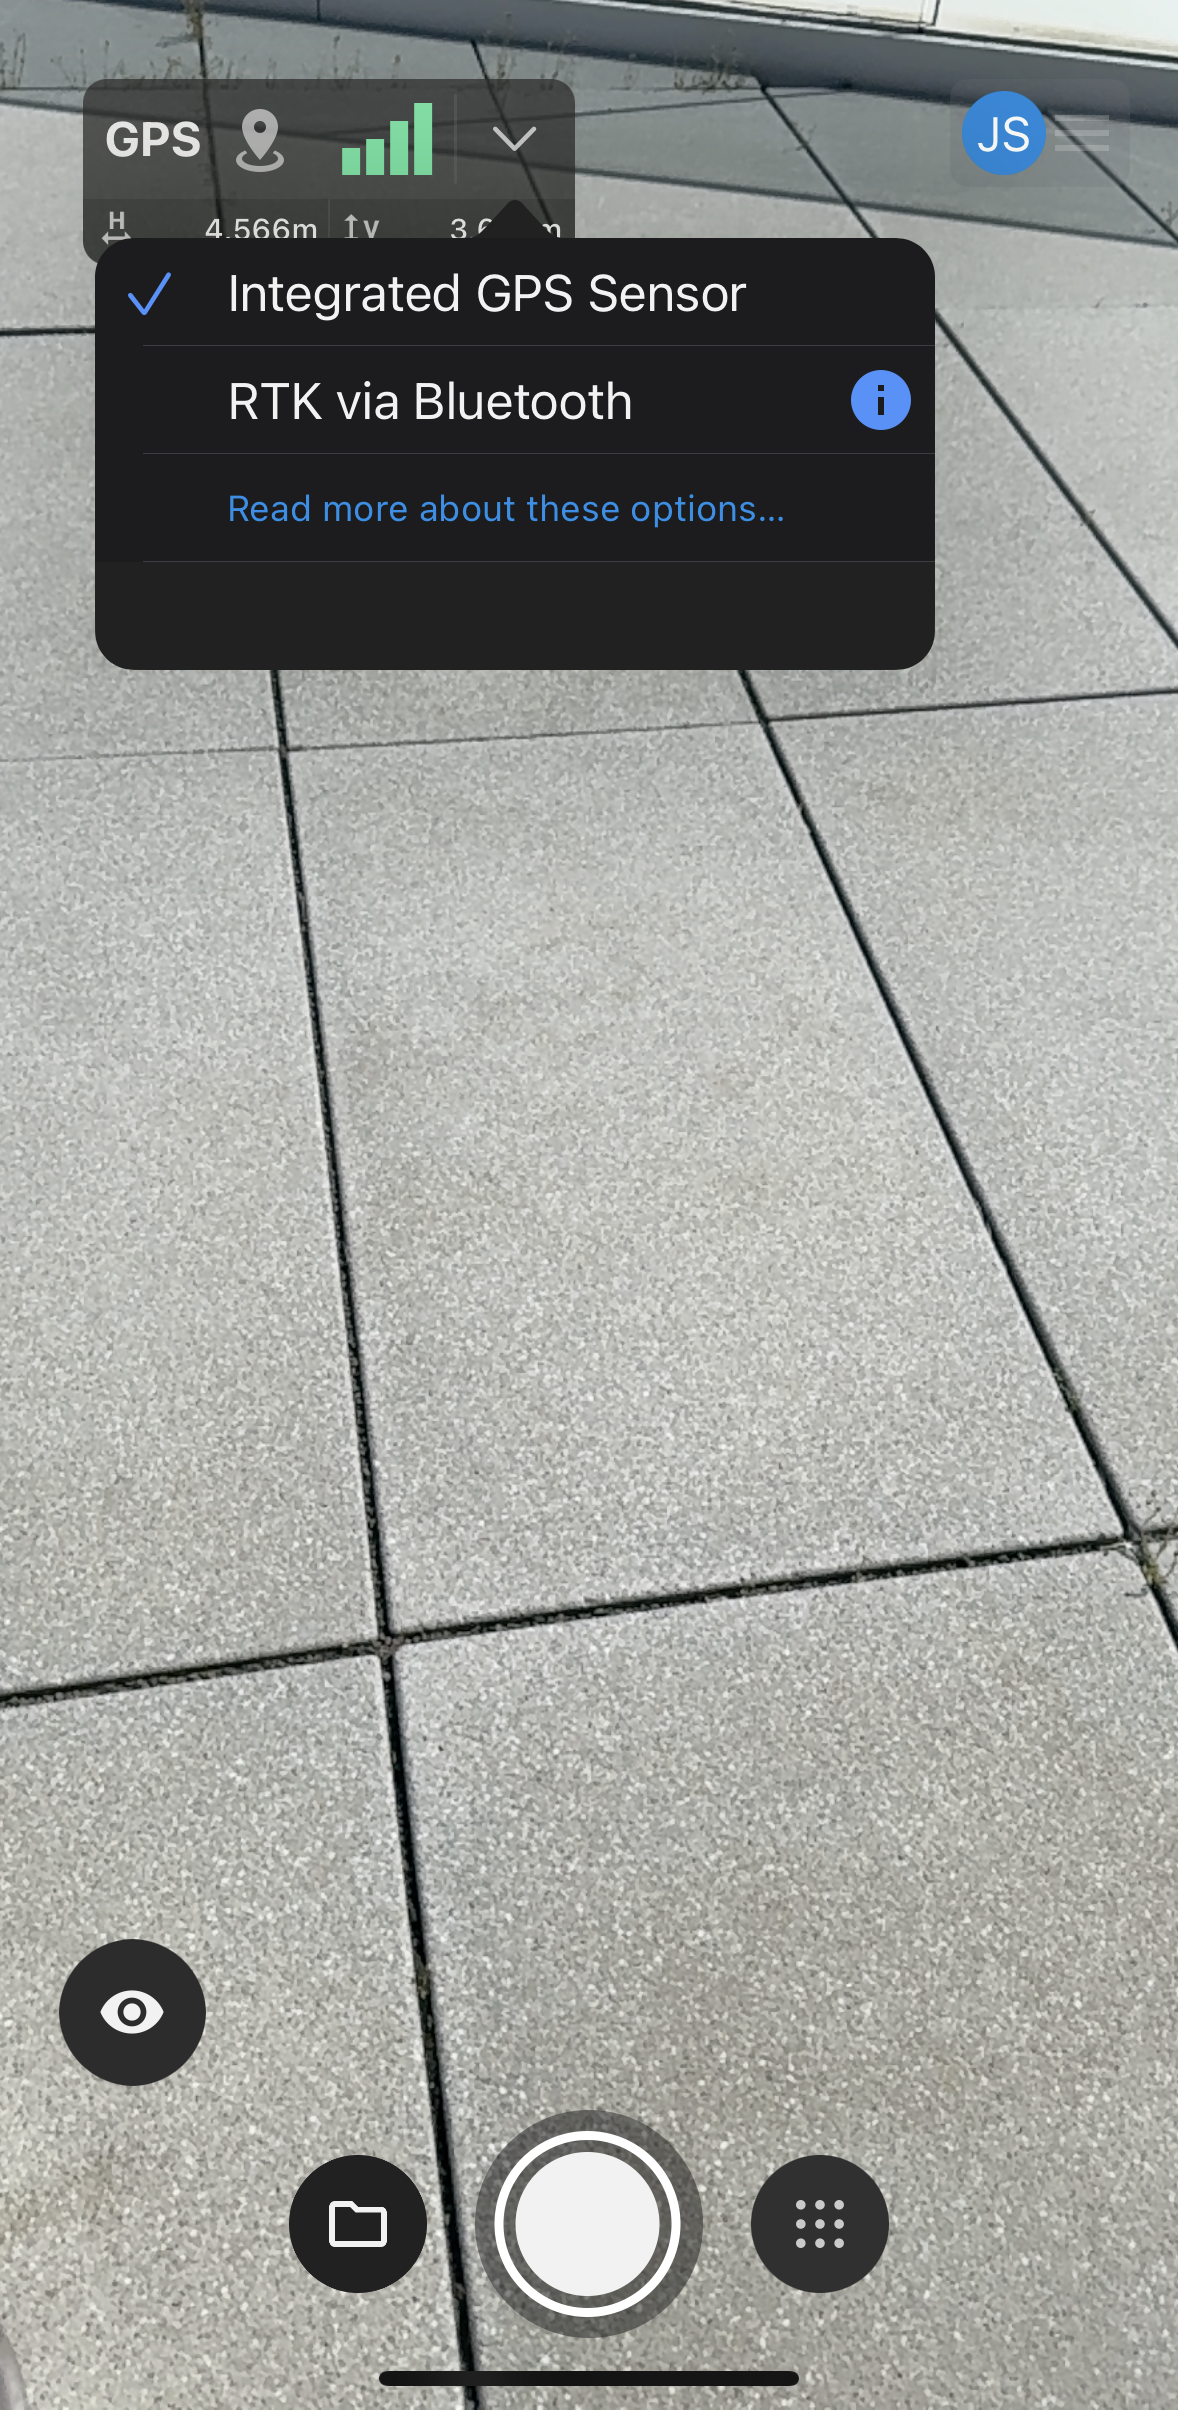
Go back and tap GPS in the upper-left corner and select RTK via Bluetooth from the drop-down menu. The RTK Device Settings screen will open.
-
Select your Reach RX from the list and wait for the connection.

-
Select the left or right device orientation.
The camera offset is automatically applied upon connection.
Configuring NTRIP connection
Once you connected to your Reach RX, you can set up receiving corrections from an NTRIP service:
-
Fill in the following information:
- Enter your NTRIP provider details: IP address, port, username, and password.
- Select the mountpoint.
- Select the NTRIP coordinate reference system.
-
Once you've entered all the necessary information, tap Connect in the upper-right corner. Wait until the Fix solution status is displayed on the main screen.

Configuring capture and AR settings and scanning
You can configure capture and AR settings as follows:
-
To apply capture and AR settings, tap the Account button in the upper-right corner.
-
Select Capture settings or AR settings and configure them:

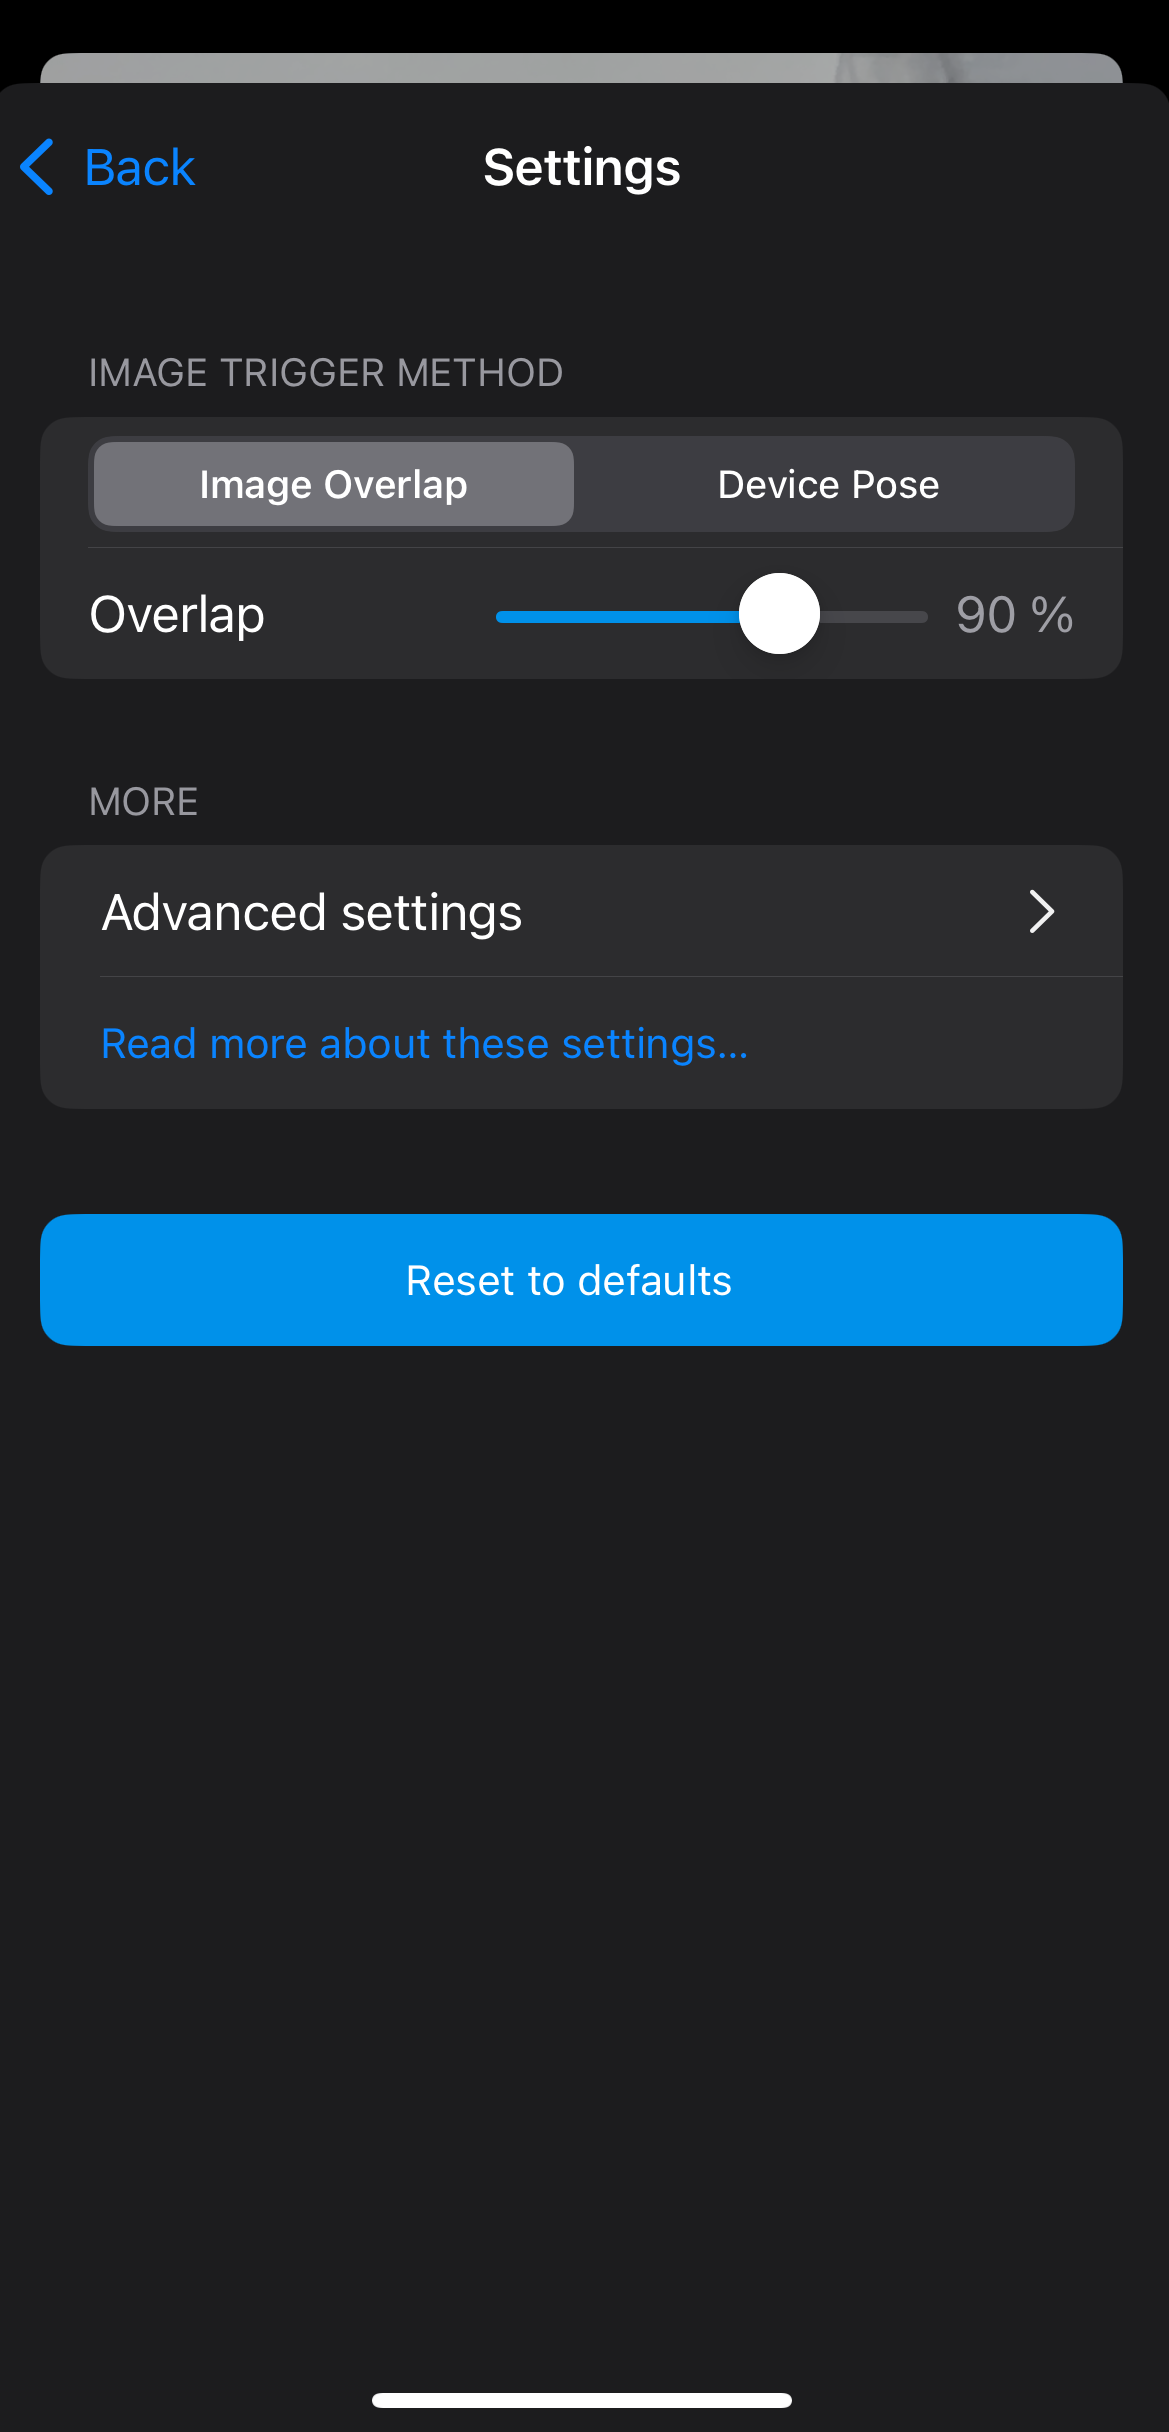

-
After configuring the settings, go back to Settings and tap Done in the upper-right corner. You are now ready to start scanning.
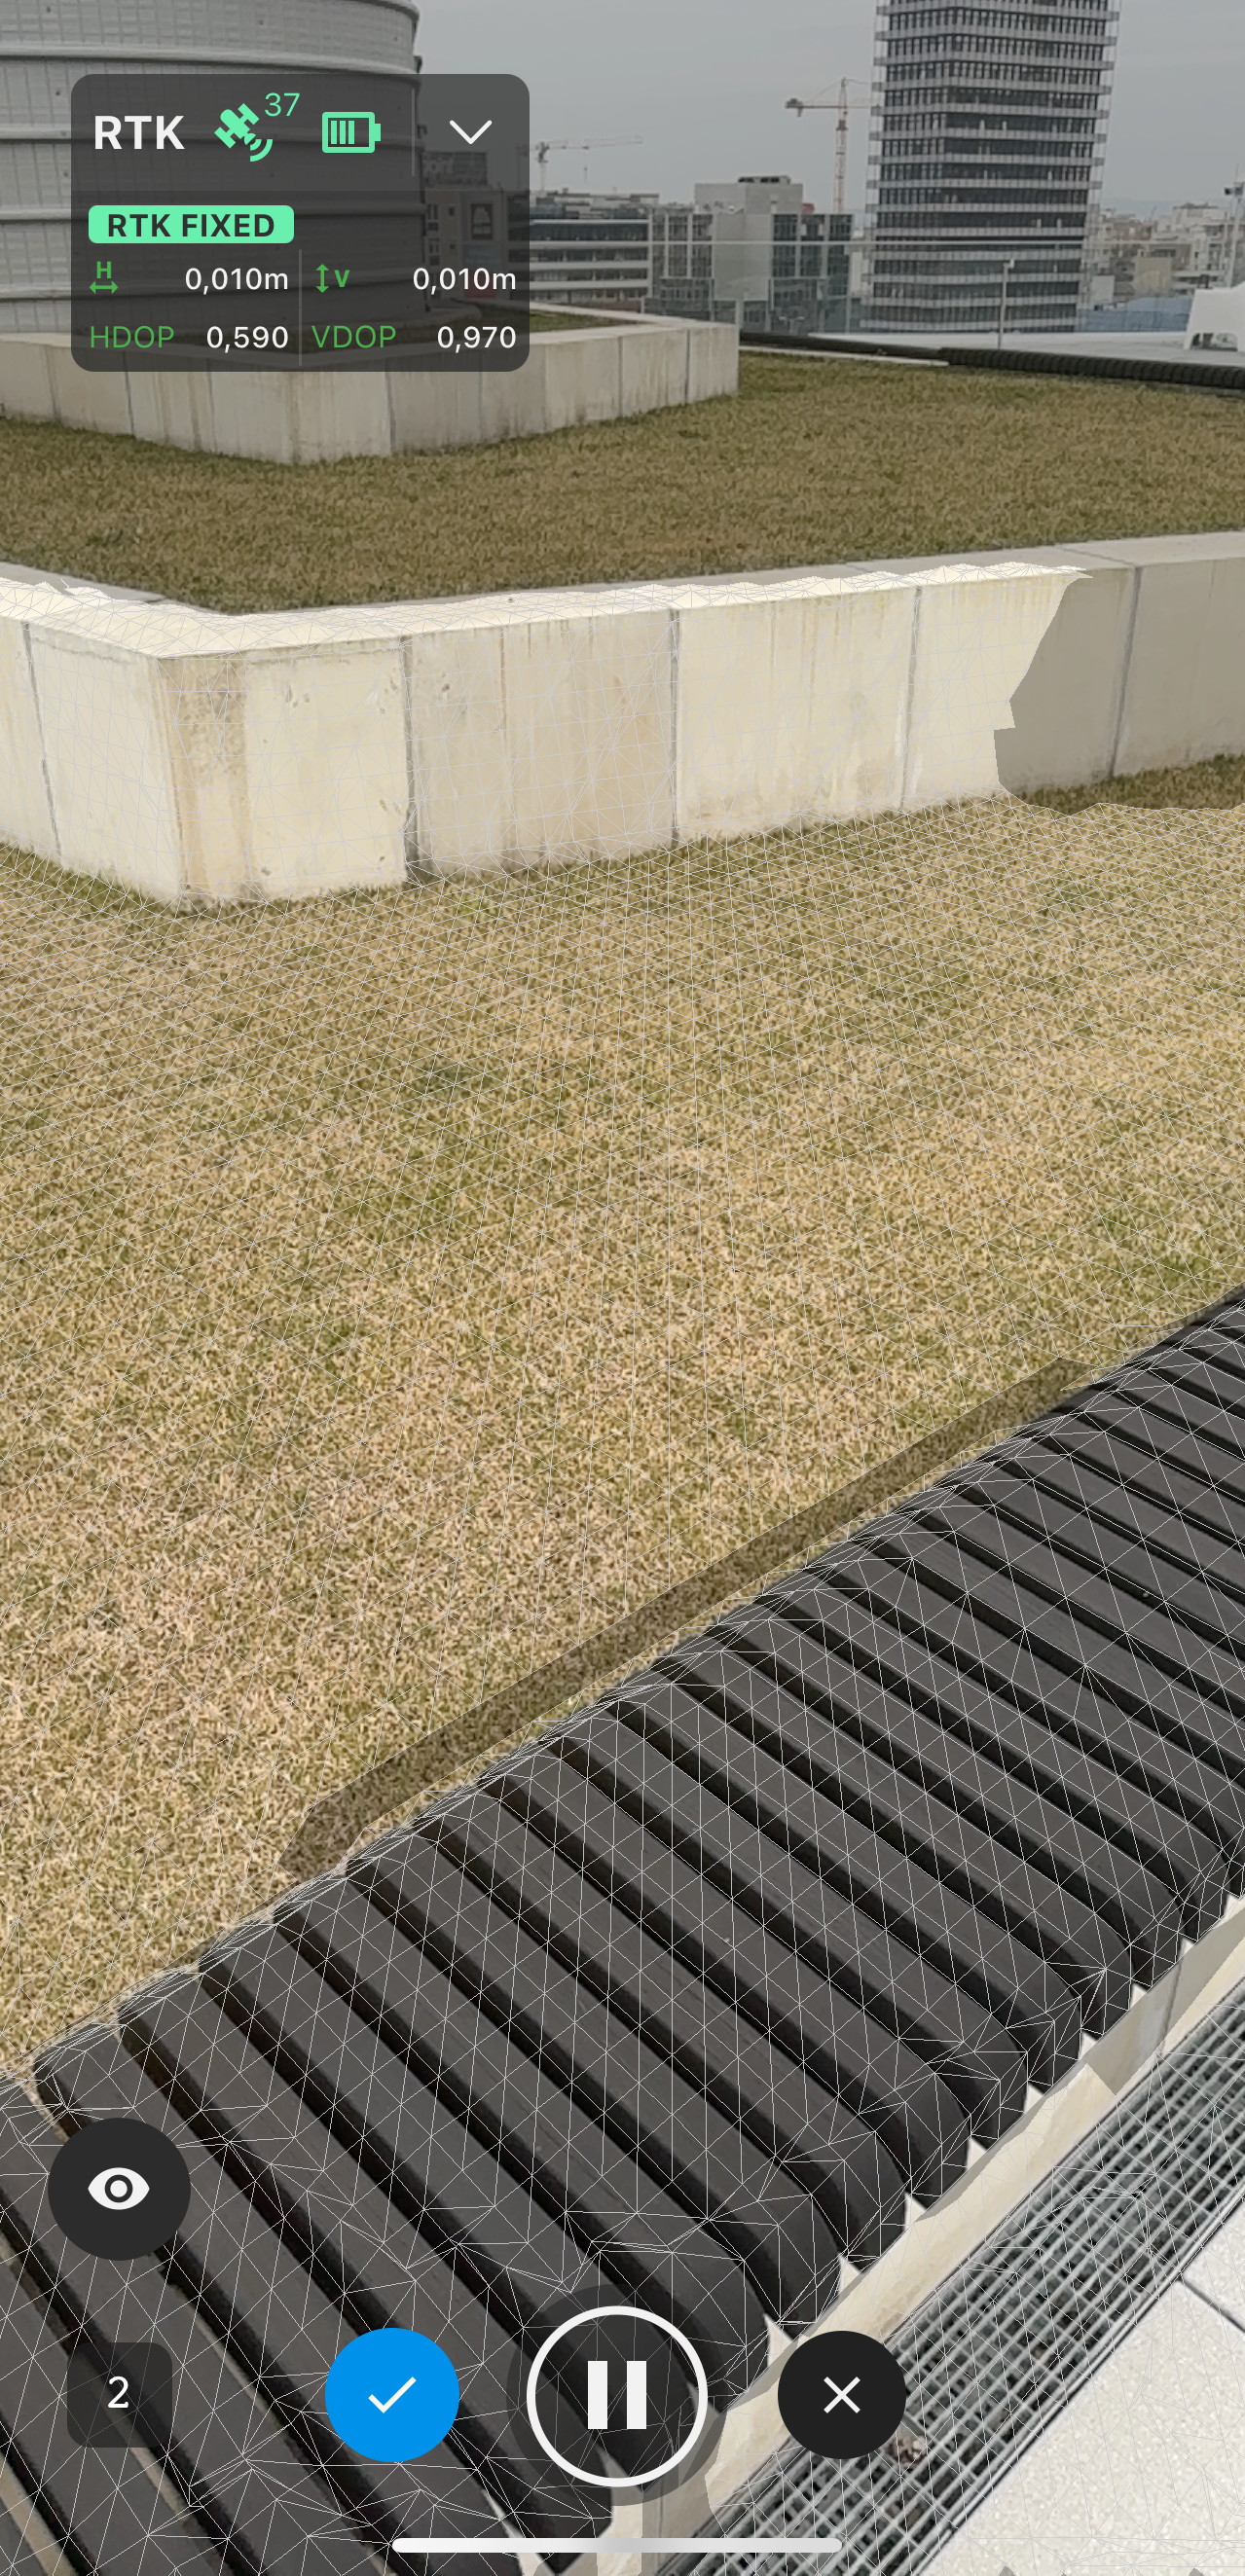
-
To scan an object, tap the Record button. While scanning, walk along or around it. The app displays the TIN model, which represents continuous surfaces in real time, so you can see if you have covered everything you need to.
tipYou can learn more about how to capture a project and find some tips in the Capture a project - PIX4Dcatch article.
-
After the capturing is finished, just tap the blue Tick button. PIX4Dcatch will suggest to save the dataset and display the capture report with the overall project quality.
noteThe optimal accuracy value shows the percentage of images with good RTK status out of the total number of images.

-
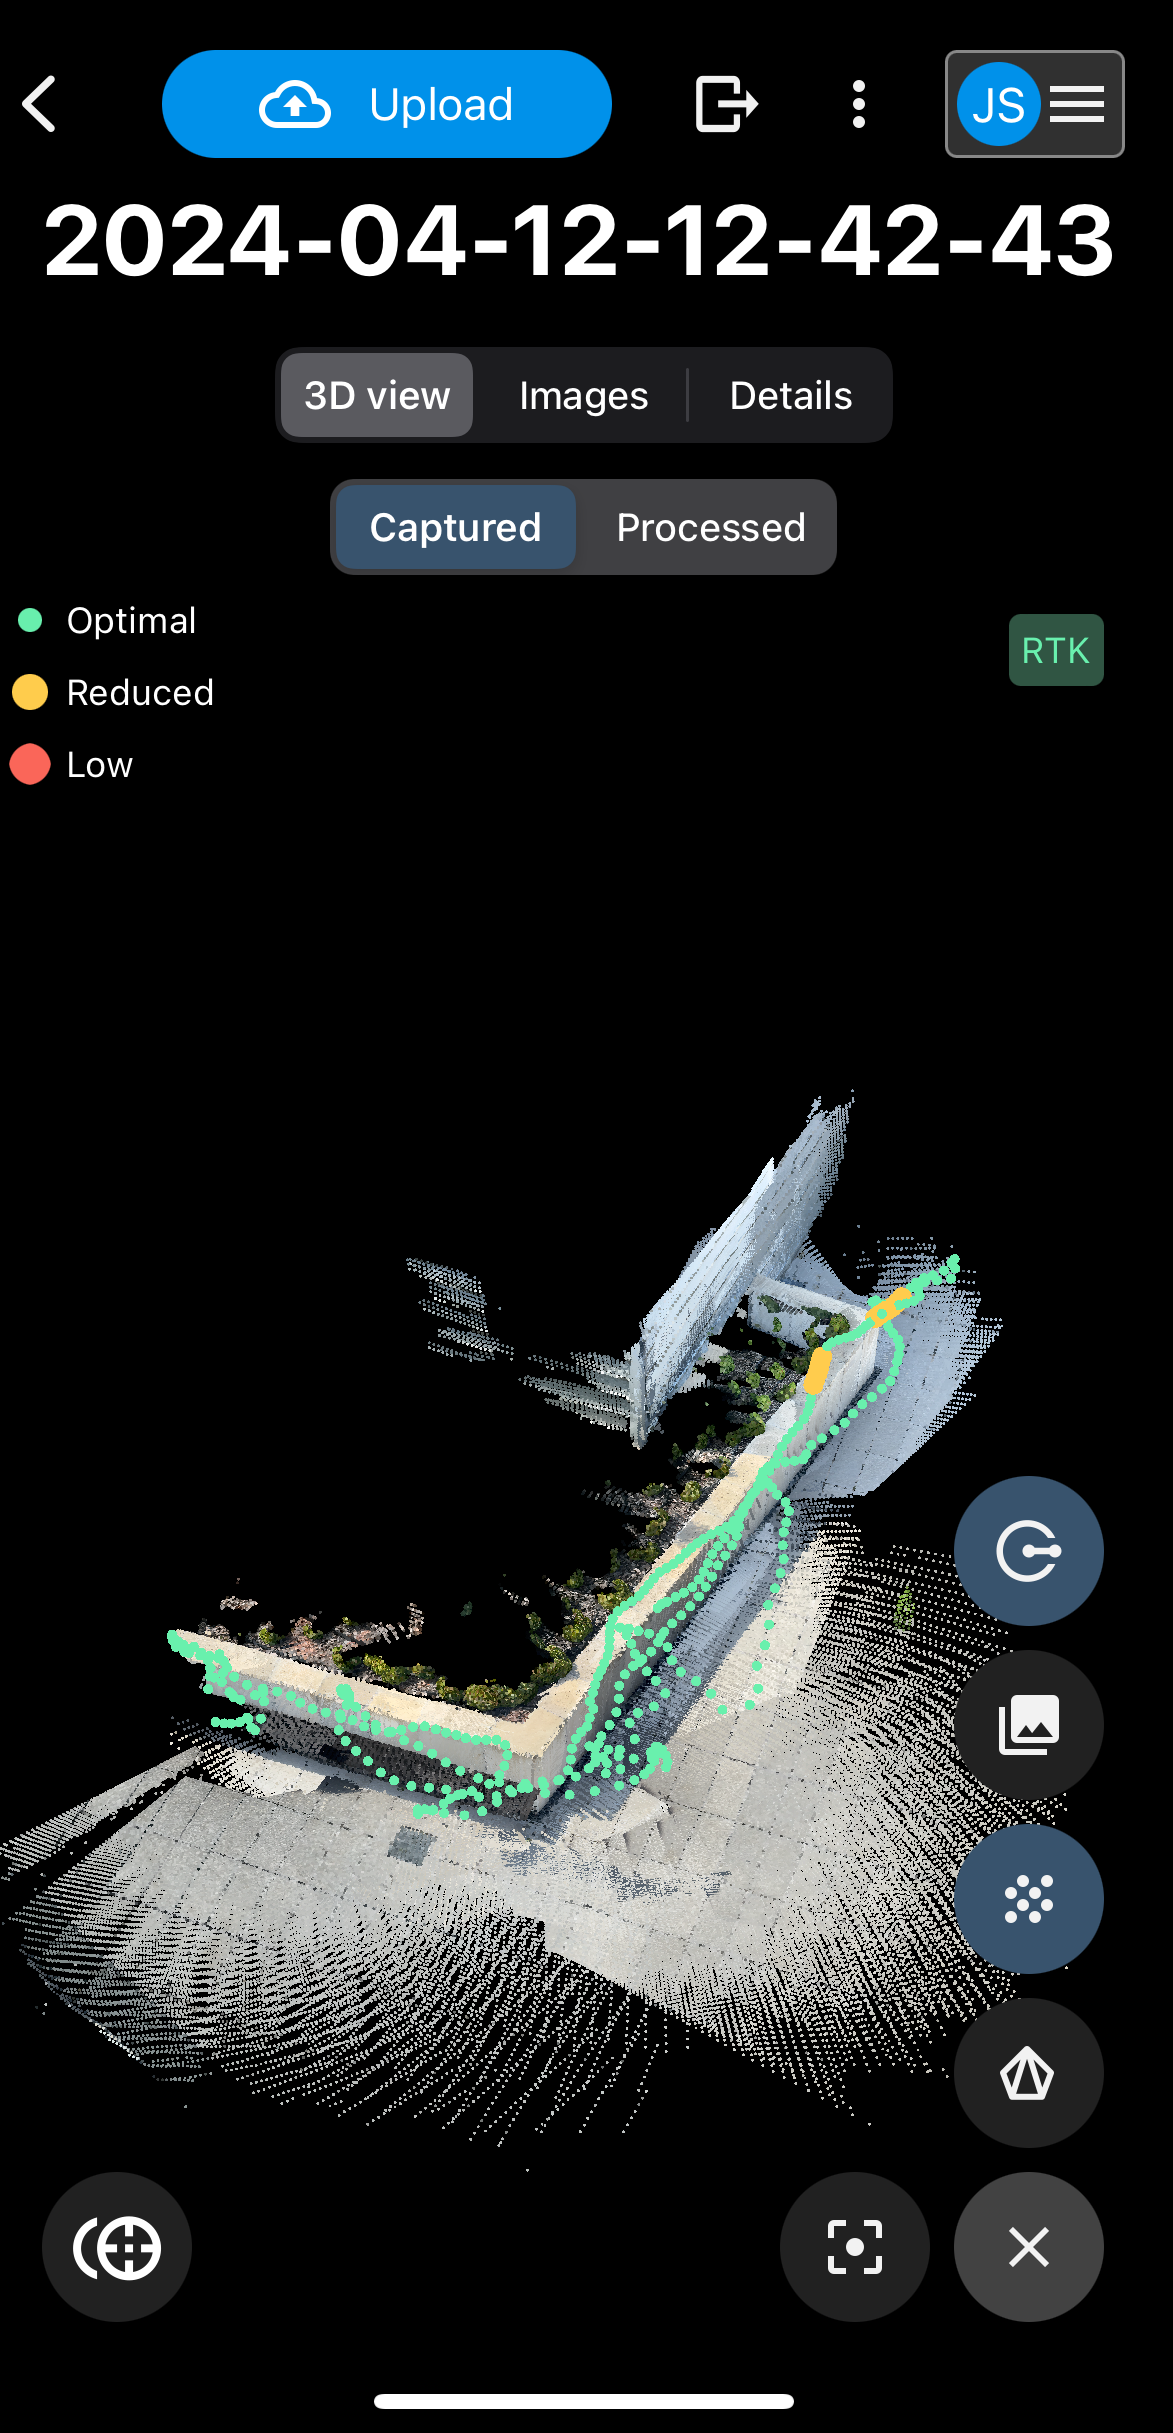
Edit the default name for your project if necessary and tap Save. The app will open the list of your projects.
-
Tap on the project to view it.
Processing dataset
Now you have two possible workflows to process your dataset:
-
Upload your dataset to PIX4Dcloud and get results right in the PIX4Dcatch app.
noteYou can only upload the images to the cloud for processing if you have a valid PIX4Dcloud, PIX4Dmatic, or PIX4Dmapper license or trial. These licenses are included in the Standard and Cloud Advanced Emlid PIX4D Scanning kits. To learn more about processing your datasets, refer to the Processing projects guide.
-
Upload your dataset to the desktop app-PIX4Dmatic and procee it there.
Choose the workflow and follow the steps below:
To process your dataset in PIX4Dcloud, do as follows:
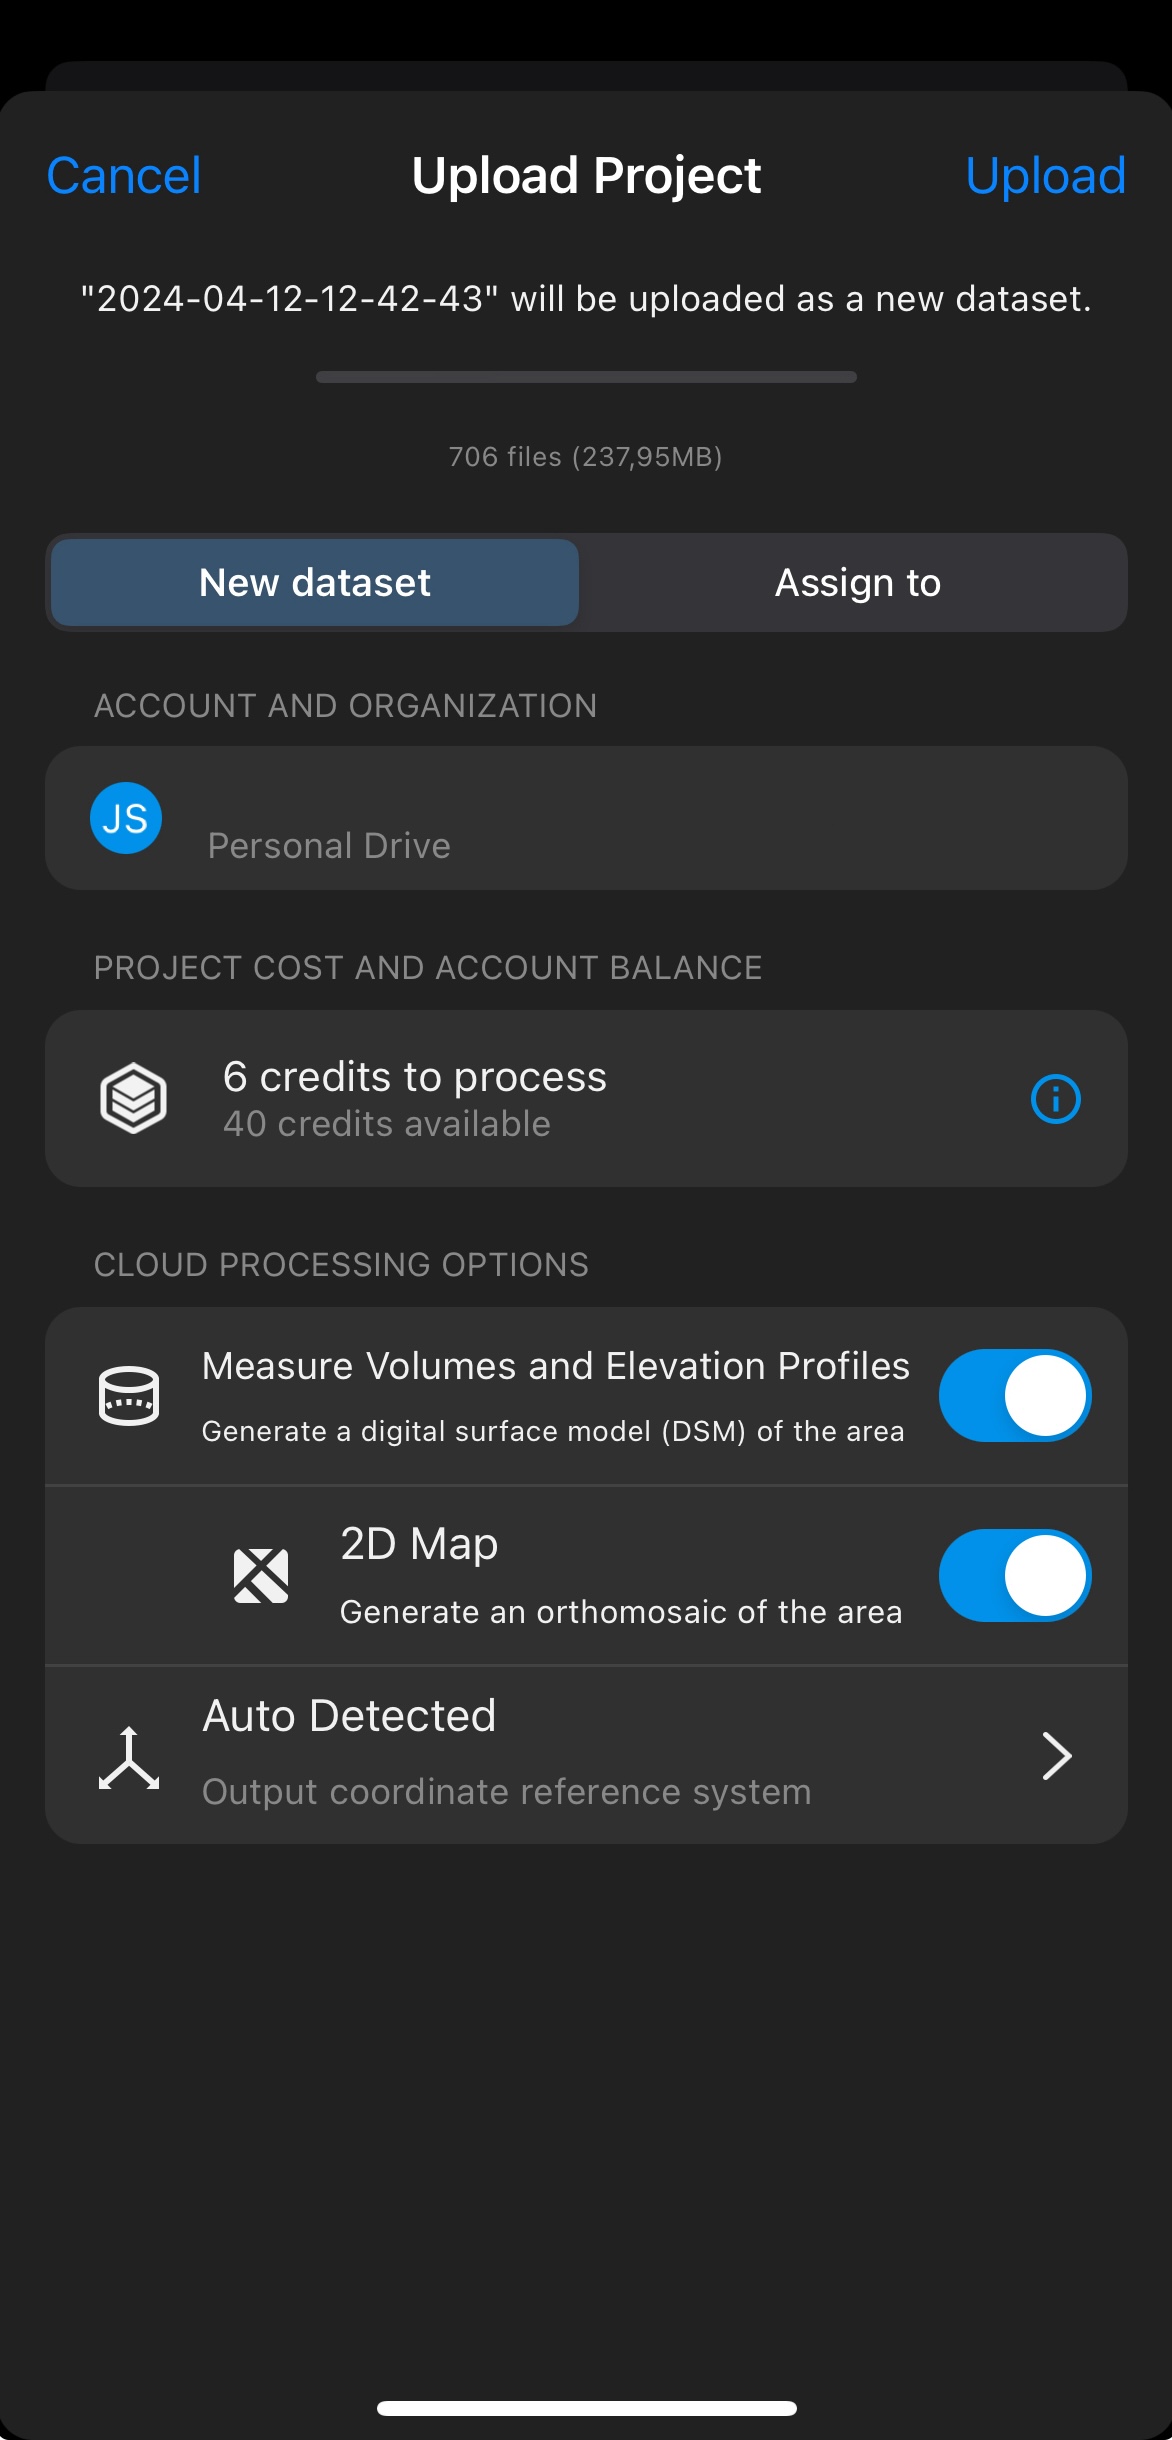
Tap the Upload button at the top of the screen. The Upload Project window will appear, allowing you to set processing options.
Tap the Upload button in the top right corner to start processing in PIX4Dcloud.
Once the processing of your dataset is finished, you will receive an email. You will be able to see the final results in the PIX4Dcatch PRO app.
To process your dataset in PIX4Dmatic, do as follows:
Tap the three-dots button in the upper-right corner.
Click on Export all data to export all the raw images.
The new window with sharing options will appear. Tap Save to Files.
Upload the file for processing into PIX4Dmatic.