Hardware setup
Currently supported boards
ArduPilot on Navio2 works on:
- Raspberry Pi 4 Model B
- Raspberry Pi 3 Model A+
- Raspberry Pi 3 Model B
- Raspberry Pi 3 Model B+
- Raspberry Pi 2 Model B
note
Other models such as Raspberry Pi Model A+, Raspberry Pi Model B+, Raspberry Pi Zero are electrically compatible, but lack performance to run ArduPilot:Copter.
It is completely safe to use Navio2 with all boards stated above.
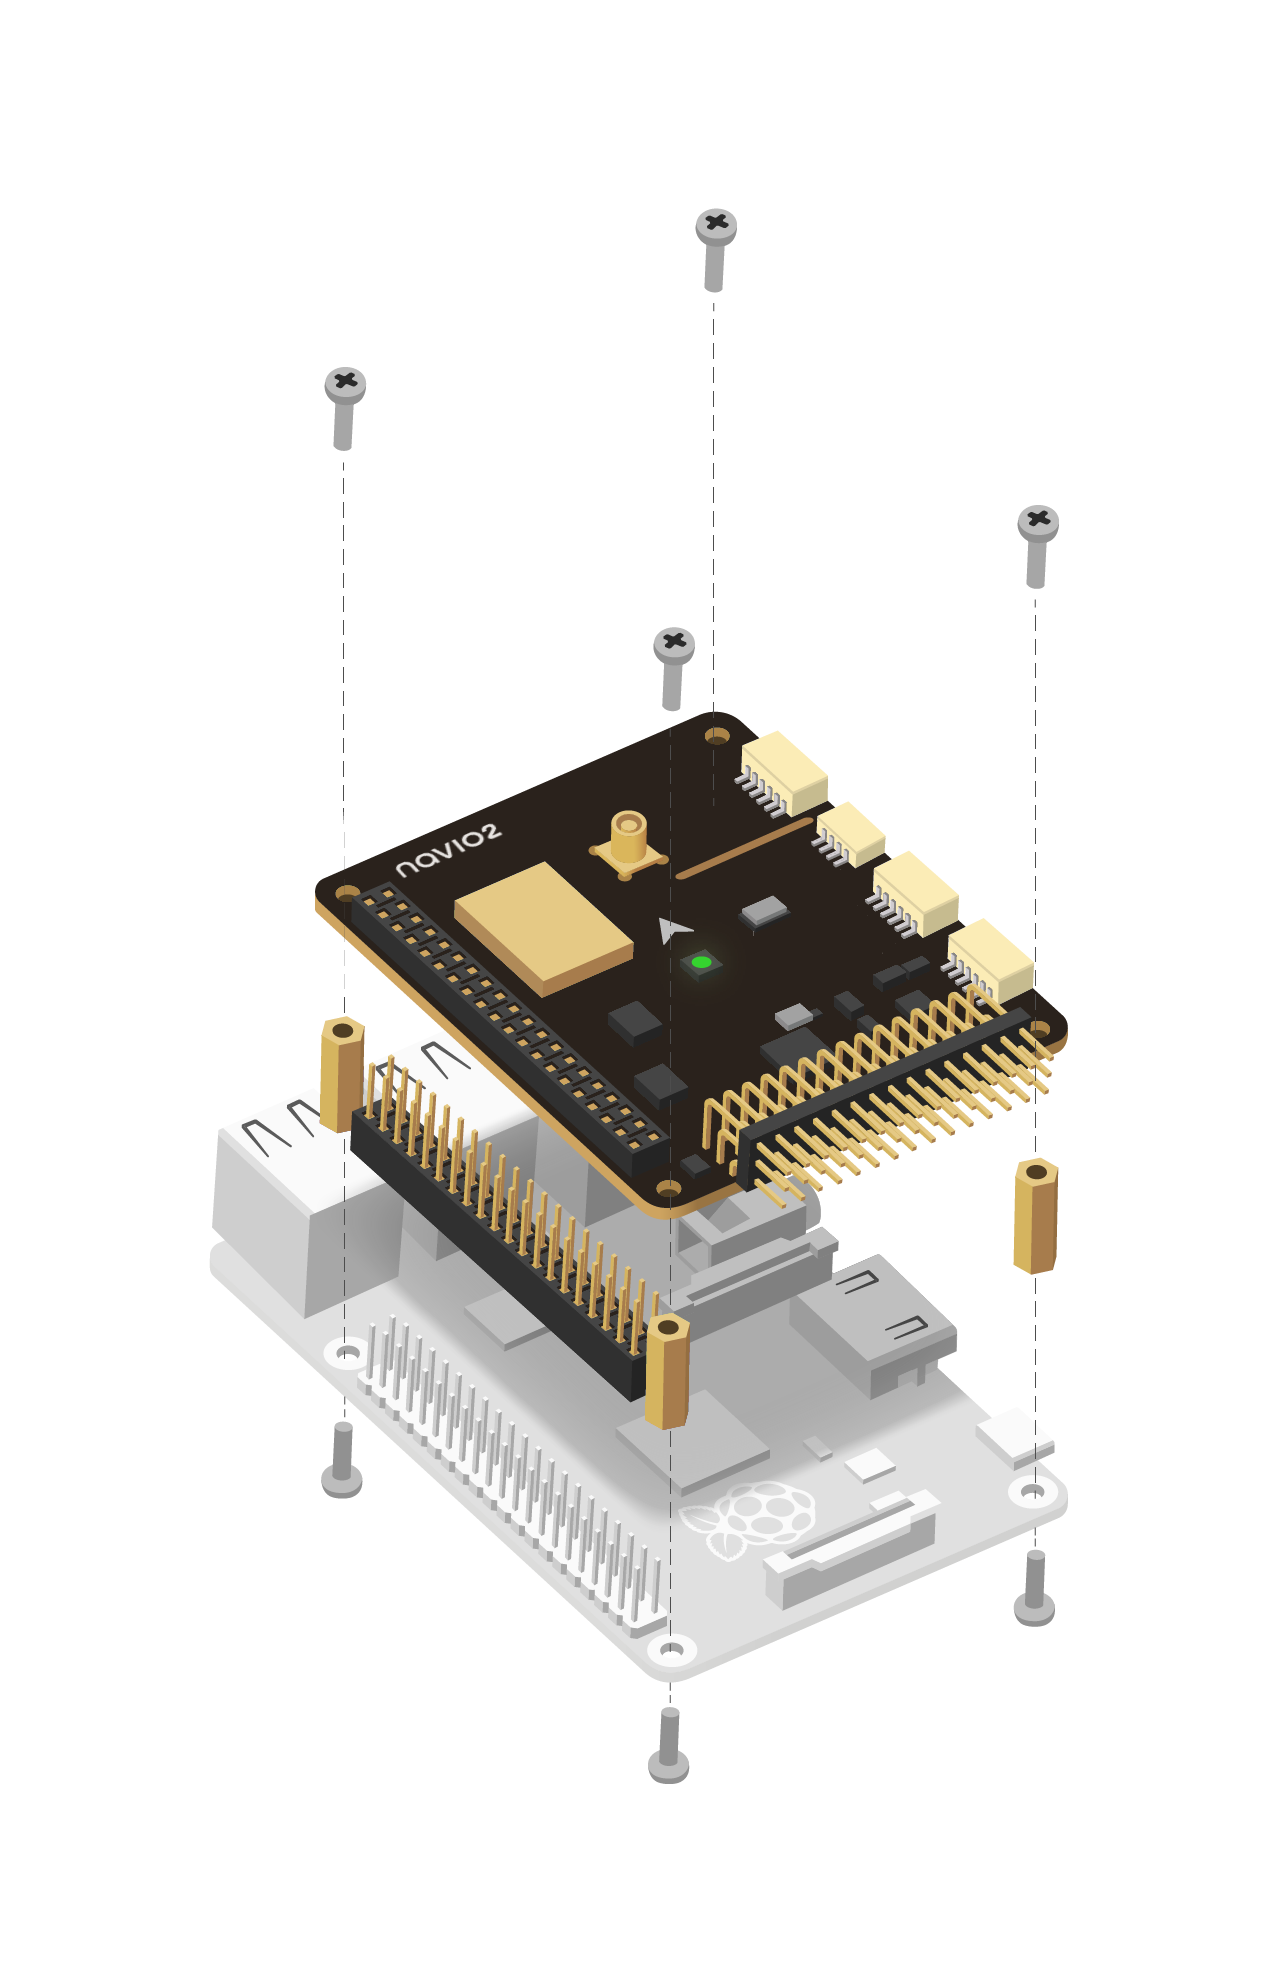
Attaching Navio2 to a Raspberry Pi
- Install spacers to the top side of Raspberry Pi and fix them with screws from the bottom.
- Connect extension header to the 40-pin GPIO port.
- Attach Navio2 to the extension header.
- Fix Navio2 using screws.
Powering Navio2
danger
All power sources should provide voltage in 4.8-5.3V range, otherwise you can damage your Navio2 and Raspberry Pi.
Navio2 has three power sources. All of them can be used simultaneously as they are protected by ideal diodes.
For testing and development purposes
Connect 5V 1A power adapter to the Raspberry Pi’s micro-USB port. Raspberry Pi will provide power to the Navio2.
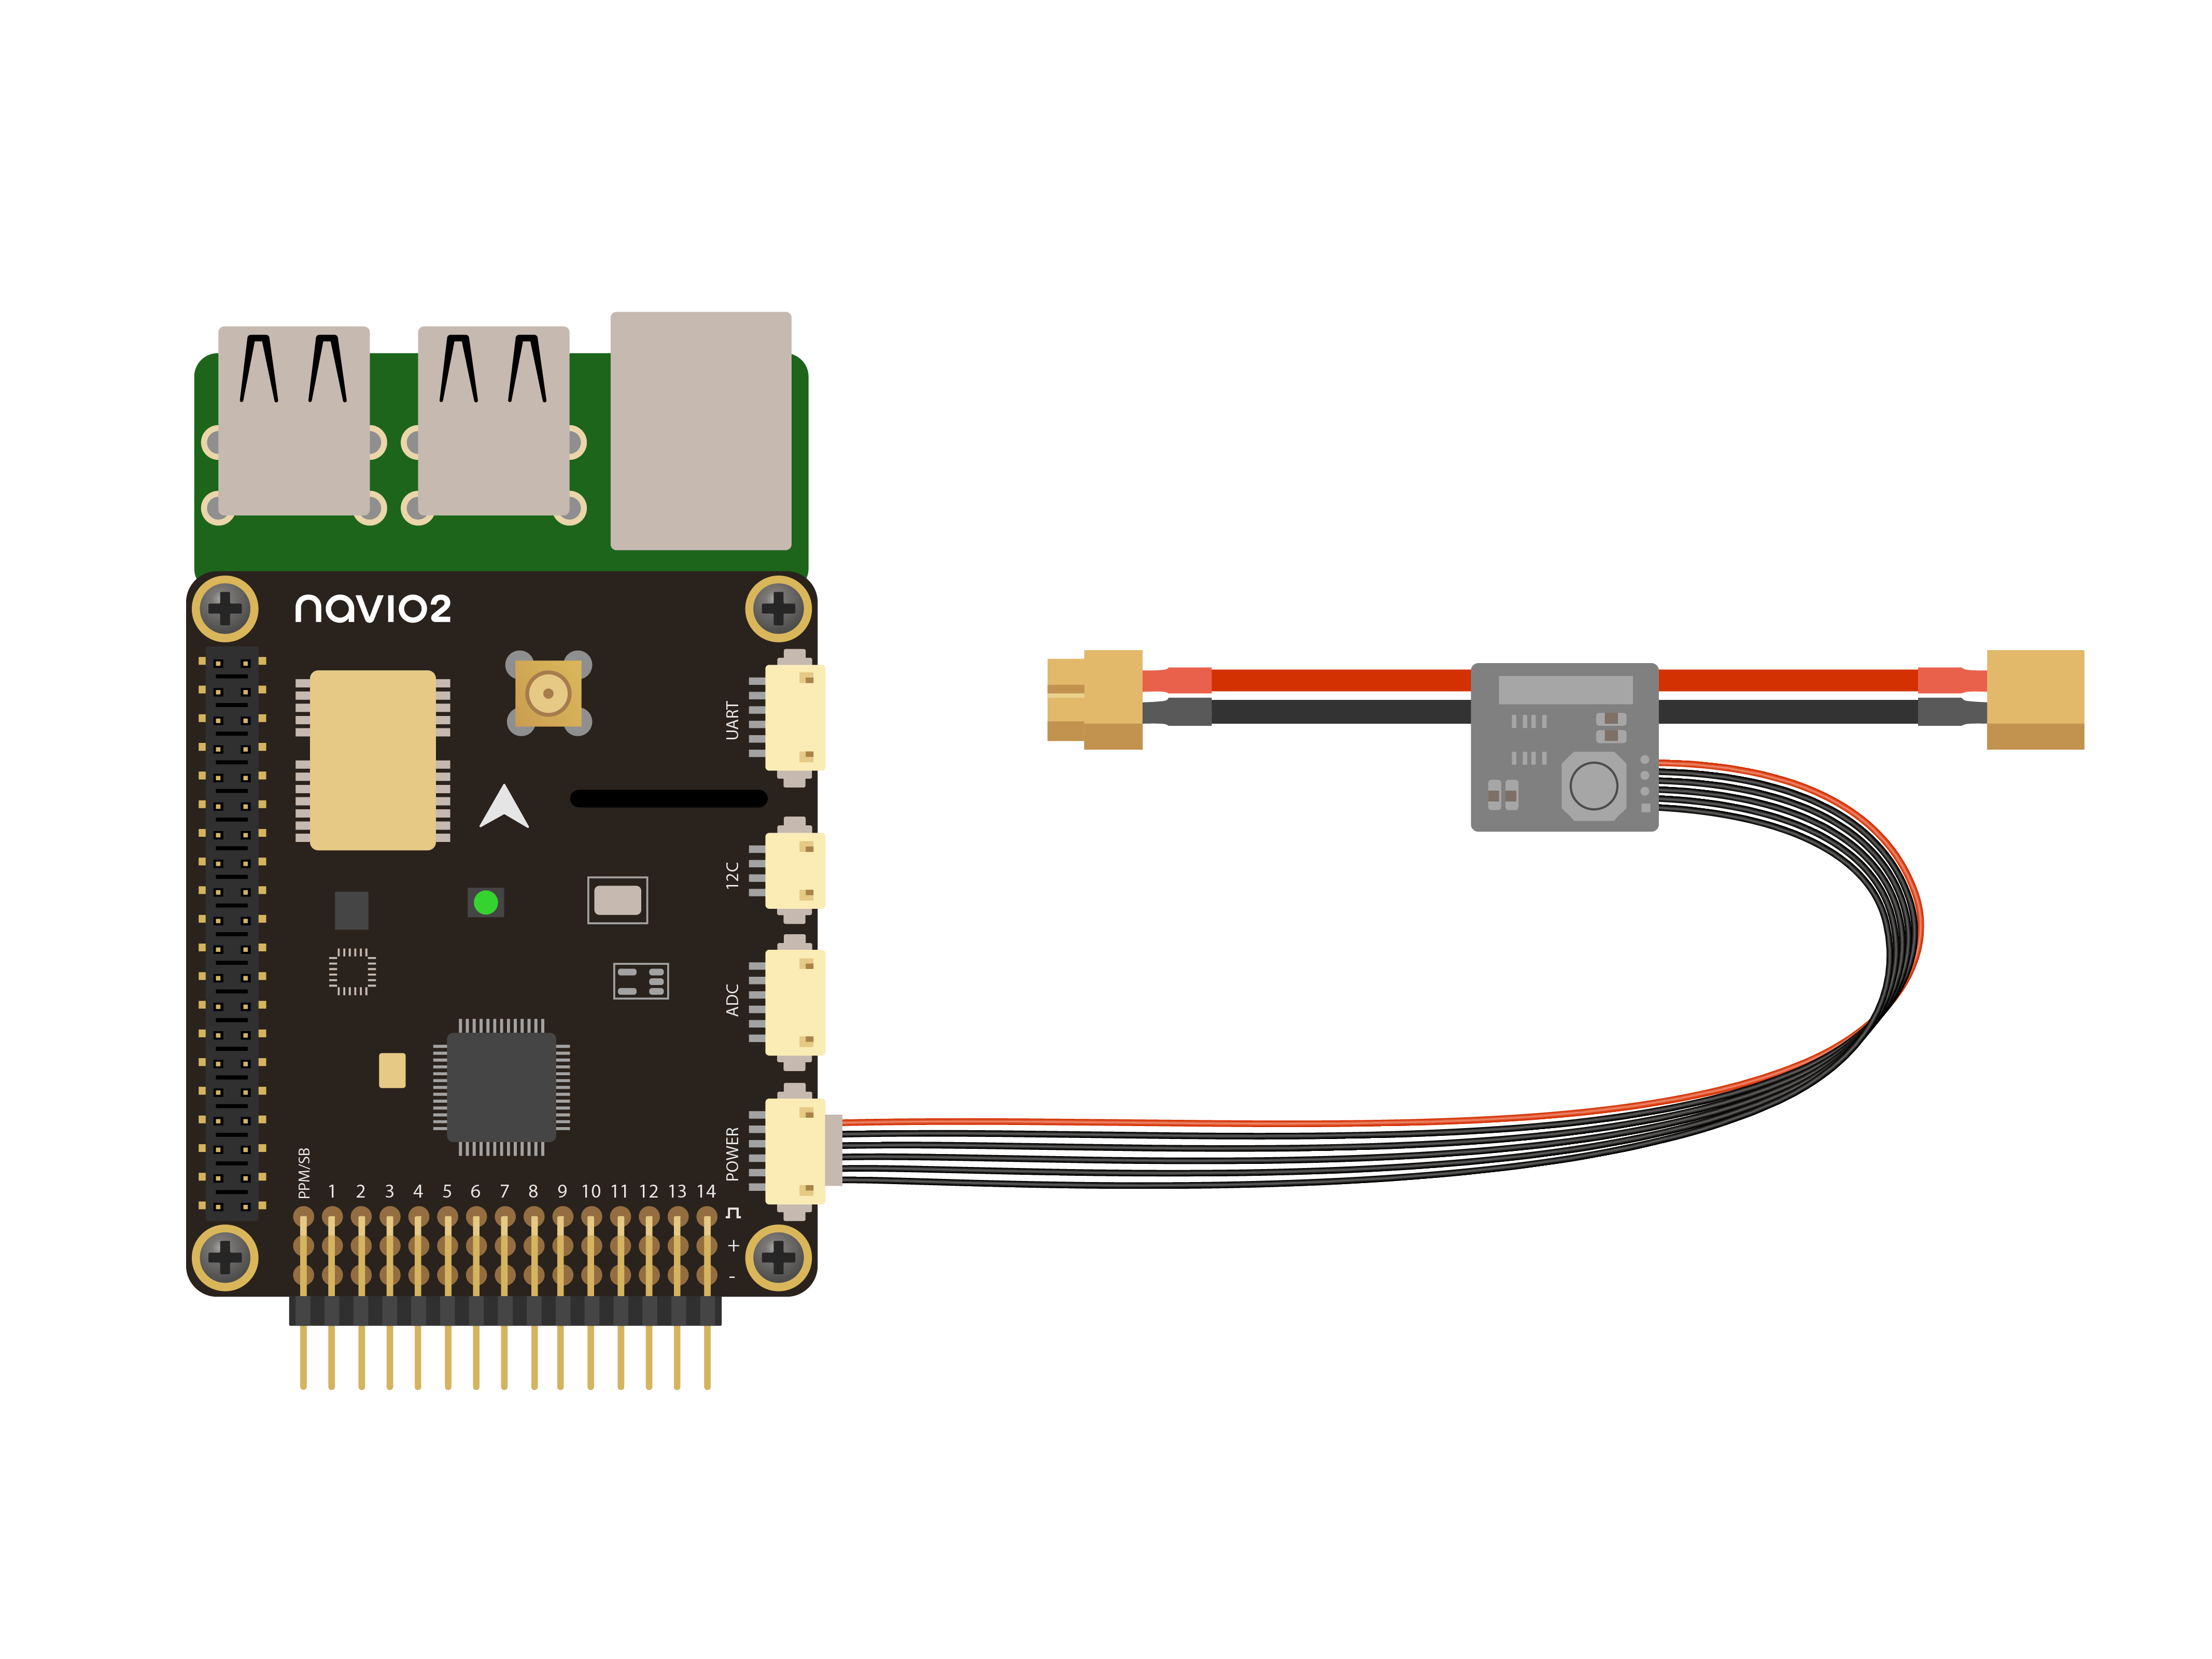
On a drone
Navio2 should be powered by a power module connected to the POWER port on Navio2. Navio2 will provide power to Raspberry Pi.
Redundancy
Navio2 will switch to power from its servo rail in case of power module failure.
Powering servo rail
Power module does not power servos. To provide power to the servo rail, plug your drone’s BEC into any free channel on the servo rail. Use BECs that provide voltage in a range of 4.8-5.3 V. If you would like to use high voltage servos, use a power separation board.
GNSS antenna
GNSS antenna should be plugged into the MCX port on top of Navio2.
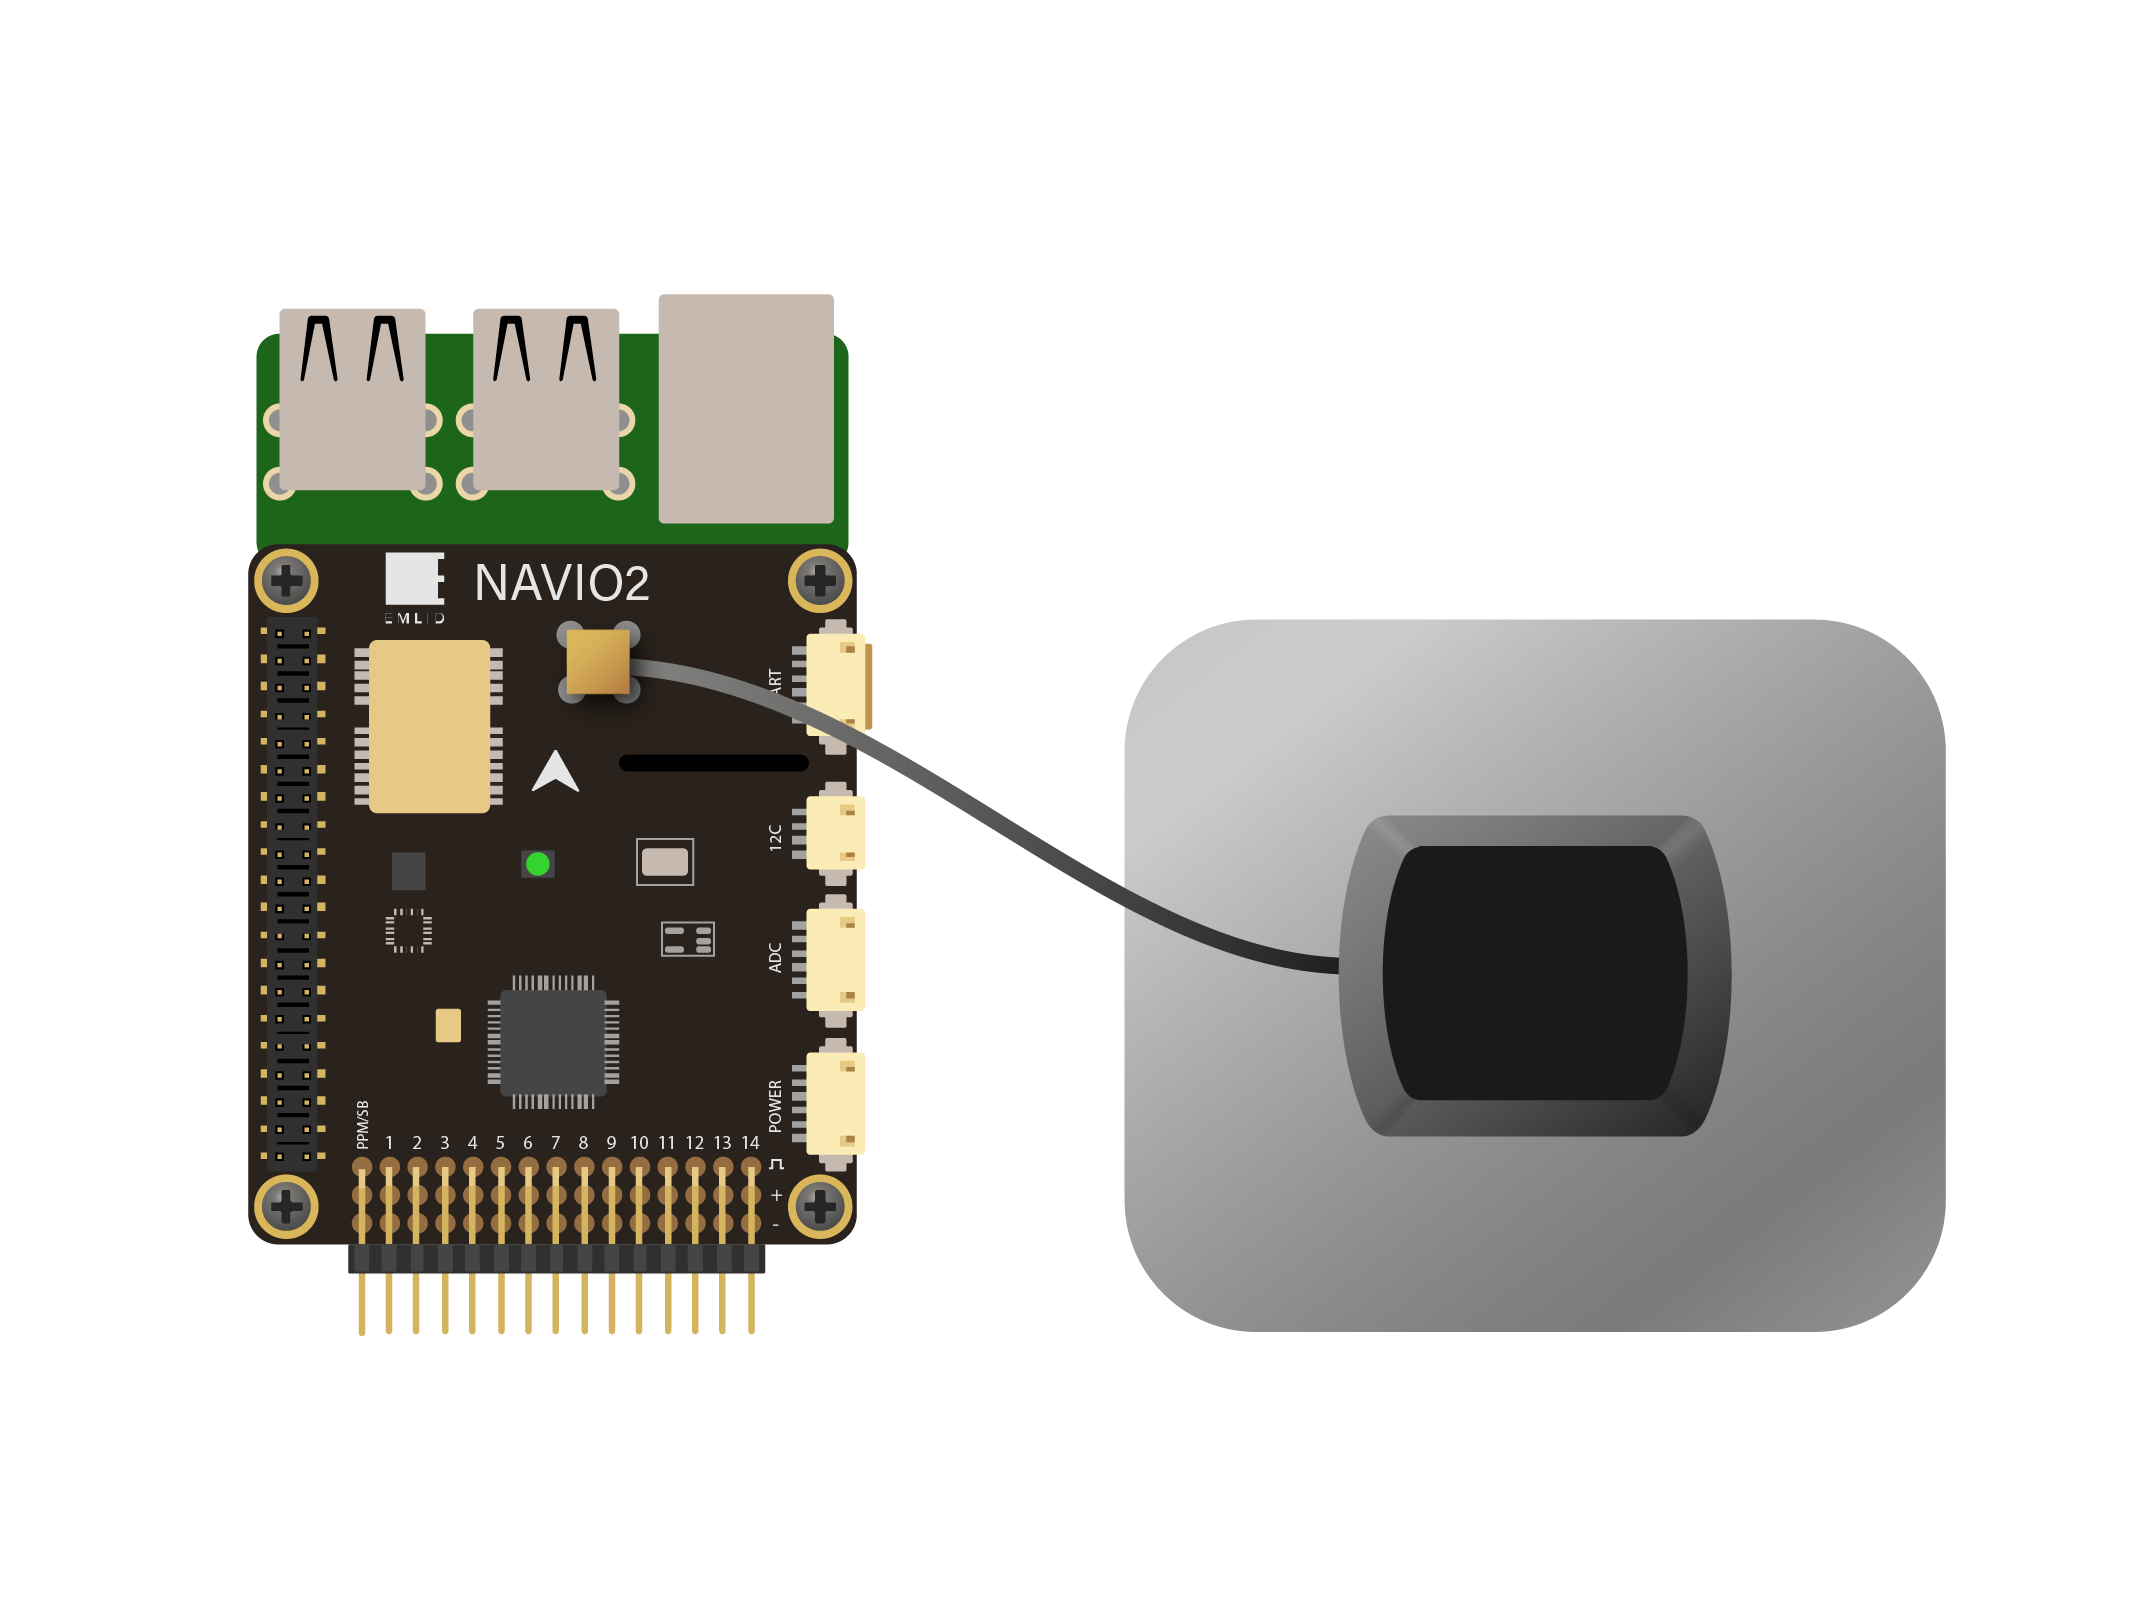
To achieve good positioning results, place the antenna observing the following conditions.
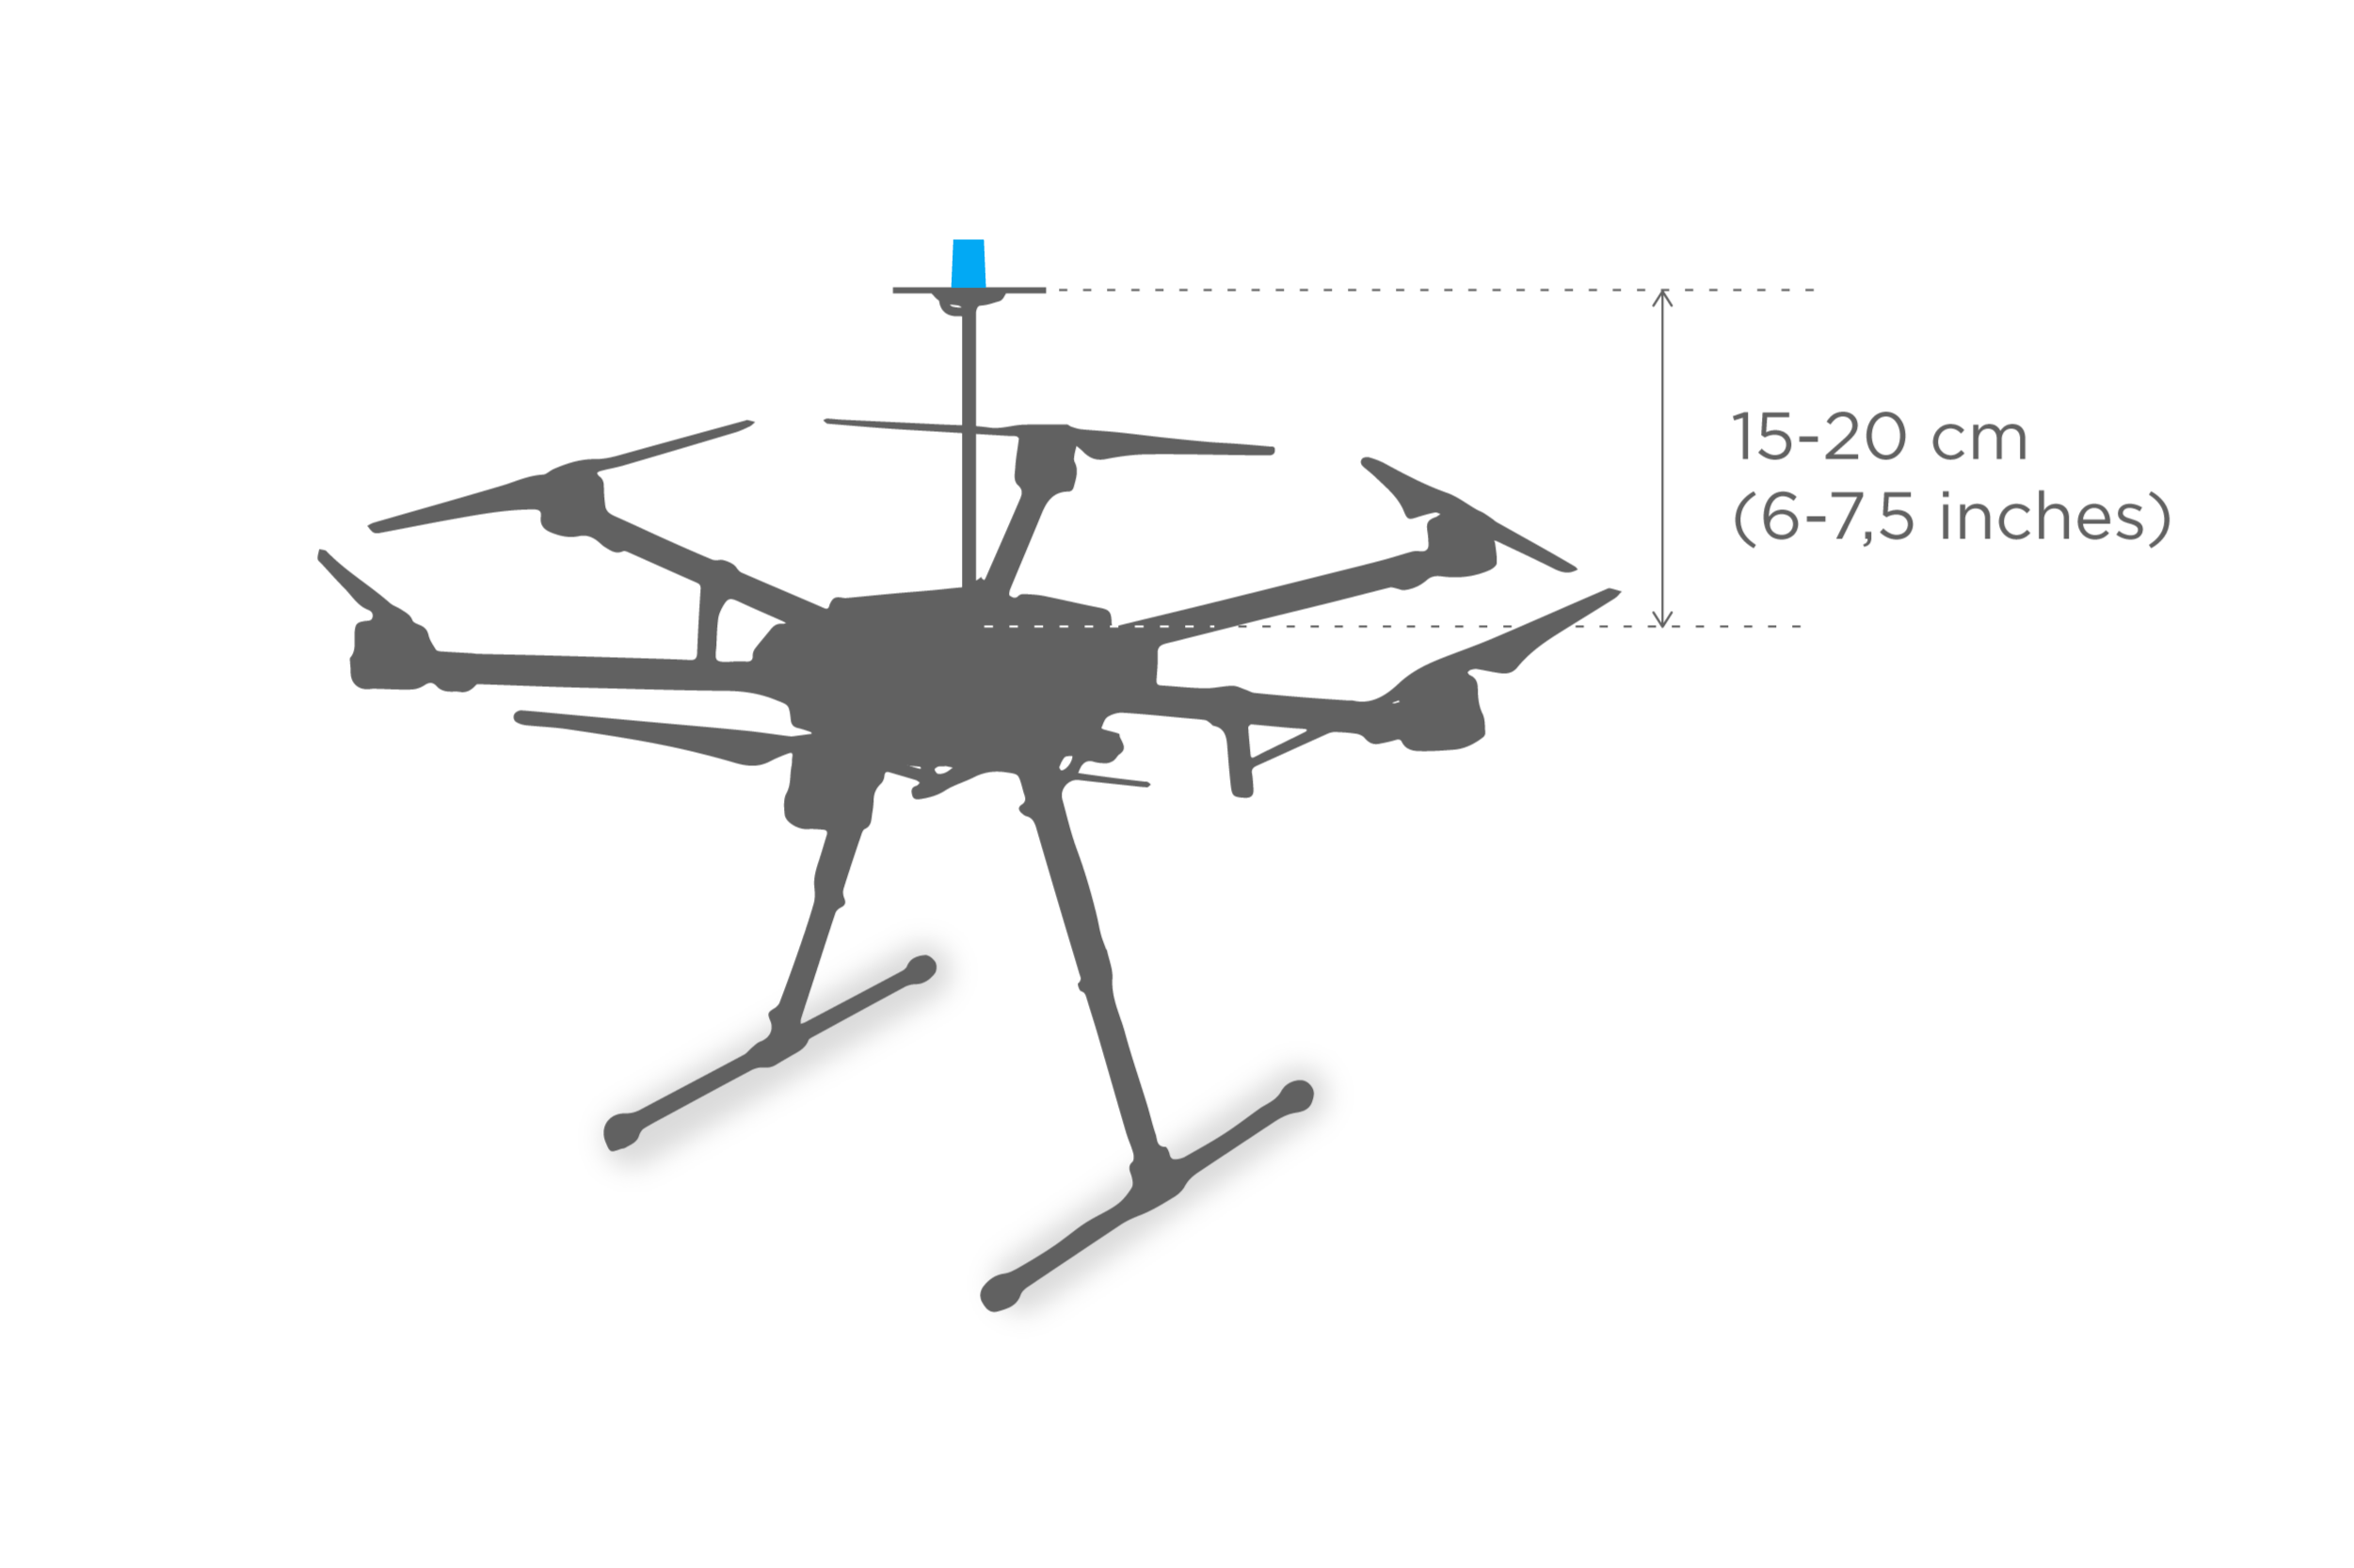
Ground plane
Use ground plane no less than 70x70 mm (3x3 inches) to reduce multipath, provide shielding and improve signal reception.
note
A ground plane is a conductive plate. It may be a piece of metal, a roof of a car, a metal roof of a building, etc.
Clear sky view without obstacles
Provide a clear sky view 30 degrees above the horizon. There should be no obstacles like buildings, trees, cars, humans, laptops, etc.
No electronics nearby
Keep all electronics as far as possible from the antenna to prevent RF noise. Electronic devices, especially ESCs, could affect the reception of the GNSS signal.
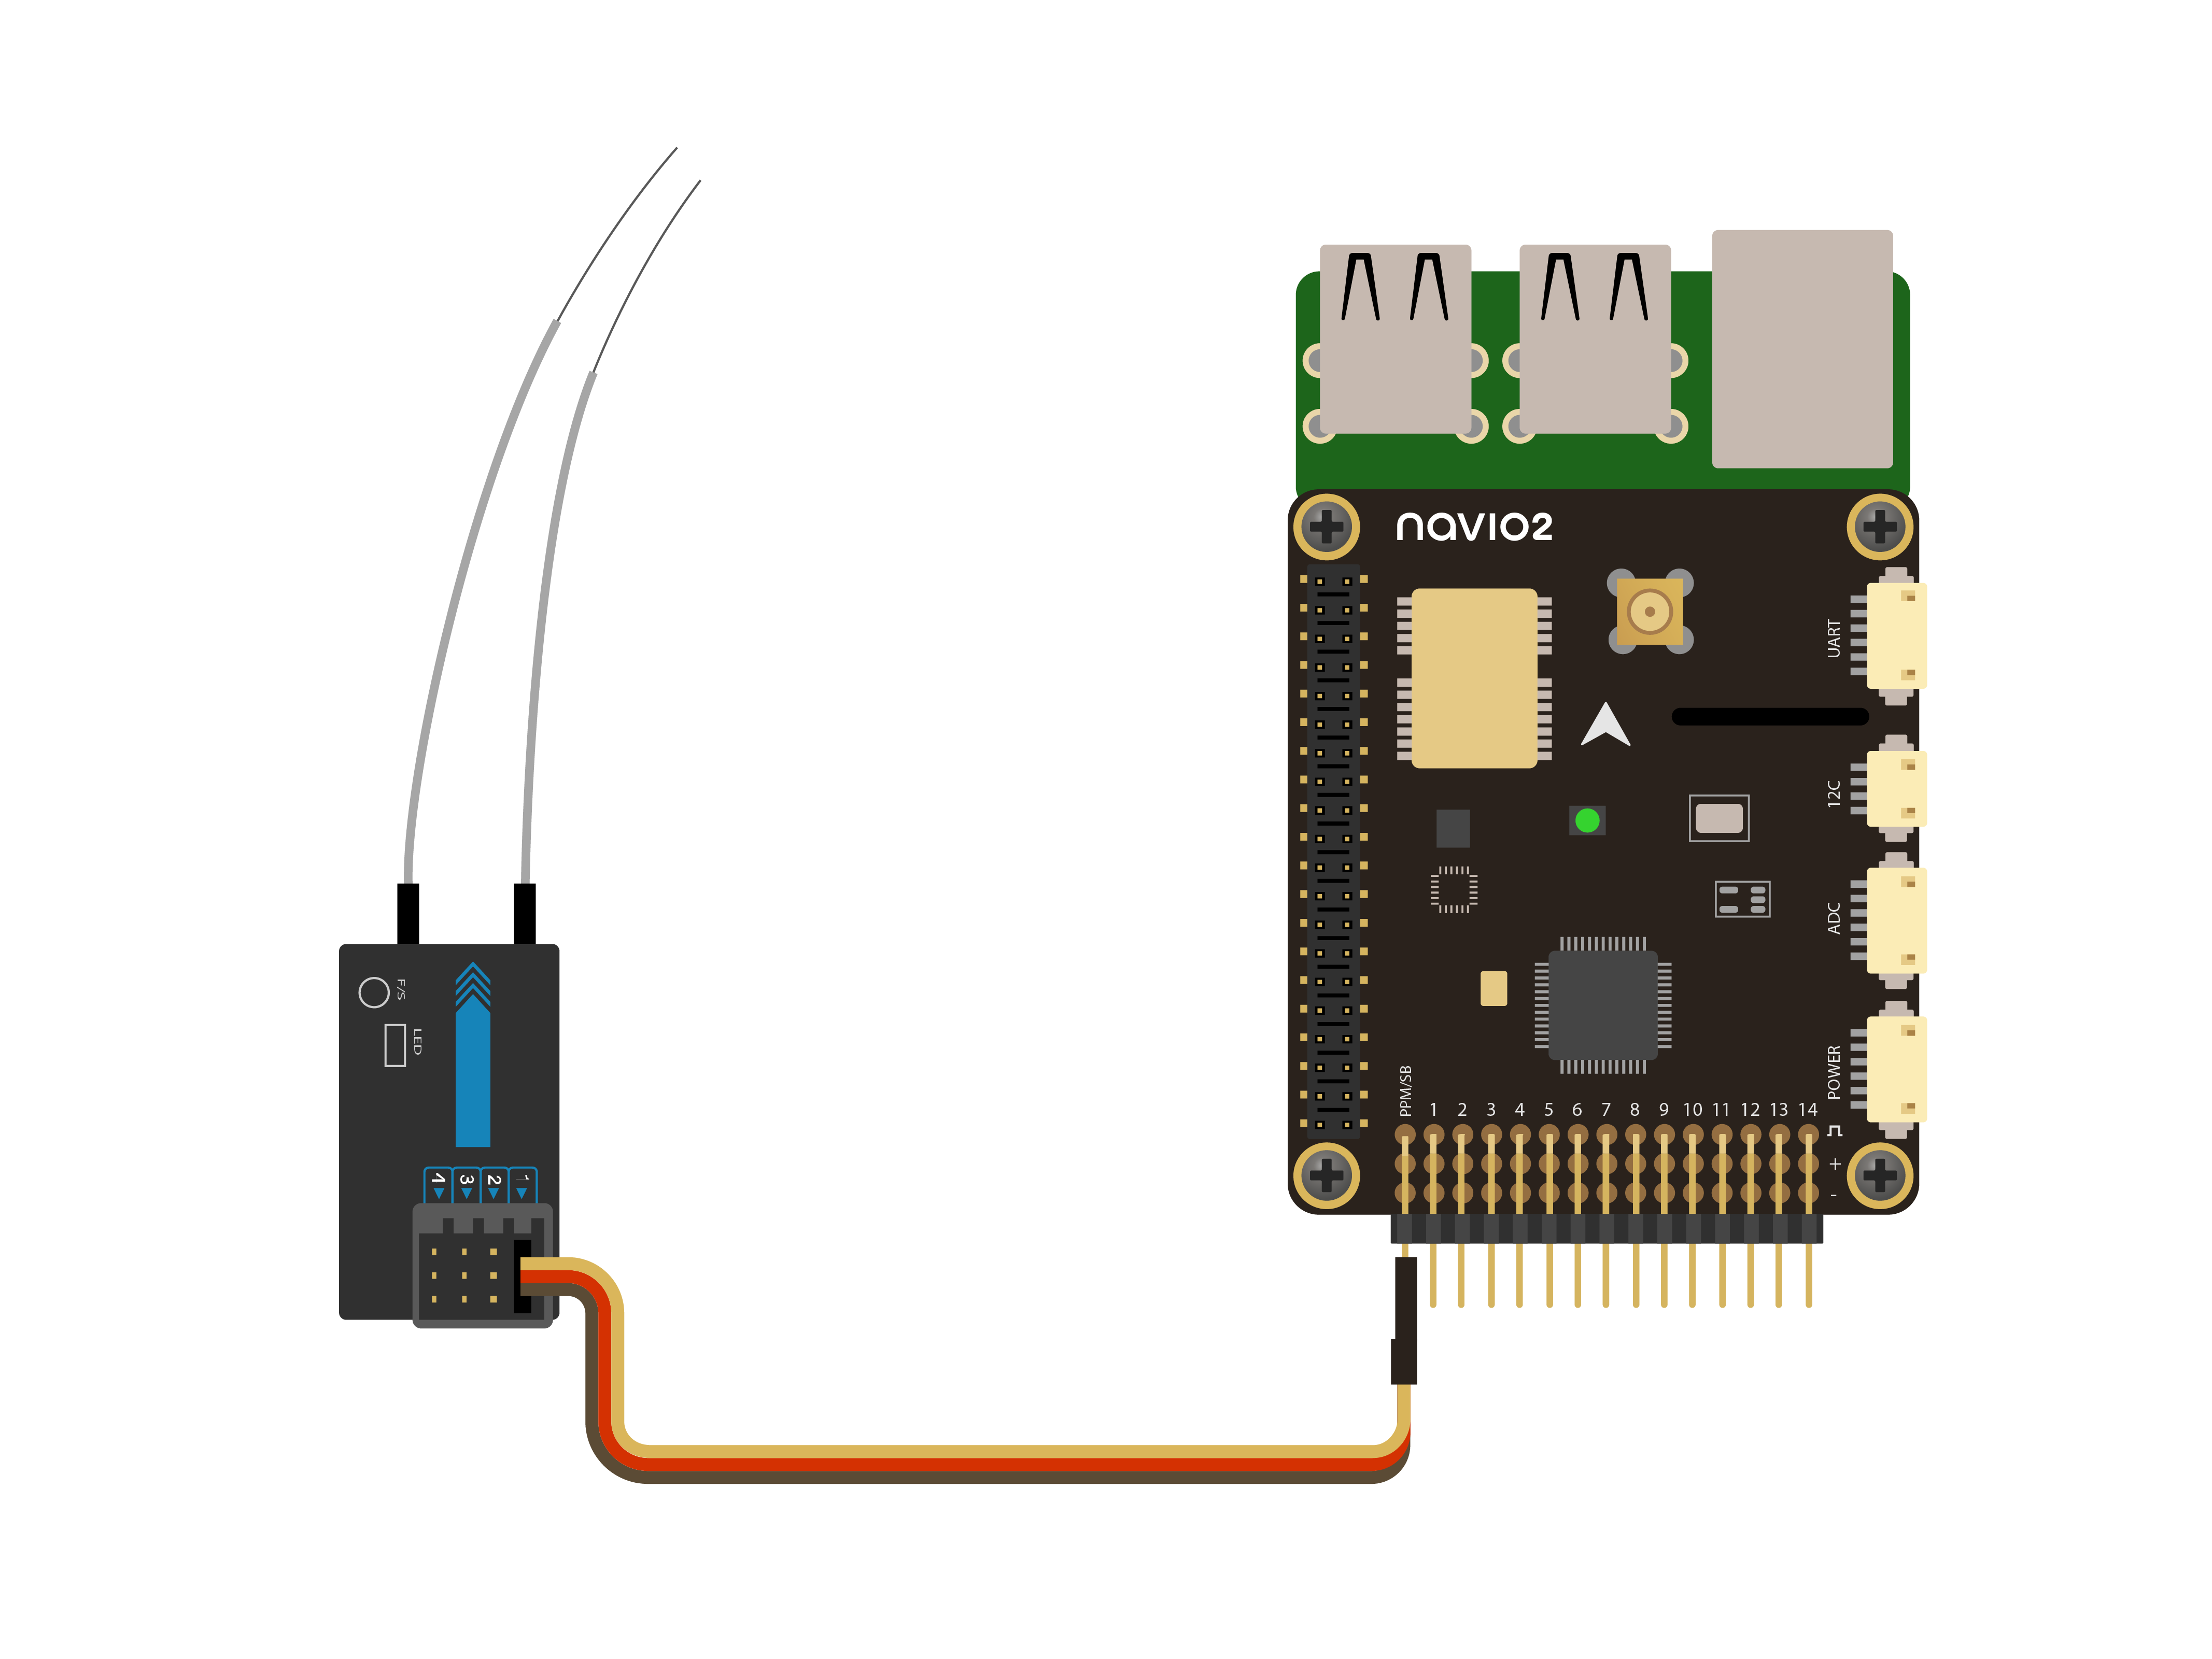
RC input
Navio2 supports PPM and SBUS signals as an RC input. To connect receivers that do not support PPM output, you can use PPM encoder. PPM receiver is powered by Navio2 and does not require power on the servo rail.
danger
Do not connect servos to the RC receiver! Servos can consume a lot of power, which RC receiver port may not be able to provide. That may lead to Raspberry Pi and Navio2 shutting down and even getting damaged.
Here are some of the receivers with PPM output:
For ACCST (most FrSky transmitters)
- FrSky D4R-II 4ch 2.4Ghz ACCST Receiver
- FrSKY V8R7-SP ACCST 7 Channel RX with composite PPM
- FrSKY D8R-XP
For FASST (Futaba & some FrSky transmitters)
FrSky TFR4 4ch 2.4Ghz Surface/Air Receiver FASST Compatible
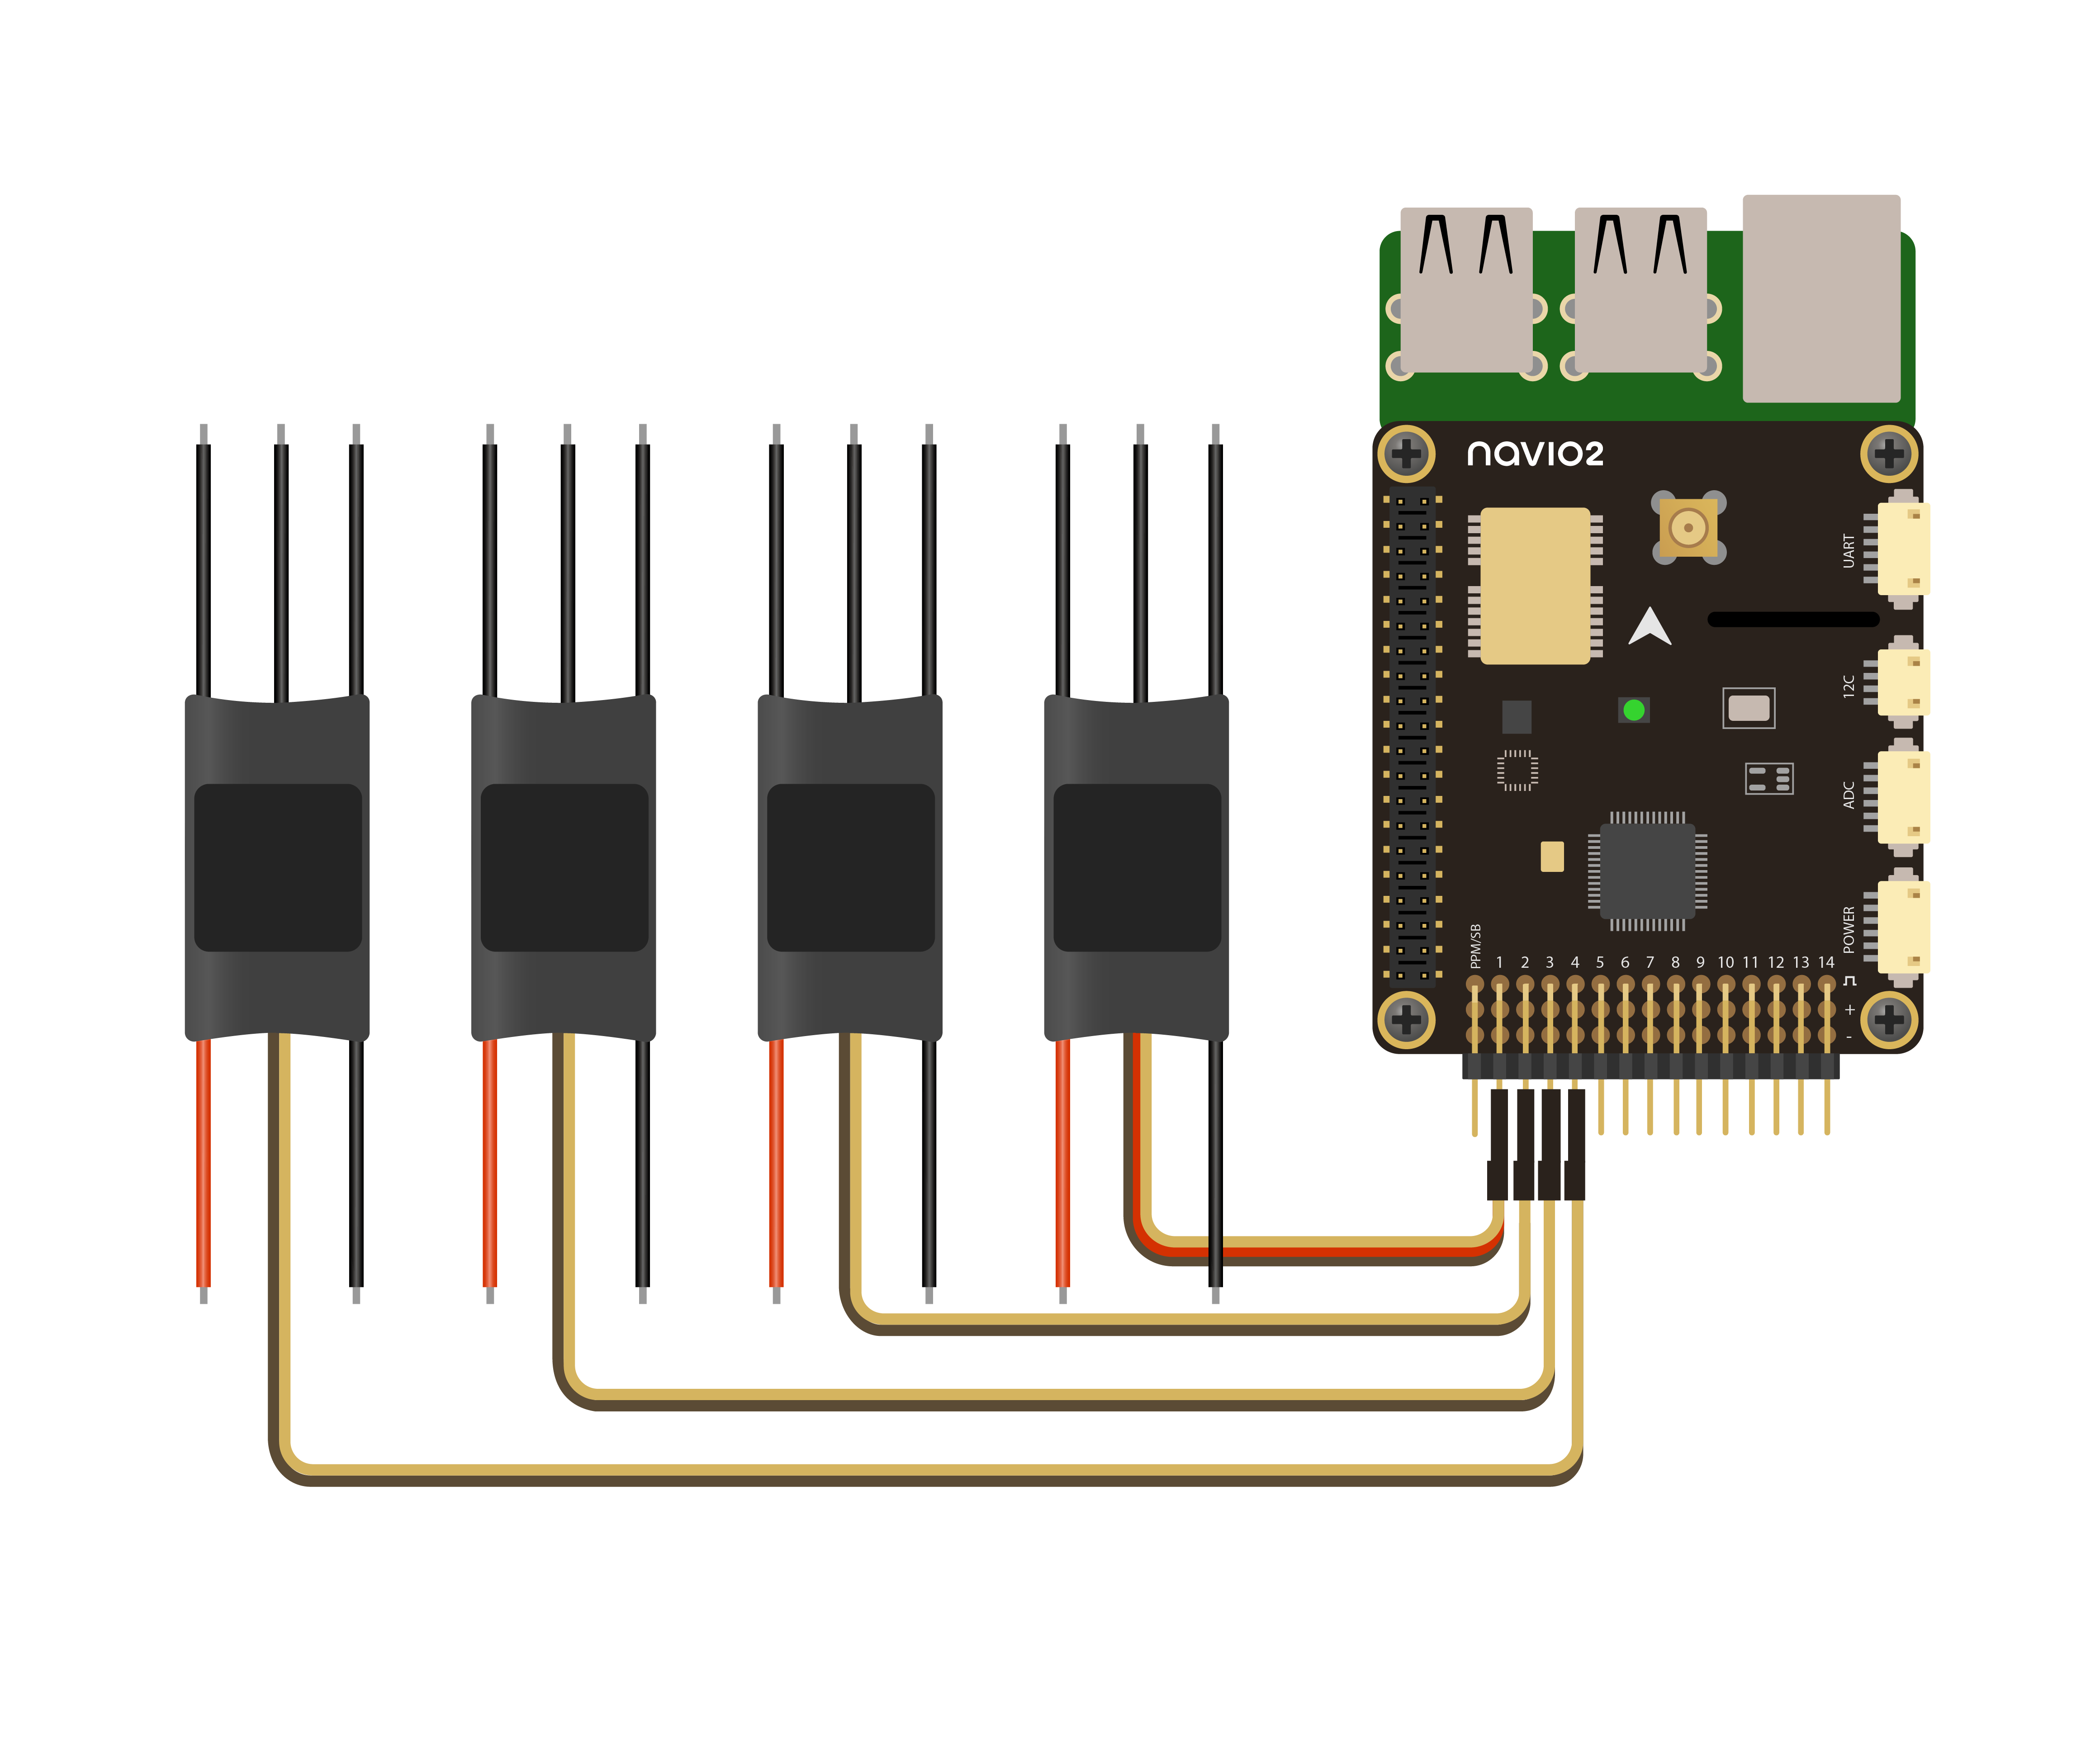
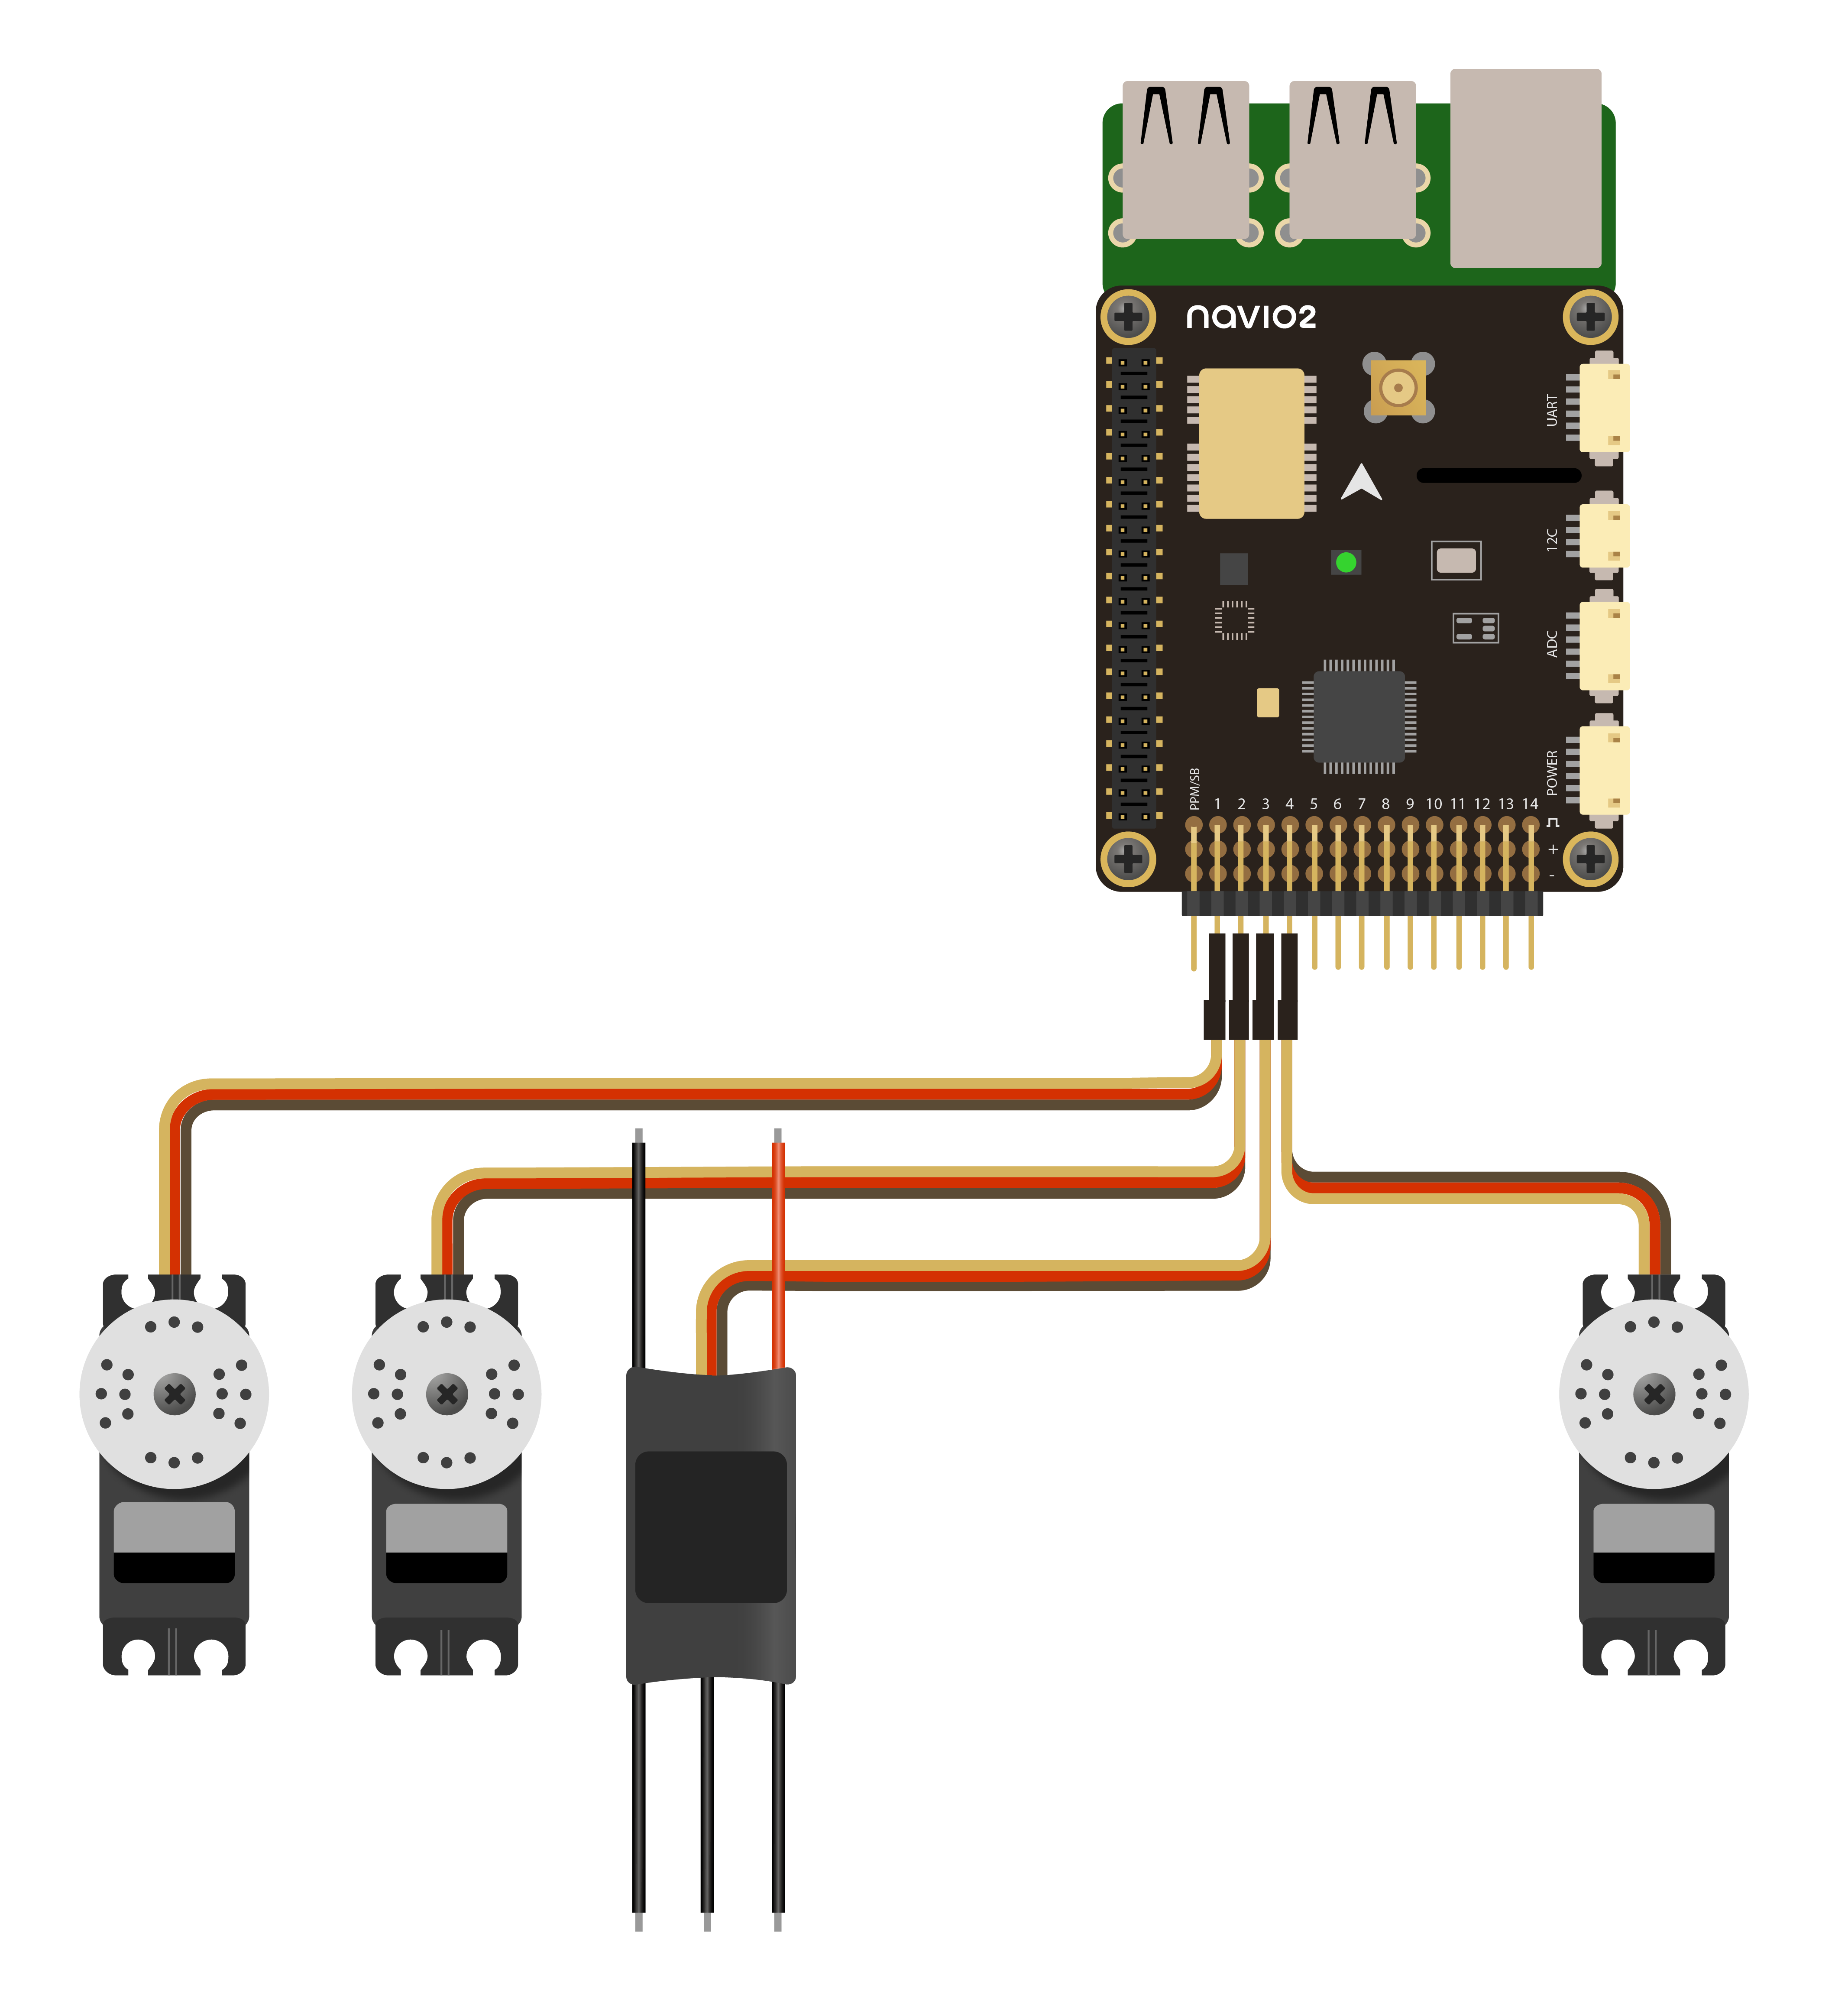
RC output
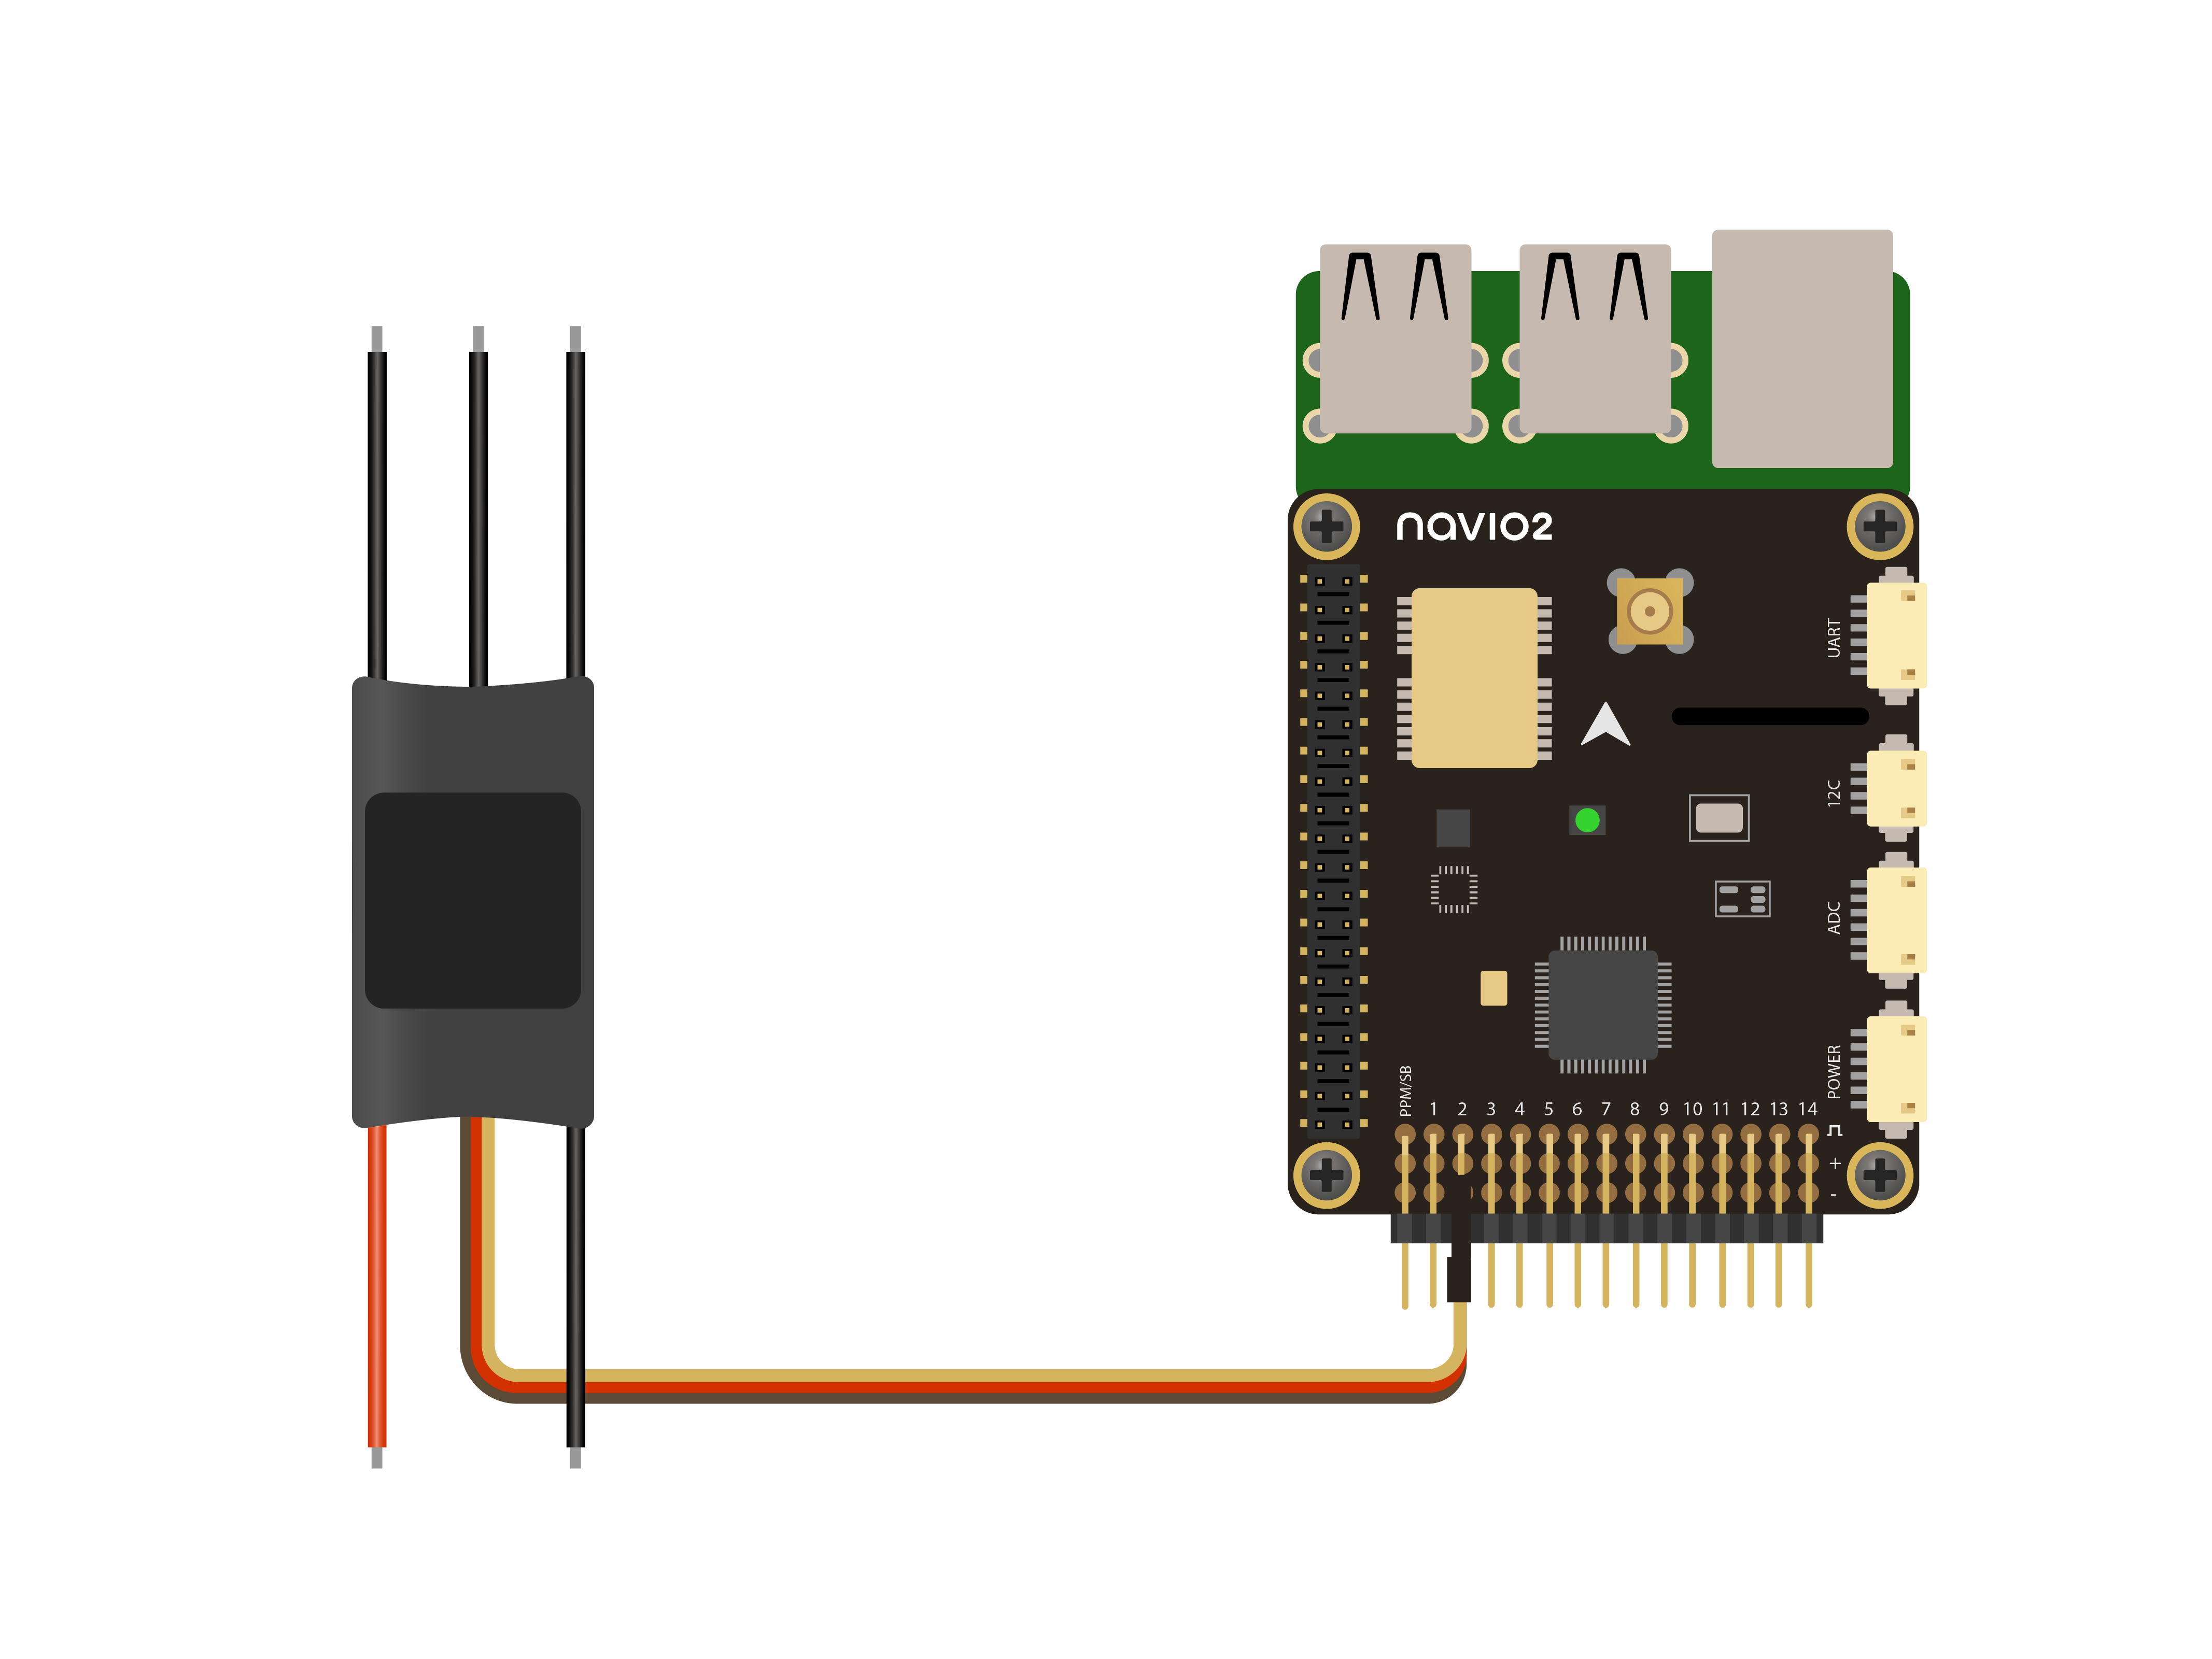
ESCs
ESCs are connected to RC outputs labeled from 1 to 14 on a 2.54 mm header.
Only one ESC power wire (central) should be connected to Navio2 servo rail, otherwise BECs built-in ESCs will heat each other.
Servos
Servos are connected to RC outputs labeled from 1 to 14 on a 2.54 mm header.
Power module does not provide power to servos. To provide power to servos, connect BEC to the servo rail. BEC will serve as back-up power supply to Navio2.
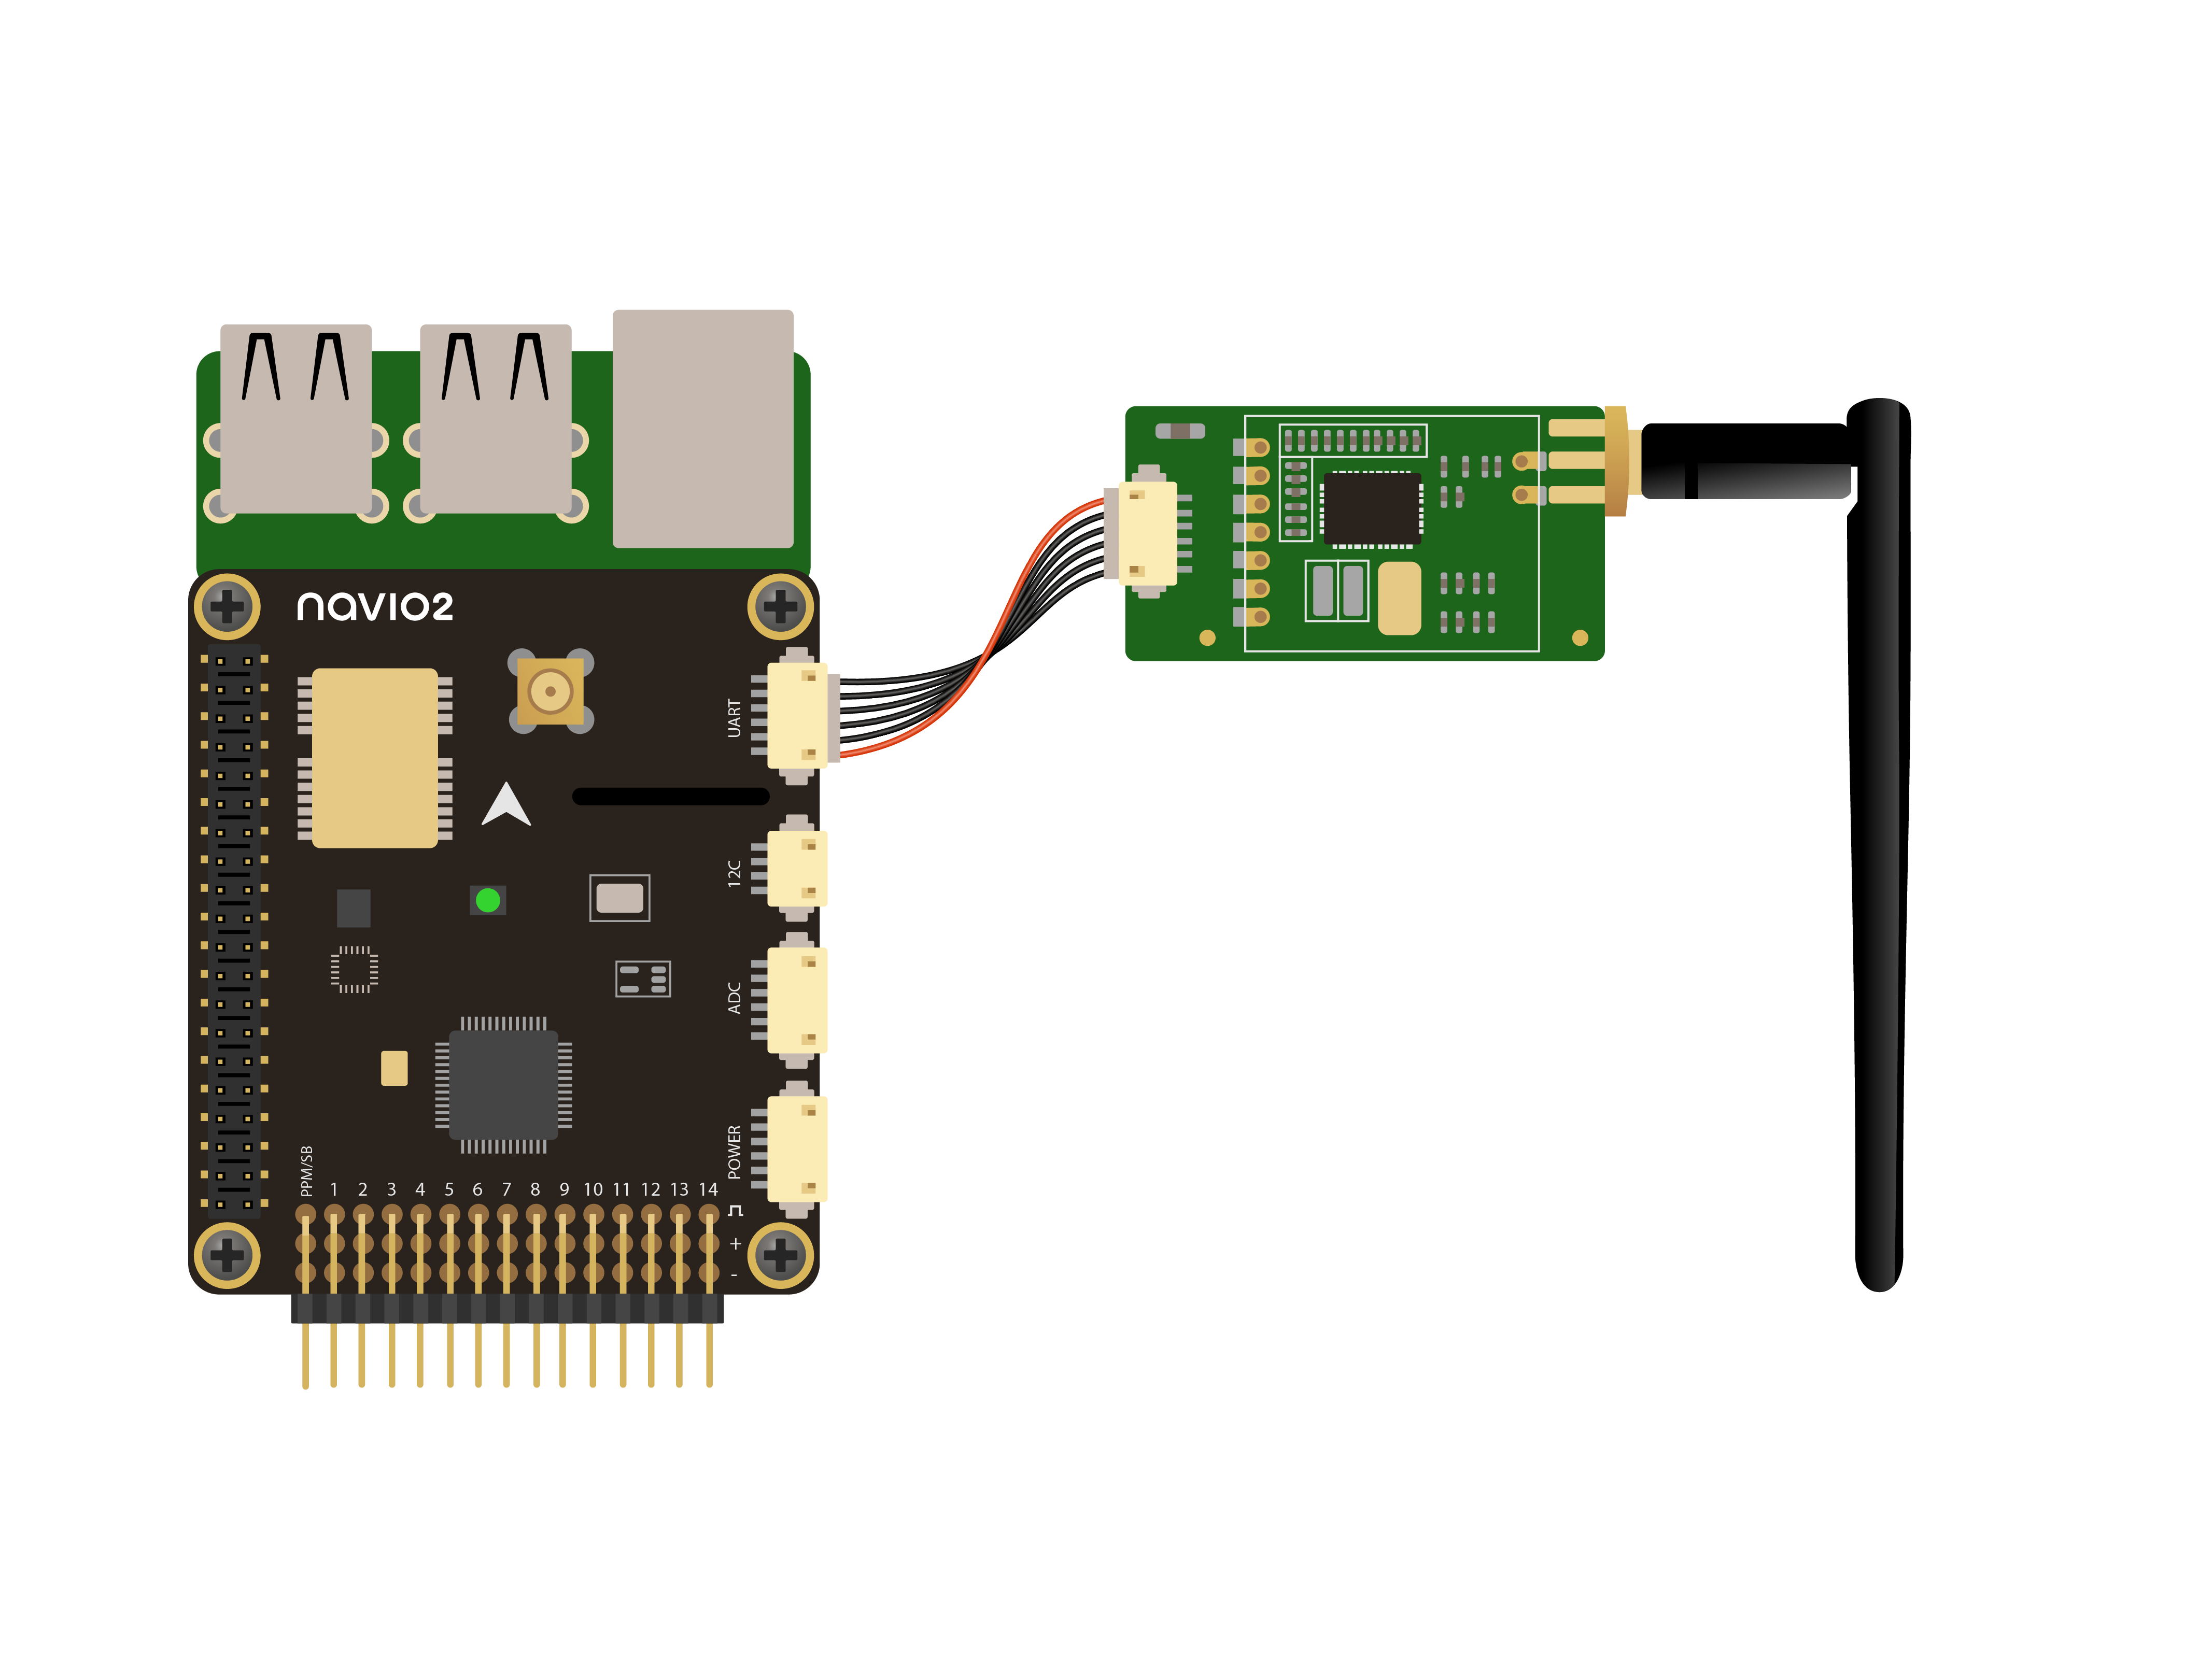
Telemetry modem
Radio modems can be connected either over UART or over USB.
UART radio
For UART port use /dev/ttyAMA0 serial.
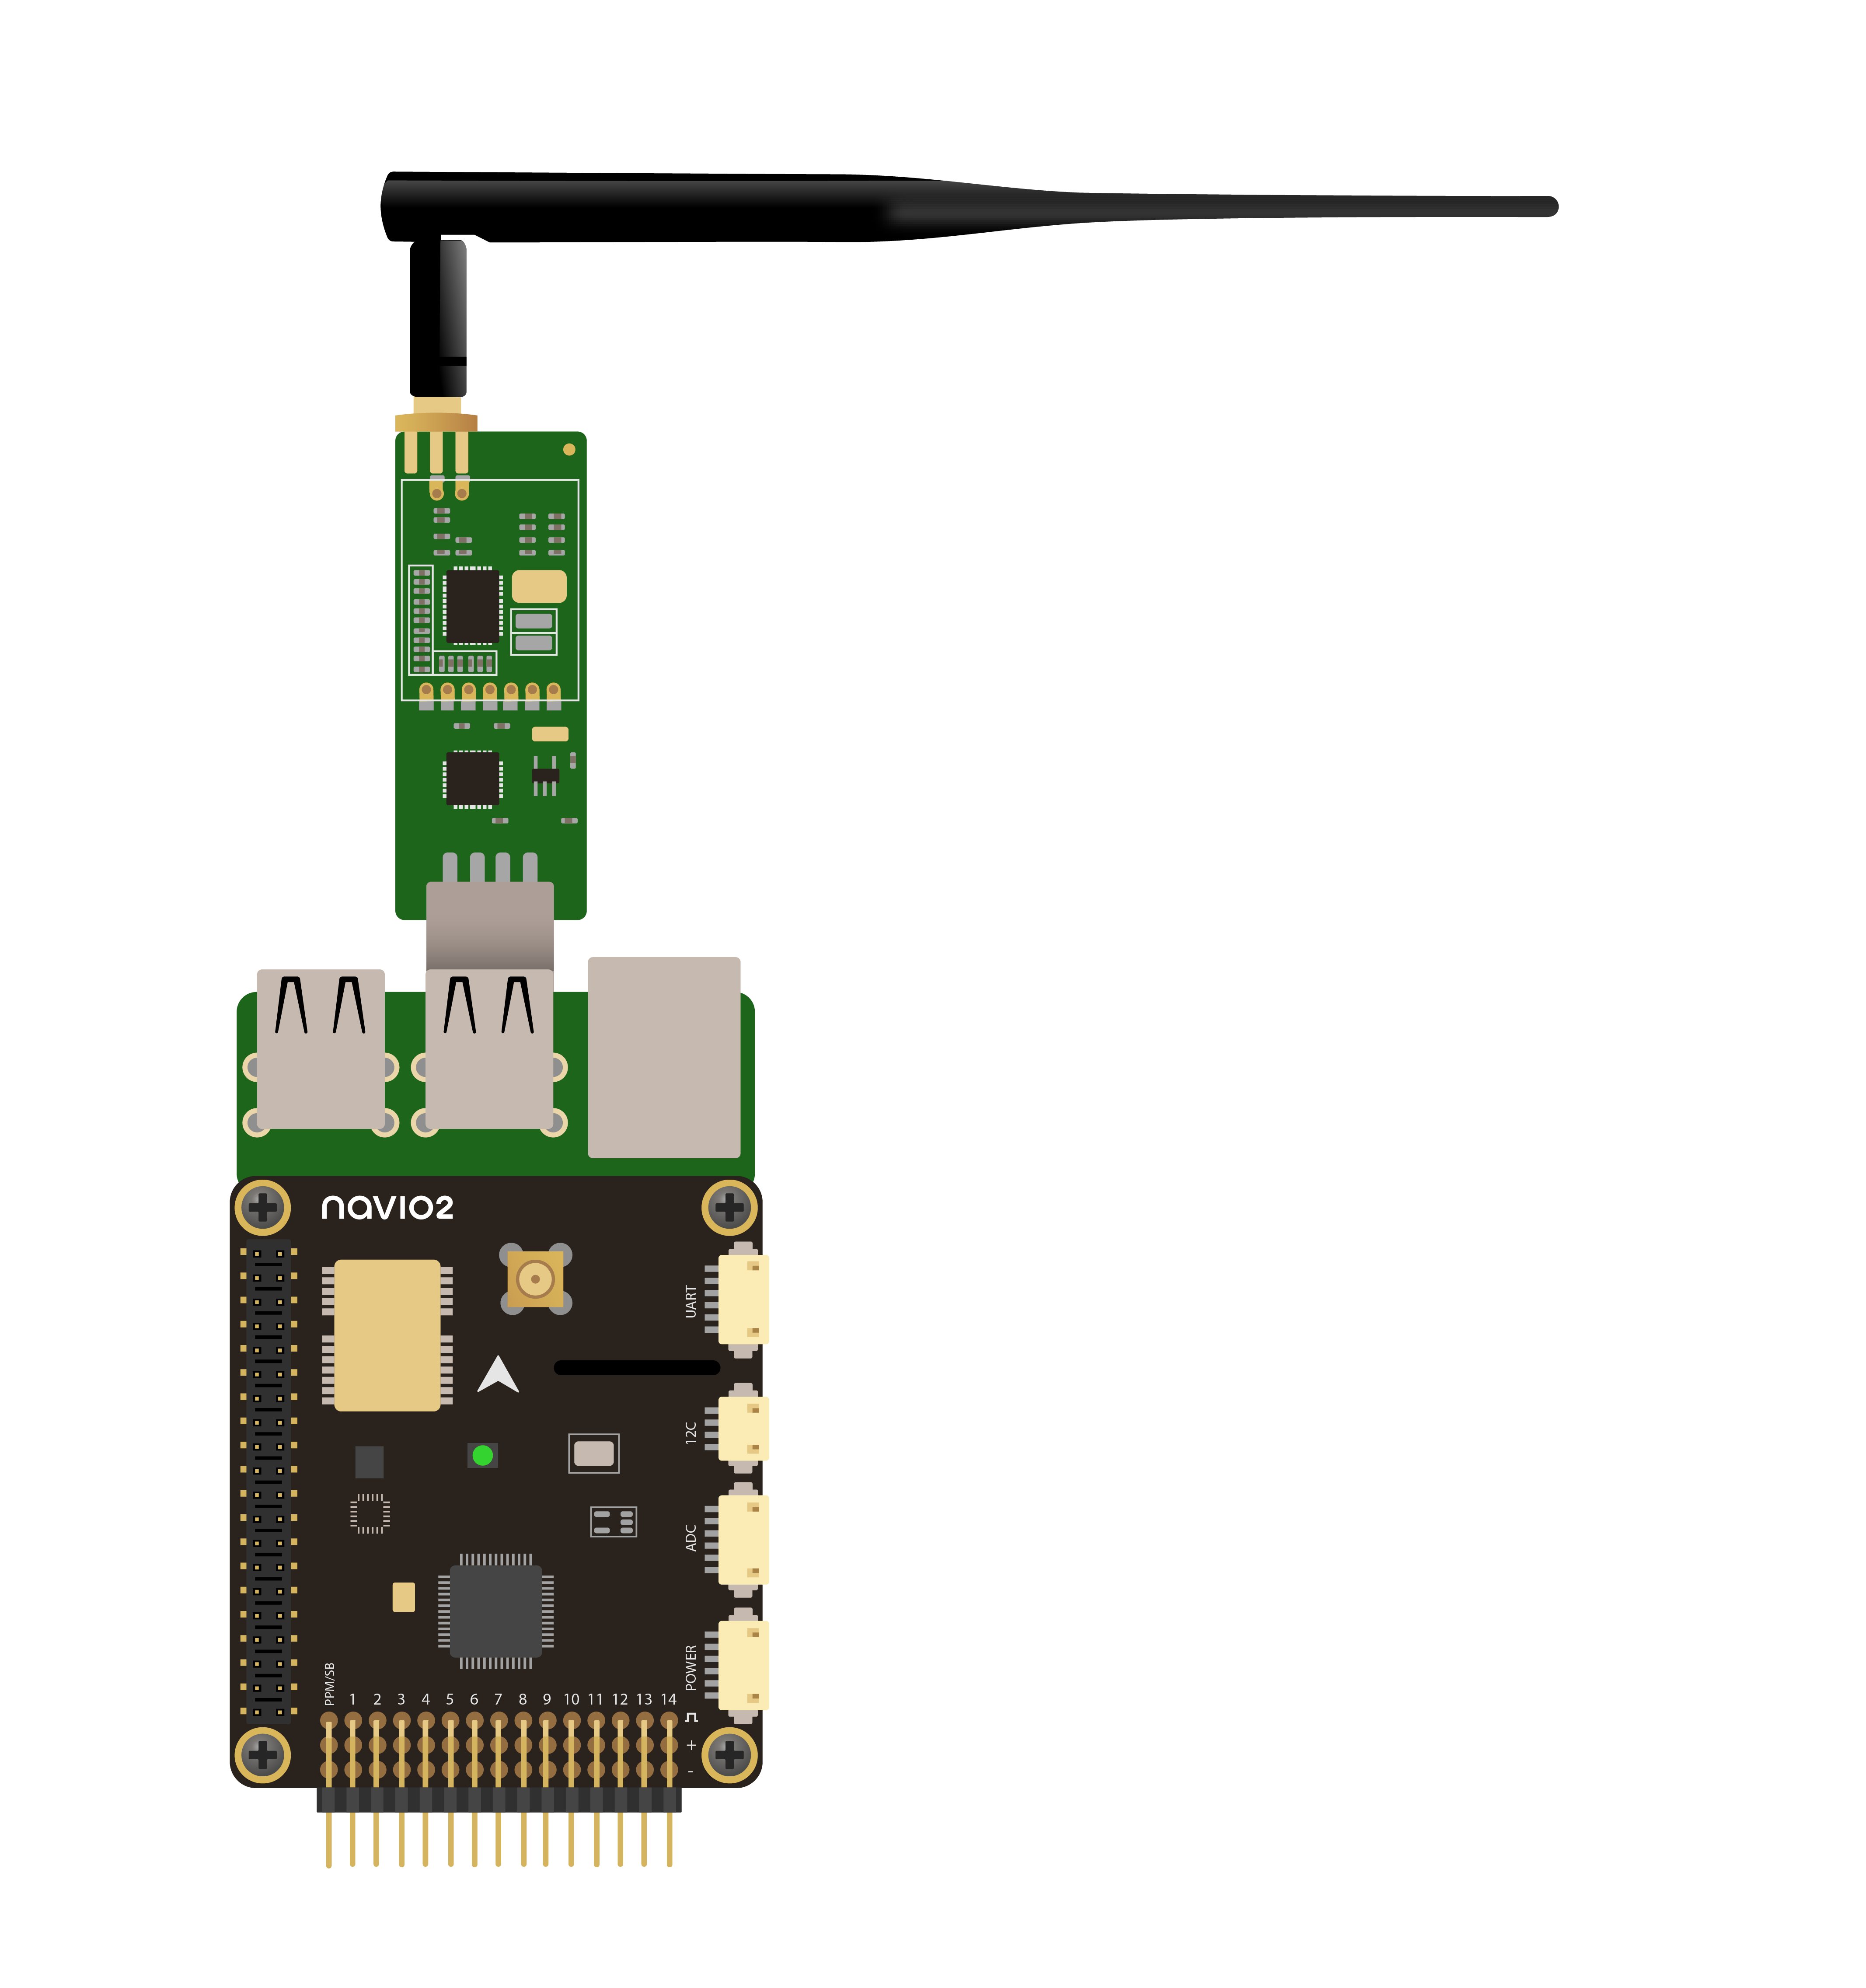
USB radio
Use /dev/ttyUSB0 virtual serial port for USB.
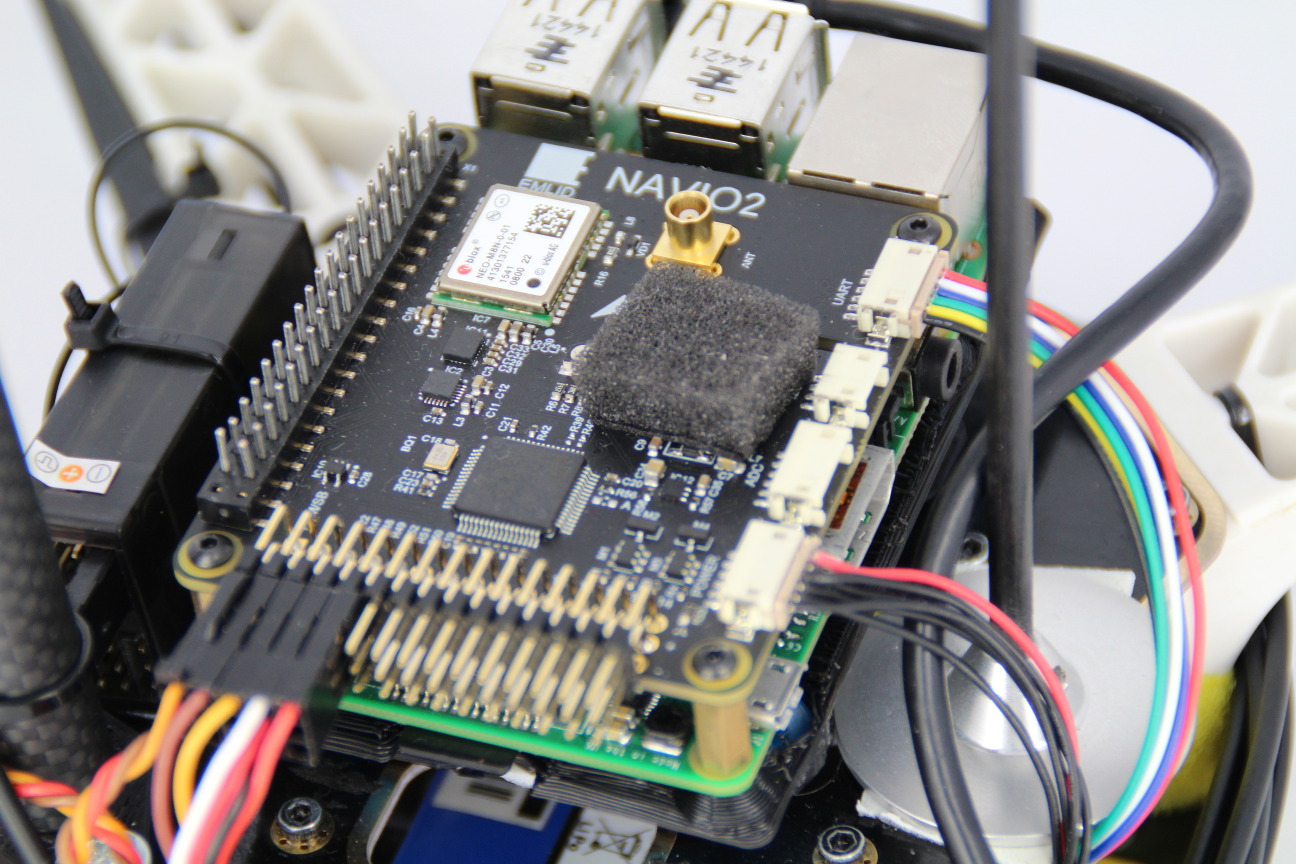
Barometer UV protection
MS5611 barometer (steel cap IC) is sensitive to UV light and might report sudden jumps in altitude under sunlight. It is very important to cover it with a piece of open cell foam (something like microphone fabric) or put autopilot in a protective case to protect it both from sunlight and airstreams.
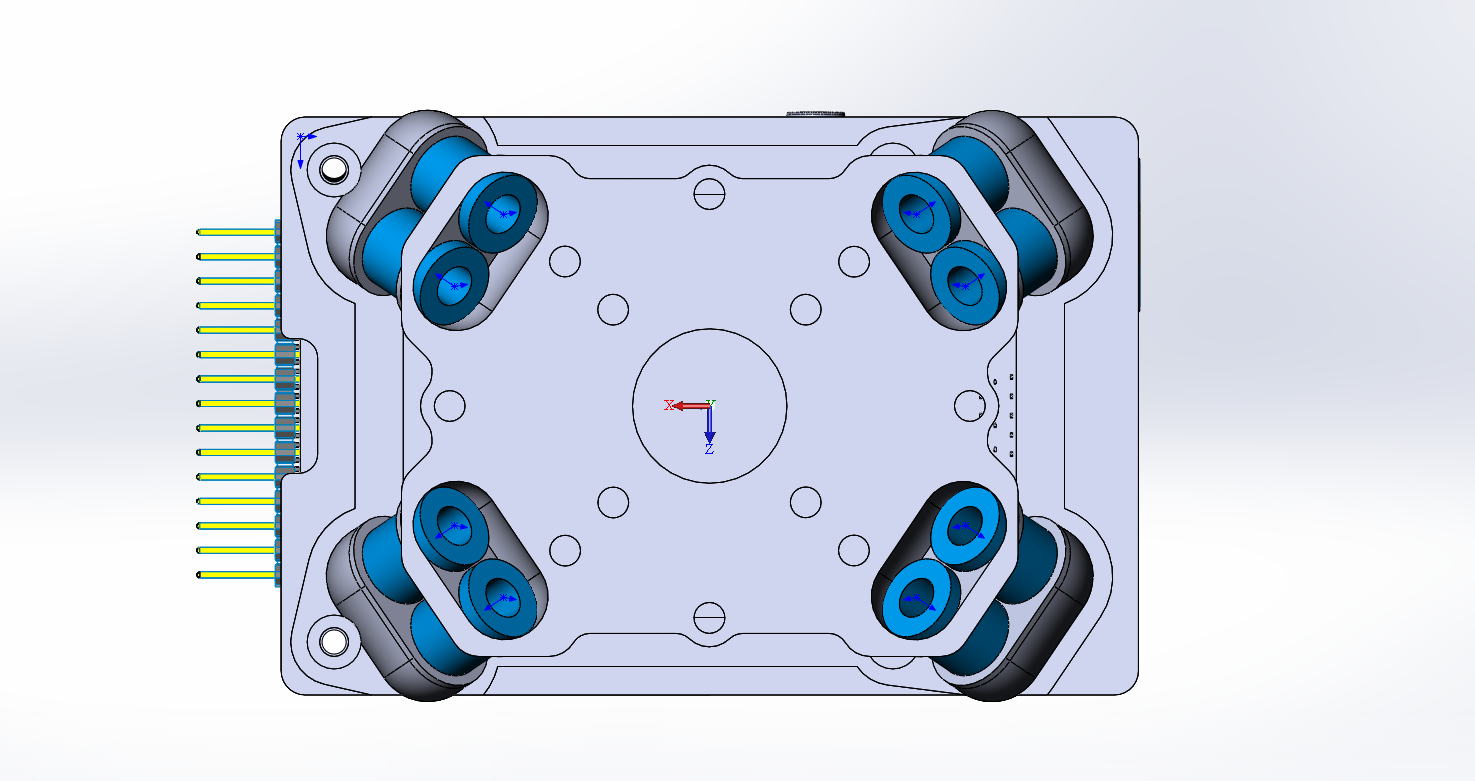
Anti-vibration mount
We have designed an anti-vibration for Navio that can be easily 3D printed. It significantly simplifies mounting and eliminates vibrations.
Bottom view:
Anti-vibration with Navio2 mounted on frame:

STL Files:
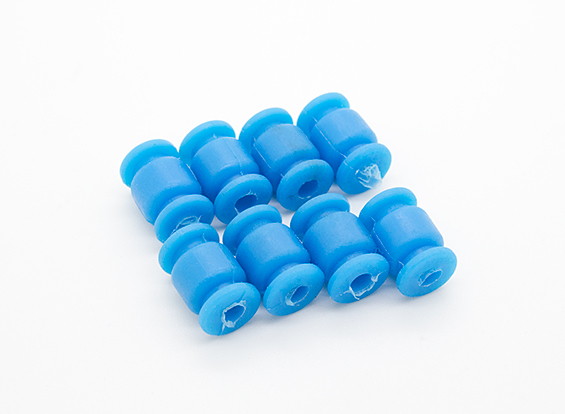
You will also need 8 blue vibration damping balls.