ROS
Emlid Raspbian image comes with pre-installed ROS.
Basic understanding
What is ROS?
Robot Operating System is an endeavor of thousands of roboticists around the globe to make development of new robots easier. ROS is an open source project which includes a ton of useful tools and that makes developing process more efficient. The idea is that you don't have to redesign the wheel every time. Someone else has already done that, and they've probably done it better than you, so you can focus your energy on specific part you want to build.
Overview
Here we will look at general scheme of ROS incorporated in Emlid Raspbian. Firstly we will give a general concept of ROS and then do everything step by step to get started promptly with some basic understanding.
Emlid image includes pre-installed ROS, so all we have to do is to start it after a little setup (we will cover this step below). After running ROS we will find ourselves at ROS Master, the place containing all services, kind of a meeting point for nodes. From this place we now are able to find nodes and make them communicate to each other on your Raspberry Pi. For this moment we can imagine a node, for instance, as an IMU-sensor which gives us some data. There might be different set of drivers within one node.
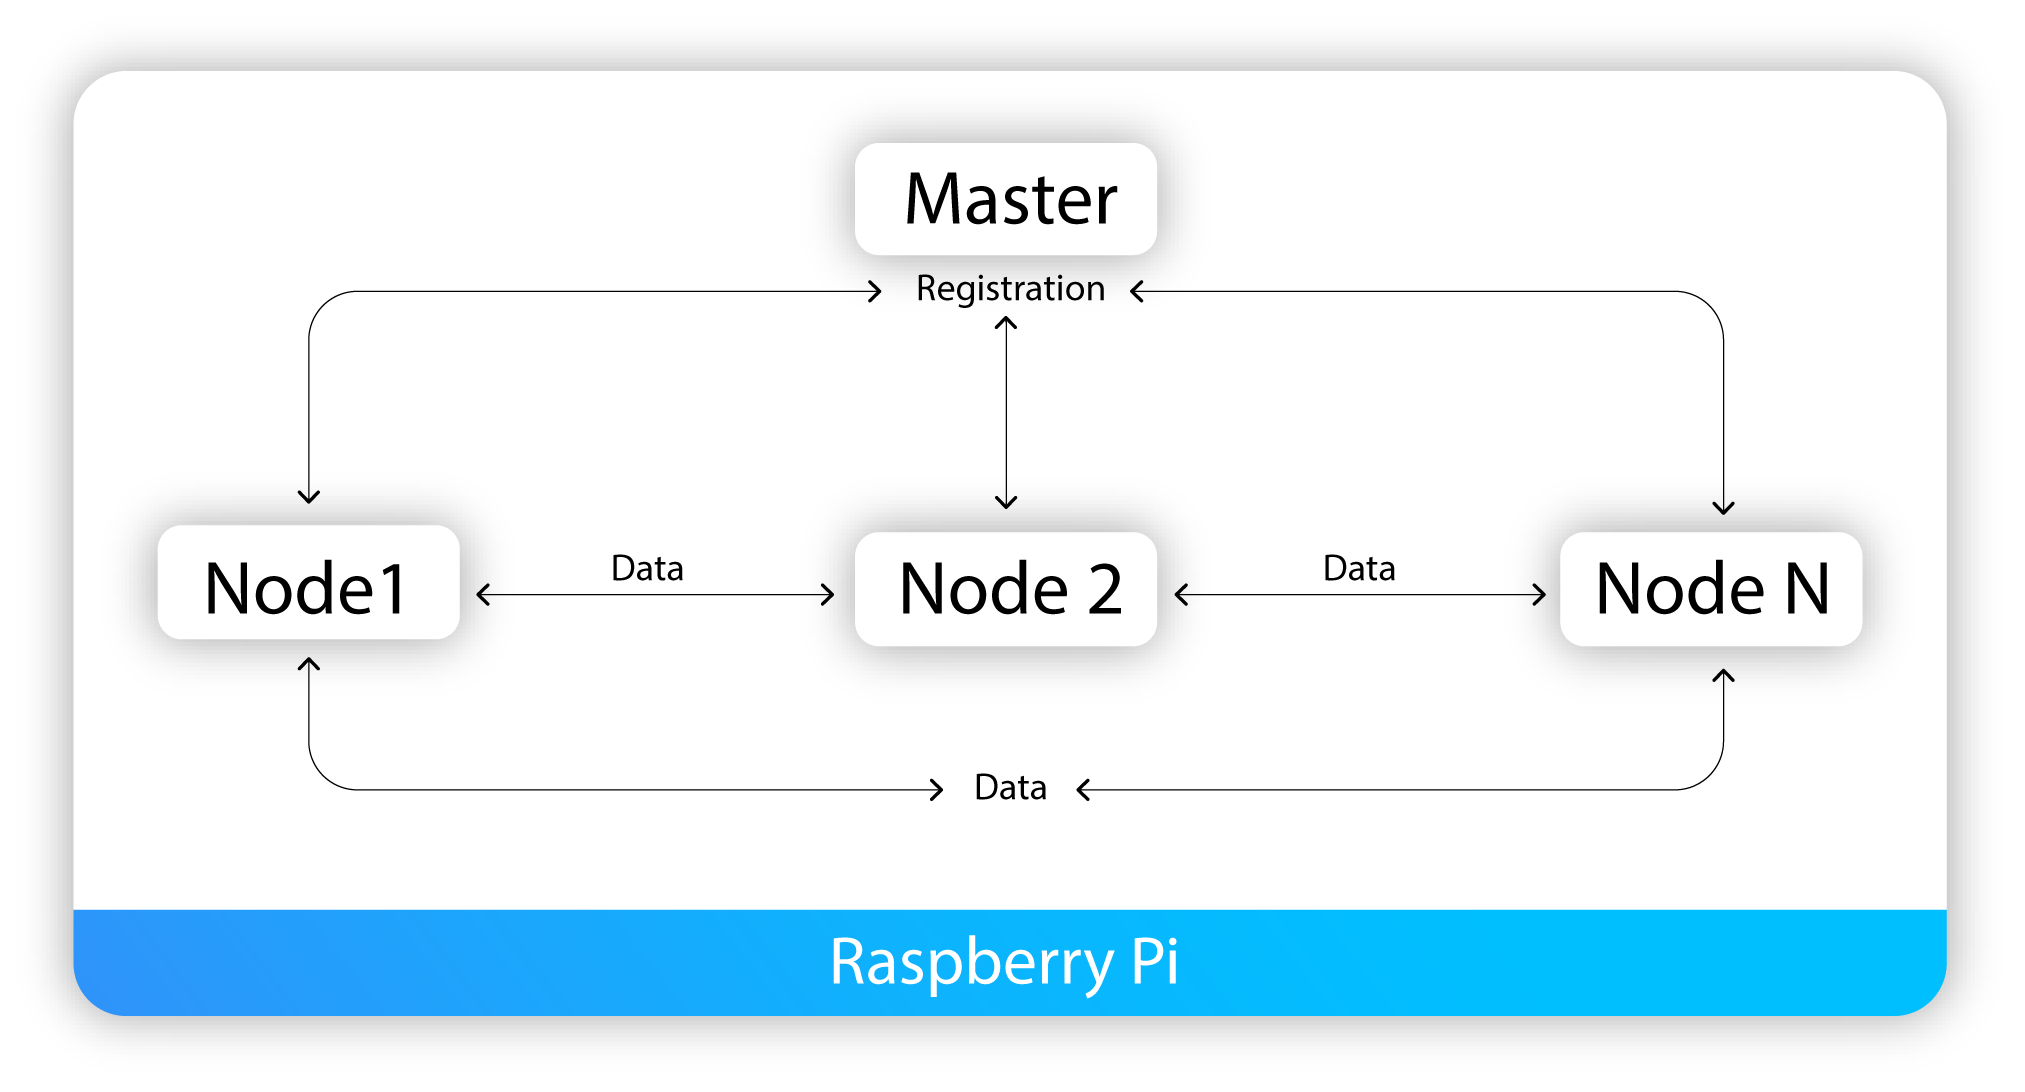
Now we are going just a little bit deeper. Nodes can find each other and share data. This data shared between nodes is called "Messages". Nodes can publish messages to the topics and may subscribe to topics to receive messages.
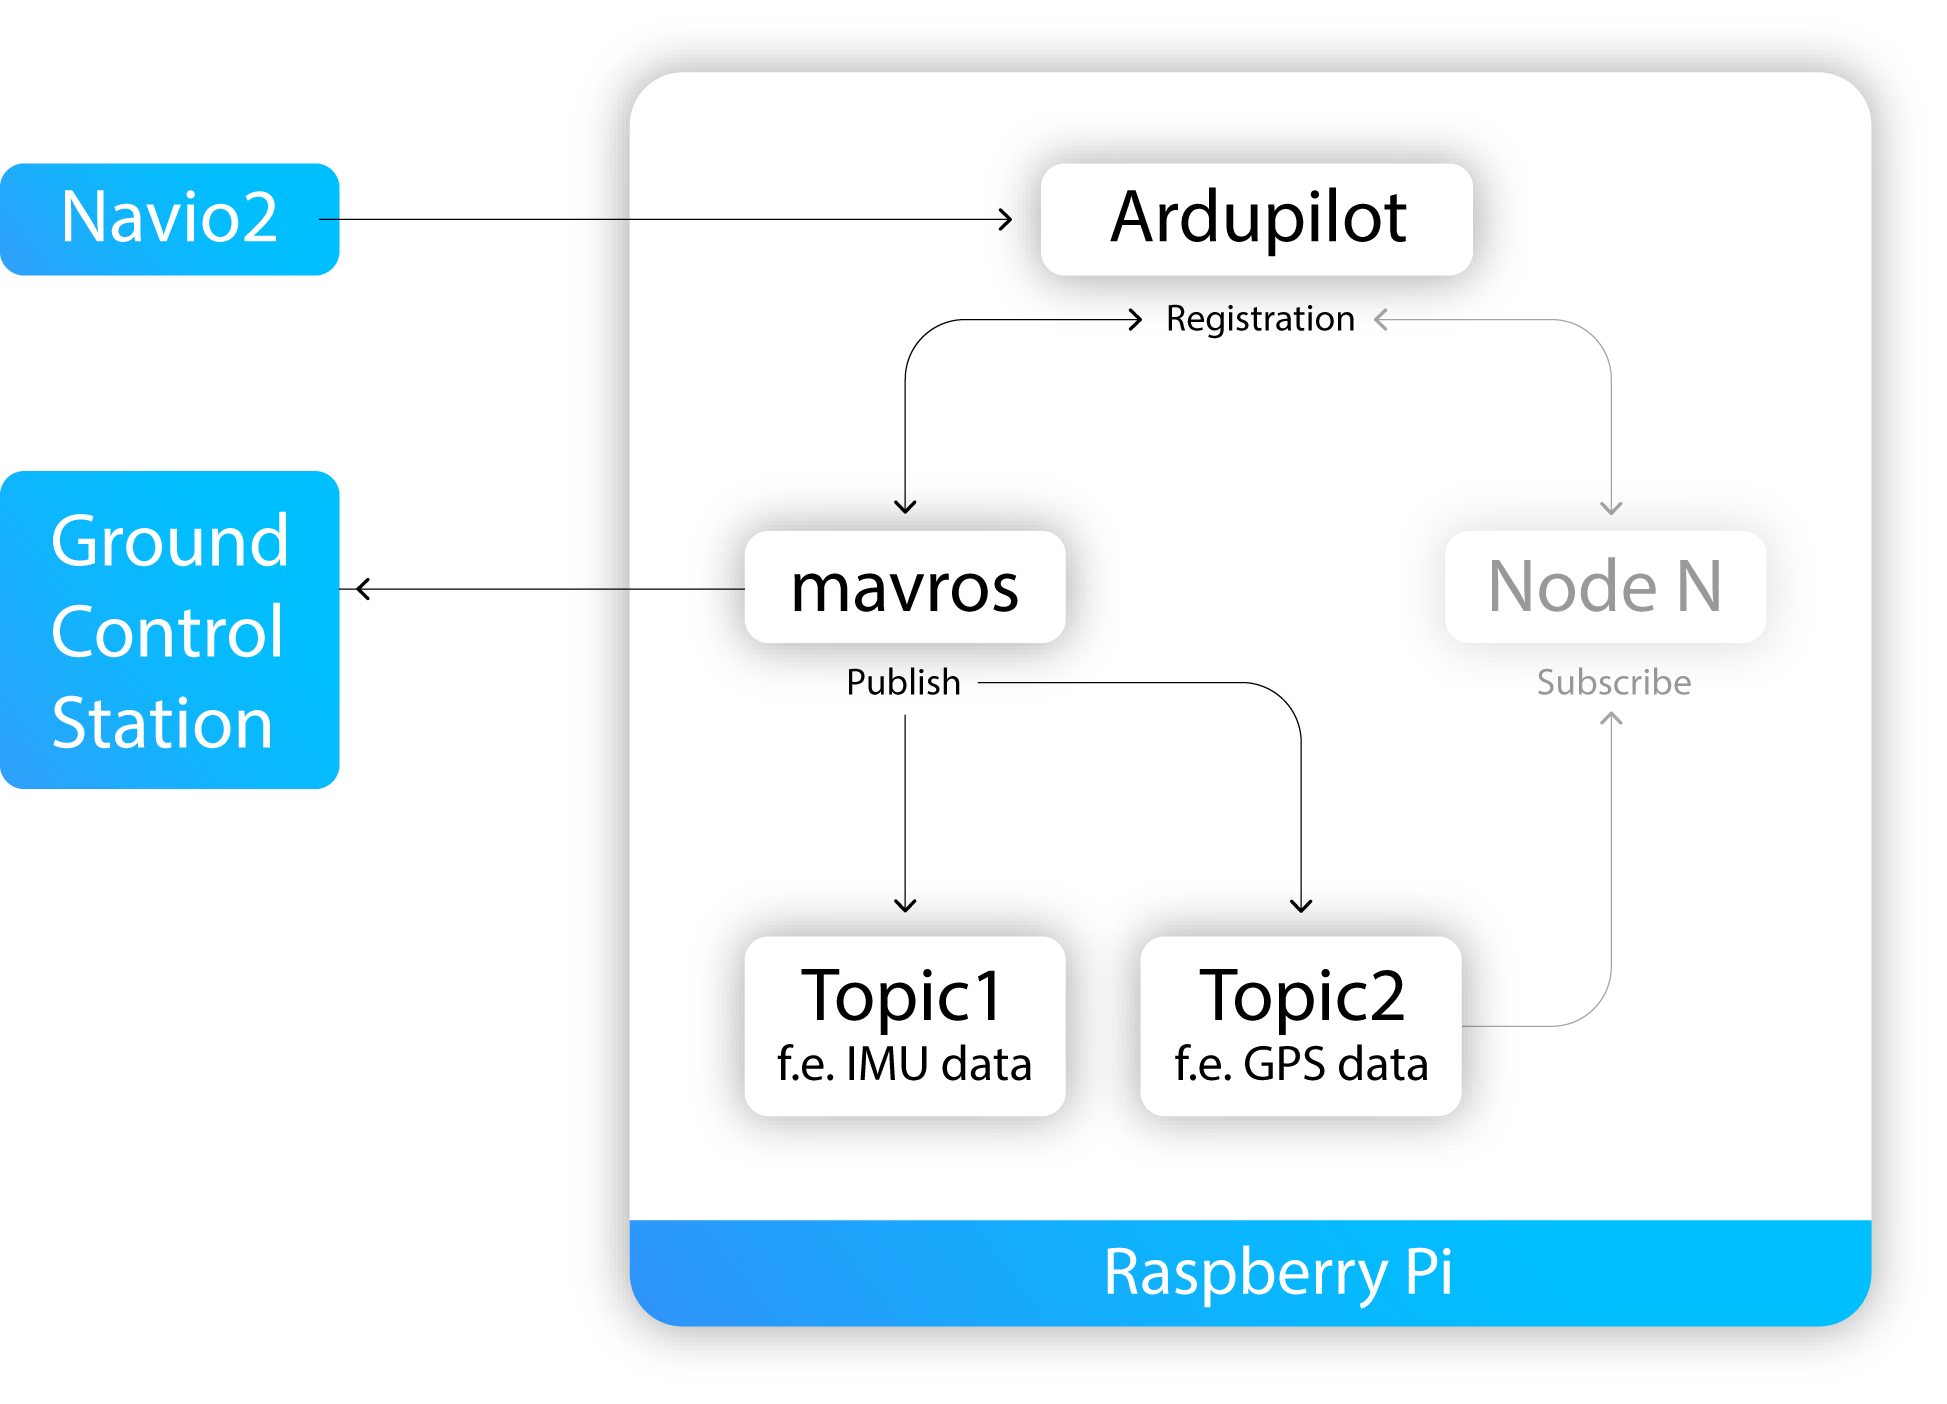
Let's take into consideration that we usually run ROS alongside ardupilot. For your convenience Emlid image contains mavros node pre-installed. This node provides a lot of sensor drivers, communication driver for ardupilot and proxy to GCS.
To make things clear let's proceed to step-by-step ROS running practical instructions which will help to perceive acquired knowledge.
How to get your hands on: step by step
Start watching the tutorial on asciinema.org.
Introduction to tmux
You'll need to ssh into your Raspberry Pi from several terminals simulteneously. That's why we recommend using a terminal multiplexer like tmux.
For operating tmux while working with ROS you have to learn some basics.
Before splitting the screen we have to create a new session $ tmux new -s session-name
The following commands might be useful too:
To attach to an existing session $ tmux a -t session-name
To detach from session $ tmux detach
To kill session $ tmux kill-session -t session-name
Inside sessions we have to operate and navigate somehow with a number of functions. For this tmux has a universal shortcuts that lets you quickly perform many tasks.
Useful shortcuts:
Ctrl+b + ? to show hot keys
Ctrl+b + $ to rename current session
Ctrl+b + % to split horizontally
Ctrl+b + " to split vertically
Ctrl+b + o to toggle between panes
Ctrl+b + x to kill the current pane
For further information please refer to this tutorial.
Preparing terminal
Create a tmux session called "ros"
pi@navio: ~ $ tmux new -s ros
And split your window into 4 panes like this:
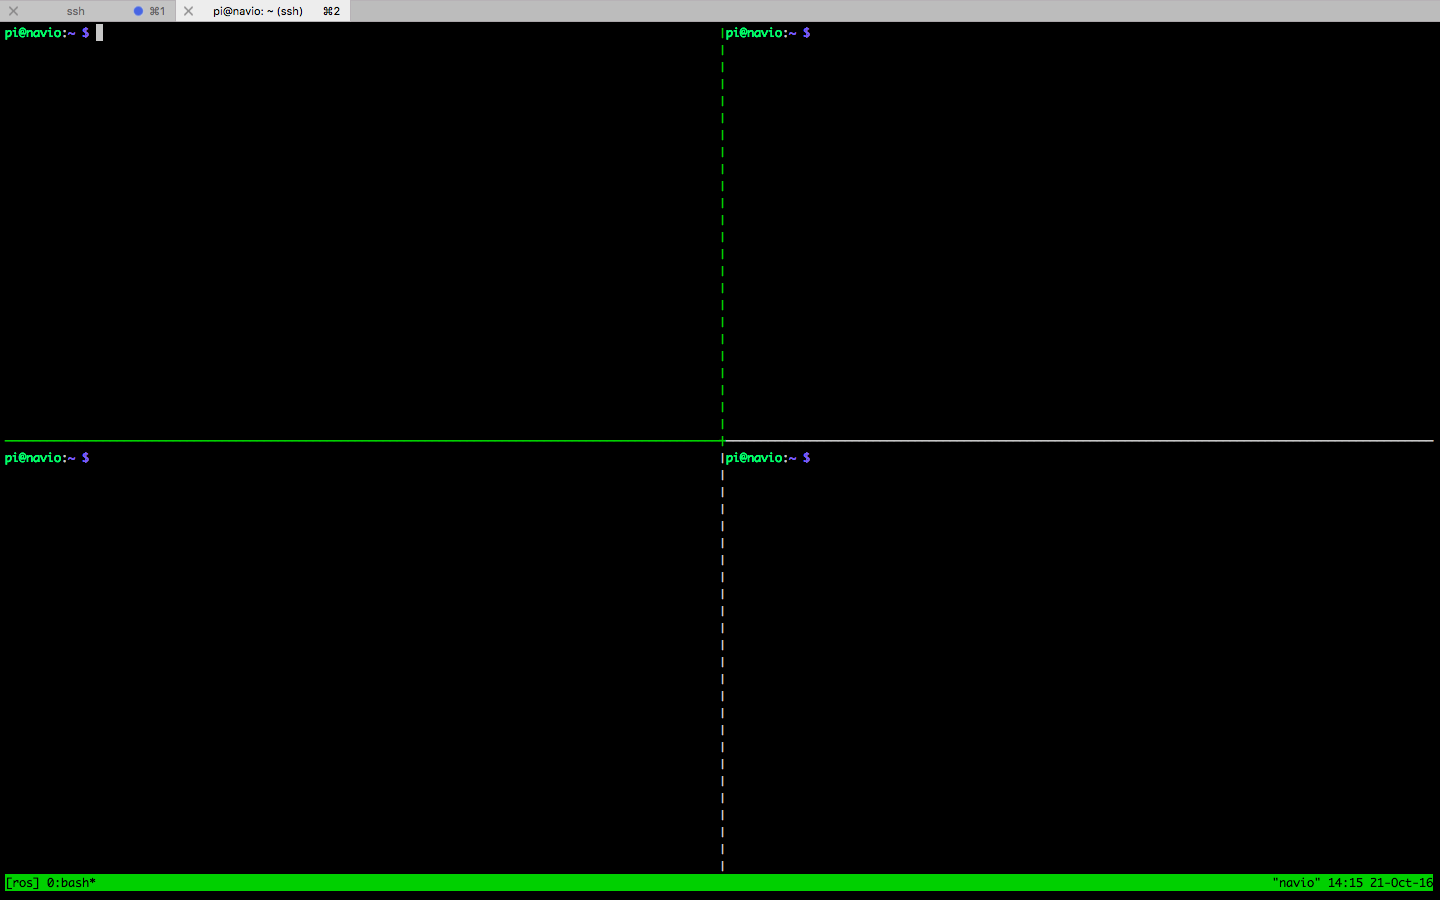
We recommend you to take your time and practice to navigate between panes in an efficient manner using hot keys.
Continue watching the tutorial for this step.
Running roscore
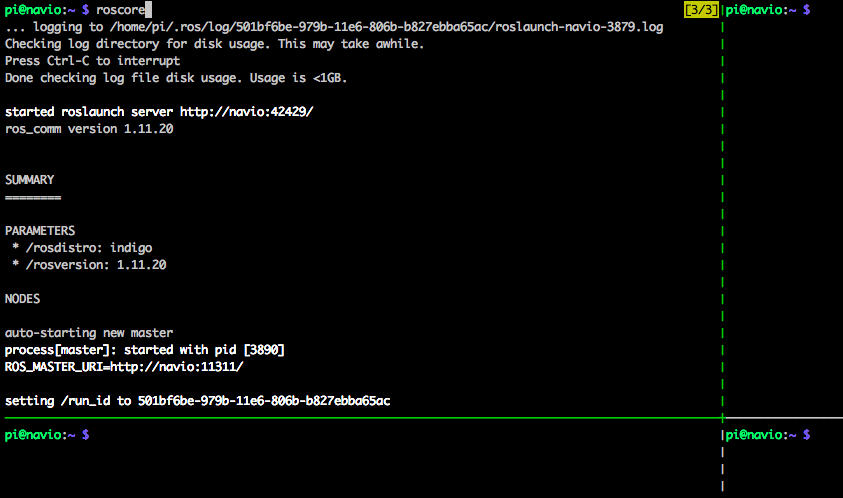
Now it's time to start ROS Master. Select top-left (doesn't matter which one actually) pane and run roscore
pi@navio: ~ $ roscore
If you are successful bash will show you the following and you'll see Master started on Raspberry Pi.
Continue watching the tutorial for this step.
roscore is a backbone of ROS. It's the first thing you should run when using ROS because it's vital for successful node execution and making publisher-subscriber architecture work.
Running ardupilot
Let's run ArduPilot in another pane as stated in here pointing telemetry to 127.0.0.1:14650
by modifying /etc/default/ardu{copter, plane, rover} depending on which vehicle do you use. Let's say that we have copter. Then we need to enter:
sudo nano /etc/default/arducopter
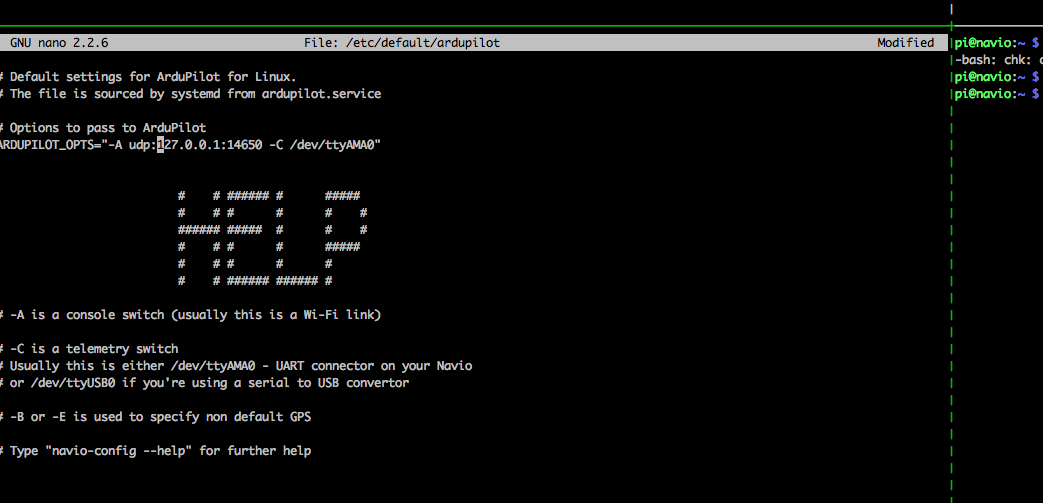
Then type:
pi@navio: ~ $ sudo systemctl start arducopter
This command launches ArduPilot (one-shot sudo systemctl enable arducopter to make it persistent). You'll see your LED blinking.
In case you make changes in ArduPilot while it's working, you should then restart:
pi@navio: ~ $ sudo systemctl restart arducopter
Continue watching the tutorial for this step.
Running a GCS
Launch your GCS (Ground Control Station) of choice. On the next step you'll understand why.
Running mavros node
As we've already discussed within the ROS package we are working with an executable files called nodes. Each ROS node contains specific functions and uses a ROS client library to communicate with other nodes. For example, we will run mavros which makes it easy to access sensor data from ArduPilot. Moreover according to the scheme from the overview, mavros will become a udp bridge to Ground Control Station we've launched on previous step.
Run this command in a third pane:
pi@navio: ~ $ rosrun mavros mavros_node \
_fcu_url:=udp://:14650@ \
_gcs_url:=udp://:14551@192.168.1.189:14550
Make sure that:
- 14650 is the same port we specified in
/etc/default/ardupilot - 192.168.1.189:14550 is IP and port of the computer where GCS is launched.
If you feel enthusiastic you can create a custom .launch file or edit pre-installed to launch everything quicker.
Roslaunch will automatically start a roscore if there isn’t already one running.
Example launch files are available in the /opt/ros/noetic/share/mavros/launch directory.
You need to modify fcu_url and gcs_url in /opt/ros/noetic/share/mavros/launch/apm.launch and run:
roslaunch mavros apm.launch
To run this on boot you can create a simple systemd service. Create mavros.service file in /lib/systemd/system with the following contents:
[Unit]
Description=mavros

[Service]
Type=simple
ExecStart=/bin/bash -c "source /opt/ros/noetic/setup.bash; /usr/bin/python /opt/ros/noetic/bin/roslaunch mavros apm.launch"
Restart=on-failure

[Install]
WantedBy=multi-user.target
Then run:
sudo systemctl daemon-reload
And enable it on boot:
sudo systemctl enable mavros.service
Finally after everything's set you'll see something like this:
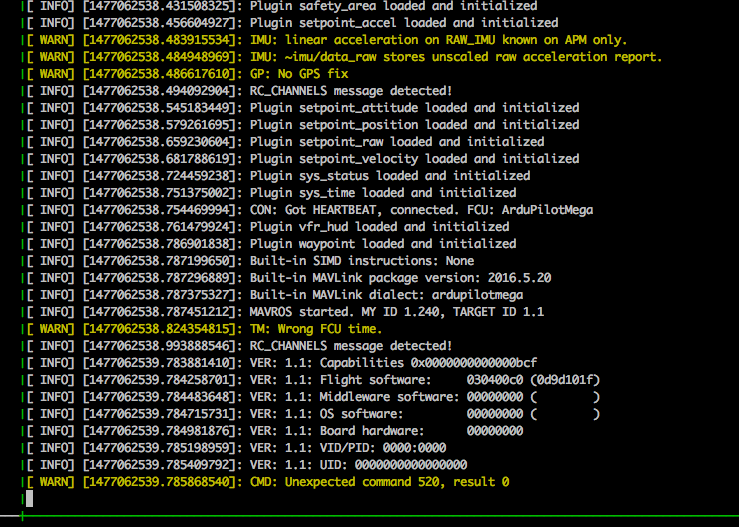
Continue watching the tutorial for this step.
Running rostopic
rostopic tools allows you to get information about ROS topics.
To learn sub-commands for rostopic you can use help option:
$ rostopic -h
If you don't use GCS, but want to get data from rostopic then you need to enter the following command for setting the stream rate:
pi@navio: ~ $ rosservice call /mavros/set_stream_rate 0 10 1
For mavros we will run echo command in the last pane to show the data published on topic.
pi@navio: ~ $ rostopic echo /mavros/imu/data

After typing rostopic echo /mavros/ you can press TAB to see the list of existing topics and check them to practice more.
Continue watching the tutorial for this step.
tip
You always can look more thoroughly on ROS wiki to get a better understanding of its concepts.