Stop & Go with Emlid Flow
This tutorial shows how to use the Stop & Go with Emlid Flow workflow in Emlid Studio to get separate points with precise coordinates from the track of measurements.
Overview
Stop & Go with Emlid Flow allows you to improve the positions of points collected without a real-time correction link between the base and the rover. This may happen due to the insufficient line of sight, absence of an internet connection, non-availability of the NTRIP service, etc.
The workflow in the field involves the use of a base and a rover attending all unknown points and occupying each one for a short time. The technique can be compared to point collection in RTK, but precise positions of collected points are calculated afterward, not in real time.
Getting started
To get separate points with precise coordinates, you will need the following:
- a RINEX observation file from the base
- a RINEX observation file from the rover
- a RINEX navigation file from the base or from the rover
- a CSV file from Emlid Flow
Make sure that you averaged points for your project and export it in the CSV format from Emlid Flow. The CSV (PENZD) format cannot be used for the Stop & Go workflow.
If you recorded raw data in the UBX format or got corrections from the NTRIP service in the RTCM3 format, Emlid Studio will automatically convert them to RINEX using the background conversion feature.
Workflow
Emlid Studio calculates all solutions using RINEX files from the base and the rover and averages them over time spans using a CSV file from Emlid Flow to provide separate points.
Generating POS file
If you already post-processed RINEX files from the base and the rover and obtained a .pos file, go straight to the Generating corrected CSV section.
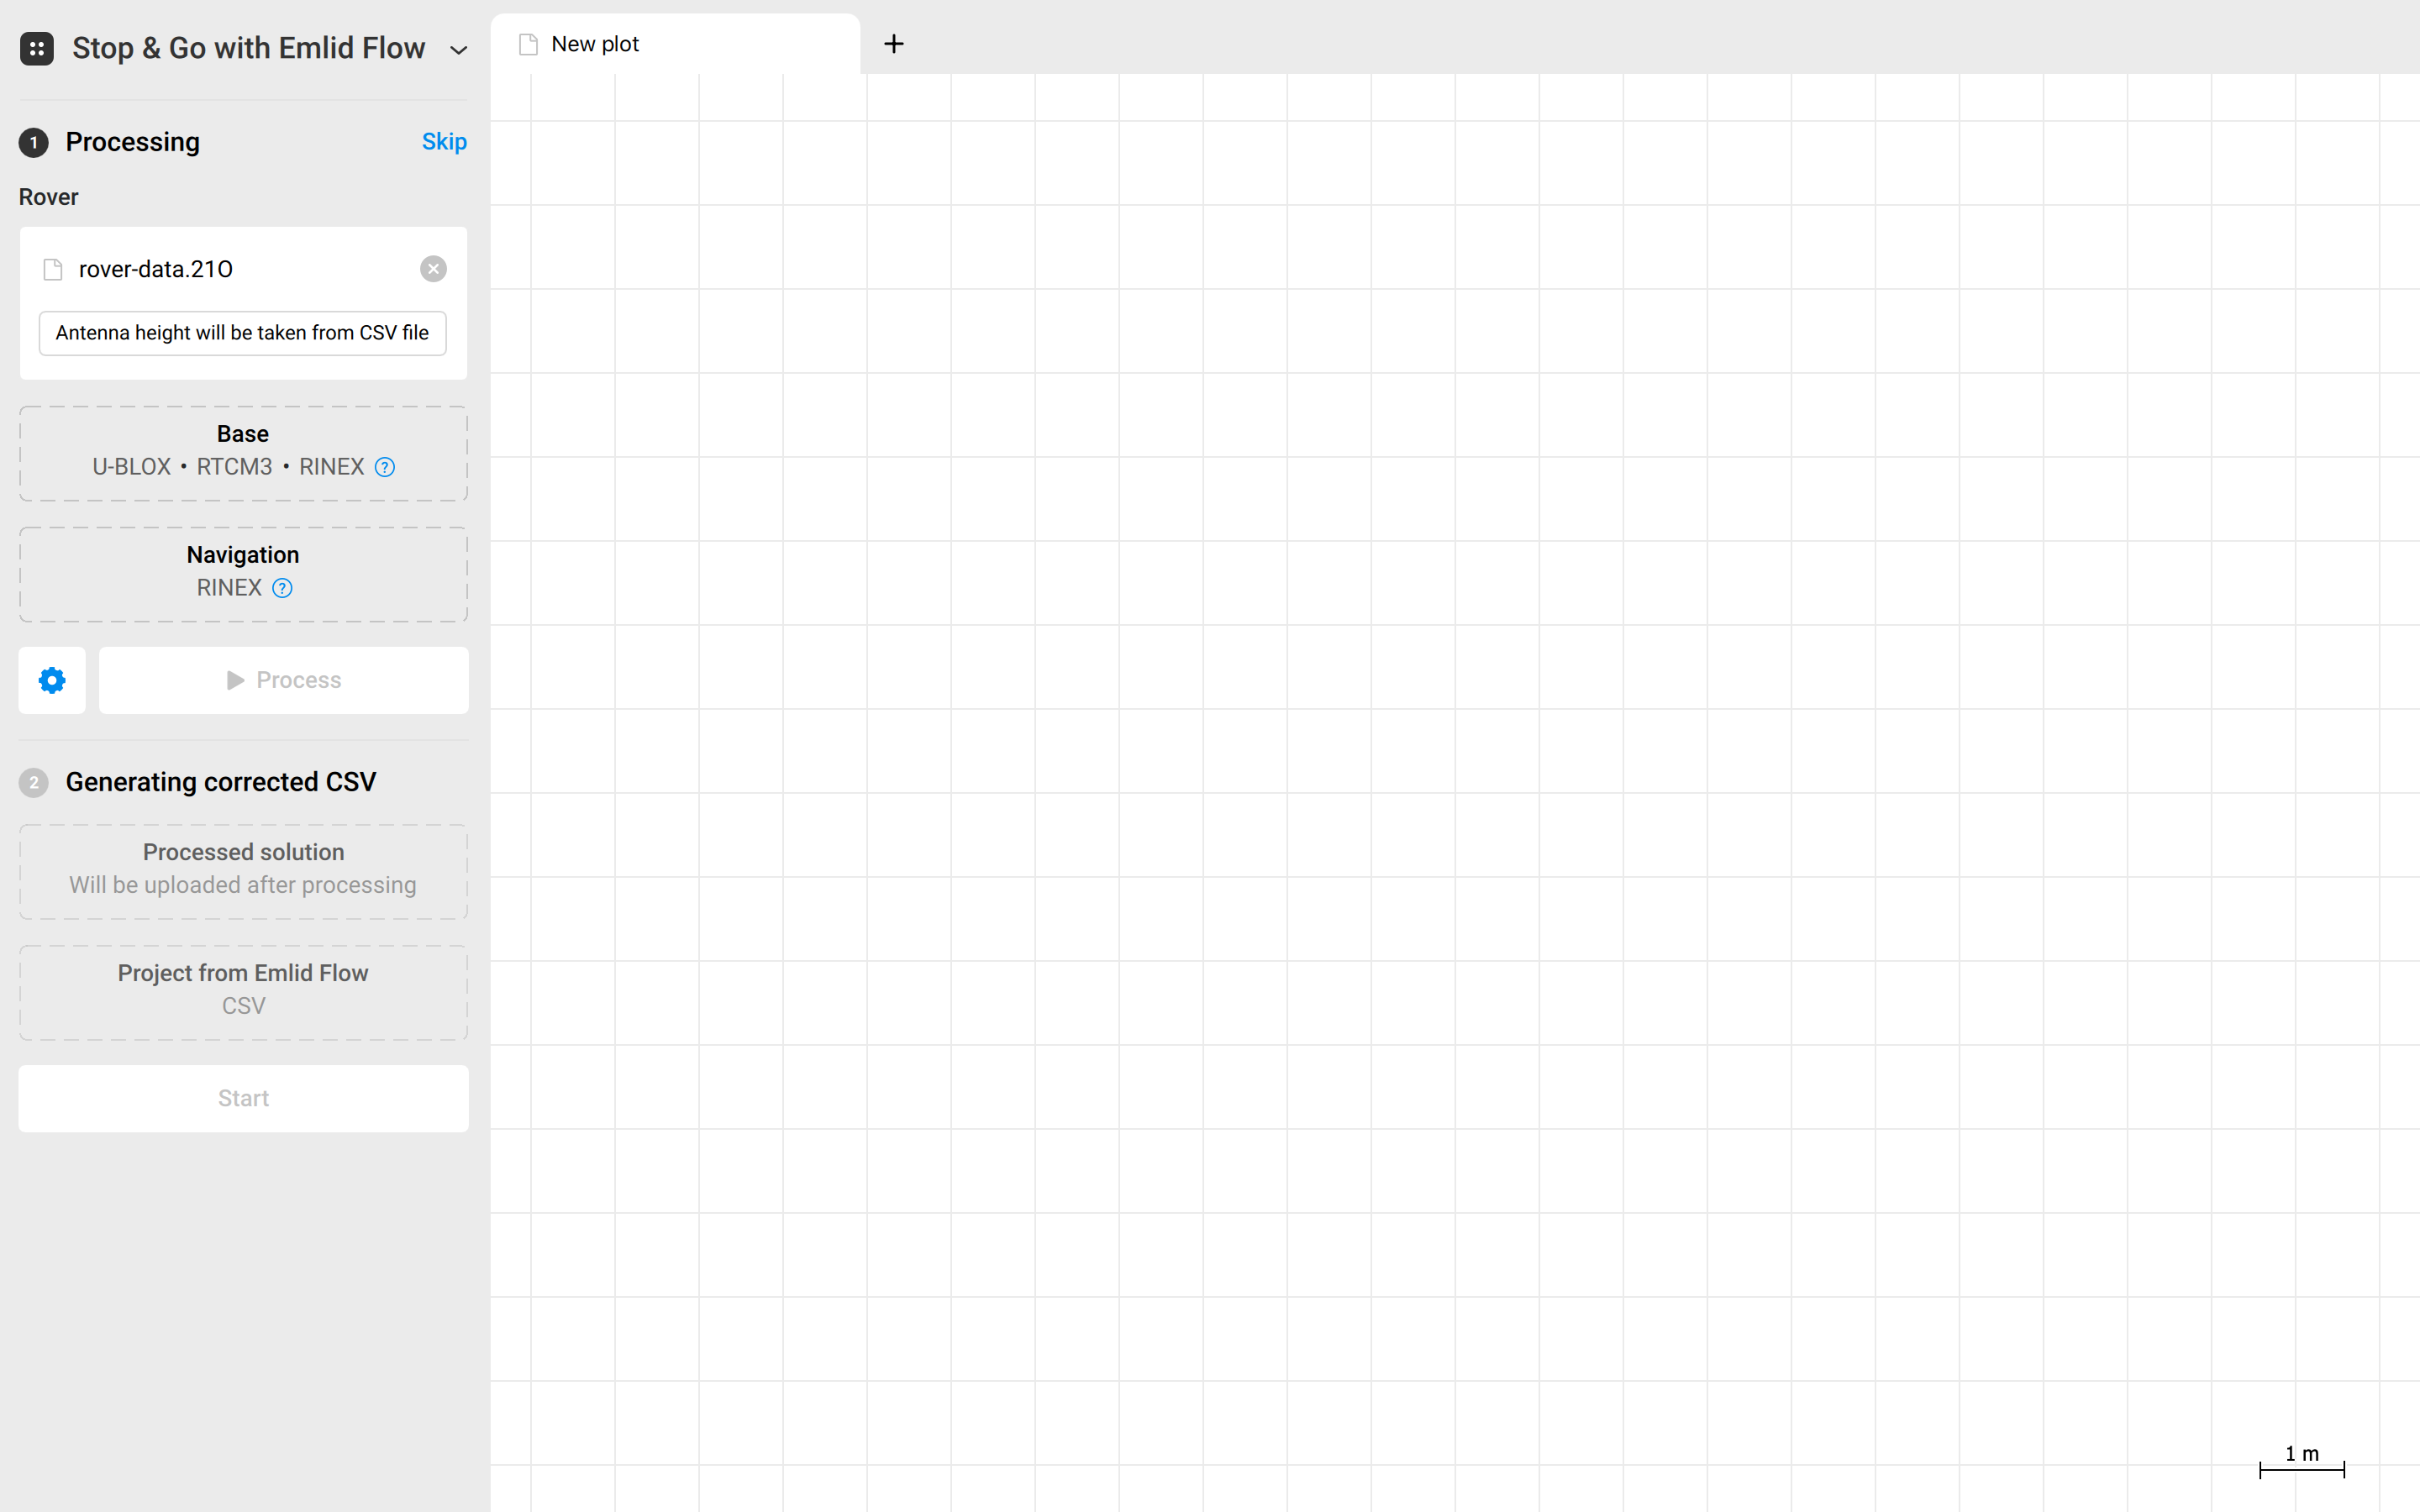
First, you need to process RINEX files from the base and the rover to get a POS file. Follow the steps below:
To add a file, simply drag and drop it from your desktop.
-
Select the workflow from the drop-down list in the upper-left corner.
-
Add the RINEX observation file from the rover.
noteThe antenna height will be taken from the CSV file.
-
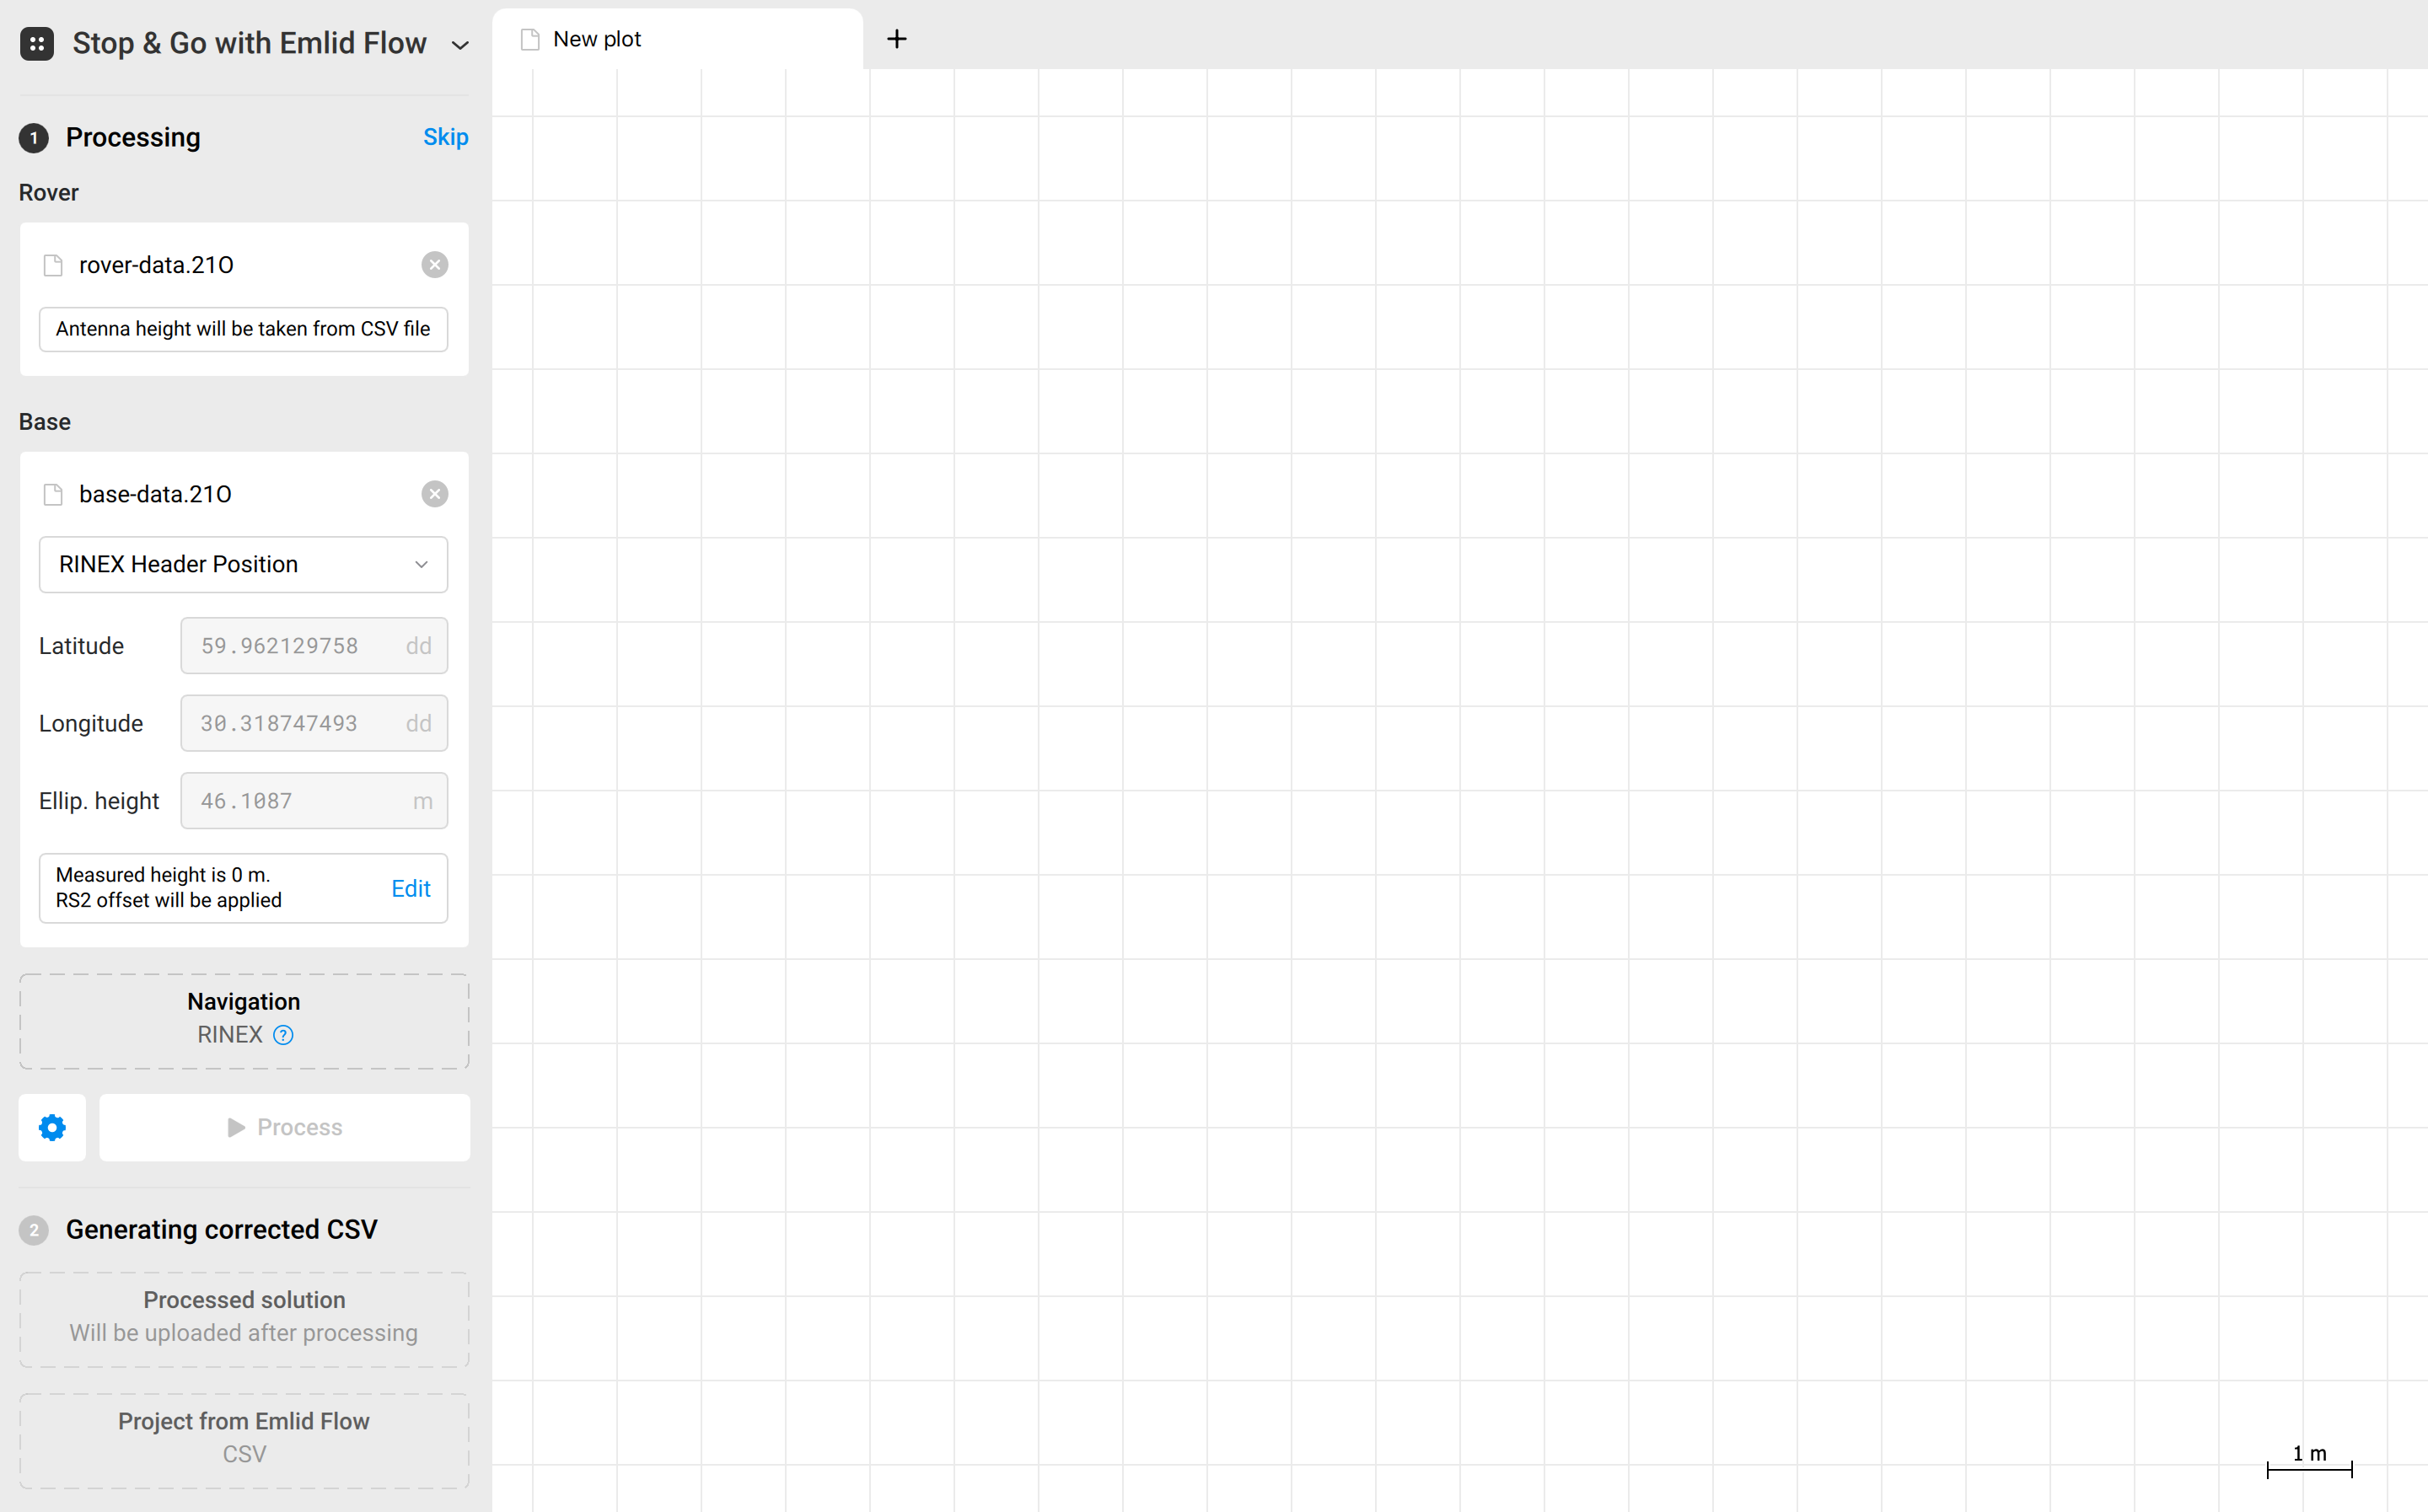
Add the RINEX observation file from the base.
-
Set the base coordinates. By default, the RINEX Header Position is used. If you placed your base over the point with known coordinates, enter them manually, including the antenna height.
-
Add the RINEX navigation file from the base or rover.
-
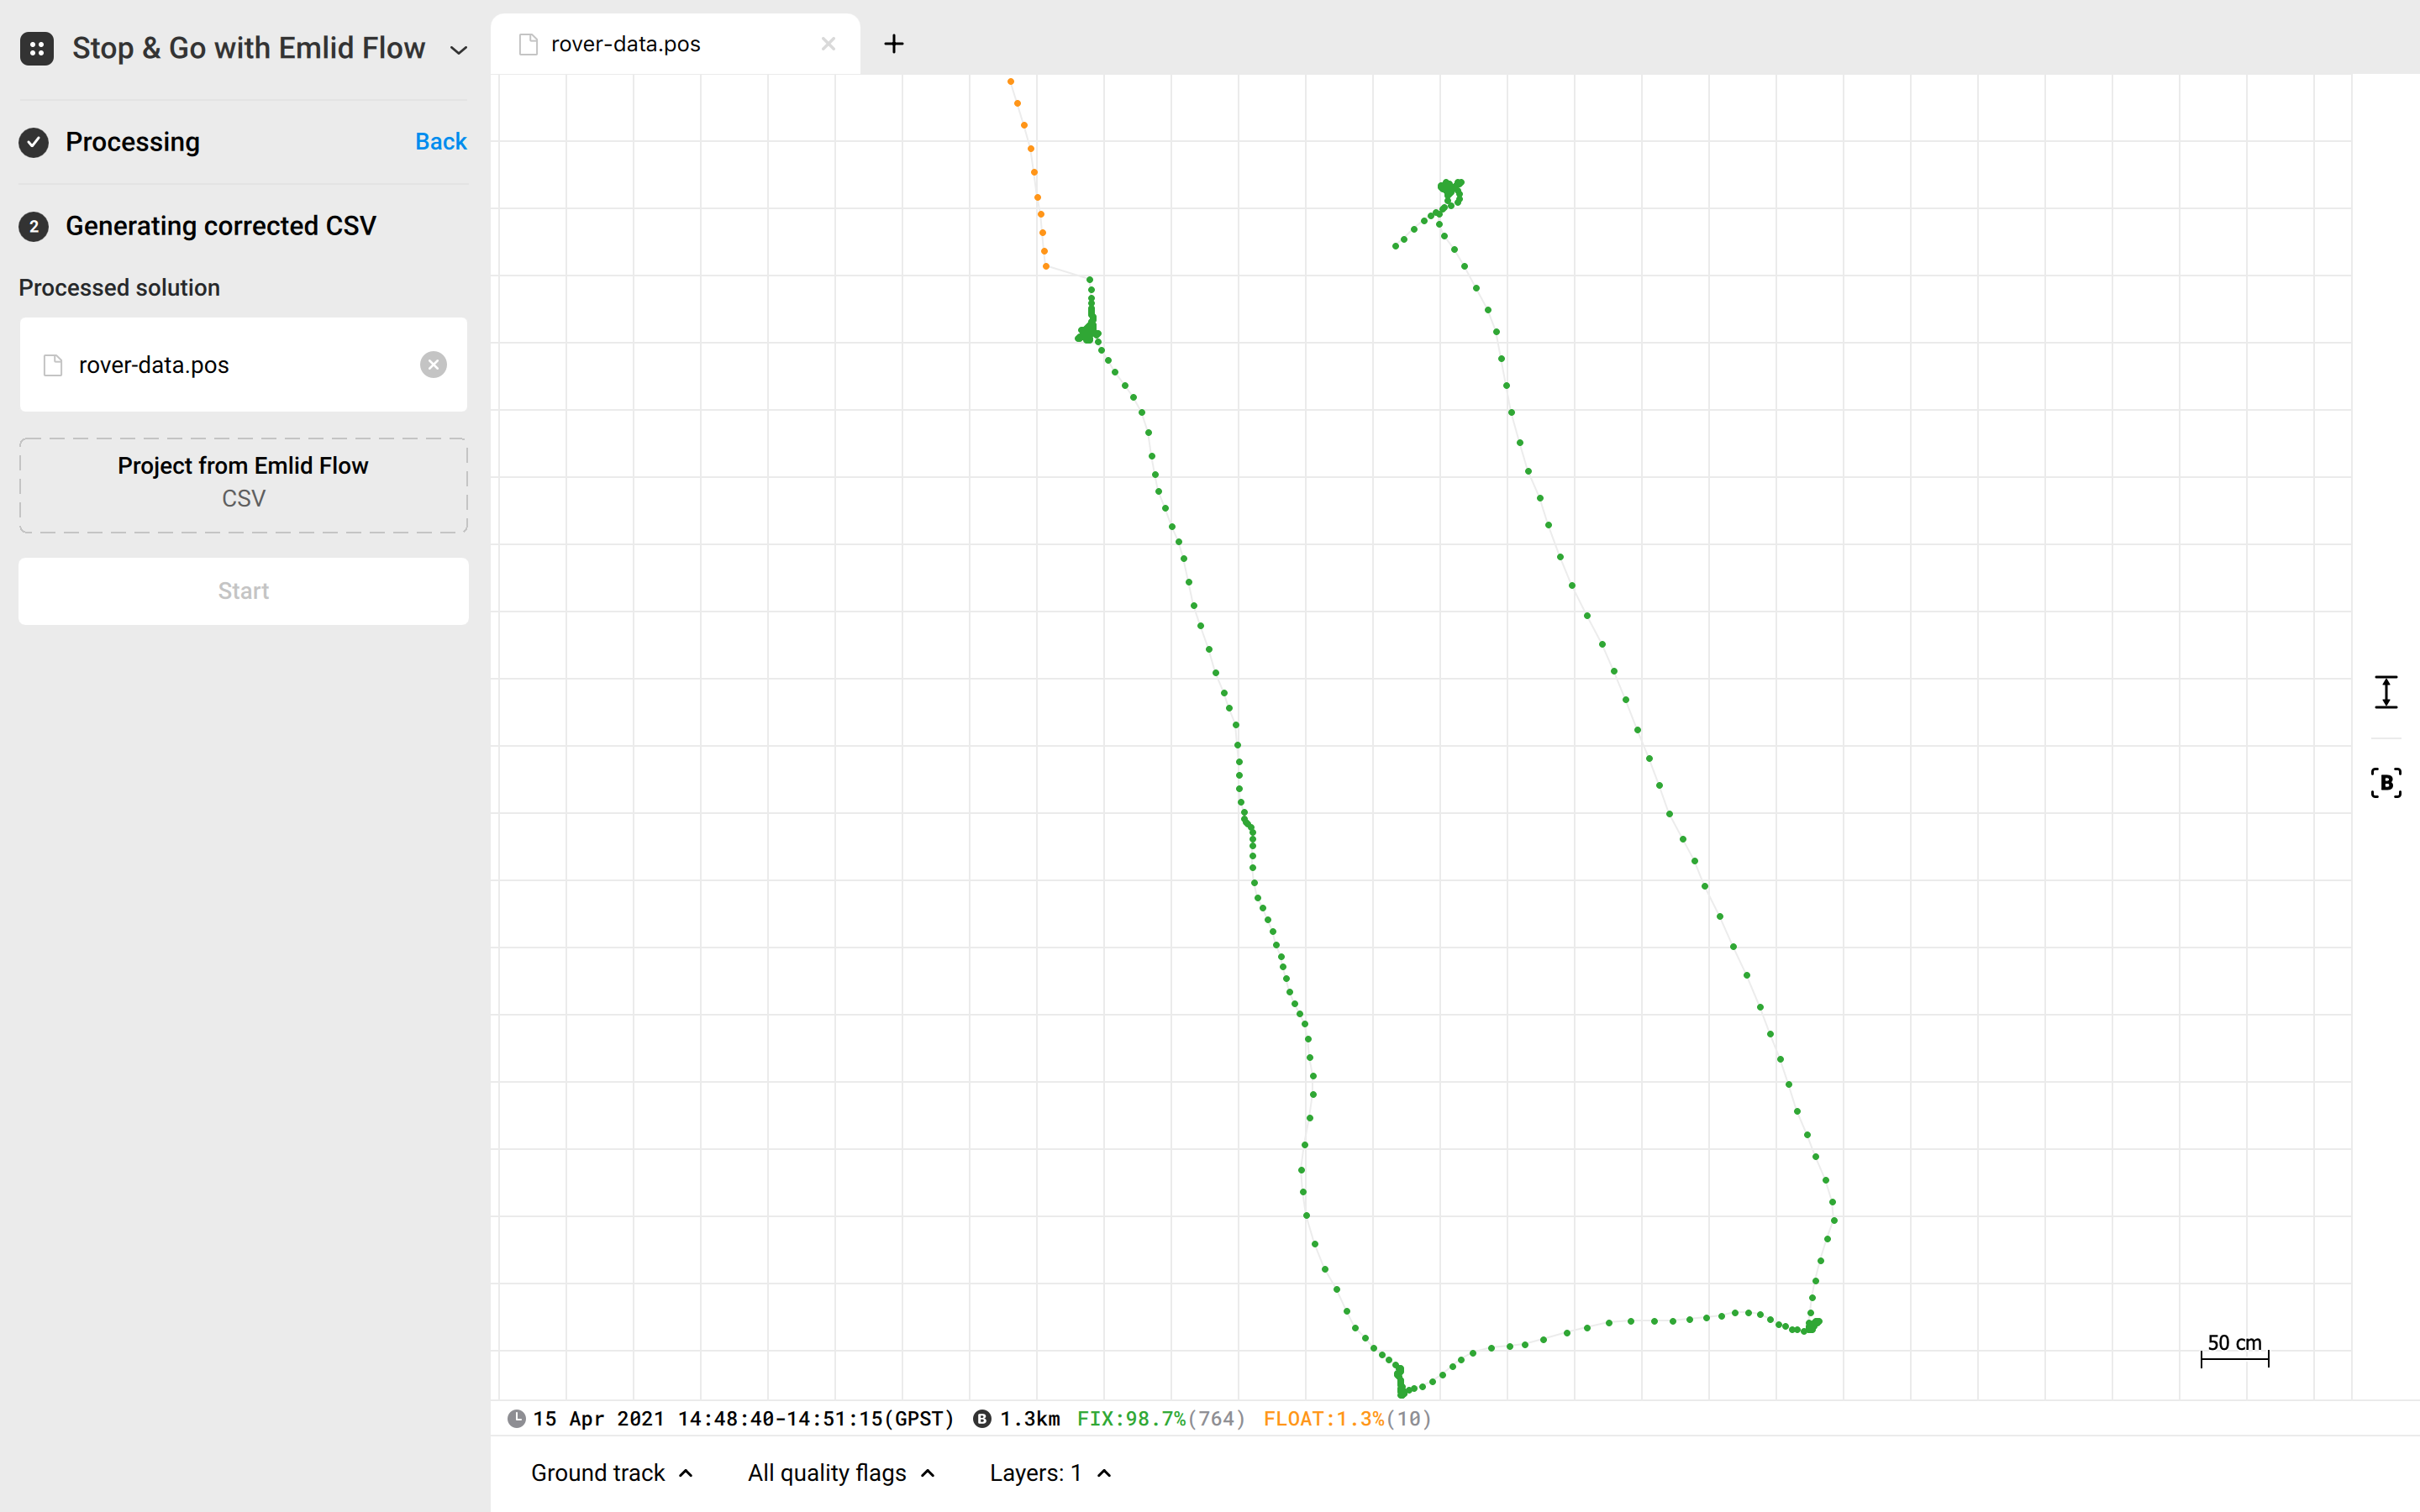
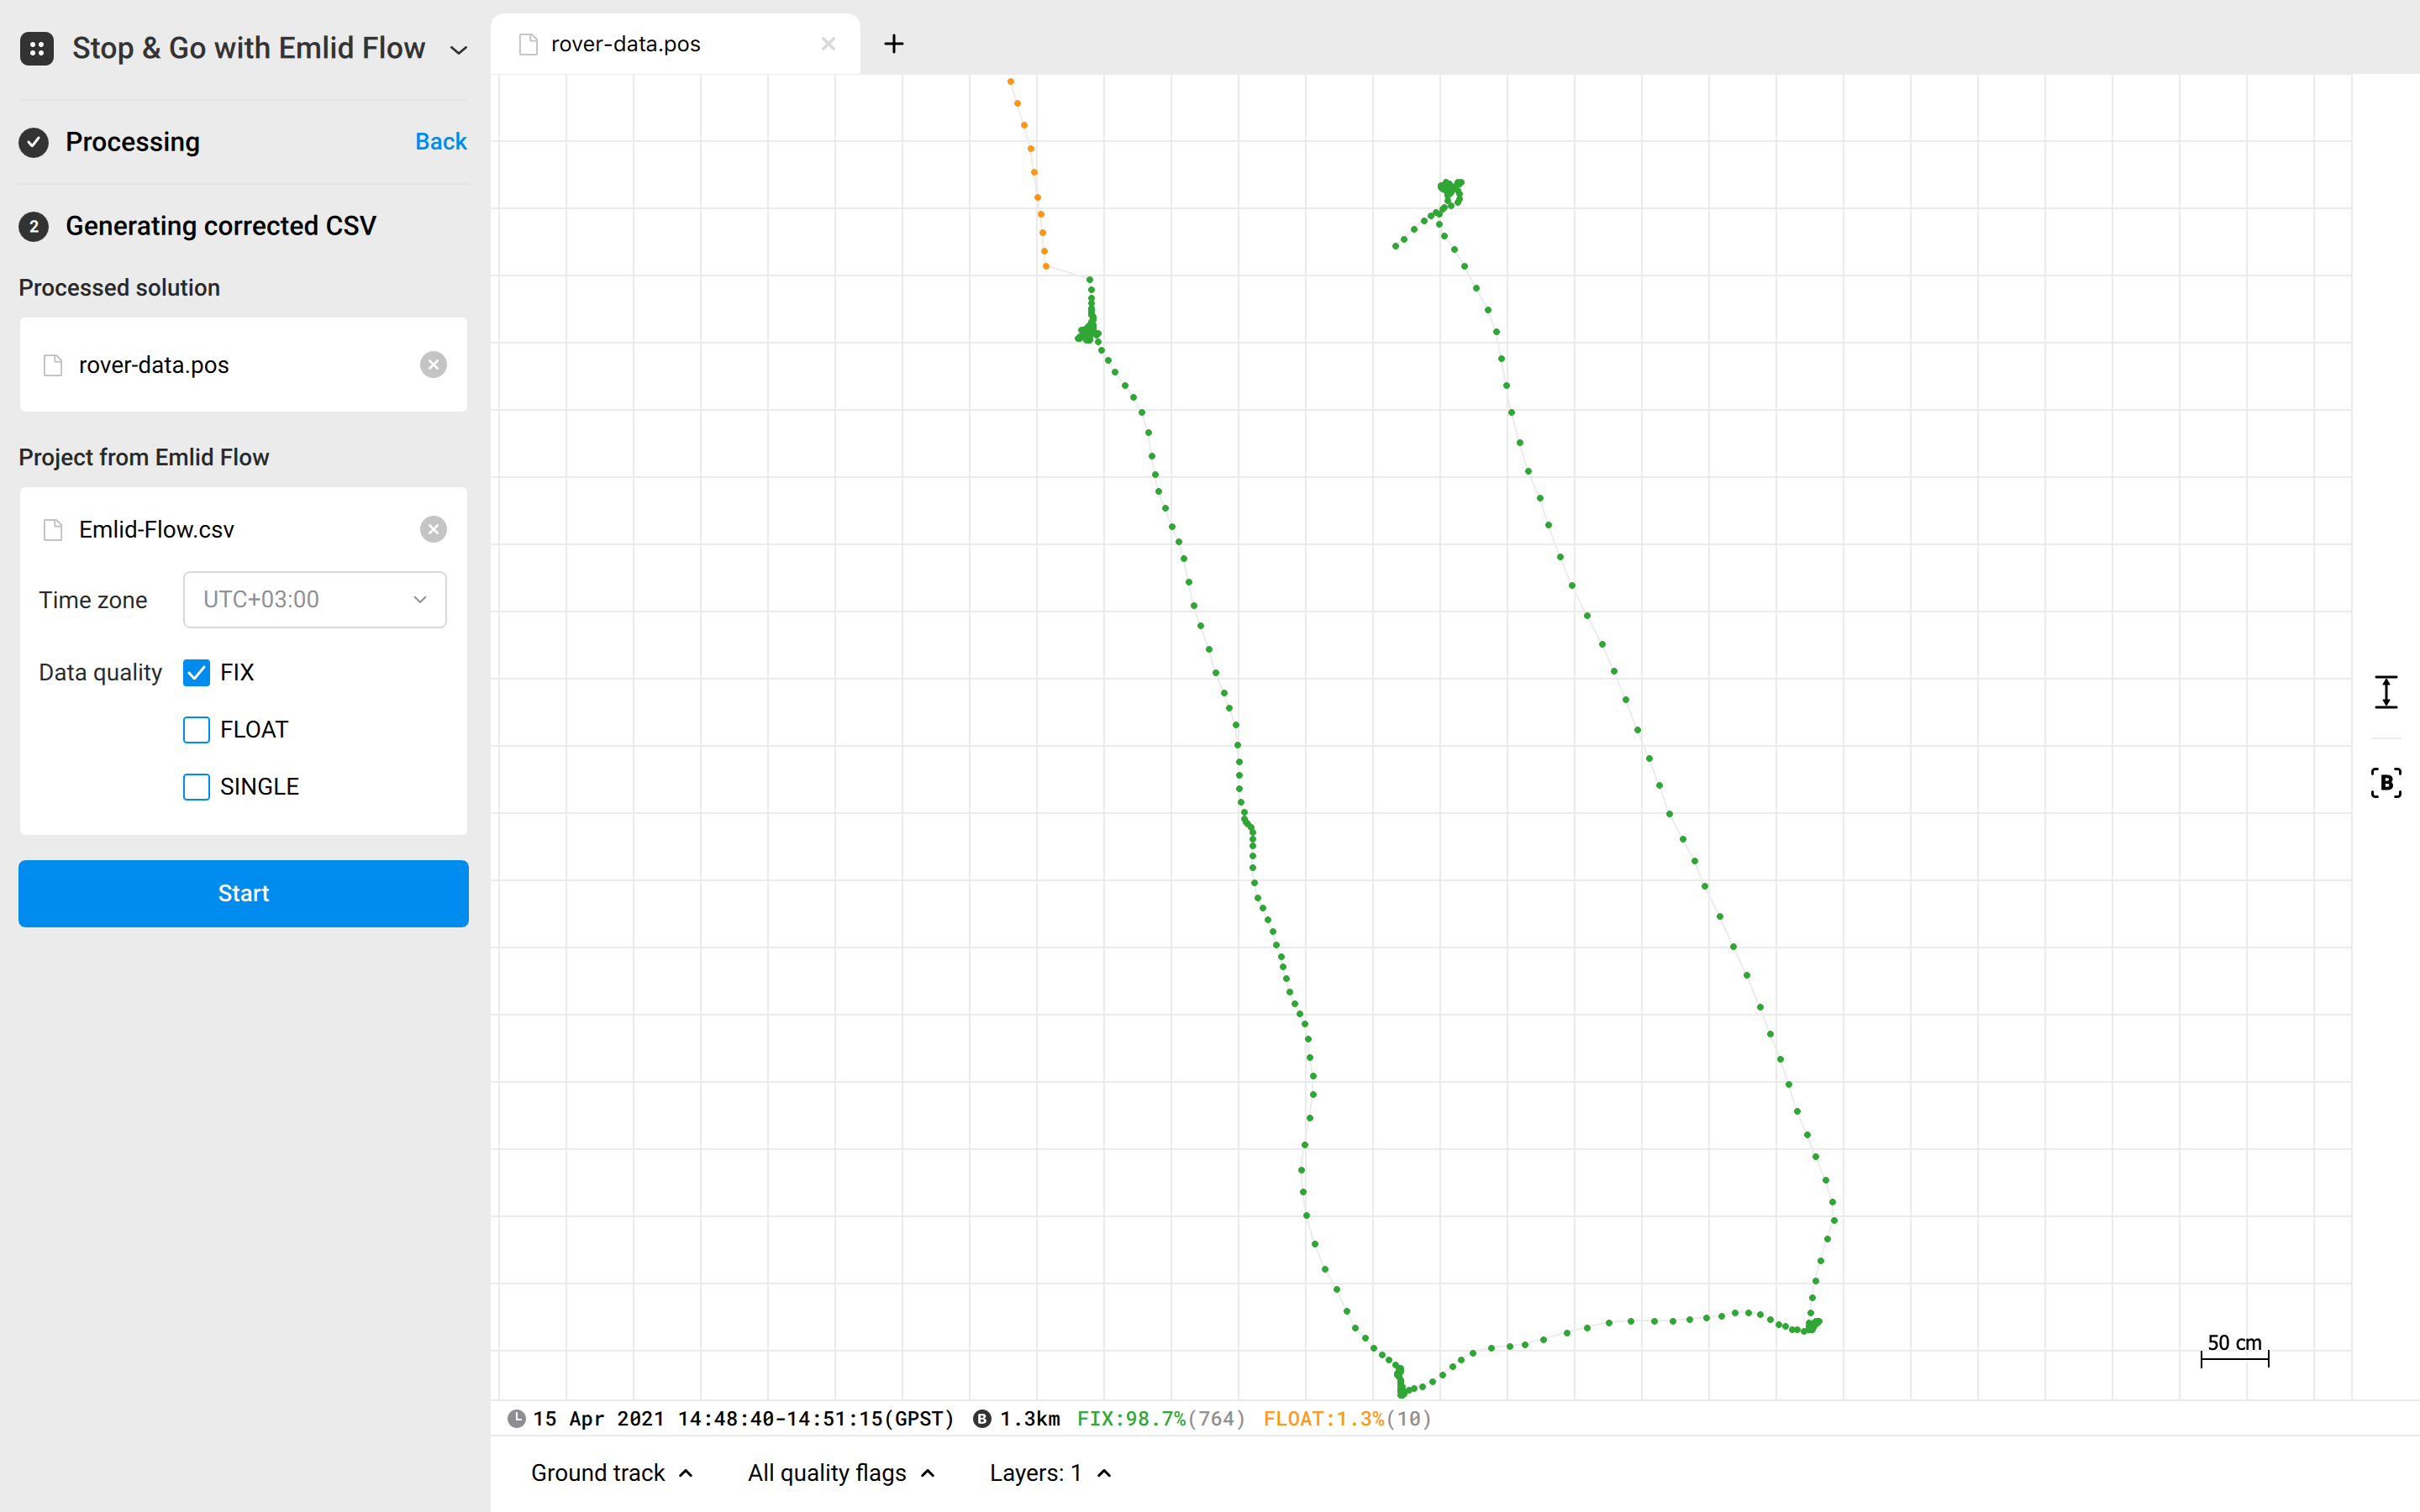
Click Process and wait until a POS file is ready, Emlid Studio will show it on the plot.
Generating corrected CSV
If you skipped the steps above, you need to add the POS file manually. Drag and drop it to the PPK solution field.
To generate a corrected CSV, follow the steps below:
-
Add a CSV file from Emlid Flow and tick the required data quality to choose solutions to be averaged.
noteIf you want to get cm-accurate results, tick Fix only.
-
Click Start. The result will be shown on the plot.
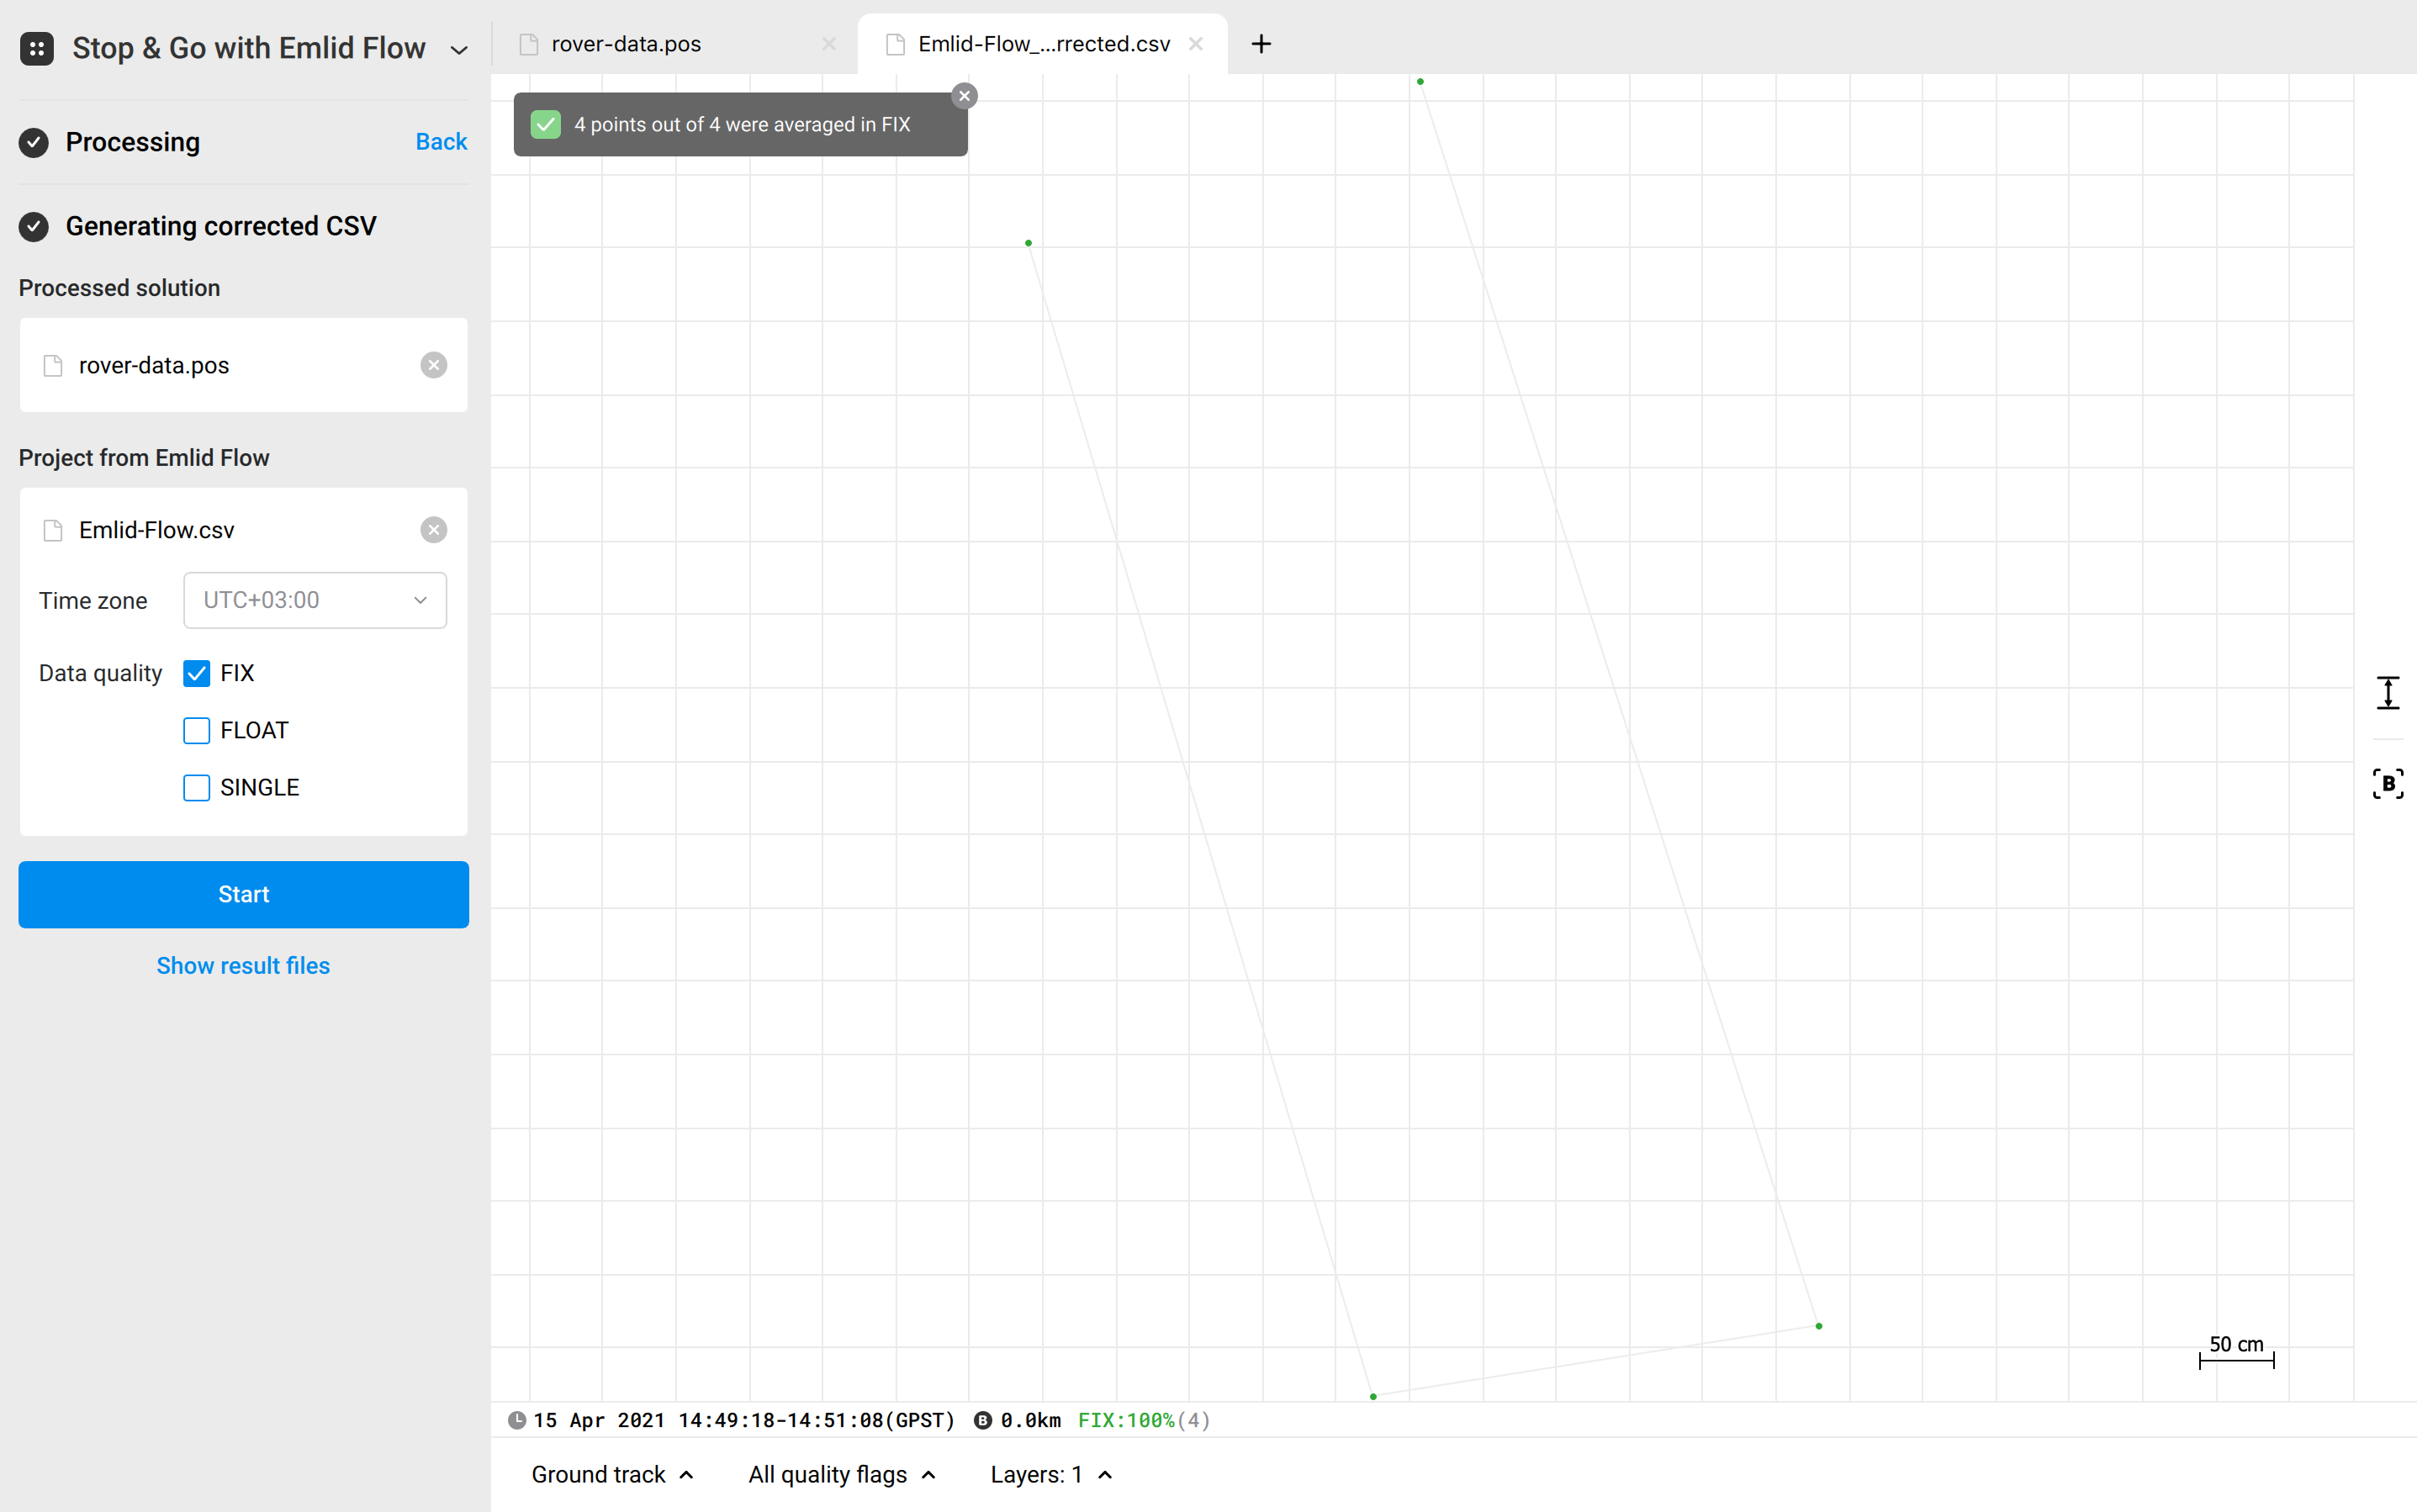
noteClick the Show result files button to get the resulting corrected CSV file. Emlid Studio creates a copy of the .csv file named “name_of your-file_corrected.csv".